We may be compensated if you purchase through links on our website. Our team is committed to delivering honest, objective, and independent reviews on home products and services.
Project details
Skill
Cost
Estimated Time
Building your own sawhorses is a practical and cost-effective solution for any DIY enthusiast or professional carpenter. These versatile workhorses provide a sturdy platform for various projects and can be customized to suit your specific needs.
In this guide, we’ll walk you through the process of constructing durable sawhorses using scrap lumber and basic tools. In the video, This Old House expert Nathan Gilbert demonstrates how to create these essential workshop staples.
*Unless otherwise noted, costs in this article reflect an average of prices that our team found from hardware stores like Lowes and Home Depot, and on Amazon.com.
Materials and Tools Needed to Build a Sawhorse
Before diving into the construction process, gather the following materials and tools:
Materials
- Scrap lumber (preferably pressure-treated for outdoor use)
- Hinges
- Screws (zinc-coated, 1 1/4-inch)
- 550 cord (paracord)
Tools
- Tape measure
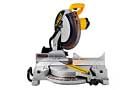
- Miter saw or circular saw
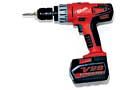
- Cordless drill/driver
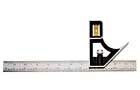
- Combination square
- Pencil
Preparing the Lumber for Your Sawhorse
The first step in building your sawhorses is preparing the lumber. Here’s how to get started:
- Measure and mark your scrap lumber to the desired length. For consistency, use a single measurement for all pieces.
- Cut the lumber to size using a miter saw or circular saw.
- Sand any rough edges to prevent splinters and ensure a smooth finish.
Gilbert recommends using pressure-treated lumber if you’re not using scrap materials from a job site. This type of wood will withstand outdoor elements, making your sawhorses more durable and long-lasting.
Assembling the Legs of a Sawhorse
With your lumber cut to size, it’s time to assemble the legs of your sawhorses:
- Lay out two boards parallel to each other for the legs.
- Place a cross piece perpendicular to the legs at the top, keeping it flush with the ends.
- Secure the cross piece to the legs using screws and your cordless drill/driver.
- Measure 7 inches from the bottom of the legs and mark a line using your combination square.
- Attach another cross piece at this mark to create the bottom brace.
- Repeat this process to create the second set of legs.
Installing the Hinges of a Sawhorse
Proper hinge installation is necessary for the functionality and stability of your sawhorses. Follow these steps:
- Position the hinges about 1/8 inch below the top of the legs. This prevents interference with materials placed on the sawhorse during use.
- Use your combination square to mark a consistent line for hinge placement across both sets of legs.
- Pre-drill holes for the hinge screws to prevent splitting the wood.
- Attach the hinges using zinc-coated screws.
Adding the 550 Cord to Your Sawhorse
The 550 cord, also known as paracord, adds stability to your sawhorses and prevents them from spreading too wide. Here’s how to incorporate it:
- Find the center point on the bottom cross piece of each leg set.
- Drill a small hole at each center point.
- Thread the 550 cord through the holes, connecting both leg sets.
- Tie the cord using a square knot (left over right, right over left) and pull it tight.
This simple addition significantly enhances the stability and safety of your sawhorses.
Customizing Your Sawhorses
One of the advantages of building your own sawhorses is the ability to customize them to your specific needs. Consider these options:
- Adjust the height by cutting the legs longer or shorter
- Add a shelf between the legs for additional storage
- Install hooks on the sides for hanging tools
- Paint or stain the wood for improved aesthetics and weather resistance
By adjusting the height, you can ensure the sawhorses are suitable for various tasks, whether you need them taller for ergonomic purposes or shorter for stability. Adding a shelf provides extra space for tools, materials, or even a small work surface. Hooks on the sides can keep frequently used tools within arm’s reach, improving your workflow and efficiency.
Maintenance and Care for a Sawhorse
To ensure your sawhorses last for years to come, follow these maintenance tips:
- Store them in a dry place when not in use.
- Periodically check and tighten screws. Ensuring screws are tight prevents the structure from becoming wobbly, which can compromise safety.
- Replace the 550 cord if it shows signs of wear. Replacing this cord when it starts to fray will maintain the stability of your setup.
- Apply a fresh coat of paint or stain annually if used outdoors. This protects against weathering, ensuring they stay in good condition through various seasons.
Regular checks and maintenance will prolong the life of your sawhorses.
Additional Tips for Building Sawhorses
While the basic steps provided will help you create functional sawhorses, there are additional tips that can enhance your building experience and the final product.
Selecting the Right Lumber
When choosing scrap lumber, consider the type of wood and its condition. Pressure-treated wood is excellent for outdoor use because it resists rot and insects. If you’re working indoors or in a controlled environment, non-treated wood can work just as well. Ensure the wood is straight and free from major defects like large knots or splits.
Precision in Measuring and Cutting
Accurate measurements and clean cuts are necessary for building sturdy sawhorses. Use a tape measure and a pencil to mark your measurements carefully. When cutting, a miter saw provides precision and ease, but a circular saw is also a great alternative. Ensure your cuts are straight to avoid alignment issues when assembling the sawhorses.
Drilling and Screwing Techniques
Pre-drilling holes for screws can help prevent the wood from splitting, especially when working with hardwoods or pressure-treated lumber. Use a drill bit slightly smaller than your screws to create pilot holes. This technique ensures a secure fit and extends the lifespan of your sawhorses.
Environmental Impact and Sustainability of Scrap Lumber
Using scrap lumber is not only cost-effective but also environmentally friendly. Repurposing materials reduces waste and supports sustainable building practices. Here are a few ways you can further minimize your environmental impact:
- Use leftover paint or stain from other projects instead of buying new
- Recycle any wood scraps that are too small to use
- Opt for eco-friendly or biodegradable cleaners when maintaining your sawhorses
By incorporating these practices, you contribute to a more sustainable and eco-conscious approach to DIY projects. Repurposing materials reduces the demand for new resources and helps minimize your carbon footprint.
Safety Considerations When Building a Sawhorse
Safety should always be a priority when undertaking any DIY project. Here are a few safety tips to keep in mind while building your sawhorses:
- Wear safety goggles to protect your eyes from sawdust and debris
- Use ear protection if operating loud tools like a miter saw
- Keep your work area clean and organized to prevent accidents
- Follow manufacturer instructions for all tools and materials
Taking these precautions ensures a safer working environment and reduces the risk of injury. Always stay mindful of your surroundings and the tools you’re using.
Using Sawhorses in Various Projects
Sawhorses are incredibly versatile and can be used in a variety of projects around your home or workshop. Here are some common uses:
- Supporting wood pieces while cutting with a handsaw or jigsaw
- Holding doors or large panels in place for painting
- Acting as a temporary table or workstation by placing a plywood sheet on top
- Providing a stable platform for sanding, drilling, or planing wood
Sawhorses’ adaptability makes them indispensable in many scenarios. Whether you’re undertaking a small DIY project or a large-scale renovation, they provide essential support and convenience.
Longevity of Homemade Sawhorses
With proper care and regular maintenance, your homemade sawhorses can last for many years. Unlike store-bought options, these custom-built versions can be easily repaired or modified as needed. The ability to personalize and adapt your sawhorses means they will remain useful for various tasks and projects over time.
Homemade sawhorses constructed with quality materials and attention to detail offer durability that can rival commercial products. Replacing worn-out parts, like the 550 cord or damaged legs, can extend their usability and ensure they remain safe and reliable.
Resources
The materials Gilbert used to build the sawhorses can be pulled from leftover materials from the job site or found at home centers. The tools he used to build them, including the drill driver, chop saw, speed square, and measuring tape, can all be found at home centers.
Gilbert also used 550 cord to tie the legs together, which can be found at any military surplus store.
Expert assistance with this project was provided by Nathan Gilbert Carpentry.
Tools
 Tape measure
- Miter saw
- Cordless drill/driver
- Combination square