Separate, Organized Closets: After
Custom closets are a pricey prospect. That’s why Ryerson Kipp and Meredith McBride Kipp went the DIY route after moving into their 1805 farmhouse, in Franklin Lakes, New Jersey. “Creating a clean, restful place to sleep and get dressed in the morning was our priority,” says Meredith, since their previous gut renovation had relegated scratch-built closets and a remodeled bedroom to last place. “We got so tired of dressing out of laundry baskets—we couldn’t live with that chaos again,” says Ryerson.
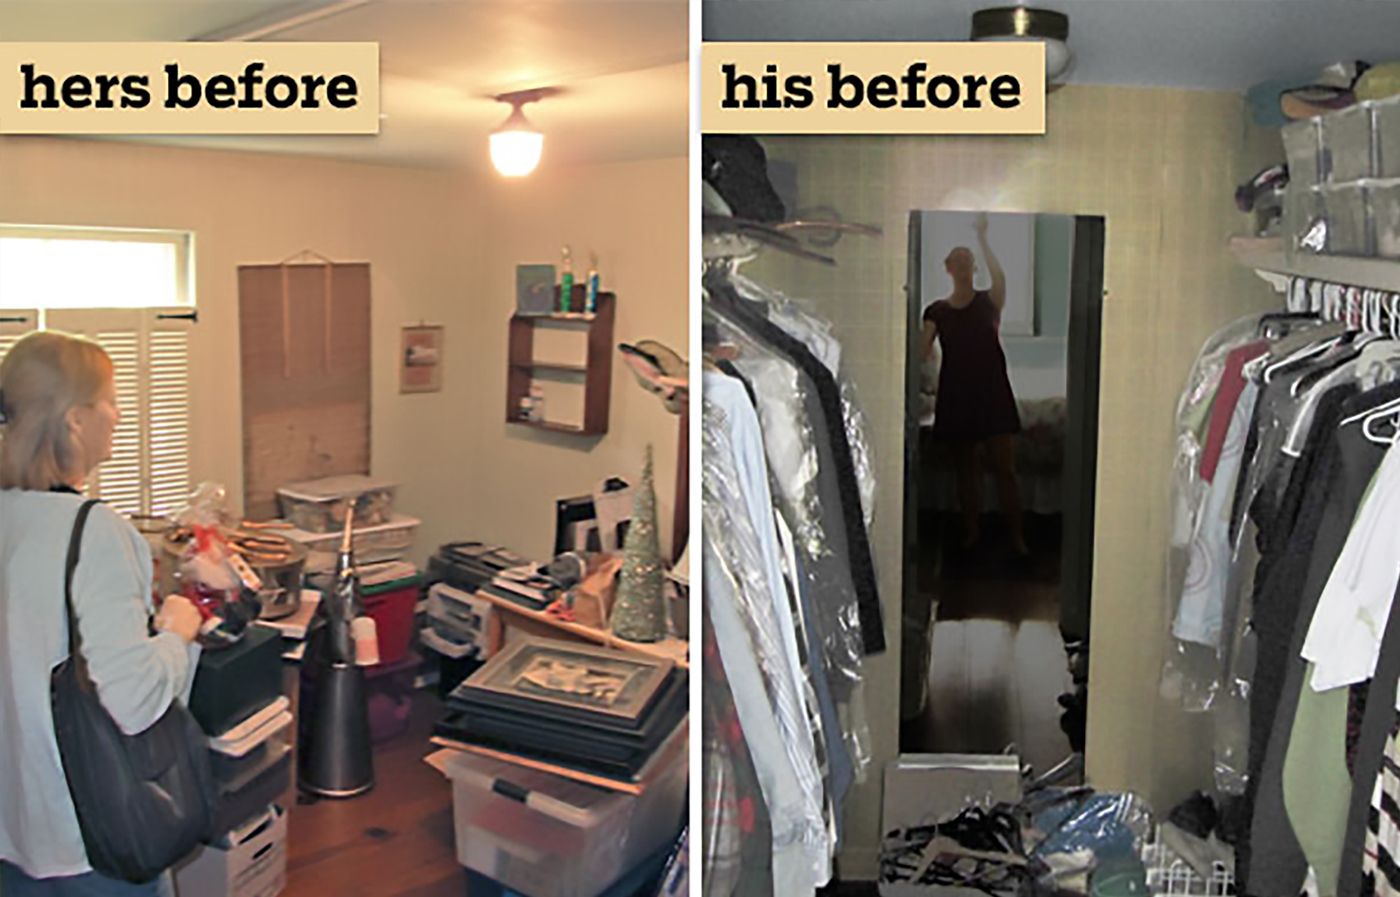
An Office and Lackluster Closet: Before
To speed up their timeline, they decided on a shortcut: Design around stock shelf and storage units and trim them out for a built-in look. The existing bedroom closet would become Ryerson’s, while an adjoining office would be fitted out for Meredith’s wardrobe.
Storage Units in Place: During
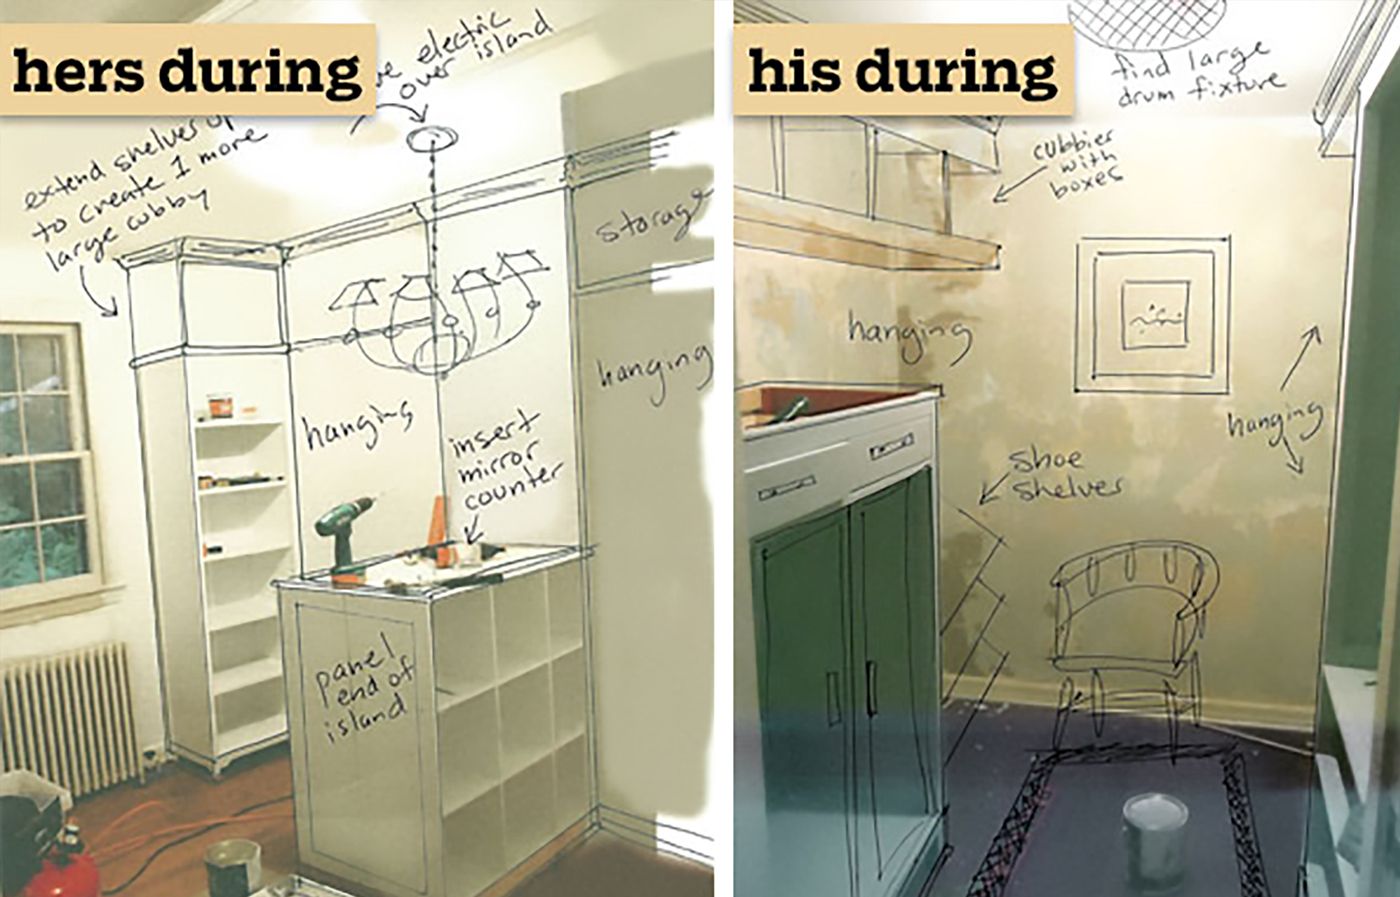
They researched like mad online, then sketched a plan, laying out the positions of the prefab pieces with painter’s tape. They created hanging space and shoe storage from scratch, and beefed up fiberboard-backed shelves and cubbies with interior bracing. To maximize storage, they added on to pieces to rise ceiling high, and built everything in by running crown and base molding along top and bottom, trimming out seams, and paneling exposed sides, as needed.
All told, the couple spent about $5,000 for both walk-ins; one-third the cost of custom closets, says Meredith, who has commissioned these for her interior-design clients. The results, they say, bring them joy and confidence—and moments of peace in the project-filled home they now share with their 1-year-old. “Ry actually meditates in his,” says Meredith. “And I’ve even hosted a cocktail party in mine!”
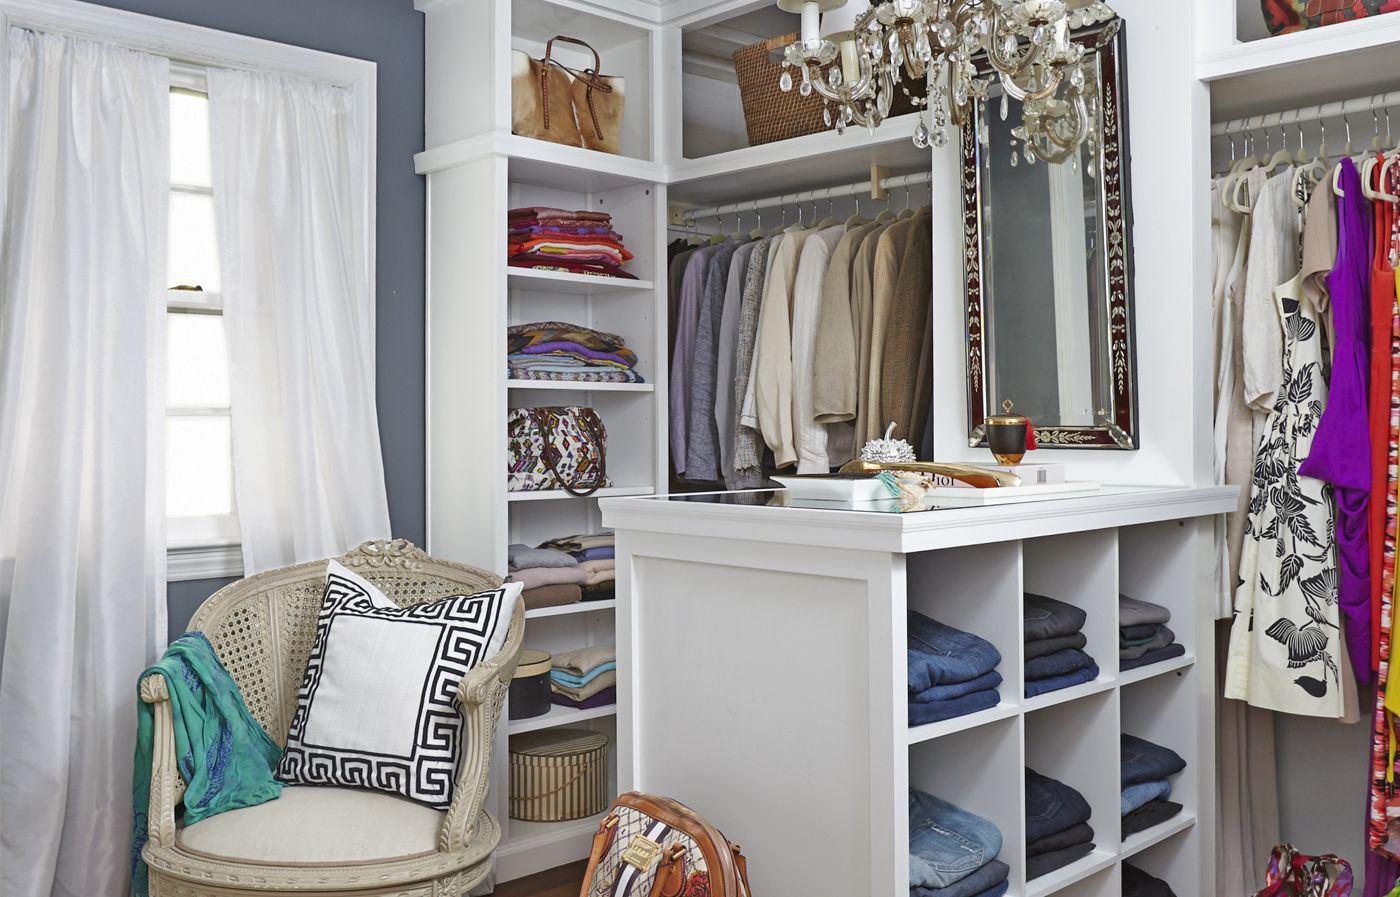
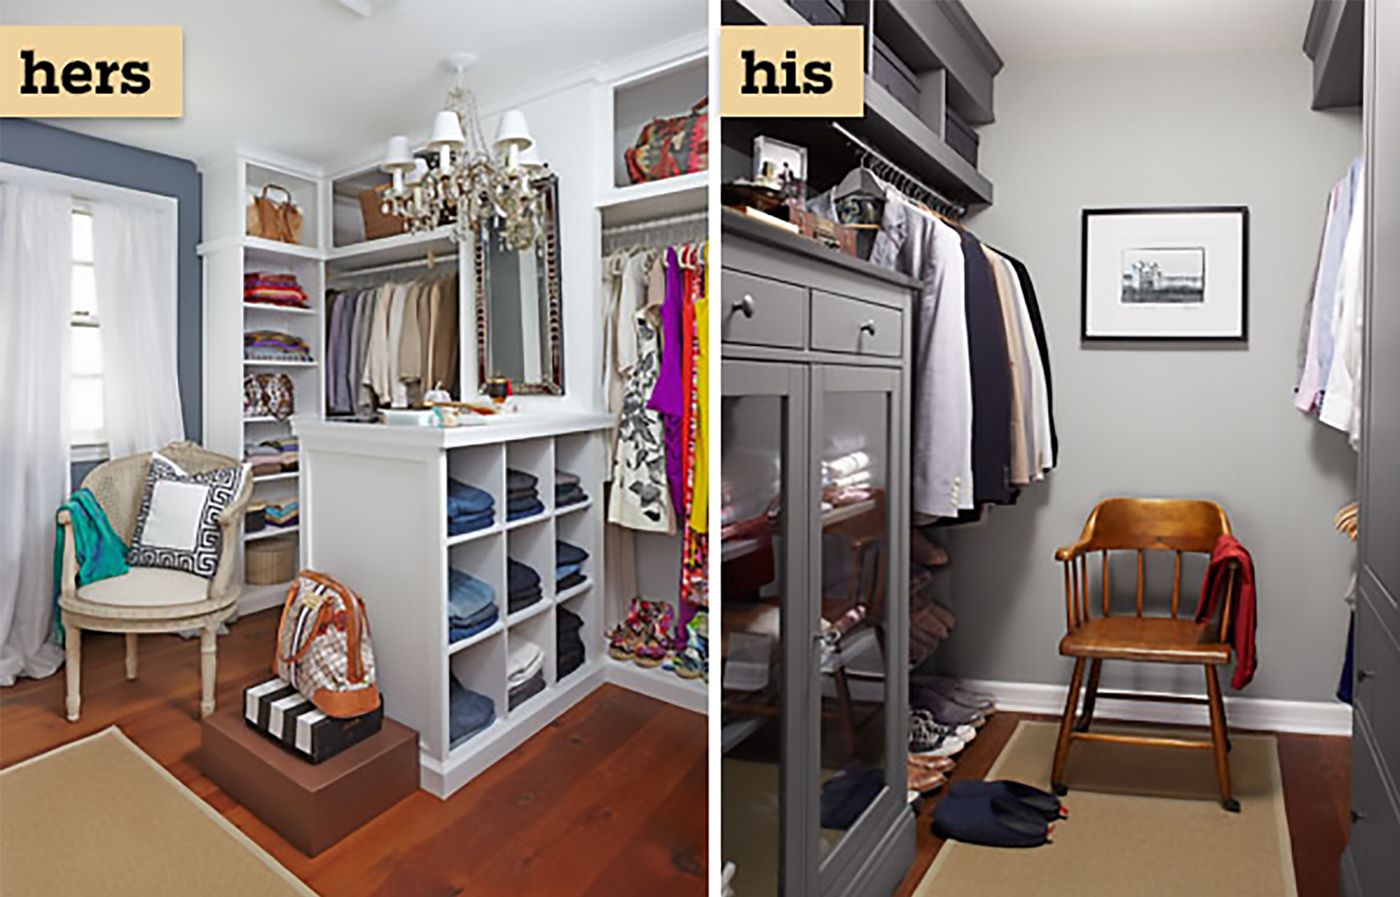
Her Boutique Closet: After
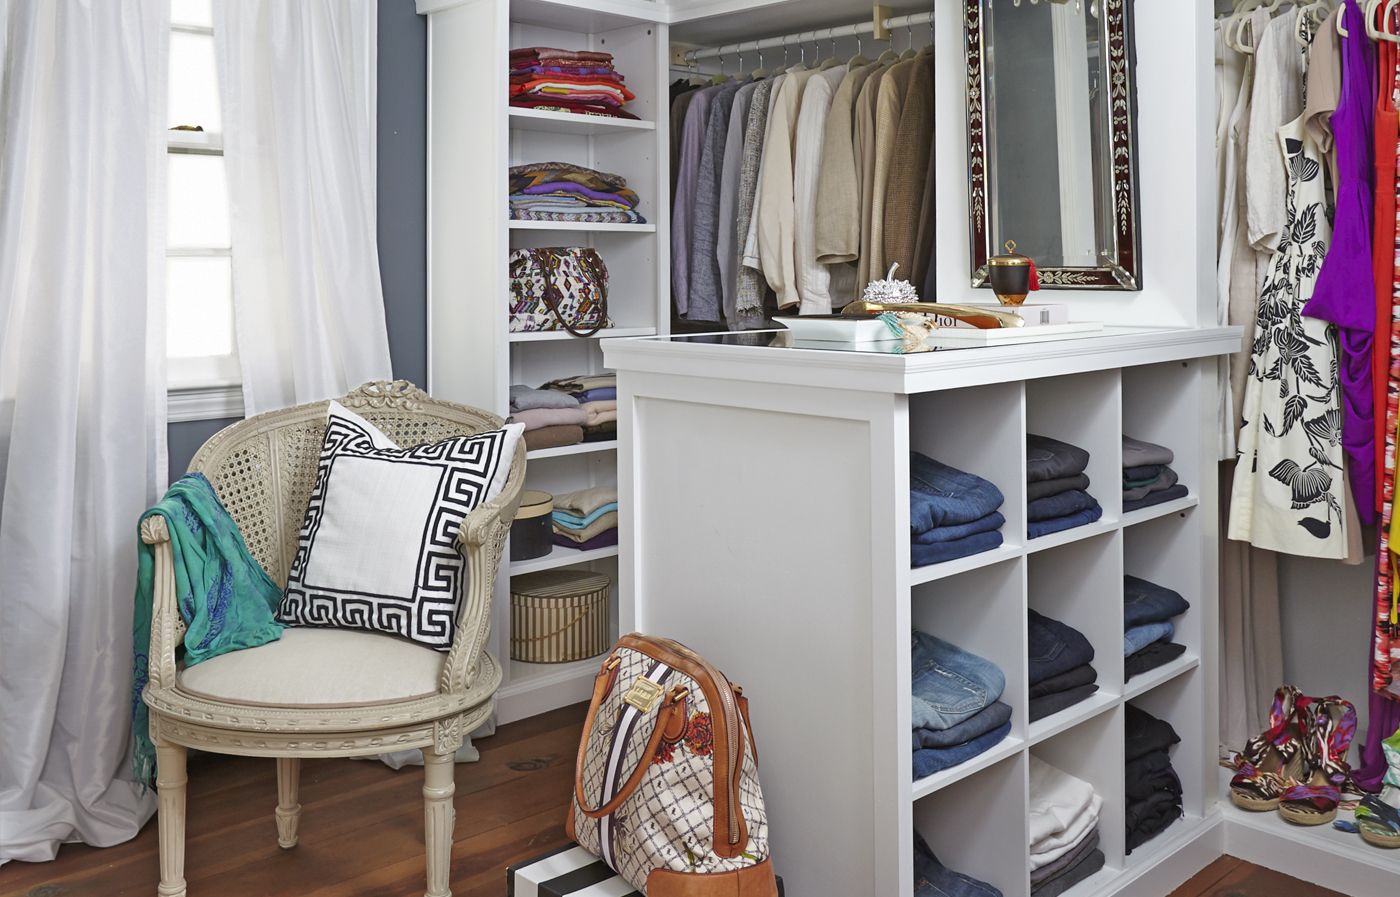
There’s a place for everything with this organized setup, which has a boutique look. Back-to-back cubes enhanced with trimwork and a mirrored top form the peninsula; a bookshelf extended to the ceiling stores handbags and sweaters.
Homeowner’s blog: amerelife.com
Cubes and bookcase: Home Decorators Collection
Cluttered Catchall Room: Before
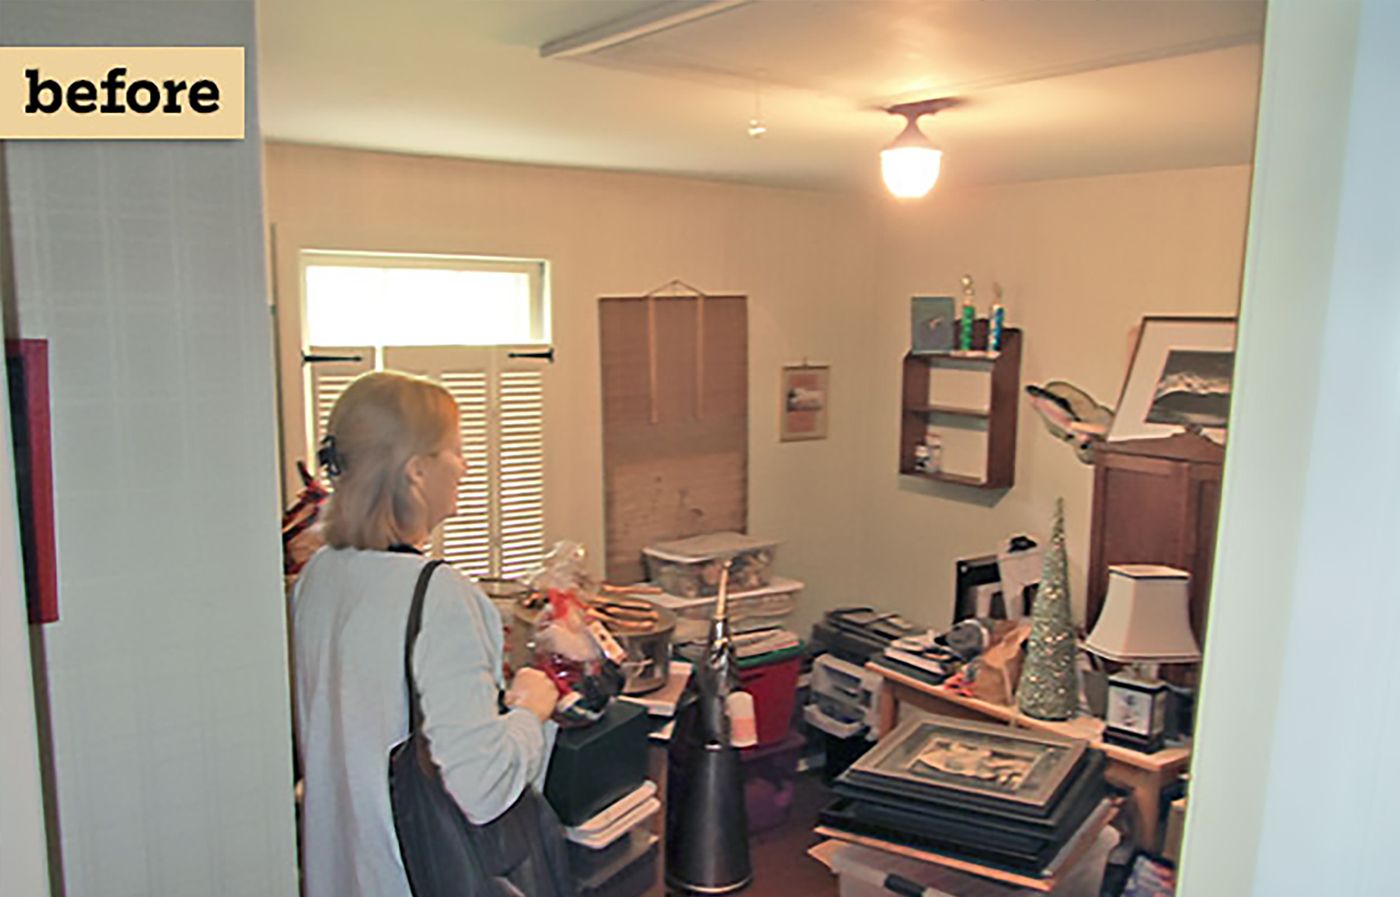
An office turned catchall off the master bedroom became her closet.
Pre-Molding Installation: During
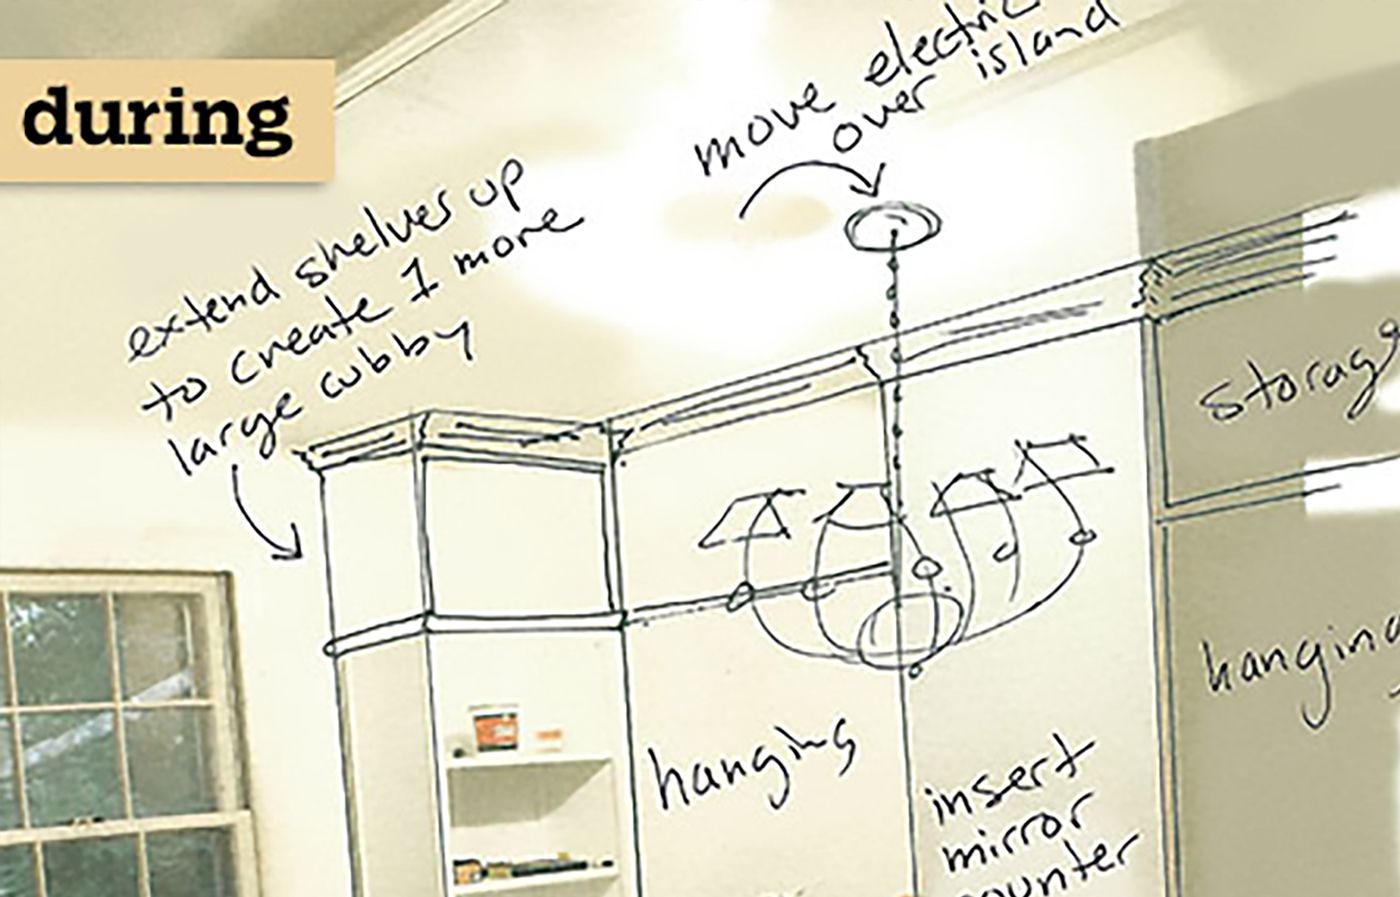
Her closet, at the midway point. Note how crown and base molding would eventually tie all the built-ins together. The building blocks of her open wardrobes are white-finished “assembly required” storage pieces: two plain dressers, three cube units, and a trio of bookcases.
Her Closet: Old Closet, New Alcove
With the doors off, the original closet is a storage alcove, where shirts hang above a pair of dressers. To avoid having to sand and repaint pieces that come with a lacquer finish, Meredith chose a color she liked and found paint to match for the added trim.
Malm dressers: IKEA
Homeowner tip: “Categorize and measure the width of your hanging clothes to figure out how much room you’ll need.” —Meredith McBride Kipp, Franklin Lakes, N.J.
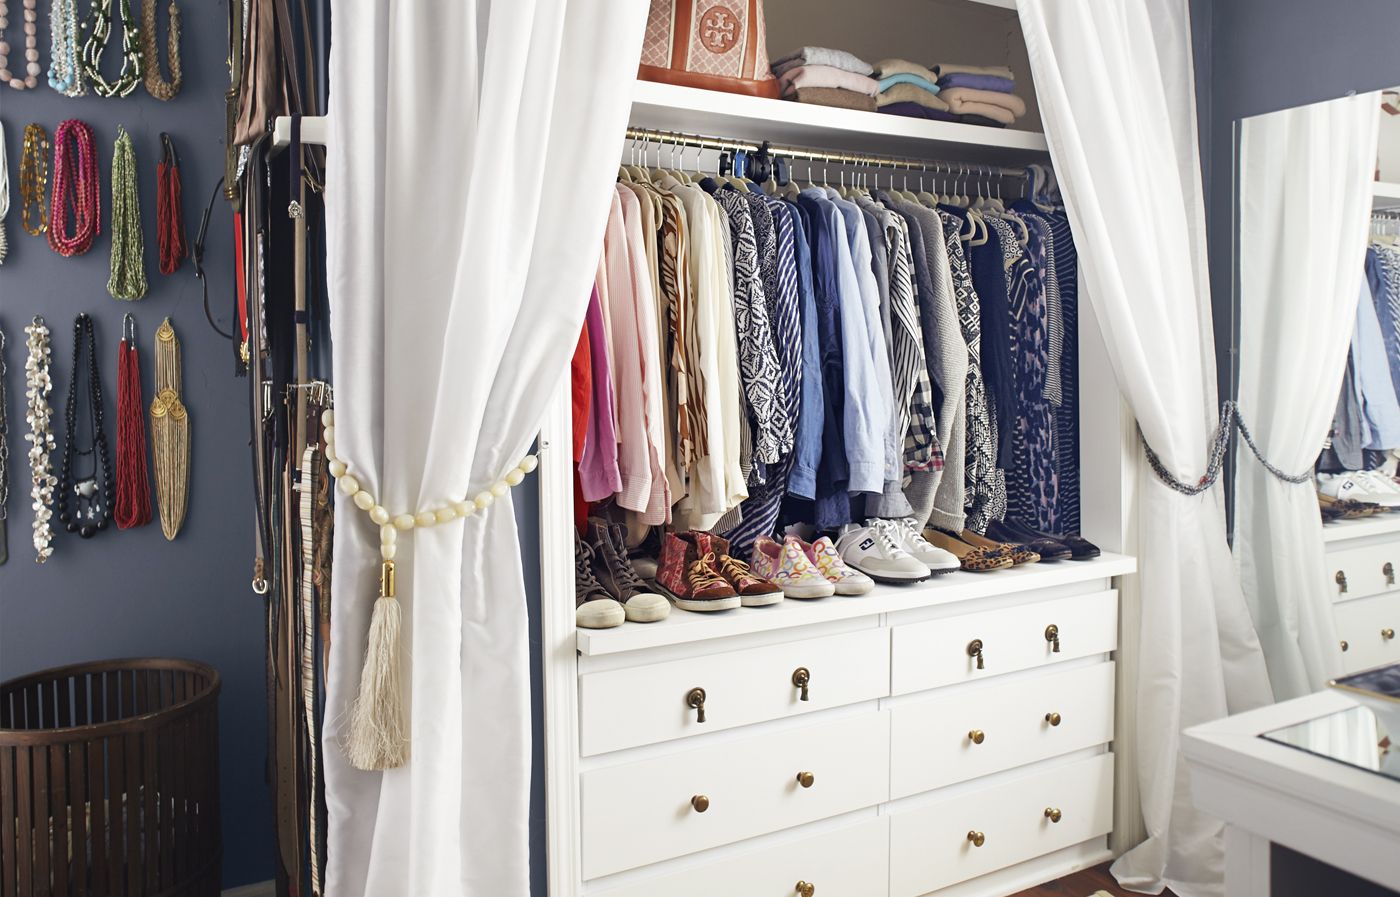
Her Closet: Dresser Storage Surface

When hanging a rod above a dresser, leave enough room below the bottom of clothing to use the dresser top as a storage surface. One continuous top, tassel-shaped drop pulls, and egg-shaped knobs unite and dress up basic white drawers.
Her Closet: Open—and Hidden—Shoe Storage
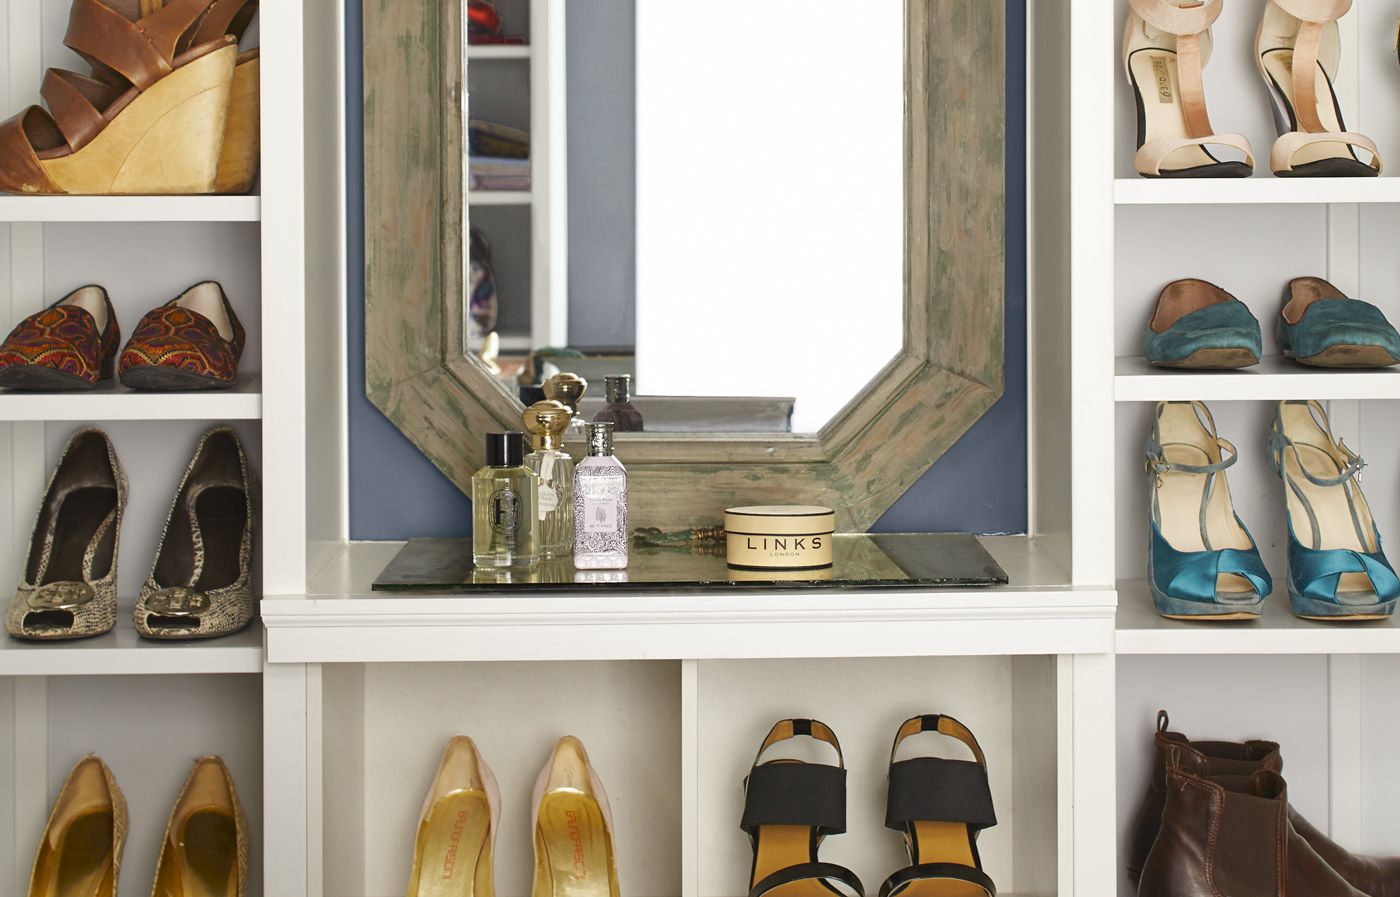
Not all shoes are display-worthy, so allow space for boxes or baskets to hold out-of-season or less-used footwear.
Bookcases: Home Decorators Collection
Her Closet: Room for Folded Clothes, Too
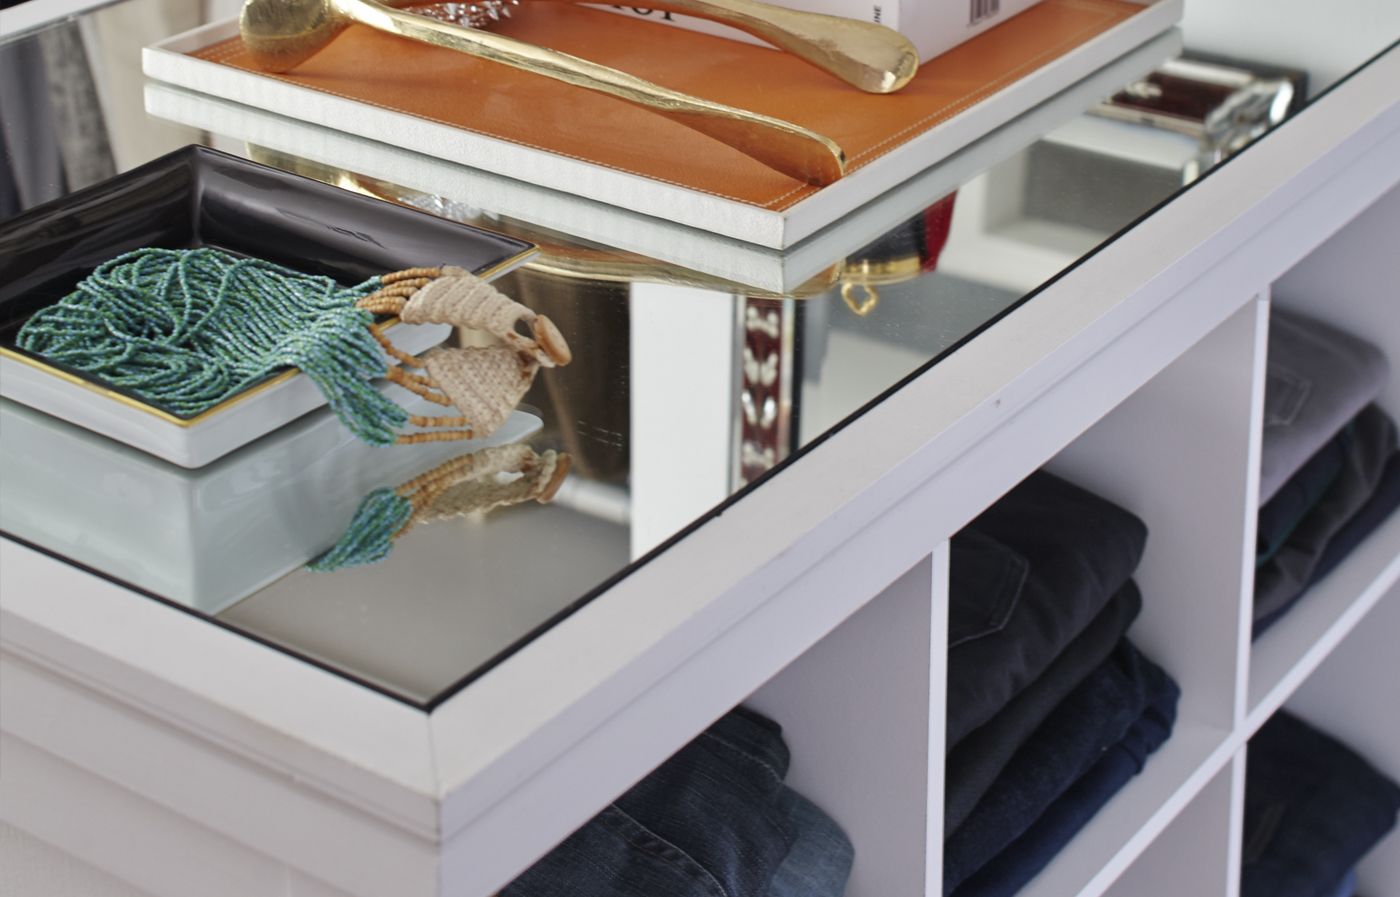
The island’s cubbies are the perfect size for folded jeans. The mirrored counter shows off jewelry and pretty grooming pieces and helps the wall-hung mirror bounce the available natural light around.
Handsome, Sleek Closet: After
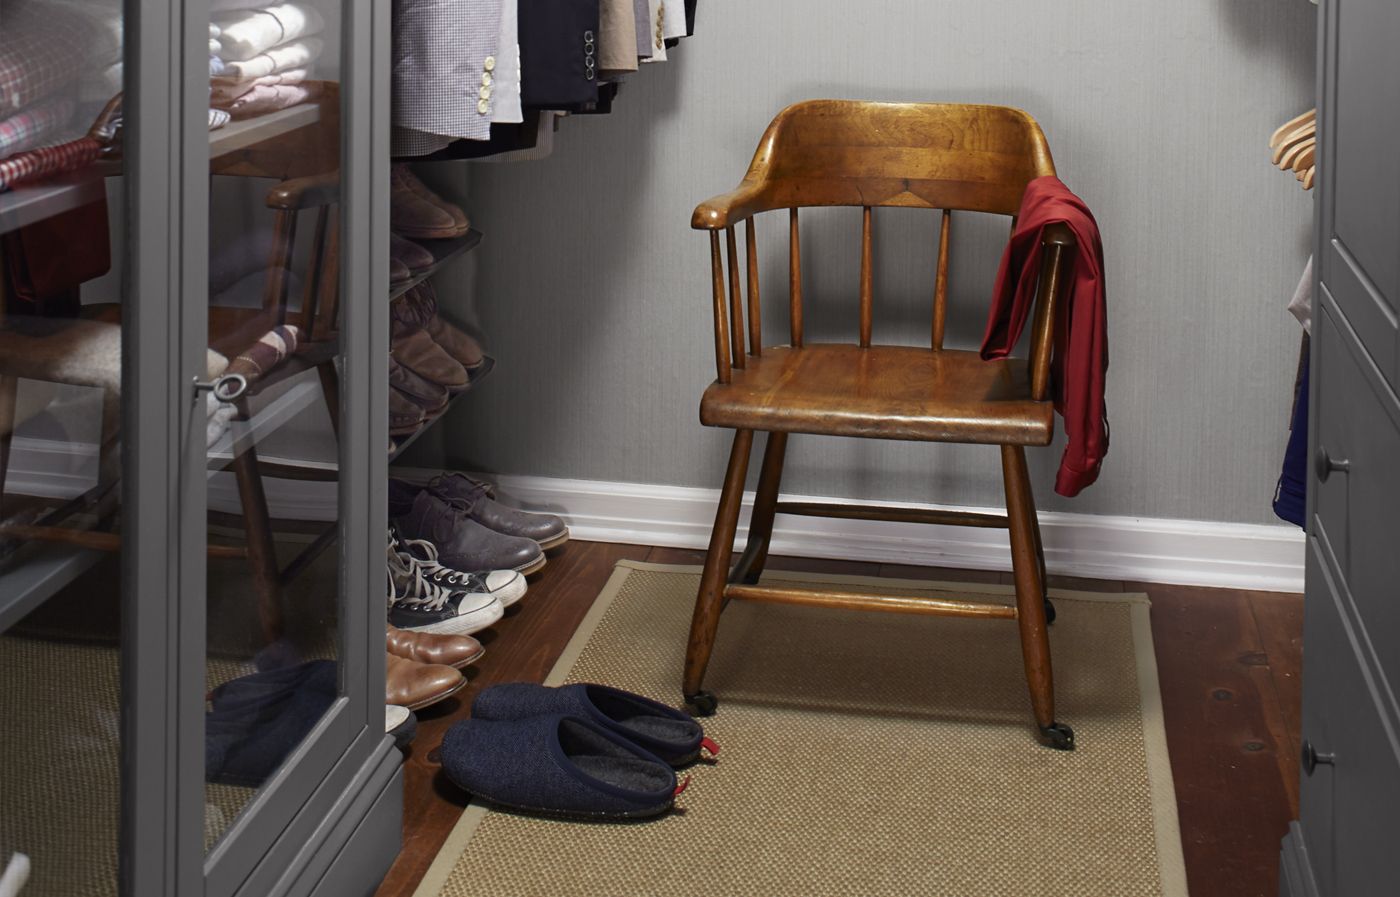
The haberdashery-inspired space in shades of gray holds a glass-front cabinet and an armoire, their feet wrapped with base molding for a built-in look.
Paint: PPU18-01 Cracked Pepper; Behr
Wallpaper: Coastal Sisal; Thibaut
Hemnes linen cabinet and wardrobe (no longer available): IKEA
Practical, Forgettable Closet: Before
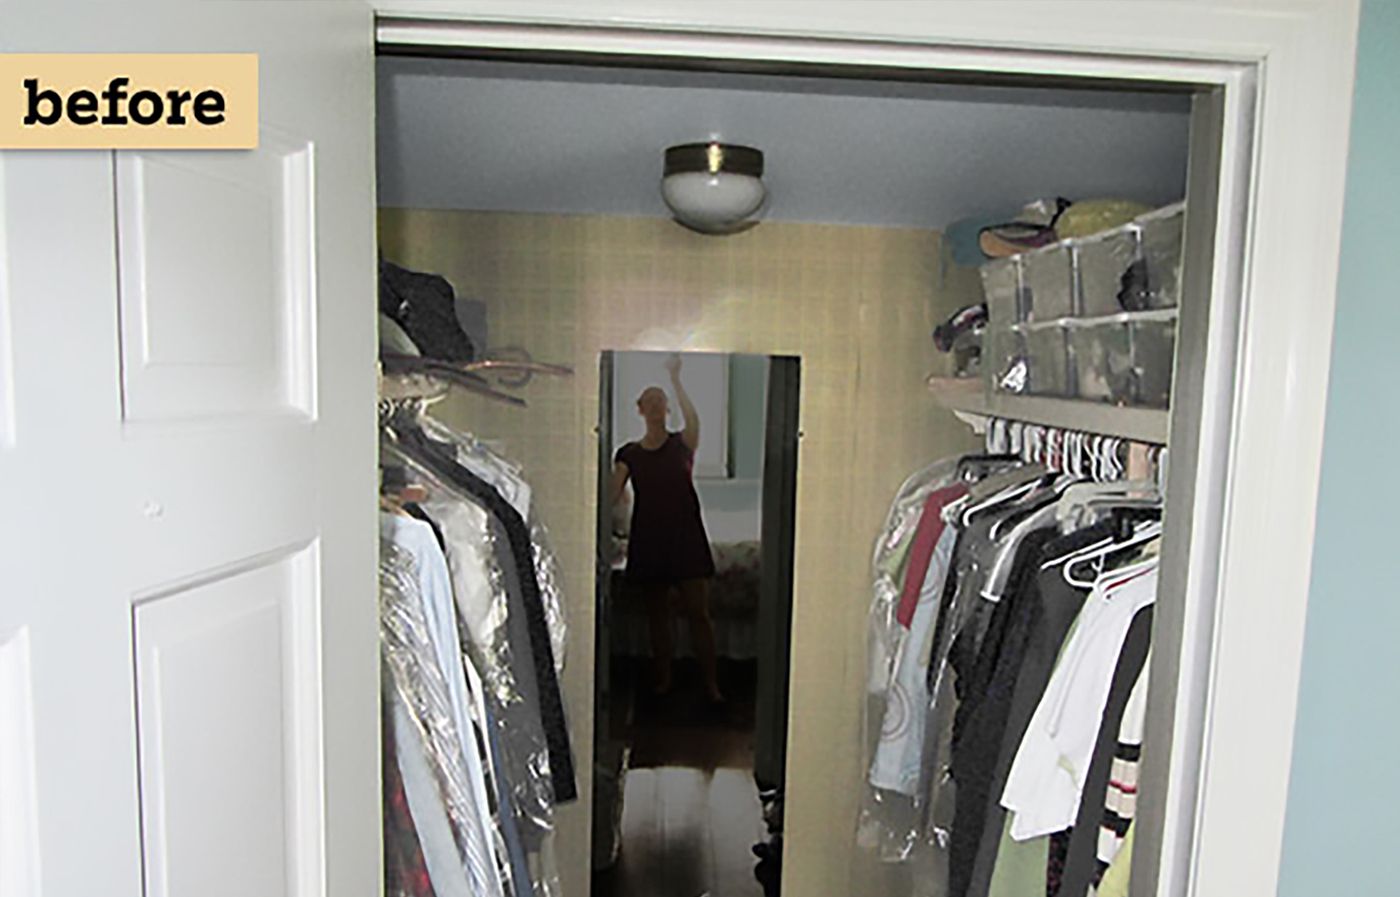
His no-frills closet had rods along both sides and shelves overhead.
Pre-Cozy Accessories: During
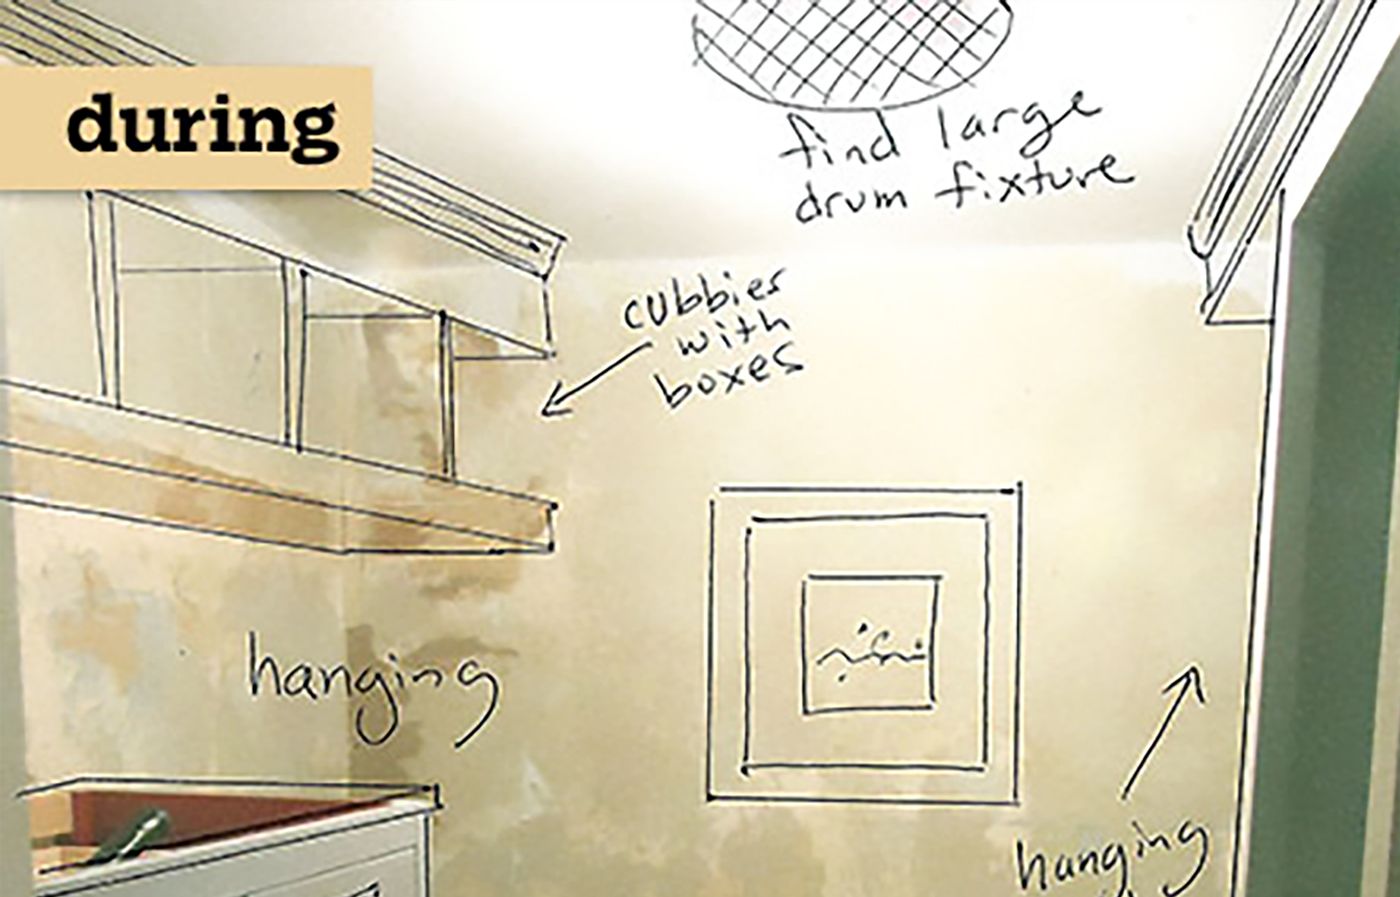
His closet, halfway there: The addition of artwork, a large light fixture, and a family-heirloom chair will make the closet into a sanctuary. Flat-pack furniture pieces form the core of his storage strategy: a glass-front cabinet and an armoire with doors and drawers that he refinished with gray paint.
His Closet: Squeezed-in Hanging Rods
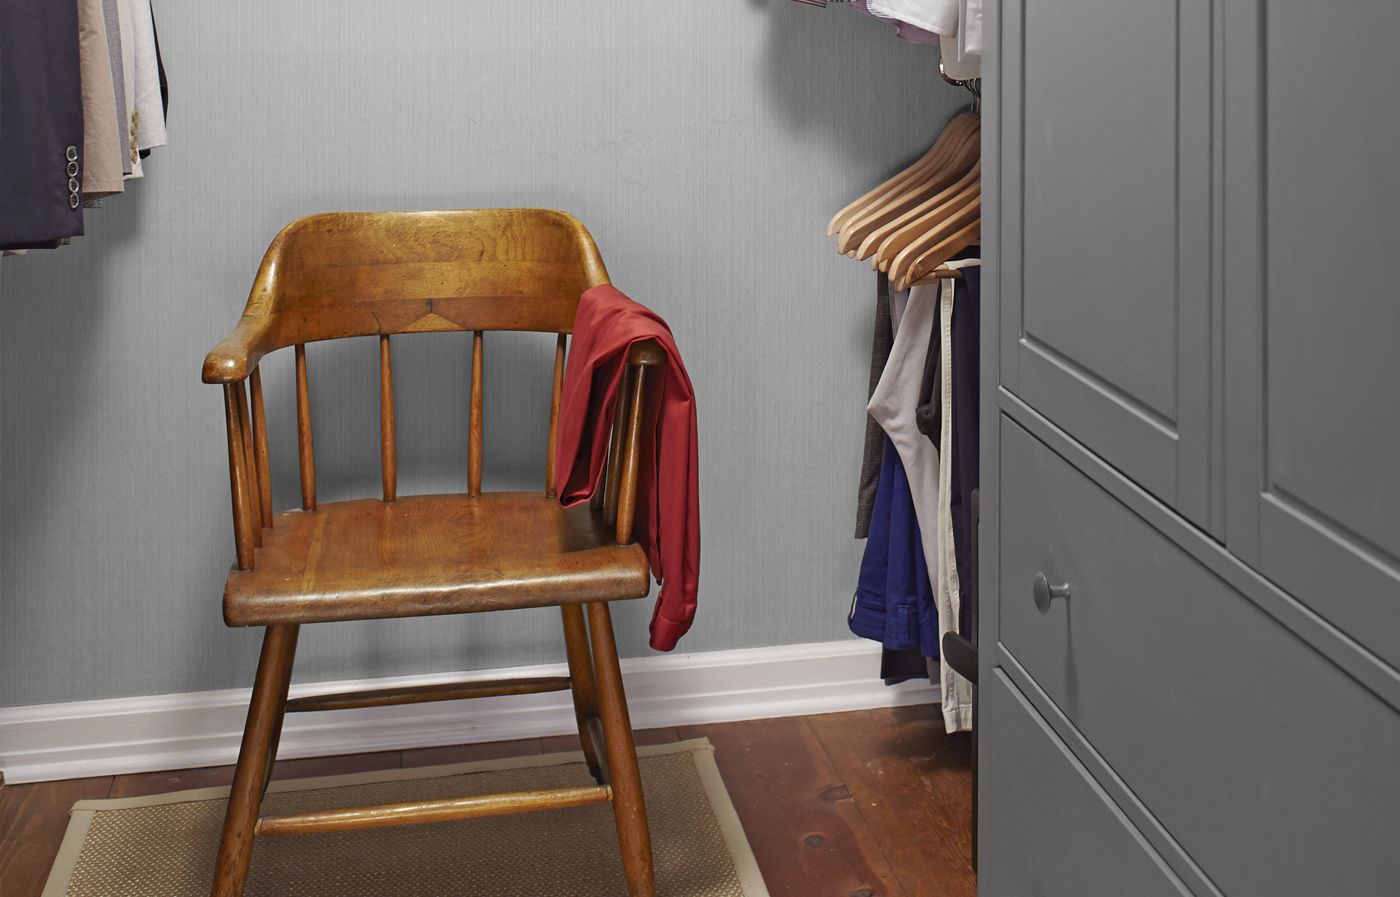
Next to the armoire, Ryerson stacked hanging rods for short items. He anchored the furniture to the walls using hardwood strips. The chair was his great-grandfather’s.
Homeowner tip: “Adding a piece of hardwood along inside edges of a prefab piece gives it a sturdier, more substantial feel.” —Ryerson Kipp, Franklin Lakes, N.J.
His Closet: Subtle Boxes for Extra Storage

A ceiling soffit with open storage to hold lidded boxes keeps attire ready to wear.
His Closet: Footwear on Display
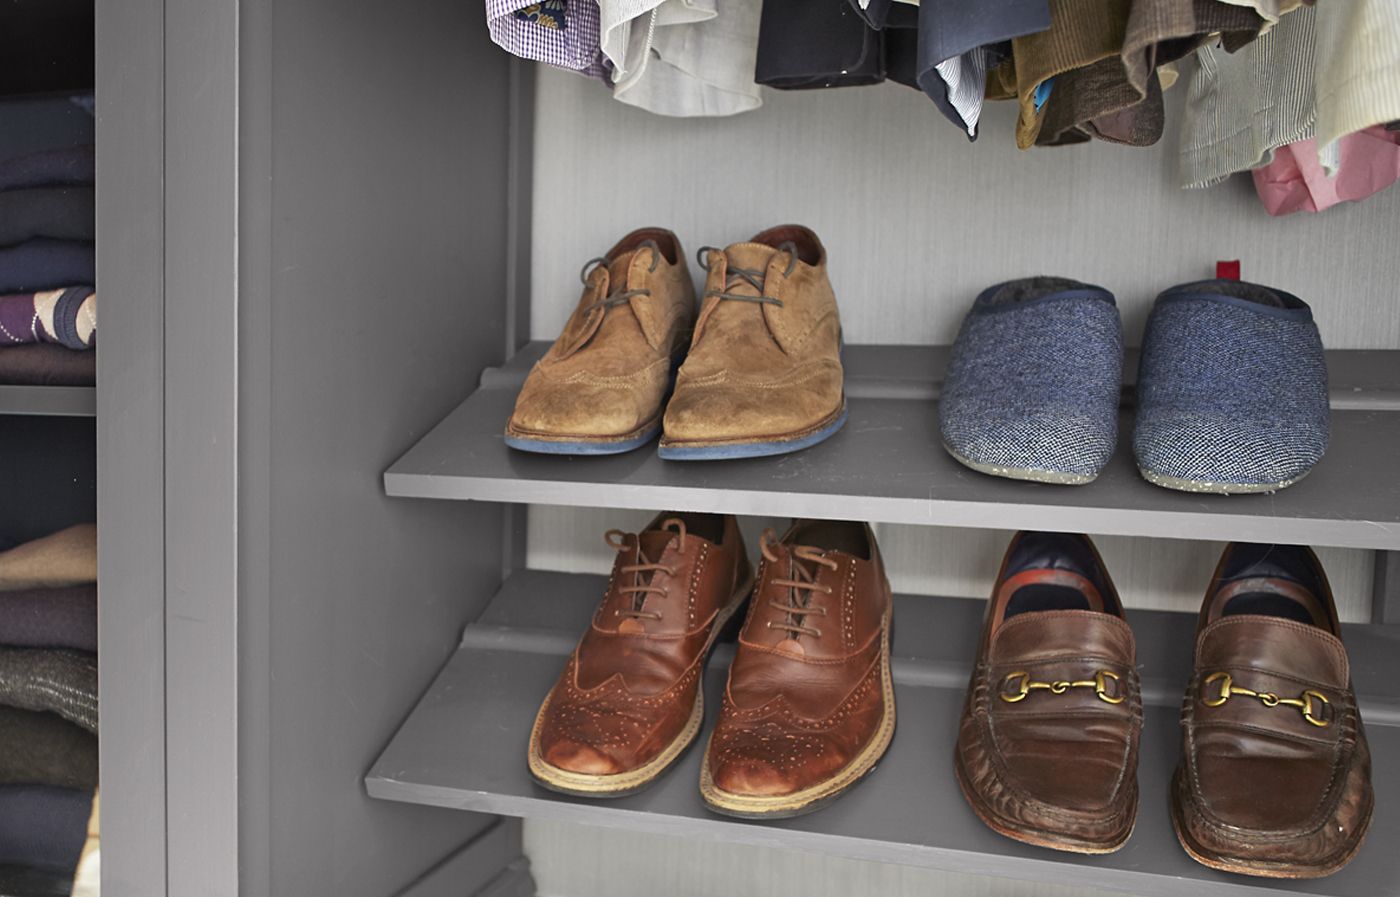
Pine shelves are set at a slight angle, with a 1× ledge to catch heels and hold footwear in place.
Ekby Riset angled shelf brackets (no longer available): IKEA
Her Closet Floor Plan Before: Blank-Slate Office
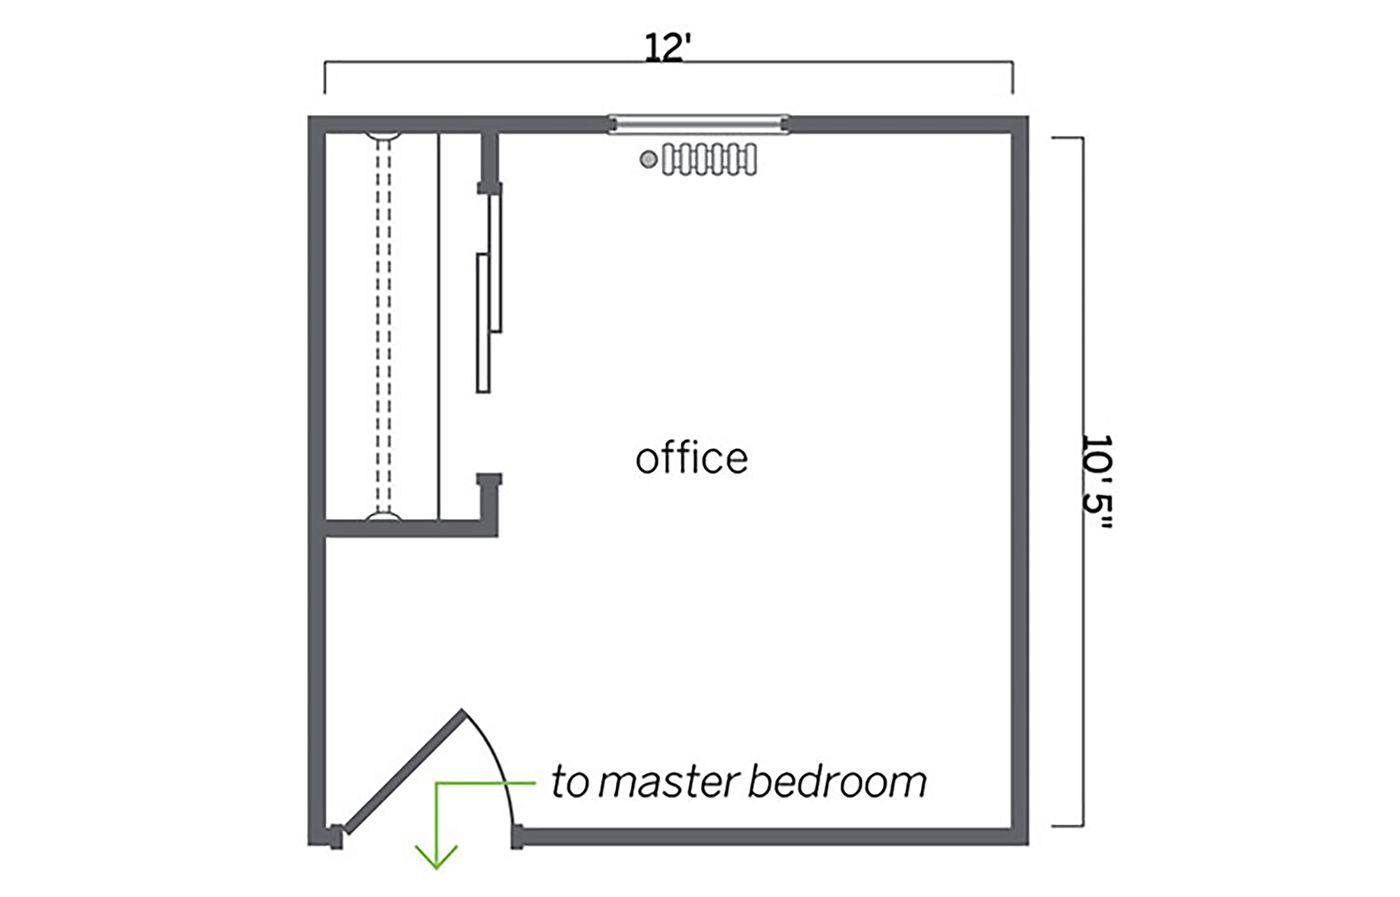
The former office had a small closet, a window with a radiator below it, and plenty of space.
Her Closet Floor Plan After: A Place for Everything
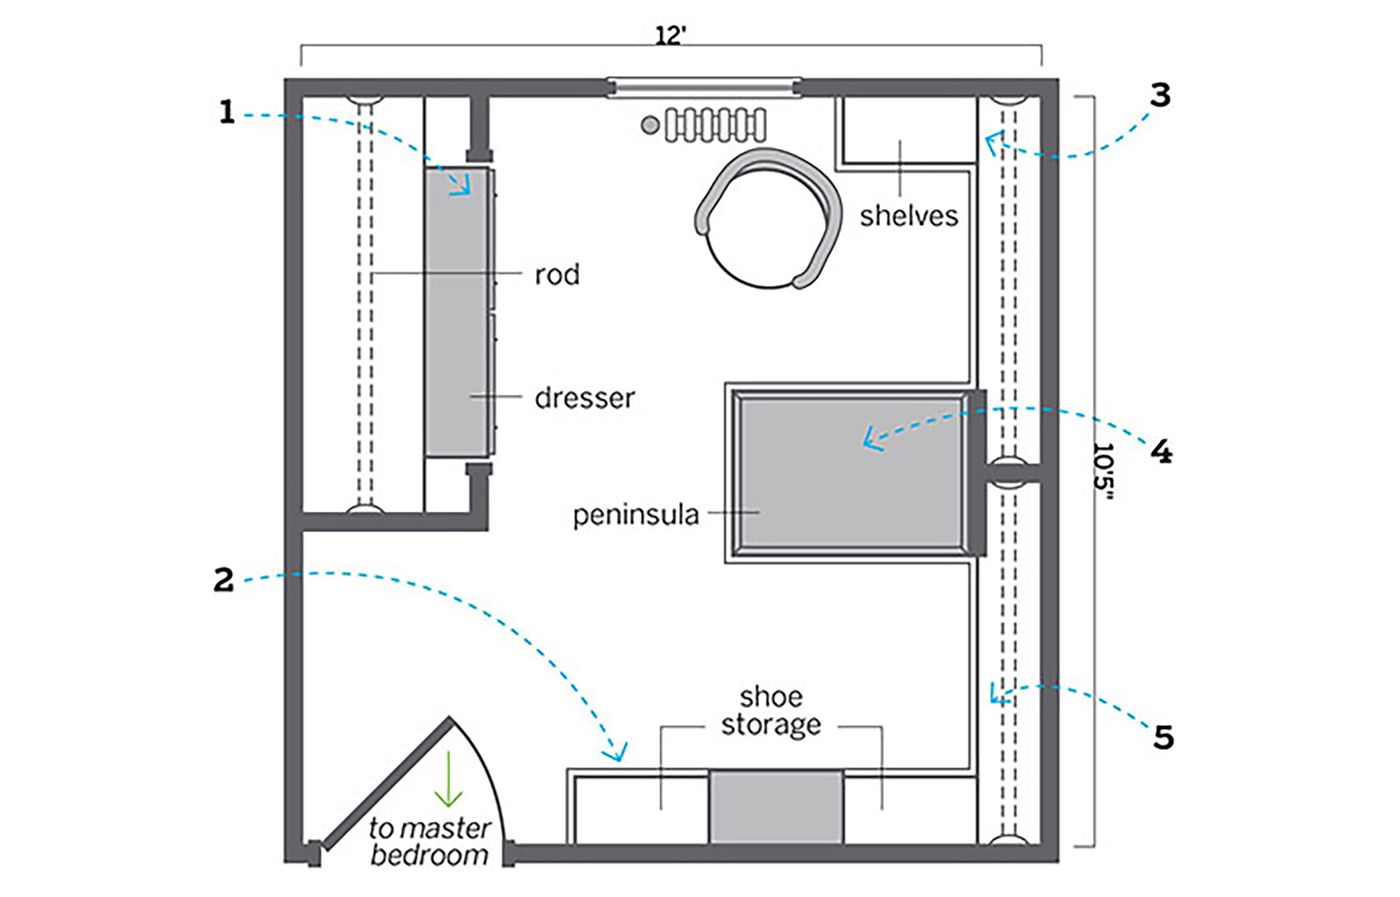
On-display short and long hanging space, to-the-ceiling shelves, and a cubby peninsula offer organized storage—and good circulation—in a room-size closet.
1. Gutted the original closet and removed the doors; built a frame to hold a hanging rod with a shelf overhead. United a pair of dressers below.
2. Built in and trimmed out two bookshelves with a six-cube unit in between for shoes.
3. Installed a bookshelf and extended it to the ceiling; stacked two tiers of short hanging space with a shelf above.
4. Created a peninsula from two cube units; moved electrical to center a chandelier above it.
5. Built a wardrobe with long hanging space, topped with a shelf.
His Closet Floor Plan Before: Roomy, But Uninspired Closet
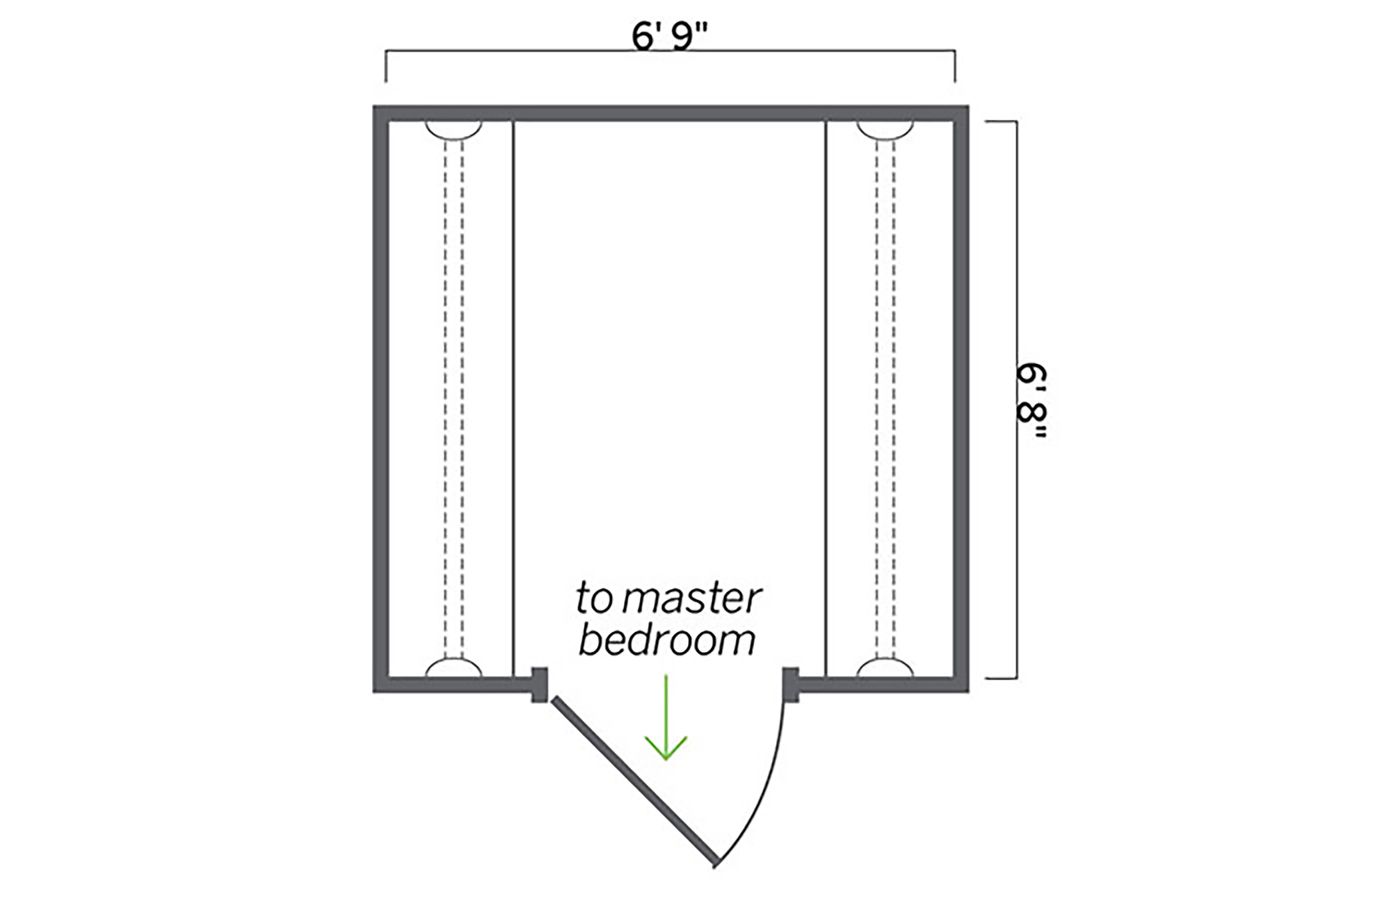
Though large enough, the closet lacked organized storage solutions.
His Closet Floor Plan After: Custom, Welcoming Touches
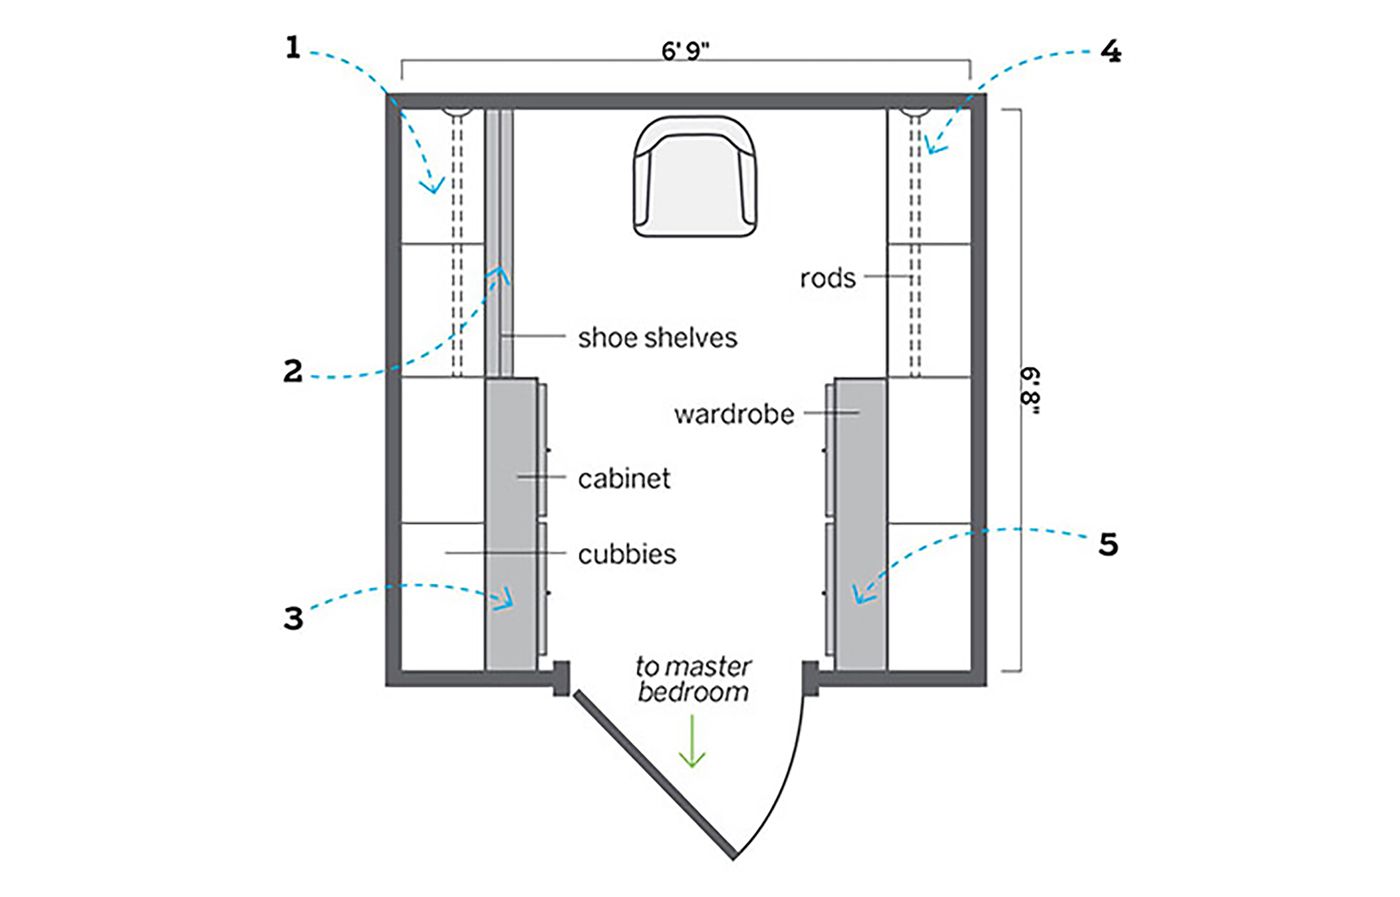
A mix of built-from-scratch storage and assembly-required furniture maximizes space from floor to ceiling—with a bit of breathing room.
1. Gutted the closet; built a soffit with cubbies and hung a rod below it.
2. Built angled shoe shelves beneath the rod.
3. Put in a painted glass-front cabinet, adding base molding for a built-in look.
4. Installed a second ceiling soffit, extending the sides to create a frame for two short-hanging rods, one for shirts and one below it for trousers.
5. Added a painted wardrobe across from the cabinet, wrapping the top and bottom with molding.