Project details
Skill
Cost
Estimated Time
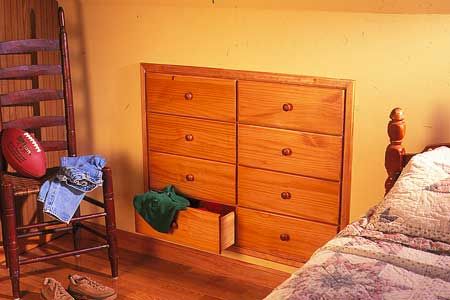
Transforming dead space into a storage area is a smart way to maximize your home’s living space. One often overlooked opportunity is the knee wall — that short wall beneath the sloping roof in attics or upper floors.
By installing knee-wall storage, you can gain a full-size chest of drawers without sacrificing any floor space and without having to install wall-mounted shelving which can shrink the size of a room. This guide will walk you through installing knee-wall storage, from planning to finishing touches.
Assessing Your Space
Before you begin the installation process, determine if your knee wall is load-bearing. In most cases, it won’t be. But if you’re unsure, consult a licensed contractor or structural engineer.
The project is easier if the wall is not load-bearing. However, you can still build in a chest of drawers if the wall does bear a load. To do so, you must first install a double-2×6 header and a pair of trimmer studs to support the rafters over the opening.
Once you’re ready to move forward, carefully measure the available space in your knee wall to determine the size of the dresser that will fit. Consider the space’s height and depth, as well as any potential obstructions like roof rafters.
Tools and Materials Needed for Knee-Wall Storage Installation
To complete this project, you’ll need the following tools:
- Circular saw
- Handsaw
- Drywall saw
- Level
- Tape measure
- Drill and drill bits
- Hammer
Required Materials
Prepare these materials for your knee-wall storage installation:
- Chest of drawers
- 2×4 lumber for support braces (if needed)
- Decorative trim
- Paint, stain, or varnish
- Wire nails or staples (¾-inch)
- Screws (2-inch and 1 1/4-inch)
- A thin strip of hardboard or plywood
Step-by-Step Guide For Installing Knee Wall Storage
Proper planning and careful execution are key to a successful knee-wall storage installation. Thoroughly read through all of the steps below before you attempt them. If you’re unsure about any step of the process, don’t hesitate to consult with a professional. For more ideas on maximizing storage throughout your home, explore 37 ways to add storage to every room.
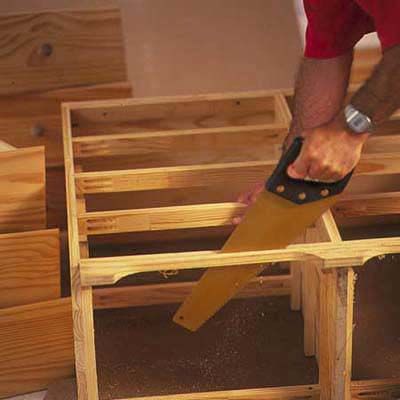
Step 1: Trim Overhanging Ends
Start by using a handsaw or circular saw to trim off the overhanging ends and front edge of the chest of drawers. This will allow the chest to slide cleanly into the wall.

Step 2: Trim Feet
Saw off any feet or other protrusions from the bottom of the chest to create a smooth, flat base.
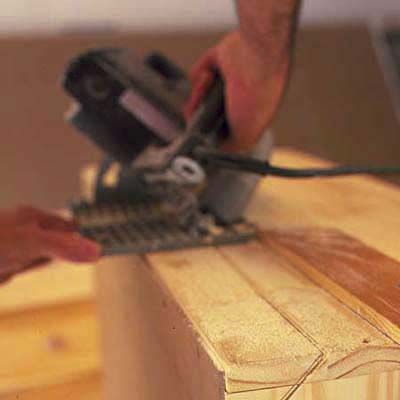
Step 3: Trim Dresser to Fit Opening
If the chest is too deep to fit the space, use a circular saw to slice off its upper rear corner. If necessary, finish the cut with a handsaw. The goal is to slide the chest into the wall without banging into the roof rafters.
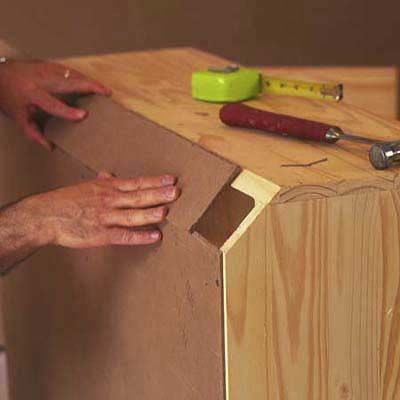
Step 4: Close the Gap
Cover the gap at the rear of the chest with a thin strip of hardboard or plywood. Attach the strip with ¾-inch wire nails or staples.
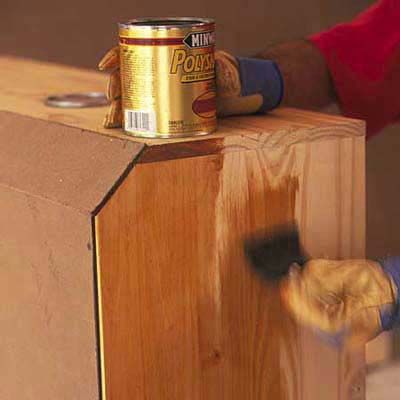
Step 5: Paint, Stain or Varnish Unfinished Wood
If the chest is unfinished, brush on a coat of paint, stain or varnish. This will help protect the wood from exposure to excessive heat and humidity.
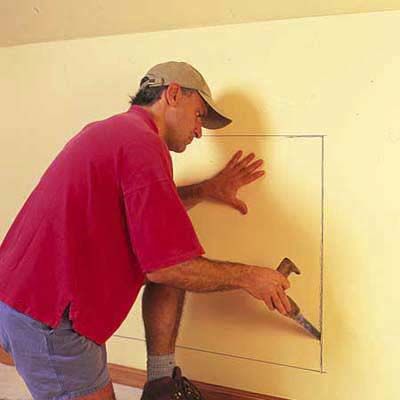
Step 6: Outline The Chest
Mark the outline of the chest onto the wall using a level, then cut out the wallboard using a drywall saw.
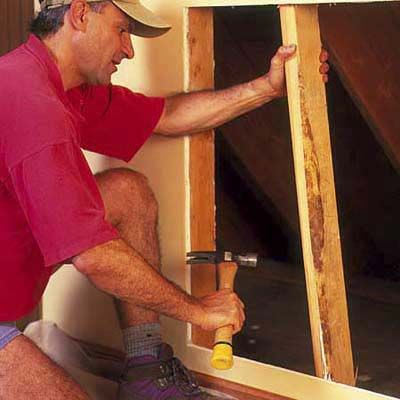
Step 7: Remove Interferences
Use a hammer to remove any knee-wall studs and insulation from the opening. Remember, this is only possible if the wall is not load-bearing. If you’re not sure, get a structural engineer to consult with you before completing this step.
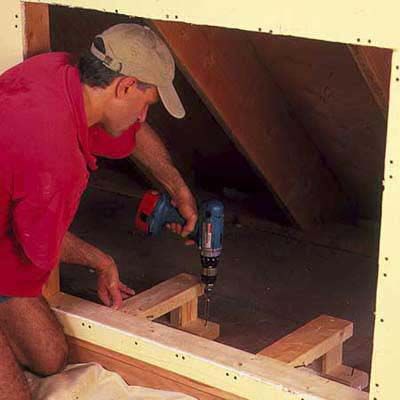
Step 8: Install Supports
Screw two support braces to the attic floor right behind the knee wall. Build the supports out of 2x4s, making sure they’re flush with the sill of the cutout.
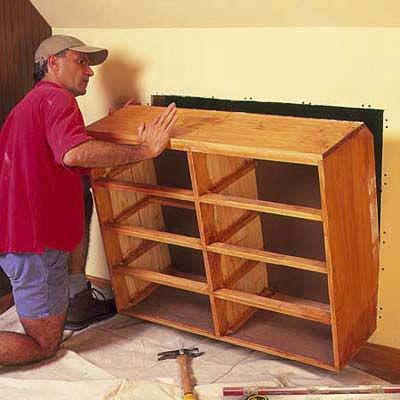
Step 9: Insert Dresser
Set the chest onto the sill and slide it into the hole in the wall. Push it straight back until it’s flush with the finished wall surface.
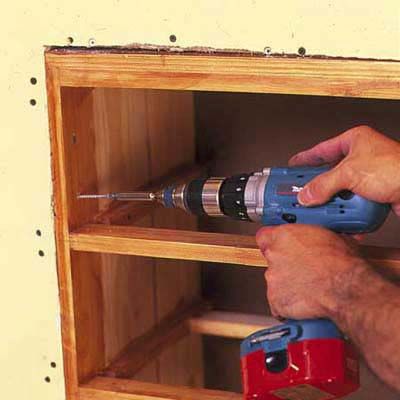
Step 10: Secure the Chest
Drive 2-inch screws through the sides of the chest, top and bottom and into the 2×4 framing.
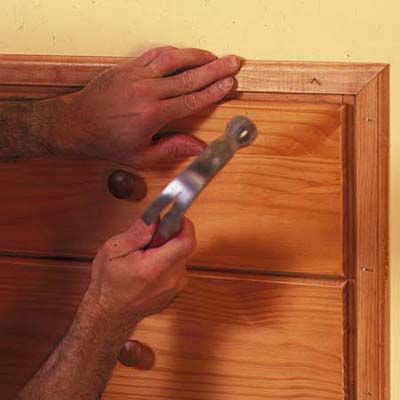
Step 11: Final Touches
Install decorative trim to finish — in the photo below, ogee doorstop molding — around the perimeter of the chest. The trim will hide the seam around the cutout and give the chest a more finished, built-in appearance.
Troubleshooting Common Issues
Even with careful planning, uneven floors and moisture accumulation can present issues for knee wall storage.
Dealing with Uneven Floors
If your attic floor is uneven, use shims under the support braces to level the dresser. This will ensure smooth drawer operation and prevent the dresser from shifting over time. Checking the level during installation can save you from complications later.
Addressing Moisture Concerns
In areas prone to high humidity and condensation, consider adding a dehumidifier or improving ventilation to protect your stored items and the dresser itself from potential damage. Proper air circulation and moisture control are crucial for maintaining the integrity of your knee-wall storage.