Project details
Skill
Cost
Estimated Time
Crown molding is an easy and affordable way to punch up an ordinary room. It can also make a room appear taller or more spacious. With the right tools, techniques, and patience, many homeowners can tackle this project themselves. Our guide will walk you through both the basics and more advanced techniques.
Crown Molding Overview
There are some basic rules for installing crown molding. We asked Tom Silva for tips. He says he seldom picks up a tape measure, marking his cuts in place whenever possible. “Measuring leaves you open to miscalculations,” says Silva.
He also doesn’t lay the molding flat to cut it. Though cutting down flat might seem easier, it requires a saw that lets you tilt the blade (for the bevel) and rotate it (for the miter angle). You also need a set of tables to know the correct angles for the cuts.
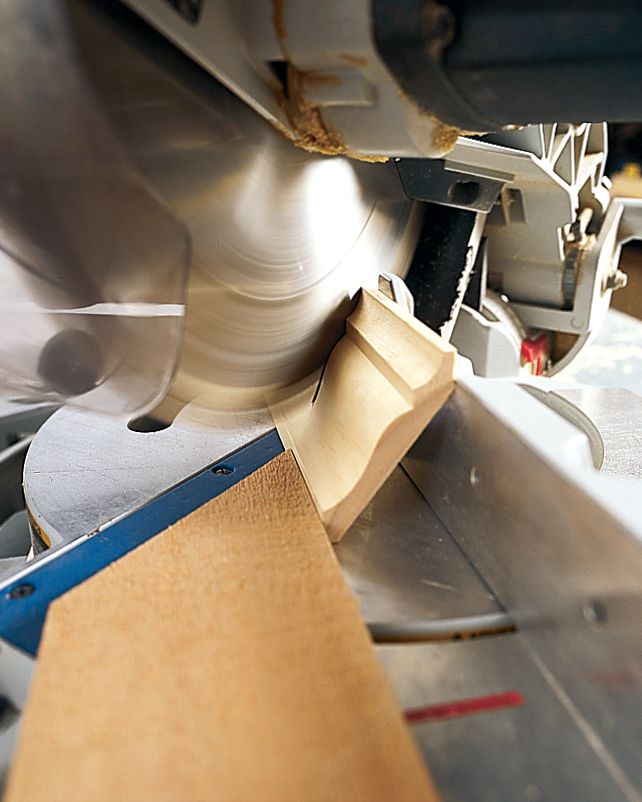
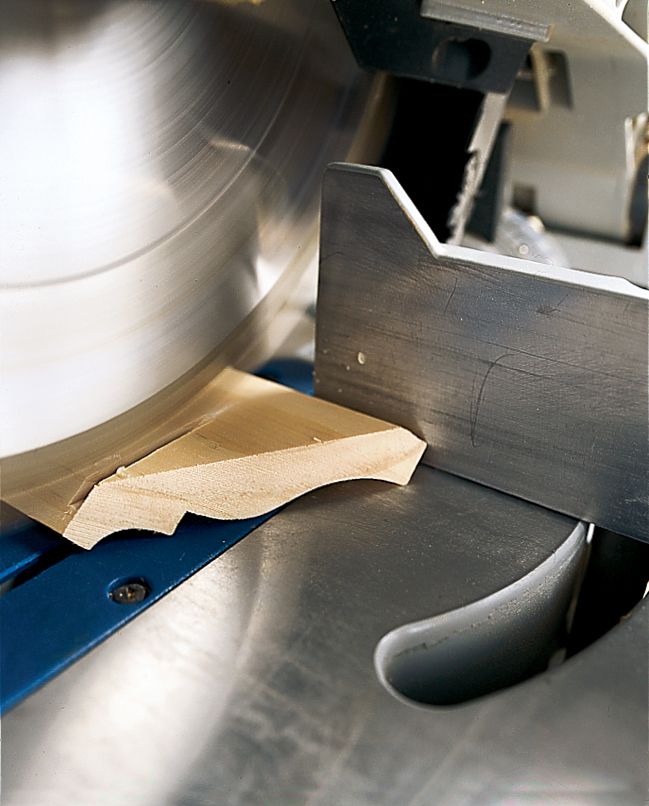
Instead, Silva uses a simple power miter saw and arranges the material so it sits against the saw fence at the same angle it will be nailed to the wall. Although the molding has to be upside down in this method, a simple downward cut of the blade set at 45 degrees produces the perfect bevel and miter at once.
Essential Tools for Crown Molding Installation
Having everything on hand before you start will make the process go smoother.
Required Tools
To install crown molding, you’ll need these tools:
- Caulk gun
- Level
- Miter saw or coping saw
- Nail gun or hammer
- Safety glasses and dust mask
- Stud finder
- Tape measure
Necessary Materials
In addition to the crown molding itself, you’ll need these materials:
- Caulk
- Finishing nails
- Paint or stain (if finishing the molding)
- Sandpaper
- Wood filler
- Wood glue
Cutting Crown Molding: Techniques and Tips
Before cutting any crown molding, first measure your room’s perimeter, adding 10% to account for waste. Measure twice to ensure accuracy. Due to its angled profile, cutting crown molding can be challenging. Mastering a few key techniques will help you achieve precise cuts for a professional finish.
Using a Miter Saw
A miter saw is the most efficient tool for cutting crown molding. Follow these steps to use it effectively:
- Set the saw to a 45-degree angle for most standard crown molding.
- Place the molding upside down against the fence, as it would sit on the wall.
- Make slow, controlled cuts to avoid splintering.
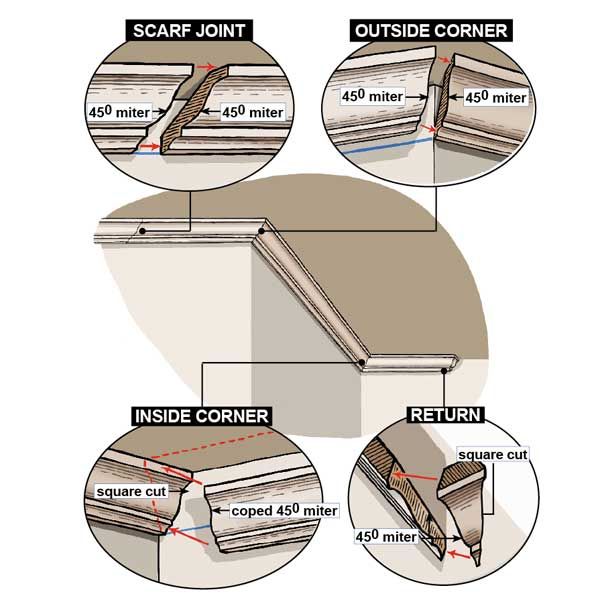
Making Scarf Joints
For walls longer than your molding pieces, you’ll need to join two pieces with a scarf joint.
- Cut the first piece at a 45-degree angle.
- Cut the second piece at the opposite 45-degree angle.
- Apply wood glue to the joint and nail both pieces in place.
Creating Coped Joints
For inside corners, coping creates a tighter fit than mitering.
- Cut one piece square and install it flush to the wall.
- Cut the adjoining piece at a 45-degree angle.
- Use a coping saw to cut along the profile of the molding, following the contours.
Step-by-Step Crown Molding Installation Process
With your preparations complete and cutting techniques mastered, you’re ready to begin the installation process. Follow these steps for a smooth and successful crown molding installation.
Marking the Wall and Ceiling
Begin by marking where the crown molding will sit.
- Use a level to draw a line where the bottom of the molding will rest.
- Mark the ceiling where the top of the molding will touch.
- Use a stud finder to locate and mark wall studs for secure nailing.
Cutting the First Piece
Start in a corner of the room.
- Measure and cut your first piece of molding, allowing for any scarf joints if needed.
- For an inside corner, cut the molding square on one end.
- For an outside corner, miter the end at a 45-degree angle.

When two lengths of molding are required for a long wall, join them with an angled, overlapping scarf joint. If you’re working counterclockwise around the room, adjust the saw for a 45-degree miter cut to the left. (Swing it to the right if you’re going clockwise.)
Once again, put the crown upside-down on the saw table between the wood guide fence and the vertical saw fence. Make sure the piece you’re keeping is on the side to which the blade is turned. Hold the molding securely, then cut through it slowly.
Leave the blade in the same position, and cut the adjoining length of molding with the piece you’re keeping on the other side of the blade.
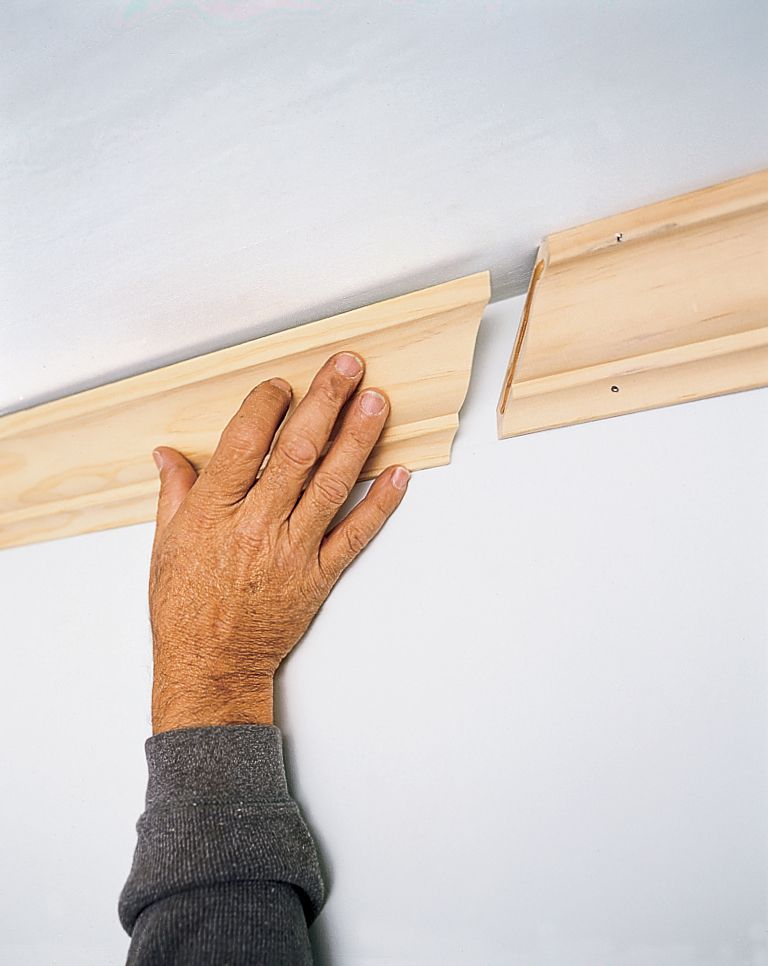
Completing the Scarf Joint
Apply a thin, even layer of glue to the scarf joint on the molding that’s now nailed in place. Install the adjoining piece of crown so it creates a tight-fitting scarf joint.
Fasten the second piece with finished nails on top and bottom, and wipe away any glue from the scarf joint.
After the glue dries, use 100-grit sandpaper to sand the joint smooth.
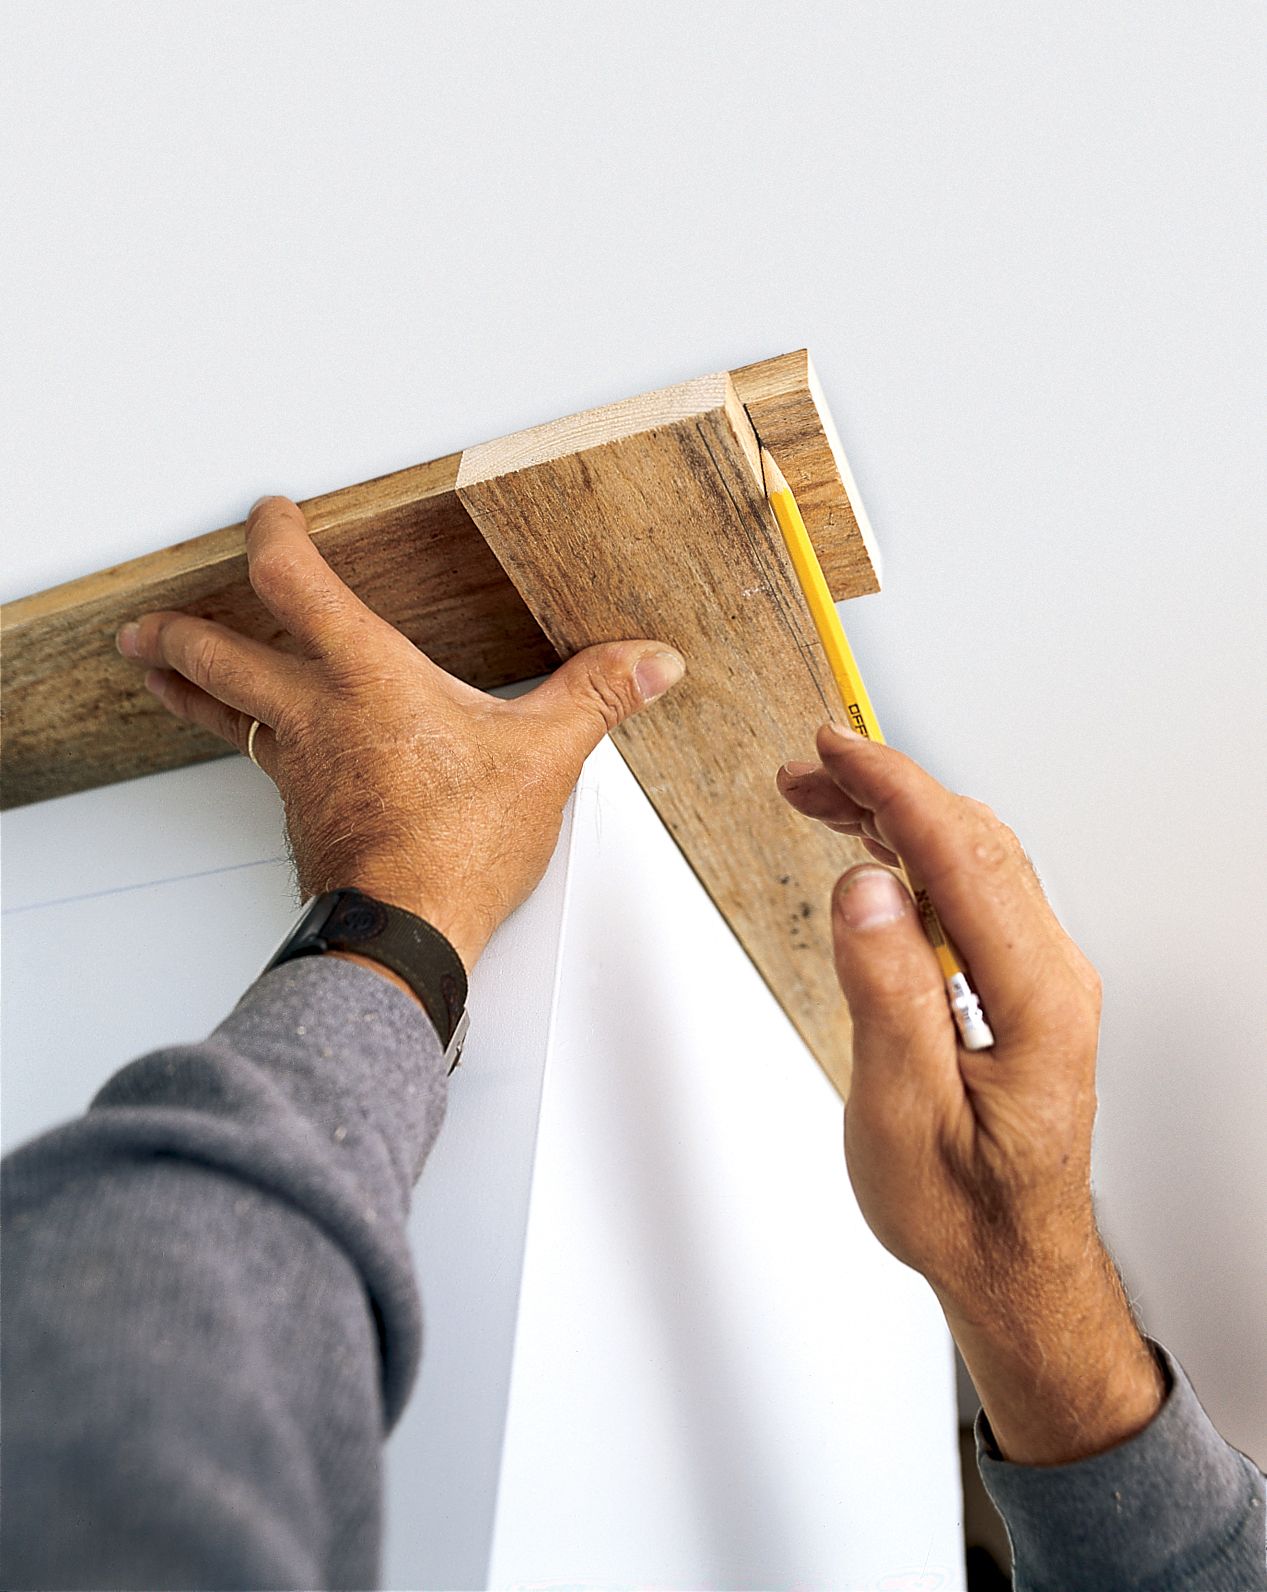
Determining the Angle of the Outside Corner
Form an outside corner by cutting two pieces of crown with opposite miters of 45 degrees each, making sure both miters are longer on the top of the crown (the part that rests on the saw table when you cut). A wall corner isn’t always exactly square, so you must first measure the angle formed by the two walls and then bisect it.
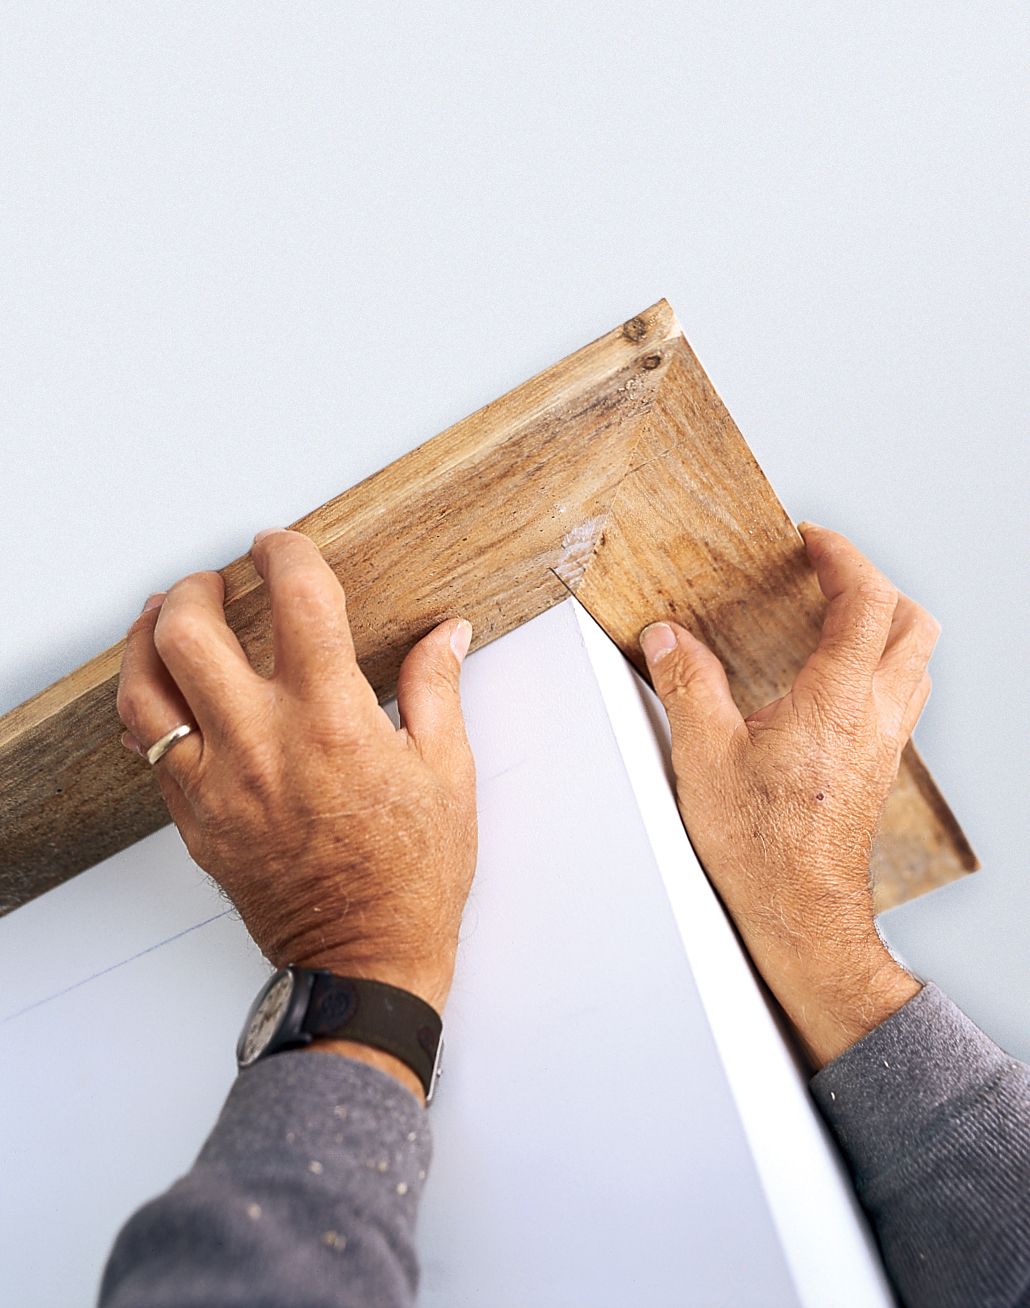
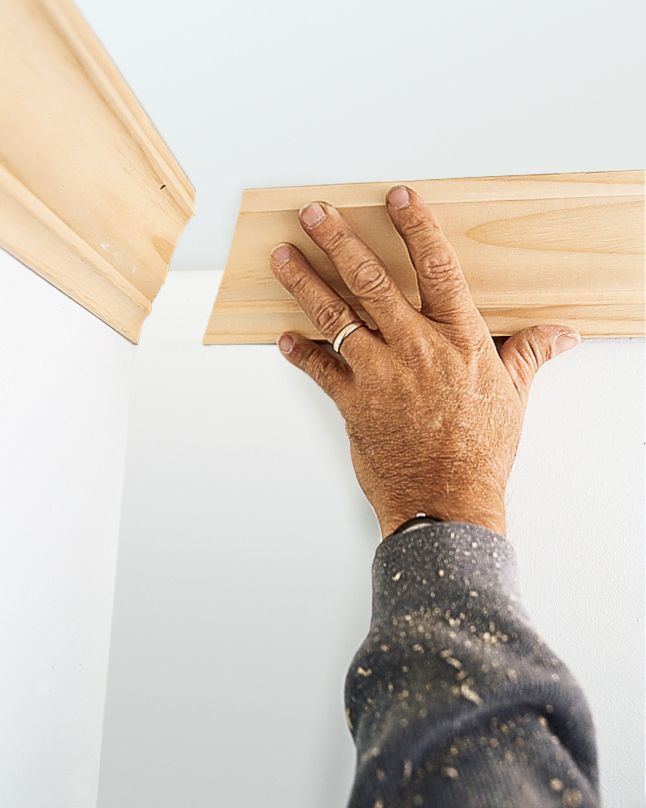
To do this, take two pieces of wood with the exact same width and hold one against each wall, making sure their ends overlap by an inch or so.
Next, draw pencil lines on the face of the upper piece (the one held flat to the ceiling) alongside each edge of the overlapping piece. Draw a diagonal line to connect two opposite corners of the marks.
Testing the Angle Cuts
Turn the pieces so they’re stacked precisely one on top of the other. Make sure to put the piece with the pencil lines on top.
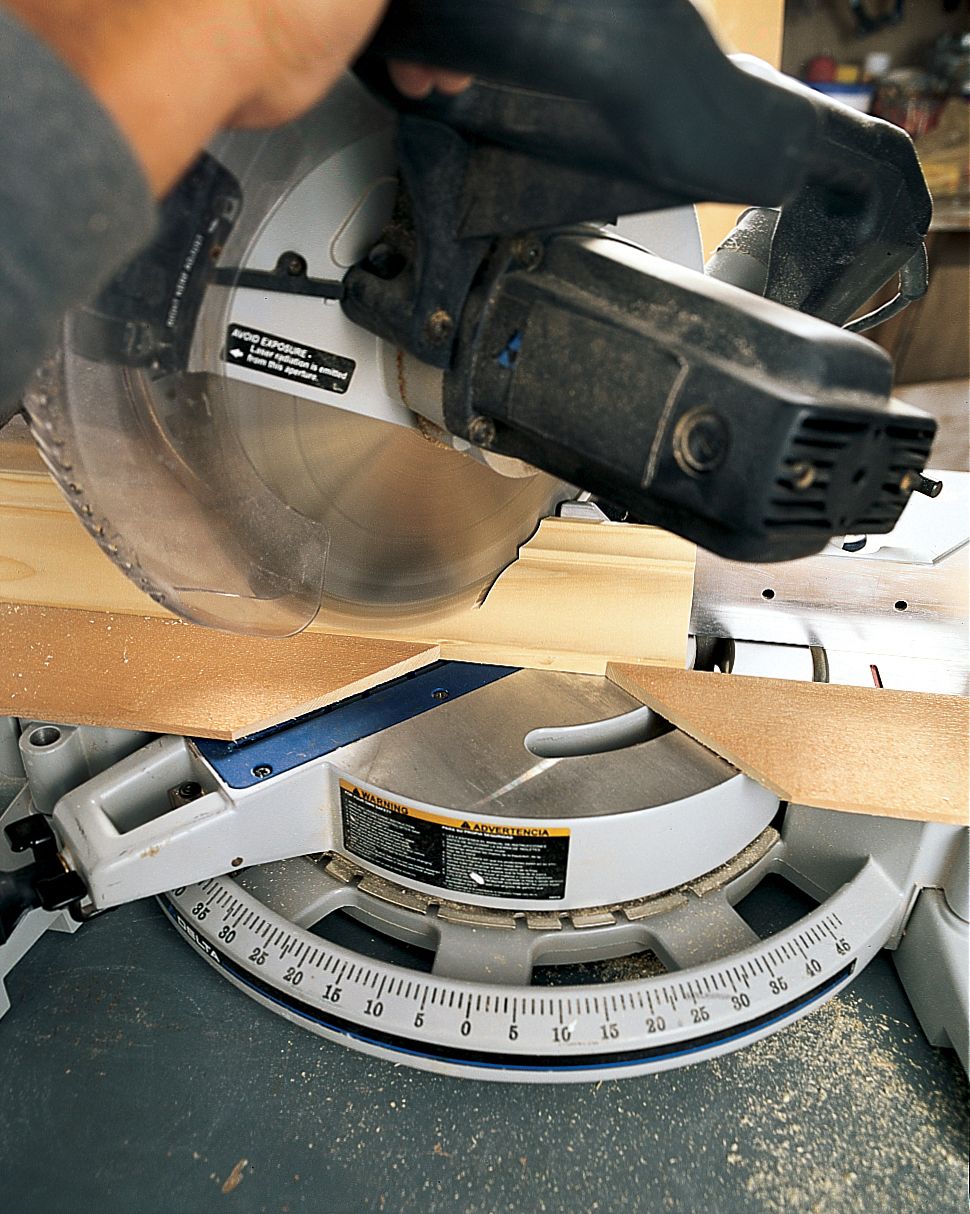
Then, take this stack to the miter saw. Put one set of the boards’ edges against the saw fence and adjust the blade angle to match the diagonal line.
Saw through both pieces at the same time along the diagonal line. This cut bisects the angle of the outside corner.
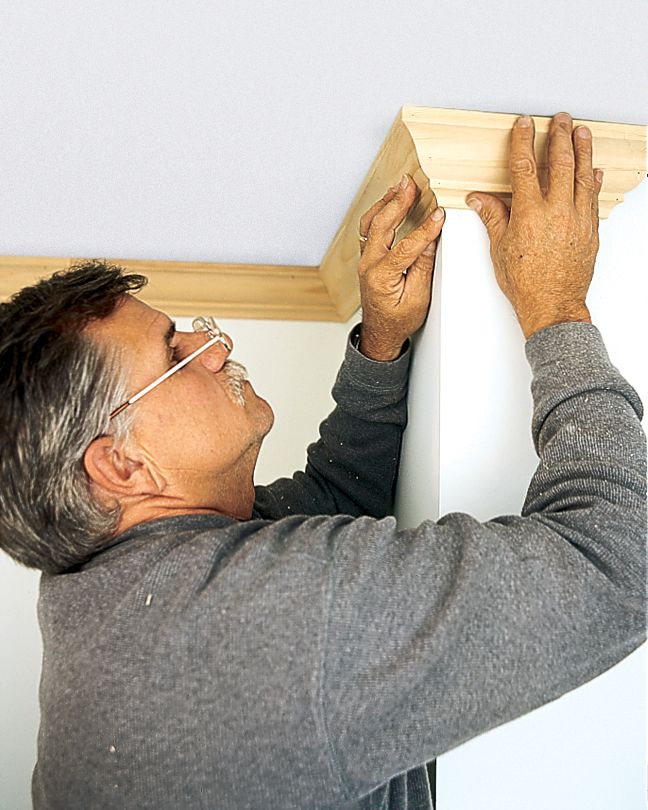
Hold the cut pieces against the ceiling as shown and check for a tight fit. If necessary, mark in which direction the angle is off, adjust the saw to match this corrected angle, reassemble the two boards as before, and cut them. Then test again to be sure.
Cutting the Outside Miter
Mount a piece of crown in the saw (upside down as before), leaving the blade set to the angle used to cut the test scrap. This is the angle you’ll use to cut the outside corner.
Because the molding is upside down, if the saw blade is swung to the right, you will be cutting the right-half piece of the joint and you’ll need to cut off the right end of the workpiece. If the blade is swung to the left, cut off the left end of the workpiece to complete the left half of the joint.
Once you’ve cut the first piece, use the test scrap to adjust the blade in the opposite direction and cut the other half of the joint.
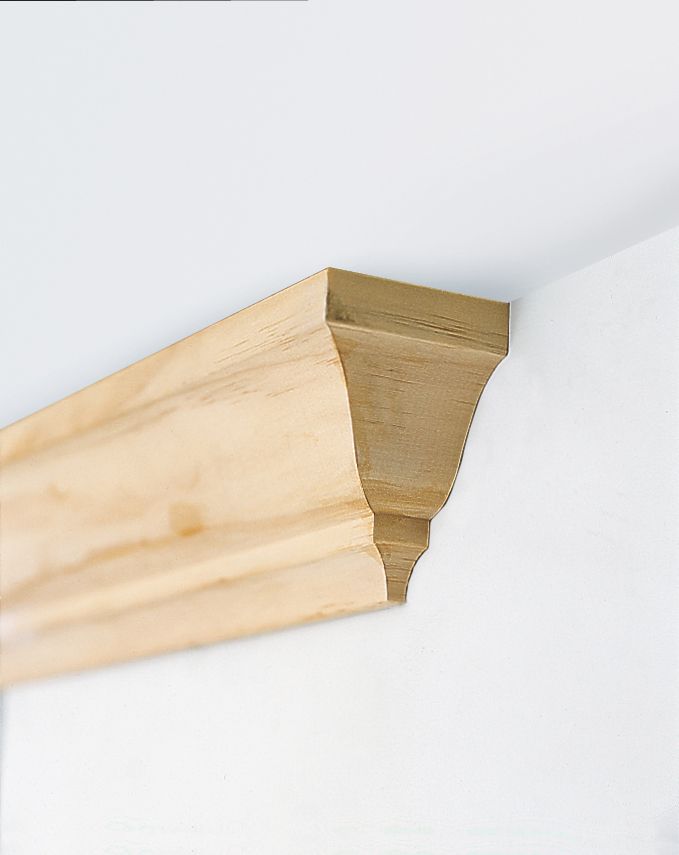
Installing the Corner Molding
Hold the molding pieces in position at the outside corner and check for a tight fit (left). Before nailing the molding to the wall, bore two pilot holes through the point of the miter joint. Then, apply glue to the miter joint and fasten each piece of crown with finish nails on top and bottom. At the corner joint, tap finish nails through the pilot holes. From there, set all the nails.
Making a 45-Degree Cut
Inside corners are made of a square-cut piece that butts the corner and a corresponding piece that’s cut on an angle and coped to conform to the first piece.
Begin by installing a piece of crown with a square-cut end (zero degrees on the saw).
Then, position a second piece of molding upside down on the saw and adjust the blade for a miter cut. If this piece comes to the joint from the right side as shown above, swing the blade to 45 degrees left and make the cut. The bulk of the molding should be sitting on the saw’s left side.
If cutting a left-side coped piece, swing the blade 45 degrees right, with the molding sitting to the right.
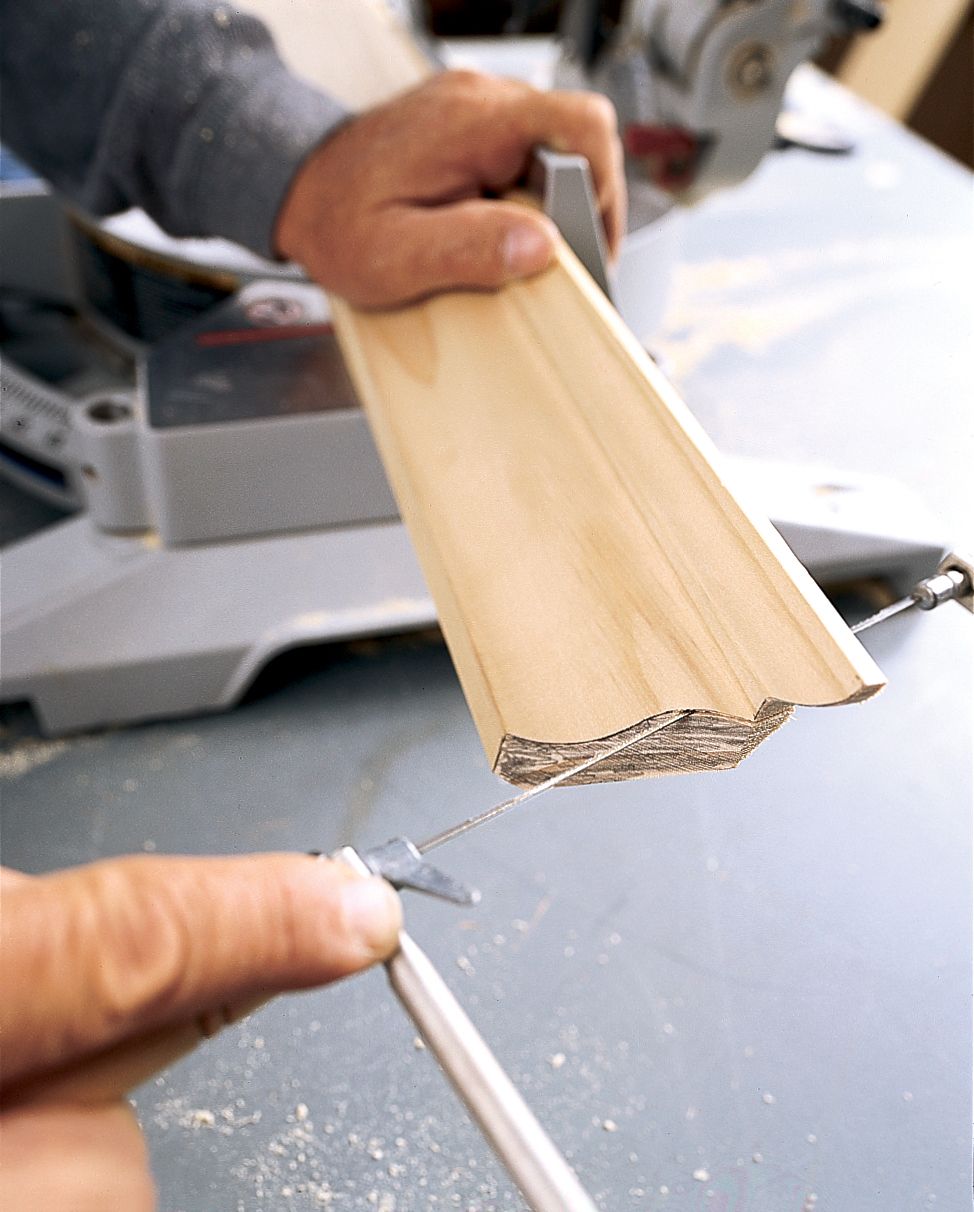
Coping the Edge
Highlight the very edge of the cut, along the profiled front of the molding, with a pencil.
Next, using a coping saw, cut away the bevel. Angle the coping saw blade toward the rear about five degrees—a technique known as back beveling—and carefully follow the molding profile as you cut. Use the miter saw table to brace the workpiece when cutting.
Checking the Fit
After completing the coped cut, test-fit it against the square-cut crown that’s nailed in place. If necessary, use a rasp to remove more wood or smooth out the coped cut. Nail the coped molding in place and set the nails.
Cutting the Return
Where the crown molding doesn’t butt into something, you need to finish it with a return. Cut a 45-degree miter on the end of the crown (as you did for an outside corner) and nail it up.
Next, make a 45-degree cut in the opposite direction on another piece. Adjust the saw to zero degrees and lay the piece flat and face-down on the saw table. You’ll need to remove your wood guide fence for this.
Cut through the crown, starting at the very point of the miter.
Completing the Return
Bore two pilot holes through the tiny triangular return with a finish nail. Apply a thin coat of glue to the return, then press it into place and hold it for one or two minutes.
Nail the joint gingerly with finishing nails through the pilot holes only if the glue fails to hold. Set the nails and fill all nail holes with putty.
Troubleshooting Common Crown Molding Challenges
Even with careful planning and execution, you may encounter some challenges during installation. Here are solutions to common problems.
Fixing Gaps and Misalignments
If you notice gaps between the molding and the wall or ceiling, use these tips:
- For larger gaps, use wood filler or a thin strip of wood as a shim.
- Sand and paint to blend the repair with the surrounding molding.
- Use caulk to fill small gaps (less than 1/4-inch).
Addressing Uneven Walls or Ceilings
Uneven surfaces can make installation tricky. Use a flexible caulk to fill gaps caused by unevenness. For significant unevenness, consider using a backer rod behind the molding to provide support. In extreme cases, you may need to float the wall or ceiling to create a level surface before installation.
Advanced Crown Molding Techniques
Once you’ve mastered basic installation, you might want to tackle more challenging projects.
Installing Crown Molding on Curved Walls
For curved walls:
- Use flexible molding designed for curves.
- Create a template of the curve using cardboard or thin plywood.
- Cut multiple relief cuts on the back of wooden molding to allow it to bend.
Creating Custom Crown Molding Designs
To create unique looks:
- Combine different molding profiles for a layered effect.
- Use corner blocks to simplify difficult angle cuts.
- Consider adding decorative elements like dentil blocks or rosettes.
Our Conclusion
Installing crown molding is a rewarding project that can level up a room’s appearance. Remember to measure carefully, cut precisely, and take your time to ensure a professional-looking result. Call a professional if you’re not familiar with saws and follow safety precautions when working with tools.