
While a perfectly flat yard may seem ideal, it can lead to drainage issues that harm your lawn and even threaten your home’s foundation. A yard that slopes toward your house is even more problematic, as it allows water to collect near the foundation, increasing the risk of damage. The best layout is a gentle slope away from your home to direct water safely away.
If your yard isn’t currently designed this way, you may need to consider yard grading. Although it can be a significant project, proper grading is essential for preventing water damage and maintaining a healthy lawn. In this guide, we’ll walk you through the yard grading process, provide step-by-step instructions for DIY grading, and recommend top lawn care services to help you maintain your newly leveled yard.
Find Lawn Help
- See our list of top lawn care companies based on in-depth research.
- Select the company that best meets your needs.
- Get a free, no-obligation quote for your home.
Get a Quote From Lawn Professionals Near You
Compare quotes from local pros
Lime Soil Amendment

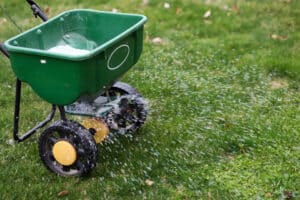
Lawn Fertilization
What Does Grading a Yard Mean?
Grading a yard is a form of yard leveling that creates a mild incline. In other words, it’s the process of correcting the slope of your yard so that rainwater and other precipitation flow away from foundation. Ideally, your lawn around your house would have a slope of about 5%. That means that the surface of the ground 10 feet away from your house would be about 6 inches lower than the ground right next to your foundation.
However, grades between 3% and 25% are usually considered acceptable. If your yard’s grade is less than that, or if its current grade isn’t directing runoff away from the home, it may need regrading. A slope greater than 25% can cause erosion and often calls for a different process called landscape grading.
To see the potential benefits of yard grading in action, watch the video below—This Old House landscape contractor Roger Cook saves a soggy foundation.
What are the Benefits of Having My Yard Graded?
As a homeowner, you likely know that drainage issues can cause many problems for a home’s lawn and foundation. Over time, runoff water can cause cracks and weaknesses in a home’s foundation, which can cause leaking, flooding, or even sinking. Here are some other problems that proper grading can solve or even prevent:
- A soggy or mushy lawn: Poor drainage can leave your lawn feeling soft and spongy, making it difficult to walk on and prone to damage from foot traffic or heavy equipment.
- Standing water or puddles that attract pests, including mosquitoes: Stagnant water is a breeding ground for mosquitoes and other insects, increasing the risk of pest infestations around your home.
- Mud on your hardscaping that gets tracked indoors: When water doesn’t drain properly, it can turn pathways, patios, and driveways into muddy messes, which can easily be tracked into your house.Soil erosion – Without proper grading, water runoff can wash away topsoil, depleting nutrients and making it harder for grass and plants to thrive.
- Suffocation or root rot in trees, bushes, and other plants: Excess water around plant roots can prevent oxygen from reaching them, leading to disease, decay, and even plant death.
- Unsightly mower ruts or other problem areas of sinkage: Poor drainage can cause soft spots in your lawn, leading to uneven ground and deep grooves where your mower or other equipment sinks in.Ice buildup in the winter: Improper grading can cause water to collect in low areas, which then freezes in winter, creating hazardous icy patches on your lawn and walkways.
Steps to DIY Lawn Regrading
If you’re making minor adjustments to the strip of land around your foundation or other yard features, regrading your lawn is a relatively manageable project. On the other hand, yard grading can become a huge undertaking if you have a large, uneven, or steeply sloped lawn.
Explore the dropdown tabs below for an in-depth look at each step of the process if you’re looking at a DIY project:
Step 1: Measure the Existing Grade
The first step is to determine the existing slope’s size. For this measurement, you’ll need two stakes, about 10 feet of string, a hanging string level, and measuring tape.
- Tie one end of the string around the first stake and pound the stake into the ground right next to your home’s foundation until the string is at ground level.
- Measure 100 inches away, or about 8 1/3 feet, and pound the second stake into the ground just enough for it to stand up on its own. Tie the other end of the string around this stake.
- Hang the level at the approximate midpoint of the string and adjust the height of the string on the second stake until the bubble is in the center of the level.
- Measure the distance from the ground to the string on the second stake.
- Divide this measurement by 100 to find the land grading measurement, expressed as a percentage by moving the decimal two places to the right.
Thus, if the string is 6 1/2 inches above the ground where it’s tied to the second stake, your calculations will come out to 0.065, or a grade of 6.5%. Repeat this measurement at several places around your foundation, including walkways and driveways. Write down your findings for later reference. It might also be good to physically mark the high and low spots with spray paint, stakes, or flags for future reference.
Step 2: Rebuild the slope
If the current slope of the yard is too shallow, you’ll want to raise the ground level near the foundation and smooth out any other high spots. If large changes are necessary, you may need to rent heavier machinery like a bobcat or a mini-excavator. However, for smaller changes, you may only need a power tiller, a landscaping rake, a wheelbarrow, and a sheet of plywood. Additionally, you’ll need enough extra soil to build up the grade. Here’s what to do next.
Check for Obstacles
First, check around the perimeter of your home for any low-lying pipes or vents. You don’t want to block, bury, or damage these features—you can often extend pipes or vents so that they’ll still be aboveground. Consult a professional about making changes if you don’t know the purpose of these features.
For basement windows that would potentially be covered up by adding soil, try window wells to hold the dirt away from the glass. If there are utility lines in the first few inches of topsoil, they need to be clearly marked, so you don’t disturb or damage them in the next step. Check with your local utility company, who may want to send a technician out to mark them. You may also need a permit from your city or county for larger projects.
Distribute the Soil
Next, you’re ready to remove about 4 inches of topsoil to work on the harder subsoil underneath. You’ll probably need to rent or purchase a power tiller to break up the soil enough that you can move it around with a landscaping rake. Additionally, be sure to purchase fill dirt to build up new high areas. You can use a soil calculator to estimate how much you might need by cubic foot or cubic yard. If it’s a small project, you may be able to get away with buying it by the bag, but for larger projects, it will make more sense to buy by the truckload.
Start taking the soil to the areas that need to be raised. You’ll want to start near the foundation, where the new high point needs to be. After laying the soil, use the back of your rake to smooth it into a reasonably level surface, then lay your plywood across it. Walk across or jump on the plywood to tamp the new soil down. If this is insufficient, you can buy or rent a tamper to compact the new dirt.
Of course, you can also remove dirt from areas that are too elevated. If you go this route, avoid creating new areas for runoff to pool. As you finish this step, make sure you leave 4 to 8 inches of your foundation uncovered above the new grade.
Measure the New Grade
Repeat the measuring process once your soil is in place with the string between two stakes to check your work. Recommendations vary as to the ideal finished grade, but the general suggestion is between 2% and 5% slope. That’s a decrease of 2 to 5 inches over 100 inches (8 1/3 feet). Now is the time to make any corrections that you need, so double-check that you’ve arrived at the right grade.
Step 3: Finish your work
To put the finishing touches on the new surface, add about 4 inches of topsoil to replace what you removed initially and till it into the surface of the subsoil. You don’t need to tamp this down, but water it well to compact it slightly.
We recommend planting grass seed or putting down sod at the same time to provide new ground cover. The roots will help bind the new topsoil together and act as erosion control. Make sure to keep up with watering the growing grass over the next days and weeks.
Step 4: Explore other options
Not all yard grading projects are quite this straightforward. For yards that are small or an unusual shape, you might not have enough room to grade the surface around your home properly. If this is the case, you can install a feature called a French drain beneath the ground to direct the water away from low points in your yard. Alternatively, if your yard has steep slopes, a retaining wall can help decrease erosion while maintaining proper drainage.
Cost of Lawn Grading: DIY vs. Professional
Like most landscaping projects, yard grading is cheaper if you do it yourself. The price will also depend heavily on the size of the project. If all you need to buy are the string level ($2), the rake (around $60), the dirt (roughly $15 per cubic yard), and the sod or seed ($1–2 per square foot), you may be able to complete the job for a few hundred dollars. The only other cost may be any necessary permits.
- If you need to rent machinery for your DIY project, the average cost rises to $500–$1,000 for yard grading. To bring in professional grading services, the cost will likely range between $1,000 and $5,000.
What Influences the Cost of Professional Yard Grading?
The more land that needs to be graded, the more equipment, soil, and labor are required. Labor usually costs about $50 per hour, and permits typically run between $100 and $500. Smaller jobs, like those around pools, patios, or a single side of a home’s foundation, may run from $500 to $3,000.
- The cost of grading around an entire home could be $3,000 to $5,000. Grading or leveling for an entire yard can run as high as $10,000 if land clearing or additional landscape design is needed.
Our Recommendation for Top Lawn Care Service
Although some companies offer both, landscaping and lawn care are two different services. While the following companies don’t offer yard grading services, they can help keep the new grass on your freshly graded lawn green and healthy.
TruGreen
Perhaps the most well-known nationwide lawn service provider, TruGreen is available in 48 states across the country. The company offers five annual lawn care packages, from just the basics to a comprehensive option that covers trees and shrubs.
You can also purchase individual treatments like aeration and fertilization to get your lawn’s health back on track.
Lawnbright
If you prefer a more DIY approach to lawn care, Lawnbright is a modern subscription service that sends you all the products you need to tend your own lawn. Every eight weeks during your area’s growing season, you’ll receive a custom blend of fertilizers and soil conditioners made of mostly natural ingredients.
FAQ About Grading a Yard
How long does it take to grade a yard?
The exact length of time will depend on the size and complexity of your grading project. As a general estimate, you can usually expect to take five to seven days if you do the project yourself. If you hire professionals, it usually takes about 12 to 24 hours of labor spread over two to three days.
What kind of soil should I use to grade my yard?
You should use a dense soil like clay to form the bulk of your new gradient. This will make it easier to tamp down and prevent erosion over time. However, for the first few inches of topsoil, you can use more fertile soil to allow better grass growth.
Can I grade my yard myself?
If your yard grading project is fairly small and simple, it’s something you can do yourself. For example, regrading the area on one side of your home’s foundation or around a landscaping feature like a patio or a pool are probably DIY jobs.
If grading is needed around your entire home or yard, the slope is very steep, or there are large obstacles like trees or rocks, it may be a better idea to hire professionals with heavy equipment.
Our Rating Methodology
We back up our lawn recommendations with a detailed rating methodology that we use to objectively score each provider. We review lawn care plans and packages, navigate the provider website and speak with customer service representatives, request quotes, and analyze customer reviews for each provider. We then score the provider against our review standards for plan options, additional benefits and customizability, availability, trustworthiness, and customer service to arrive at a final score out of 100.


