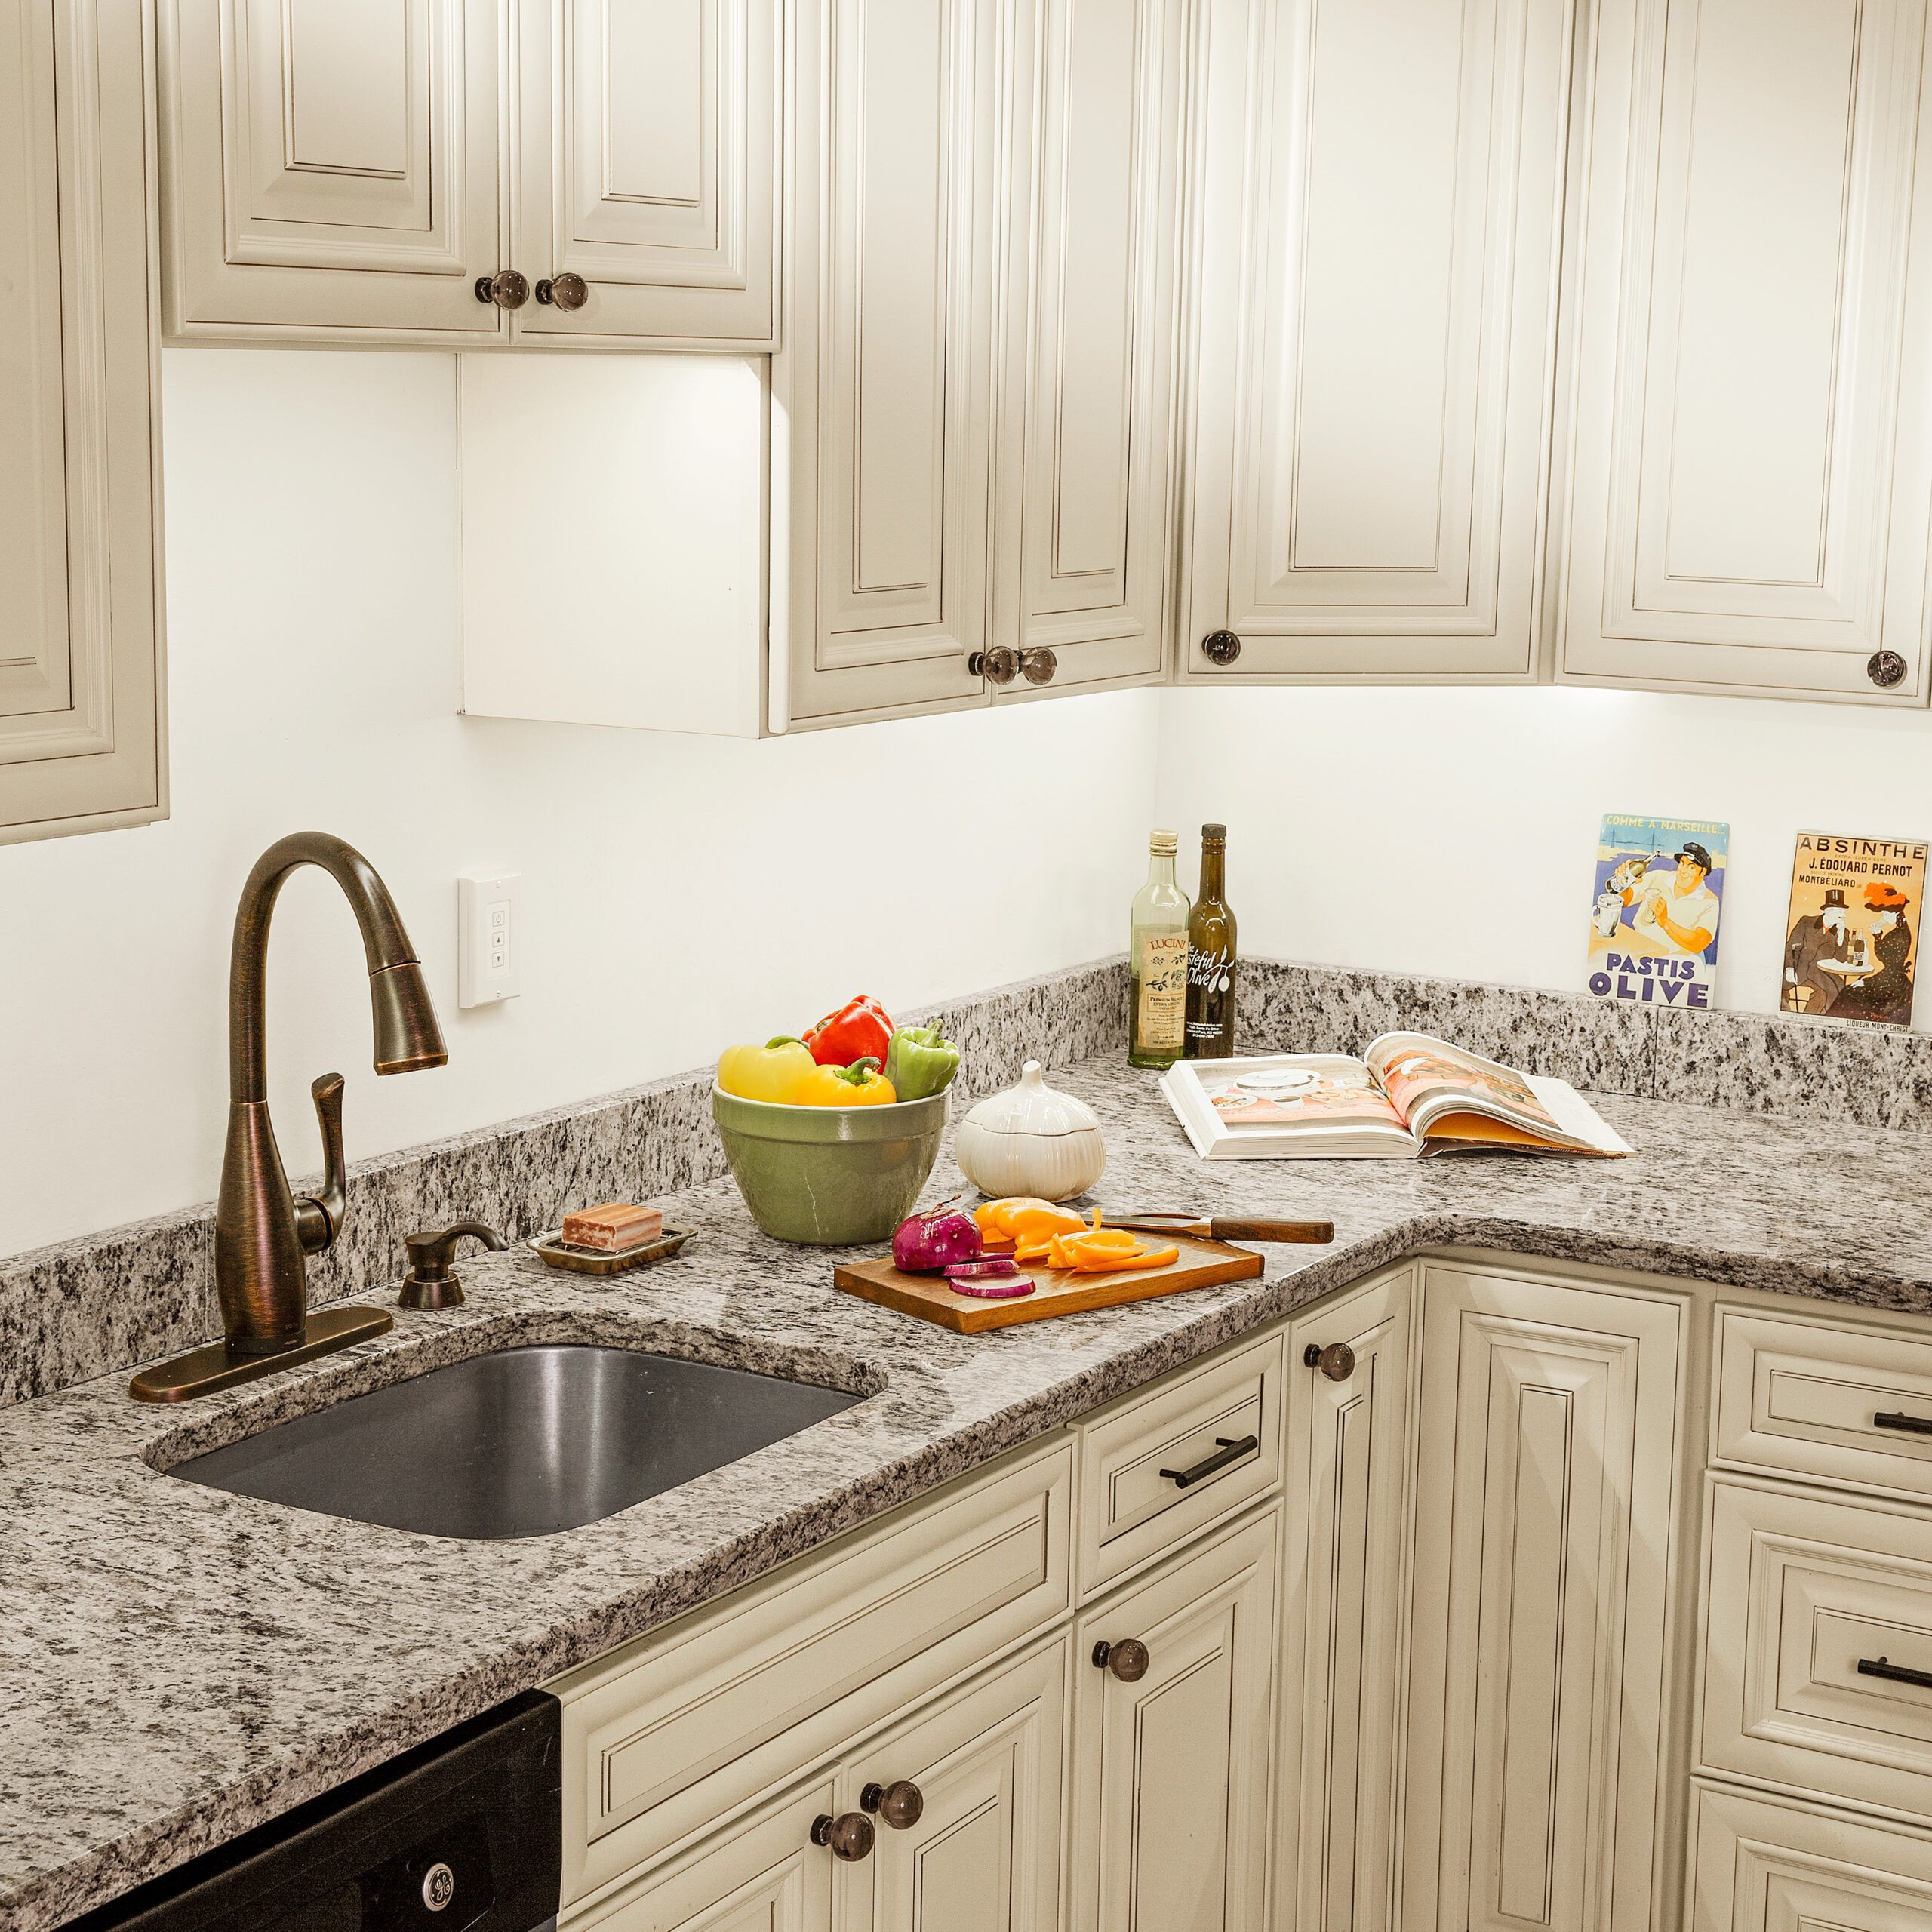
Undercabinet LED lighting can transform your kitchen, making meal prep easier and adding a warm ambiance. LED systems are also easy to install, customizable, and energy-efficient. This guide will walk you through the process of installing undercabinet LED lighting, from the planning stages to the final adjustments.
Planning Your Undercabinet LED Lighting Installation
Proper planning is crucial for a successful undercabinet lighting project. This phase includes measuring your space, choosing the right LED strips, and gathering the necessary tools.
Measuring Your Cabinet Space
Carefully measure the length of each cabinet section where you plan to install lighting. Add these measurements together to determine the total length of LED strips needed. Purchase slightly more than your measurements require to account for any errors or adjustments.
Choosing the Right LEDs
When selecting LEDs, consider the following aspects:
- Brightness: Look for strips with at least 200 lumens per foot to ensure you have enough brightness to see well.
- Color temperature: Warm white (2700K–3000K) is popular for kitchens, but some people prefer the blue tones of a cool white light. Get lighting samples or try them at the store to determine what color temperature you prefer.
- Cuttable intervals: Consider purchasing cuttable intervals to easily trim the lights to fit your space.
- Voltage: 12V or 24V systems are the most common for undercabinet use, but check your home’s outlets to determine what will work best.
Gathering Tools and Materials
Gather the following items before beginning installation:
- Cleaning supplies, such as a degreasing cleaner and rubbing alcohol
- Dimmer switch (optional)
- Drill
- Drywall saw
- Electrical tape
- Fish tape
- LED strip lights
- LED tape-light extension connections
- Measuring tape
- Pliers
- Power supply (matched to your LED voltage)
- Scissors
- Screwdriver and screws
- Staples
- Thermostat wiring
- Utility knife
- Wire strippers
Preparing for an Undercabinet LED Lighting Installation
Before installing your LED lighting, take proper safety precautions and prepare the mounting surface.
Safety Precautions
Always prioritize safety when working with electrical systems. Follow these tips to make sure you’re staying safe throughout the installation:
- Follow manufacturer instructions for all components.
- Turn off the power at the breaker before working on any outlets.
- Use a voltage tester to confirm that the power is off.
- Wear safety glasses when drilling or cutting.
Cleaning and Prepping the Cabinet Surface
Clean the undersides of your cabinets thoroughly:
- Remove any dust or grease with a degreasing cleaner.
- Wipe surfaces with rubbing alcohol to ensure good adhesion.
- Allow cabinets to dry completely before installation.
Step-By-Step Installation
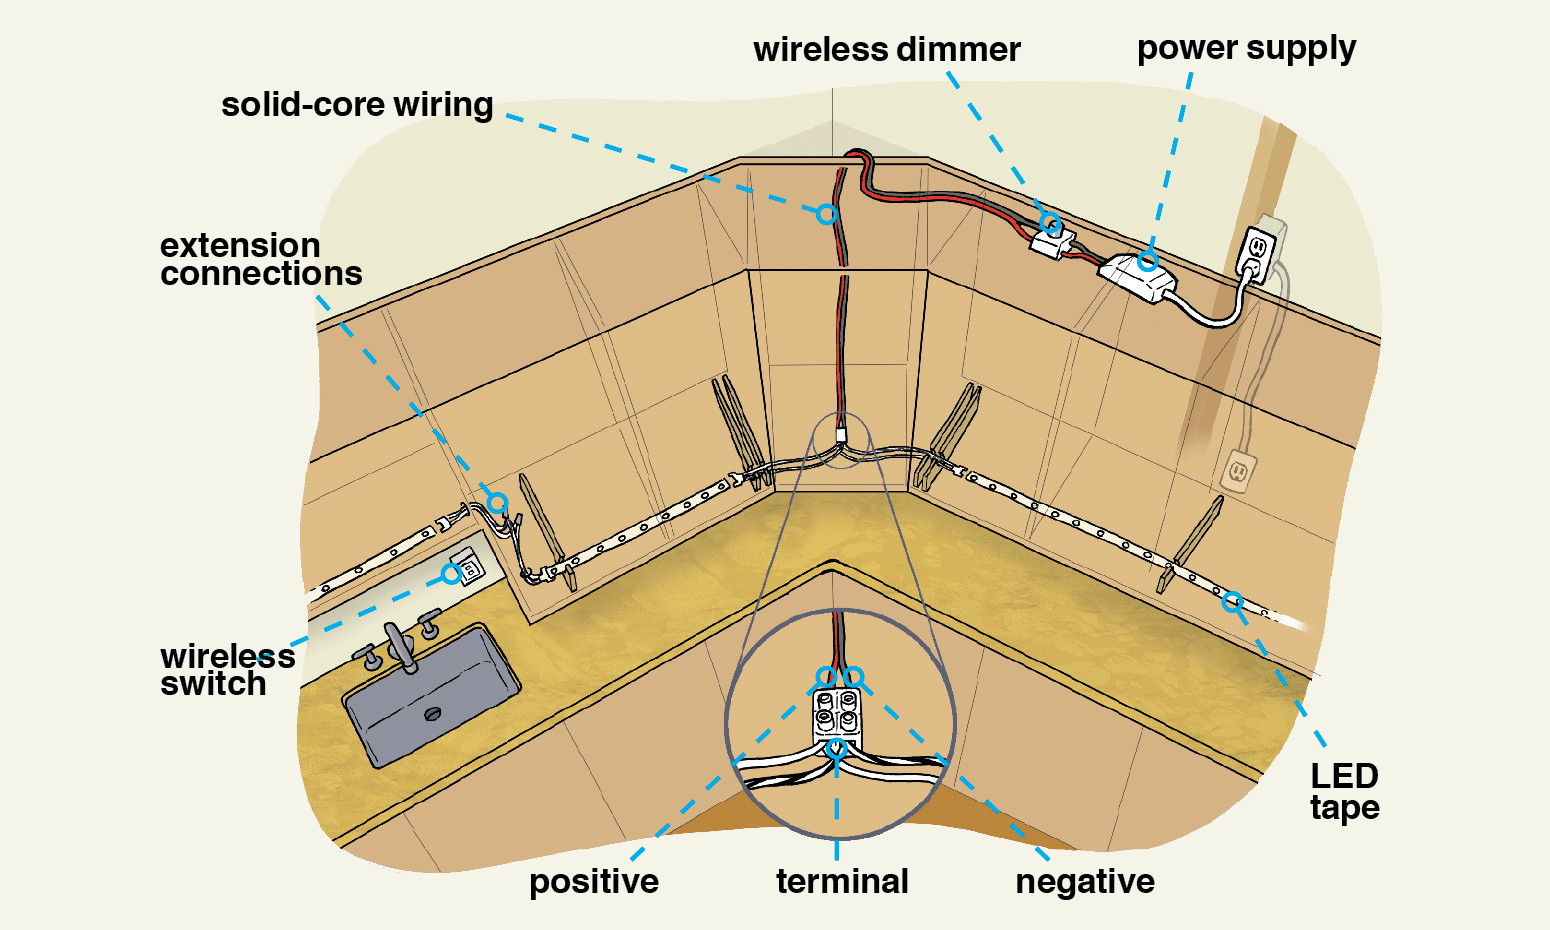
Step 1: Feed up the Tape
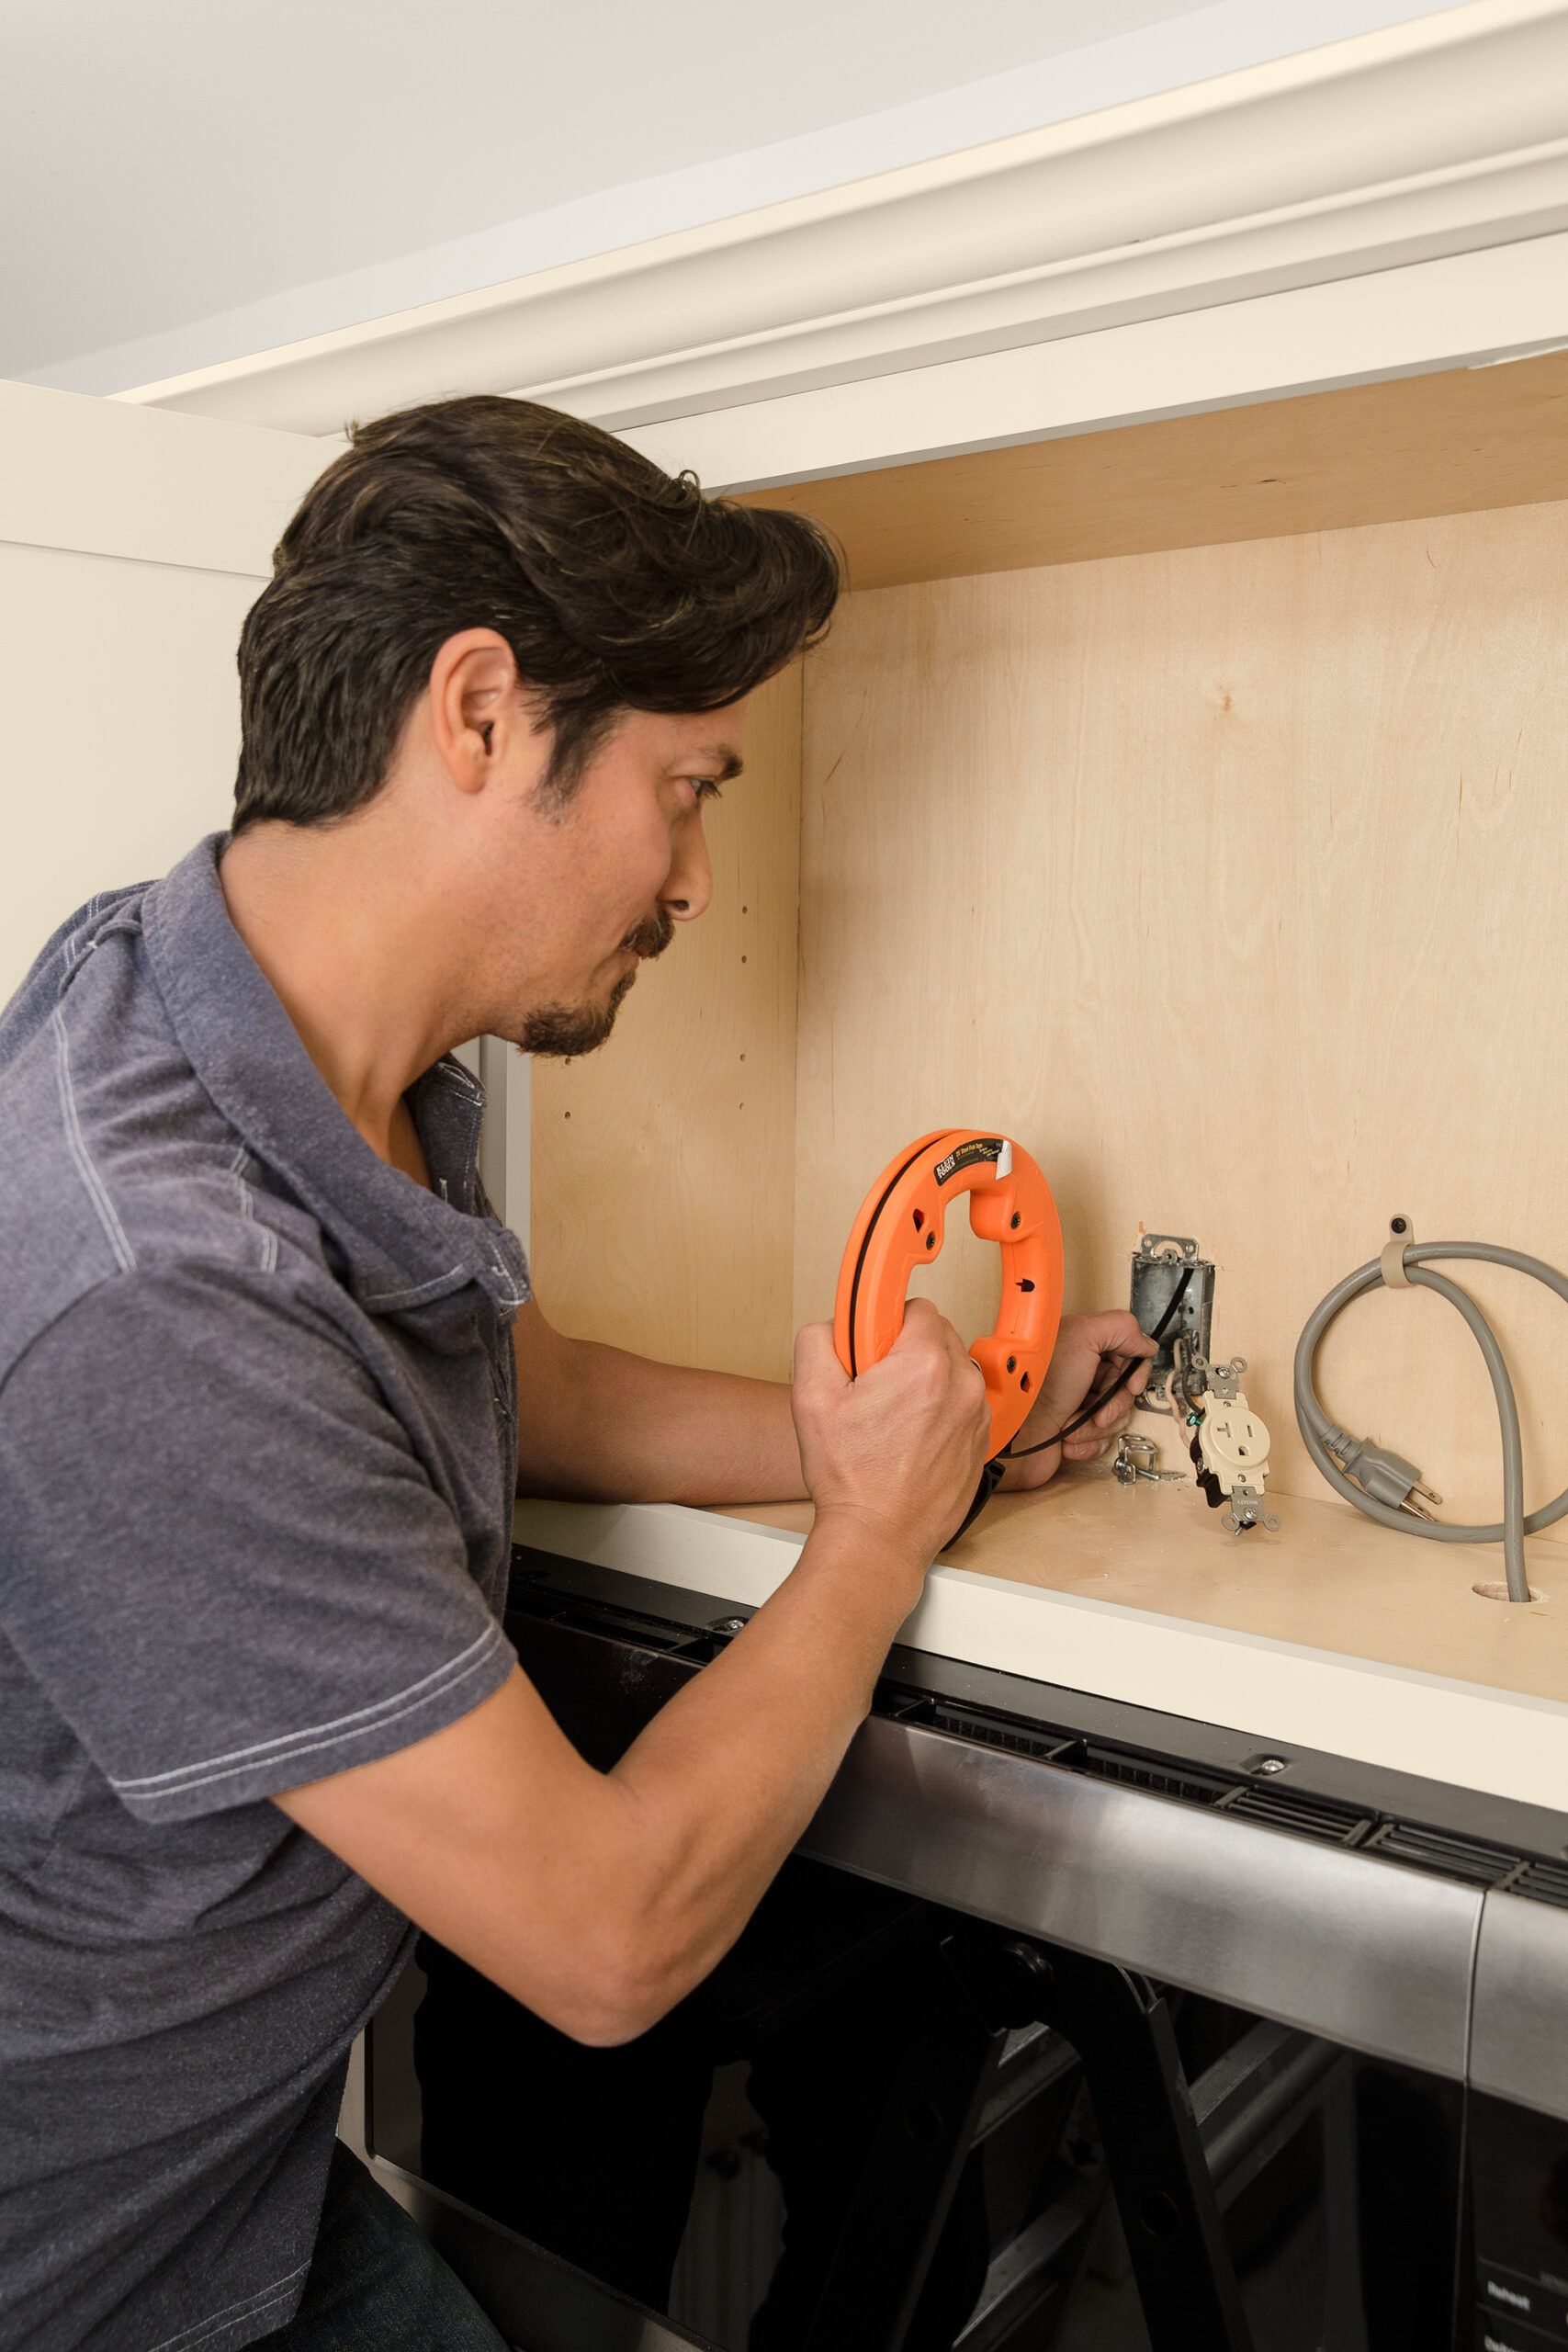
To power the lights, we installed a remodeling wiring box above an upper cabinet and borrowed from the dedicated circuit powering the microwave.
- Flip off the breaker to the existing outlet.
- Check with a tester that the electricity is off.
- Pull out the outlet and bang free one of the metal knockouts in the box with a screwdriver.
- Use a drywall saw to cut a hole for the remodeling box in the wall above the cabinet.
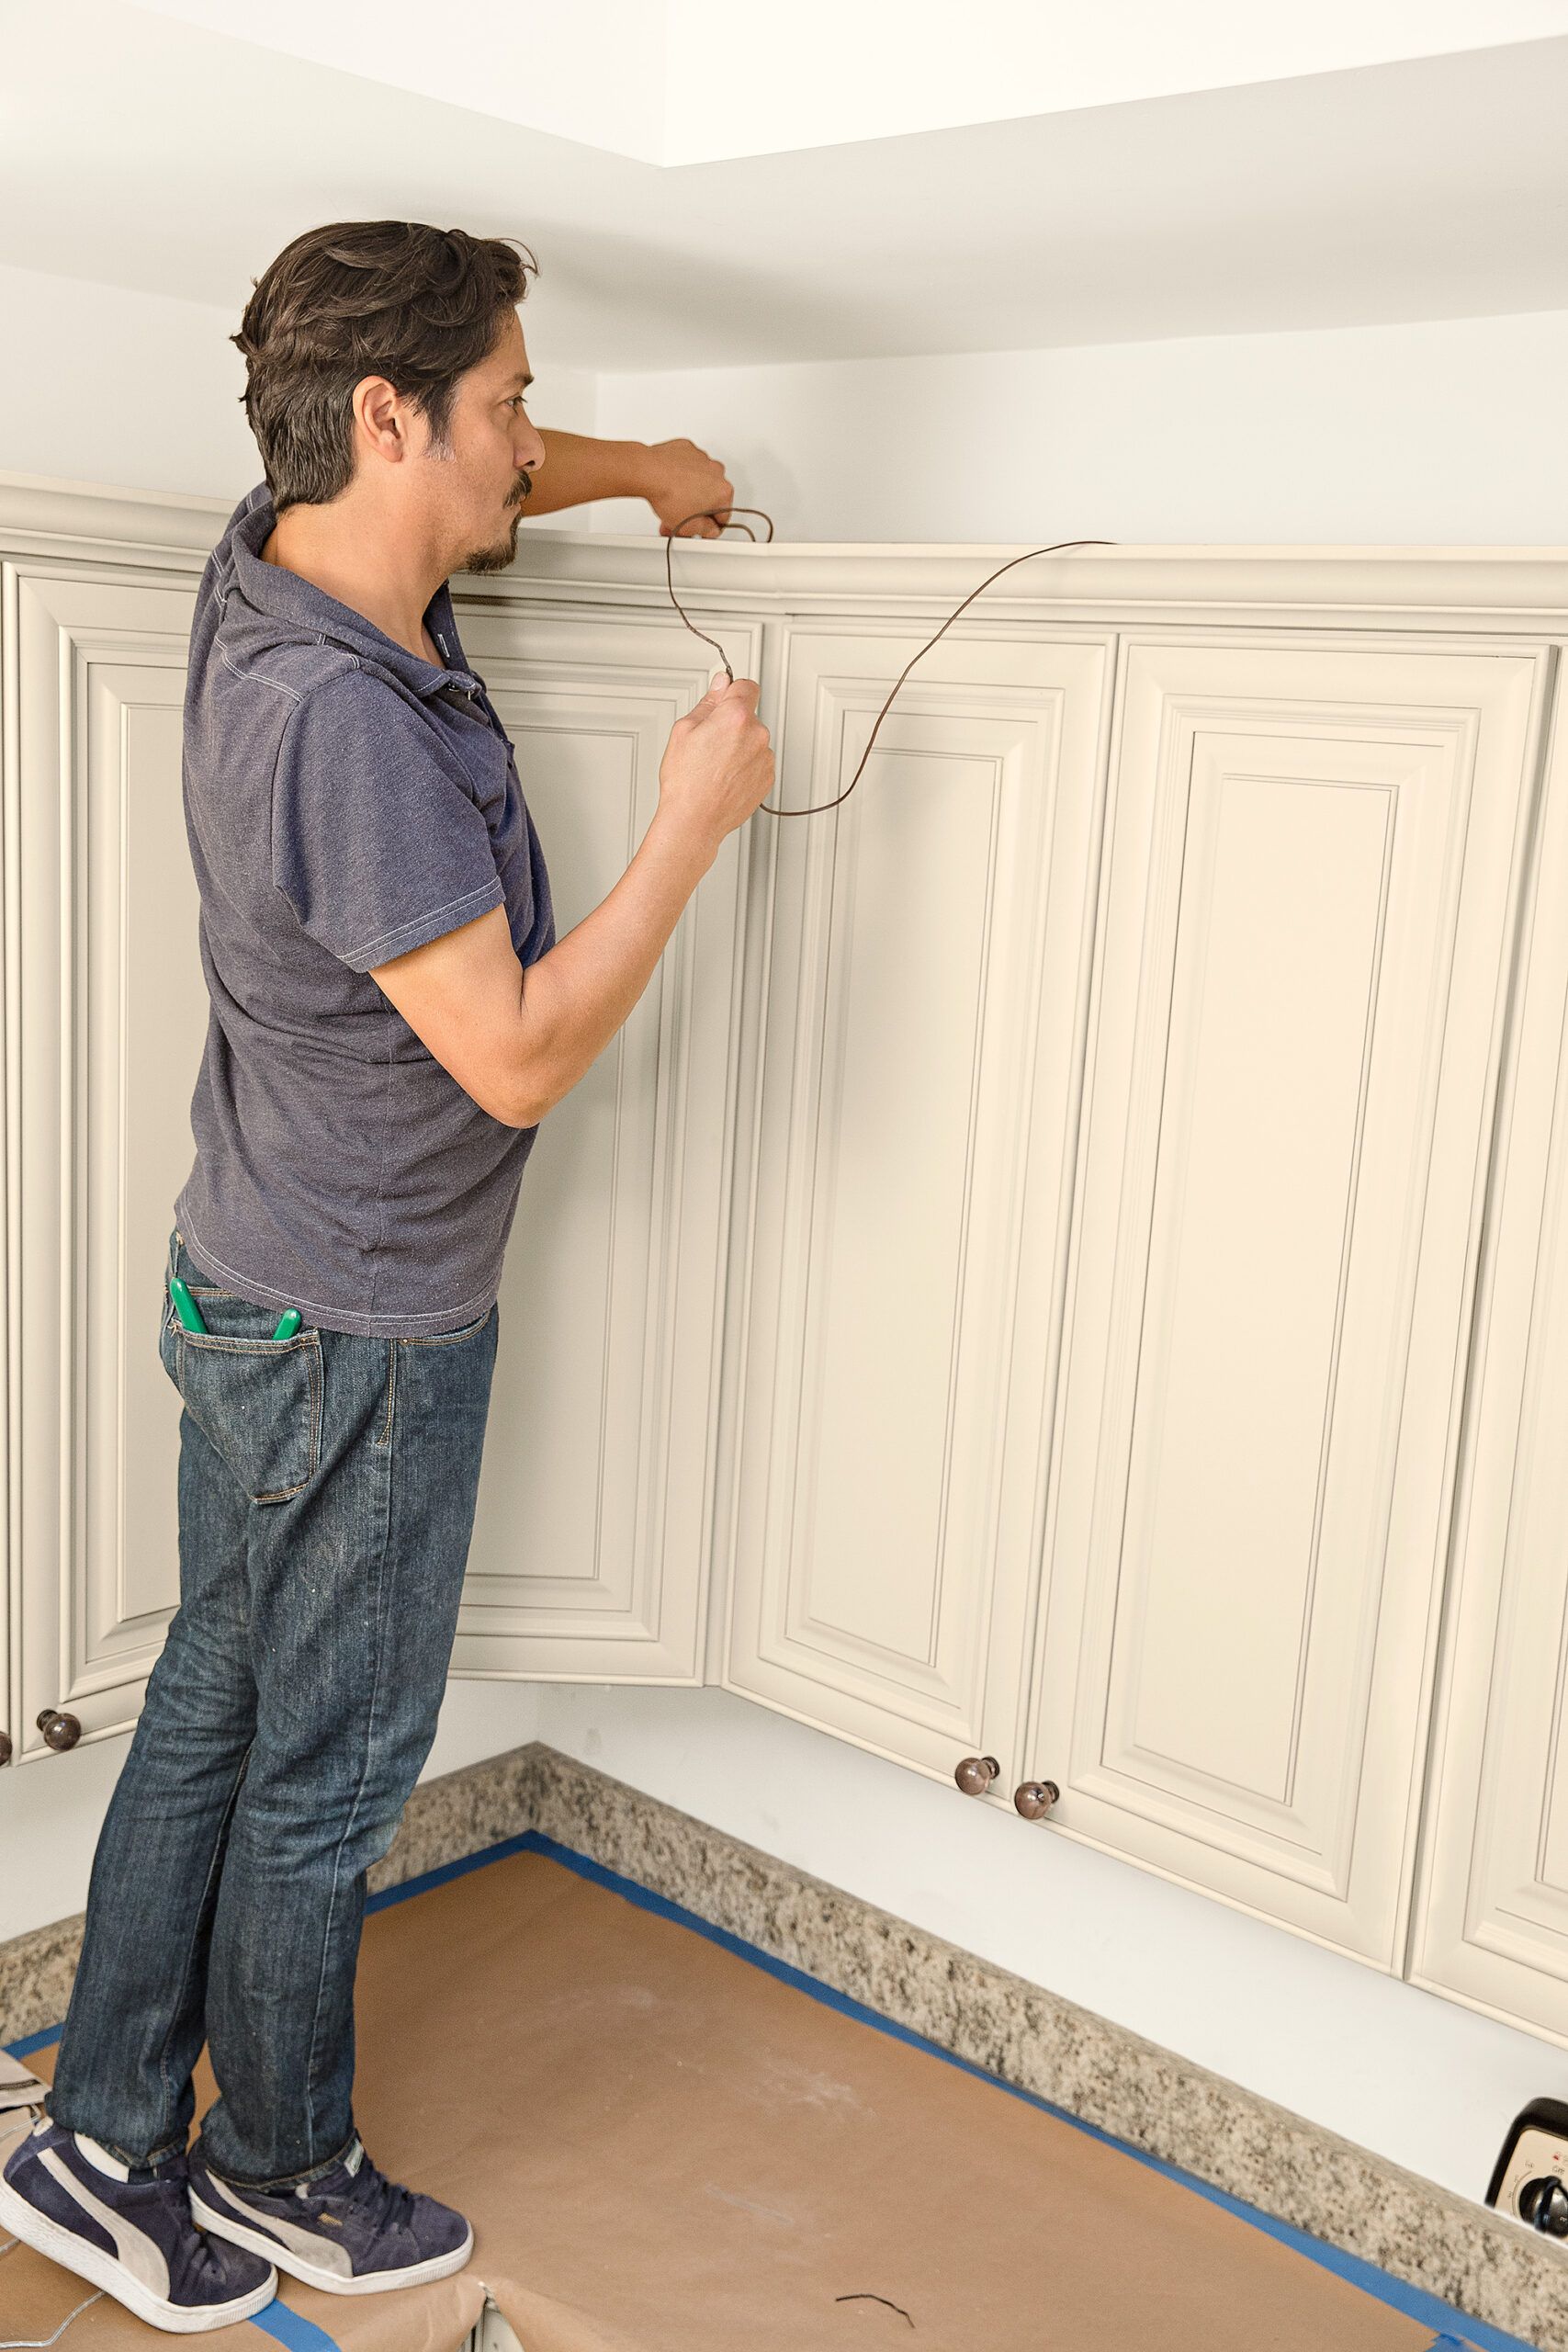
- Feed the fish tape up through the knockout, as shown, and out the new hole in the drywall.
Plan to use an accessible but hidden outlet to run the LED power supply, similar to the one above or inside a cabinet. If you’re adding an outlet, locating the new one in the same stud bay as an existing outlet makes using the fish tape easier.
Step 2: Pull down the Wire
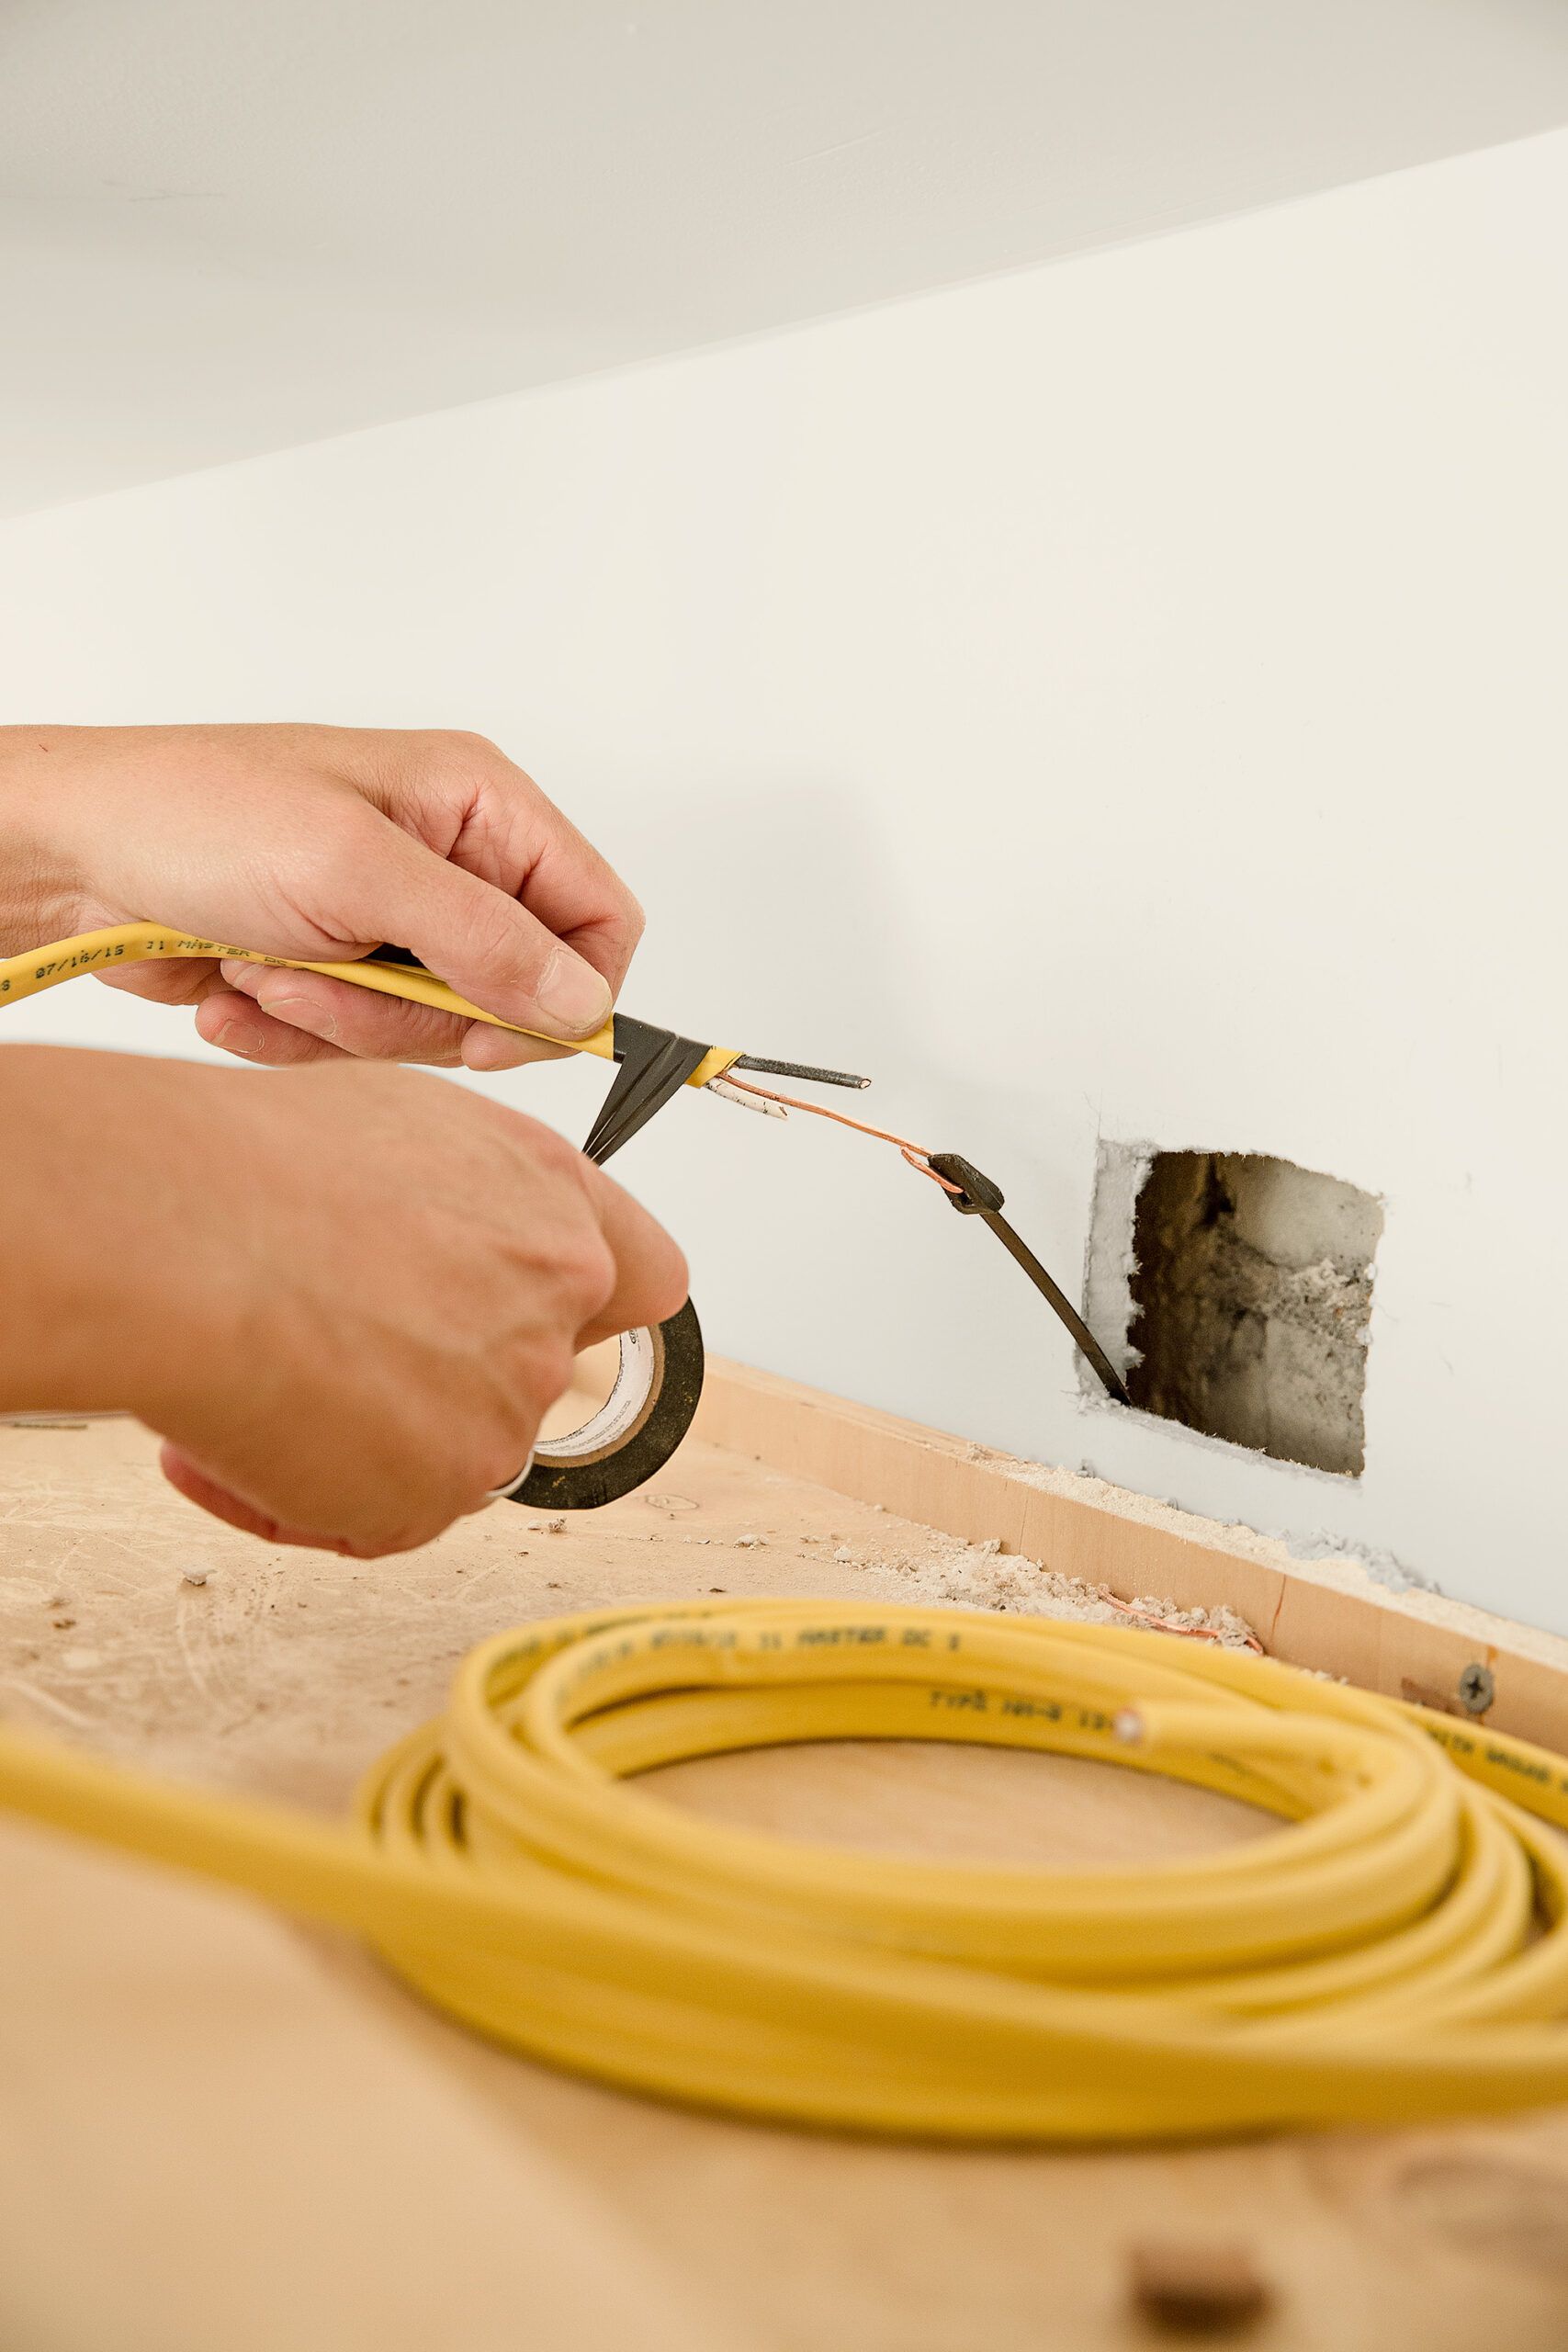
After feeding the tape, pull down the wires before connecting the dimmer:
- With pliers, strip the insulation off the length of 12⁄2 wire.
- Hook the ground to the fish tape and cover the connection with electrical tape, as shown.
- Pull the fish tape through the knockout until you expose about 10 inches of wire, then free the fish tape.
- Cut the first 6 inches of wire for pigtails, and use a utility knife to free the three individual wires from the yellow sheathing.
- Strip all the ends of the pigtails and the ends of the 12⁄2 wire.
- Grab all three white wires—for the existing outlet, the new outlet, and the pigtail—and join them with a wire nut.
- Repeat the process for the black and ground wires.
- Rewire the existing outlet, push all the wiring into the box, and screw the outlet back into place.
Step 3: Add the Dimmer
Follow these instructions for adding the dimmer:
- At the opening for the outlet, cut the 12⁄2 wire and thread it through a remodeling box.
- Install the box in the wall, strip the wires, and attach them to the new outlet.
- Screw the outlet in place and secure the trim plate.
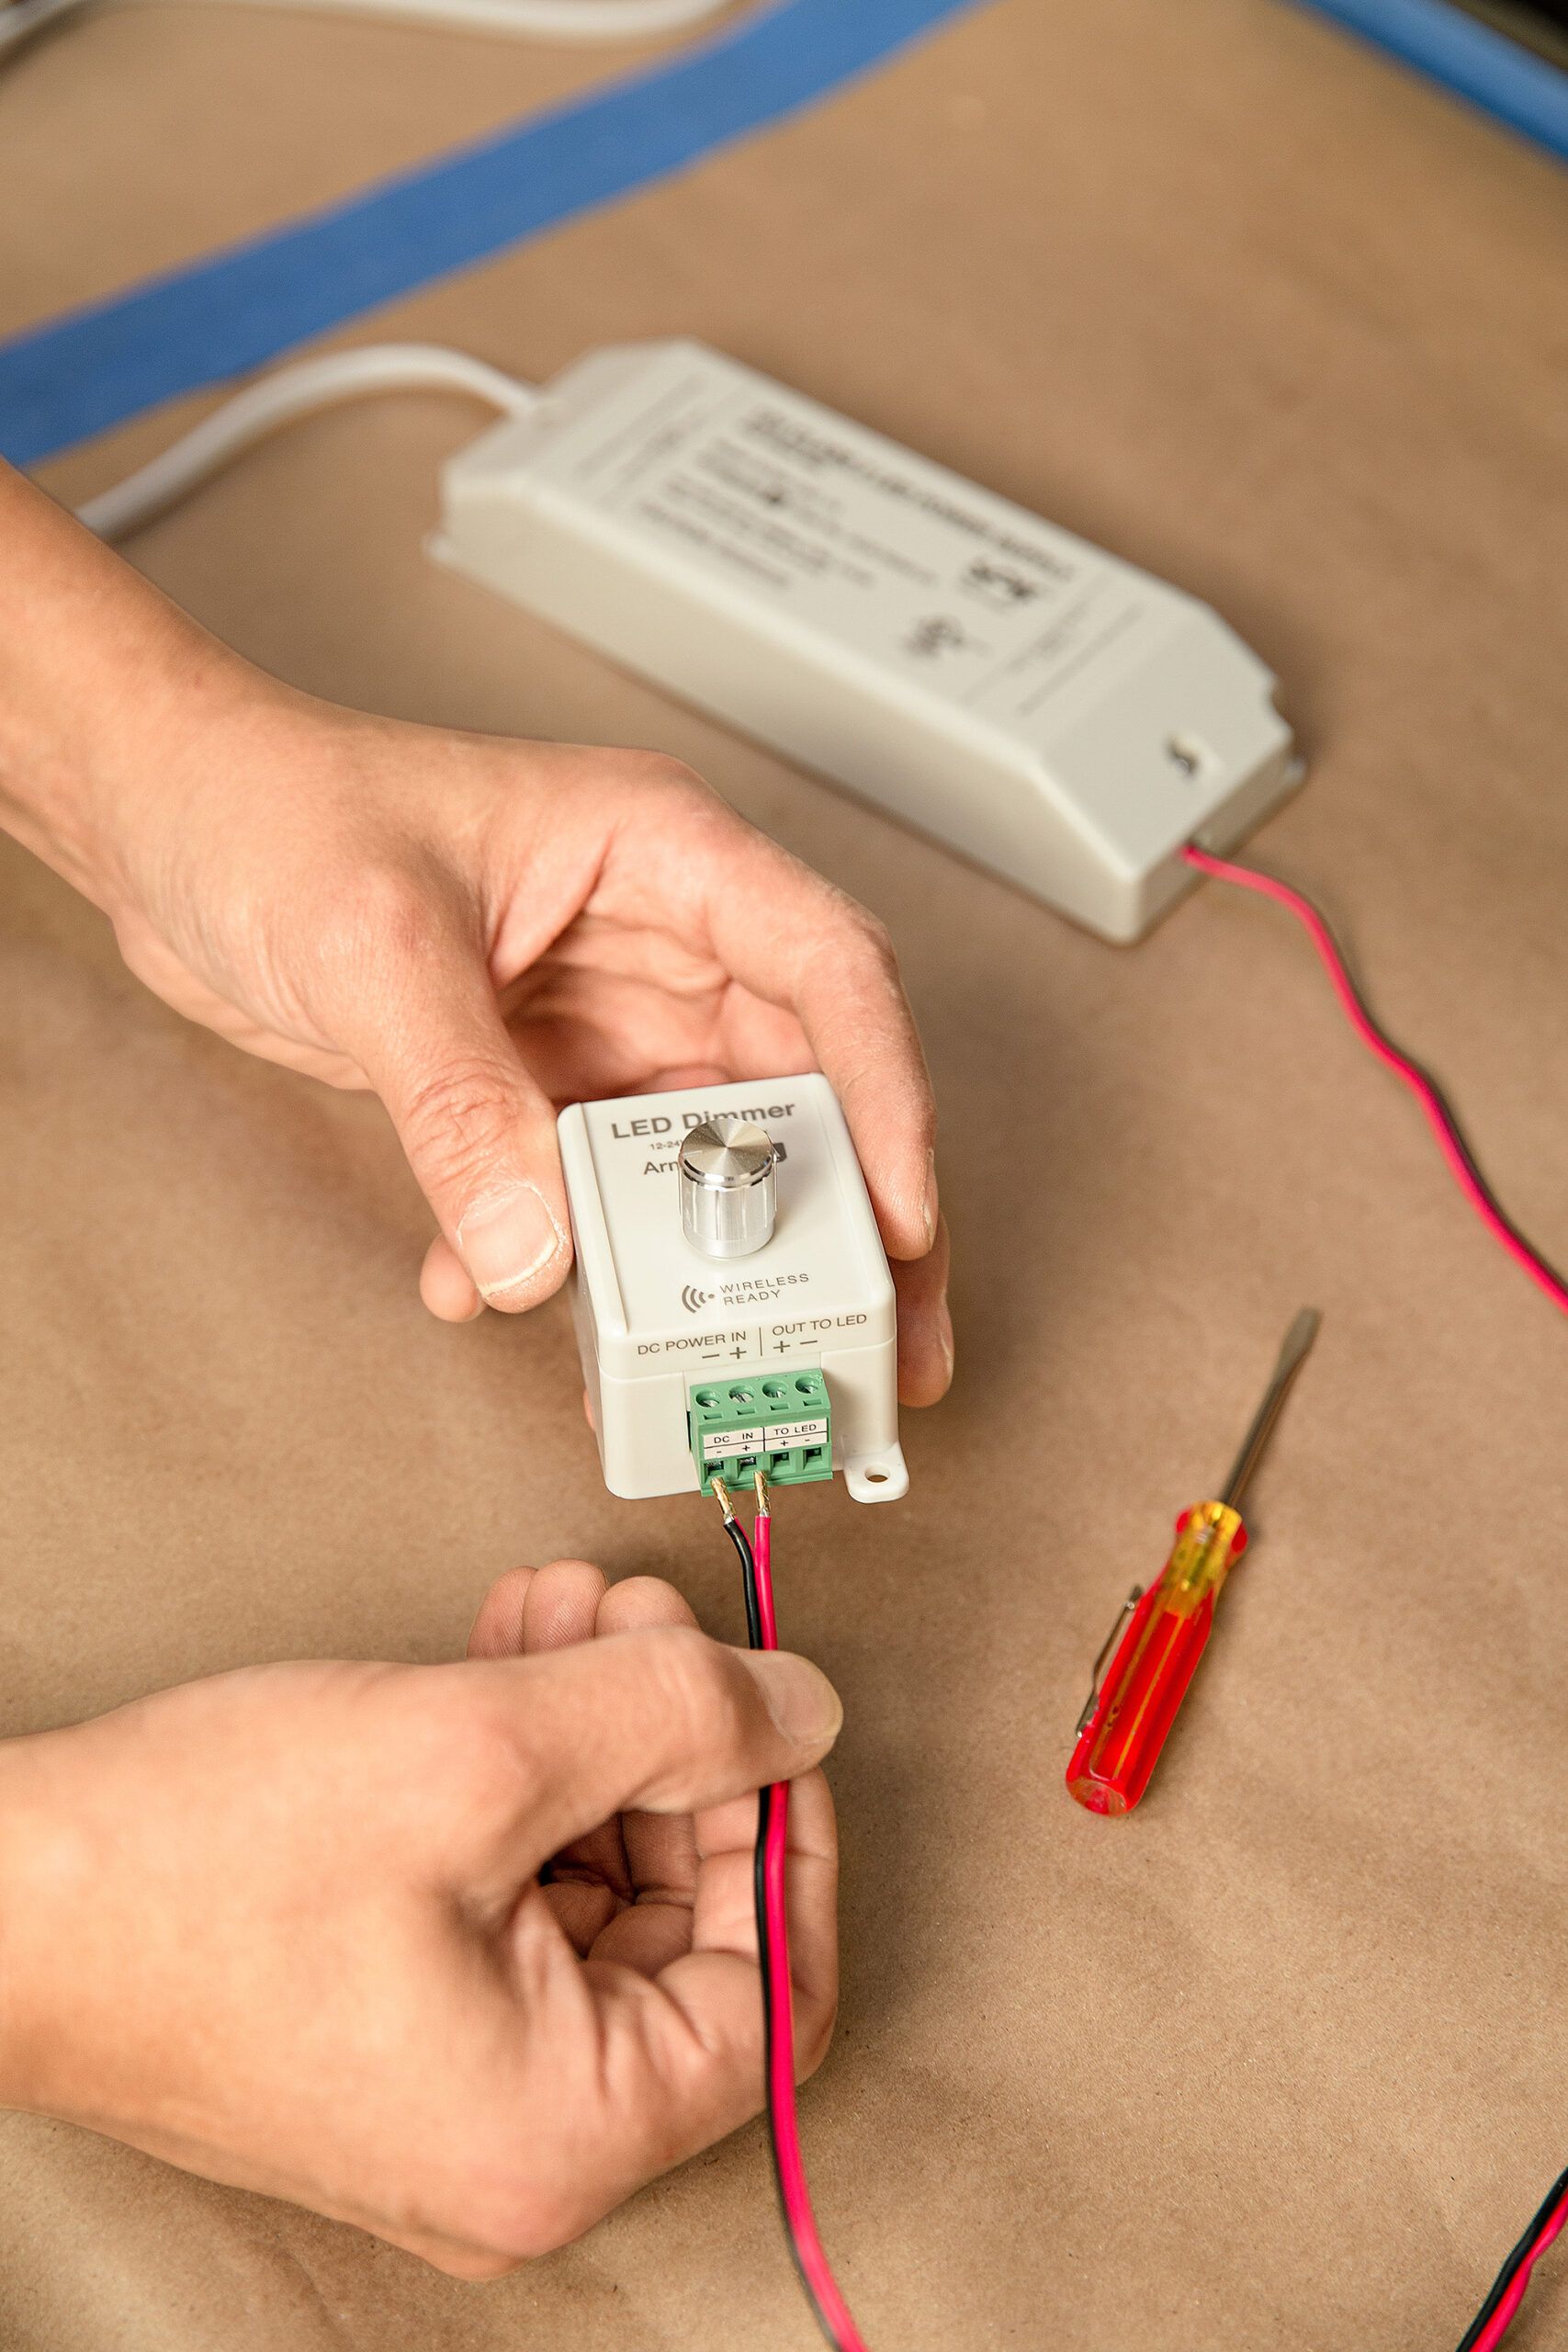
- Add the power supply’s red and black wires to the inputs on the wireless dimmer: red to positive and black or white to negative, as shown.
- Complete the connection by tightening the setscrew.
- Let the system’s wiring hang free until all the LED tape is in place.
- Secure the wires and terminals to the cabinets with staples and screws.
Step 4: Plug in the Power Supply
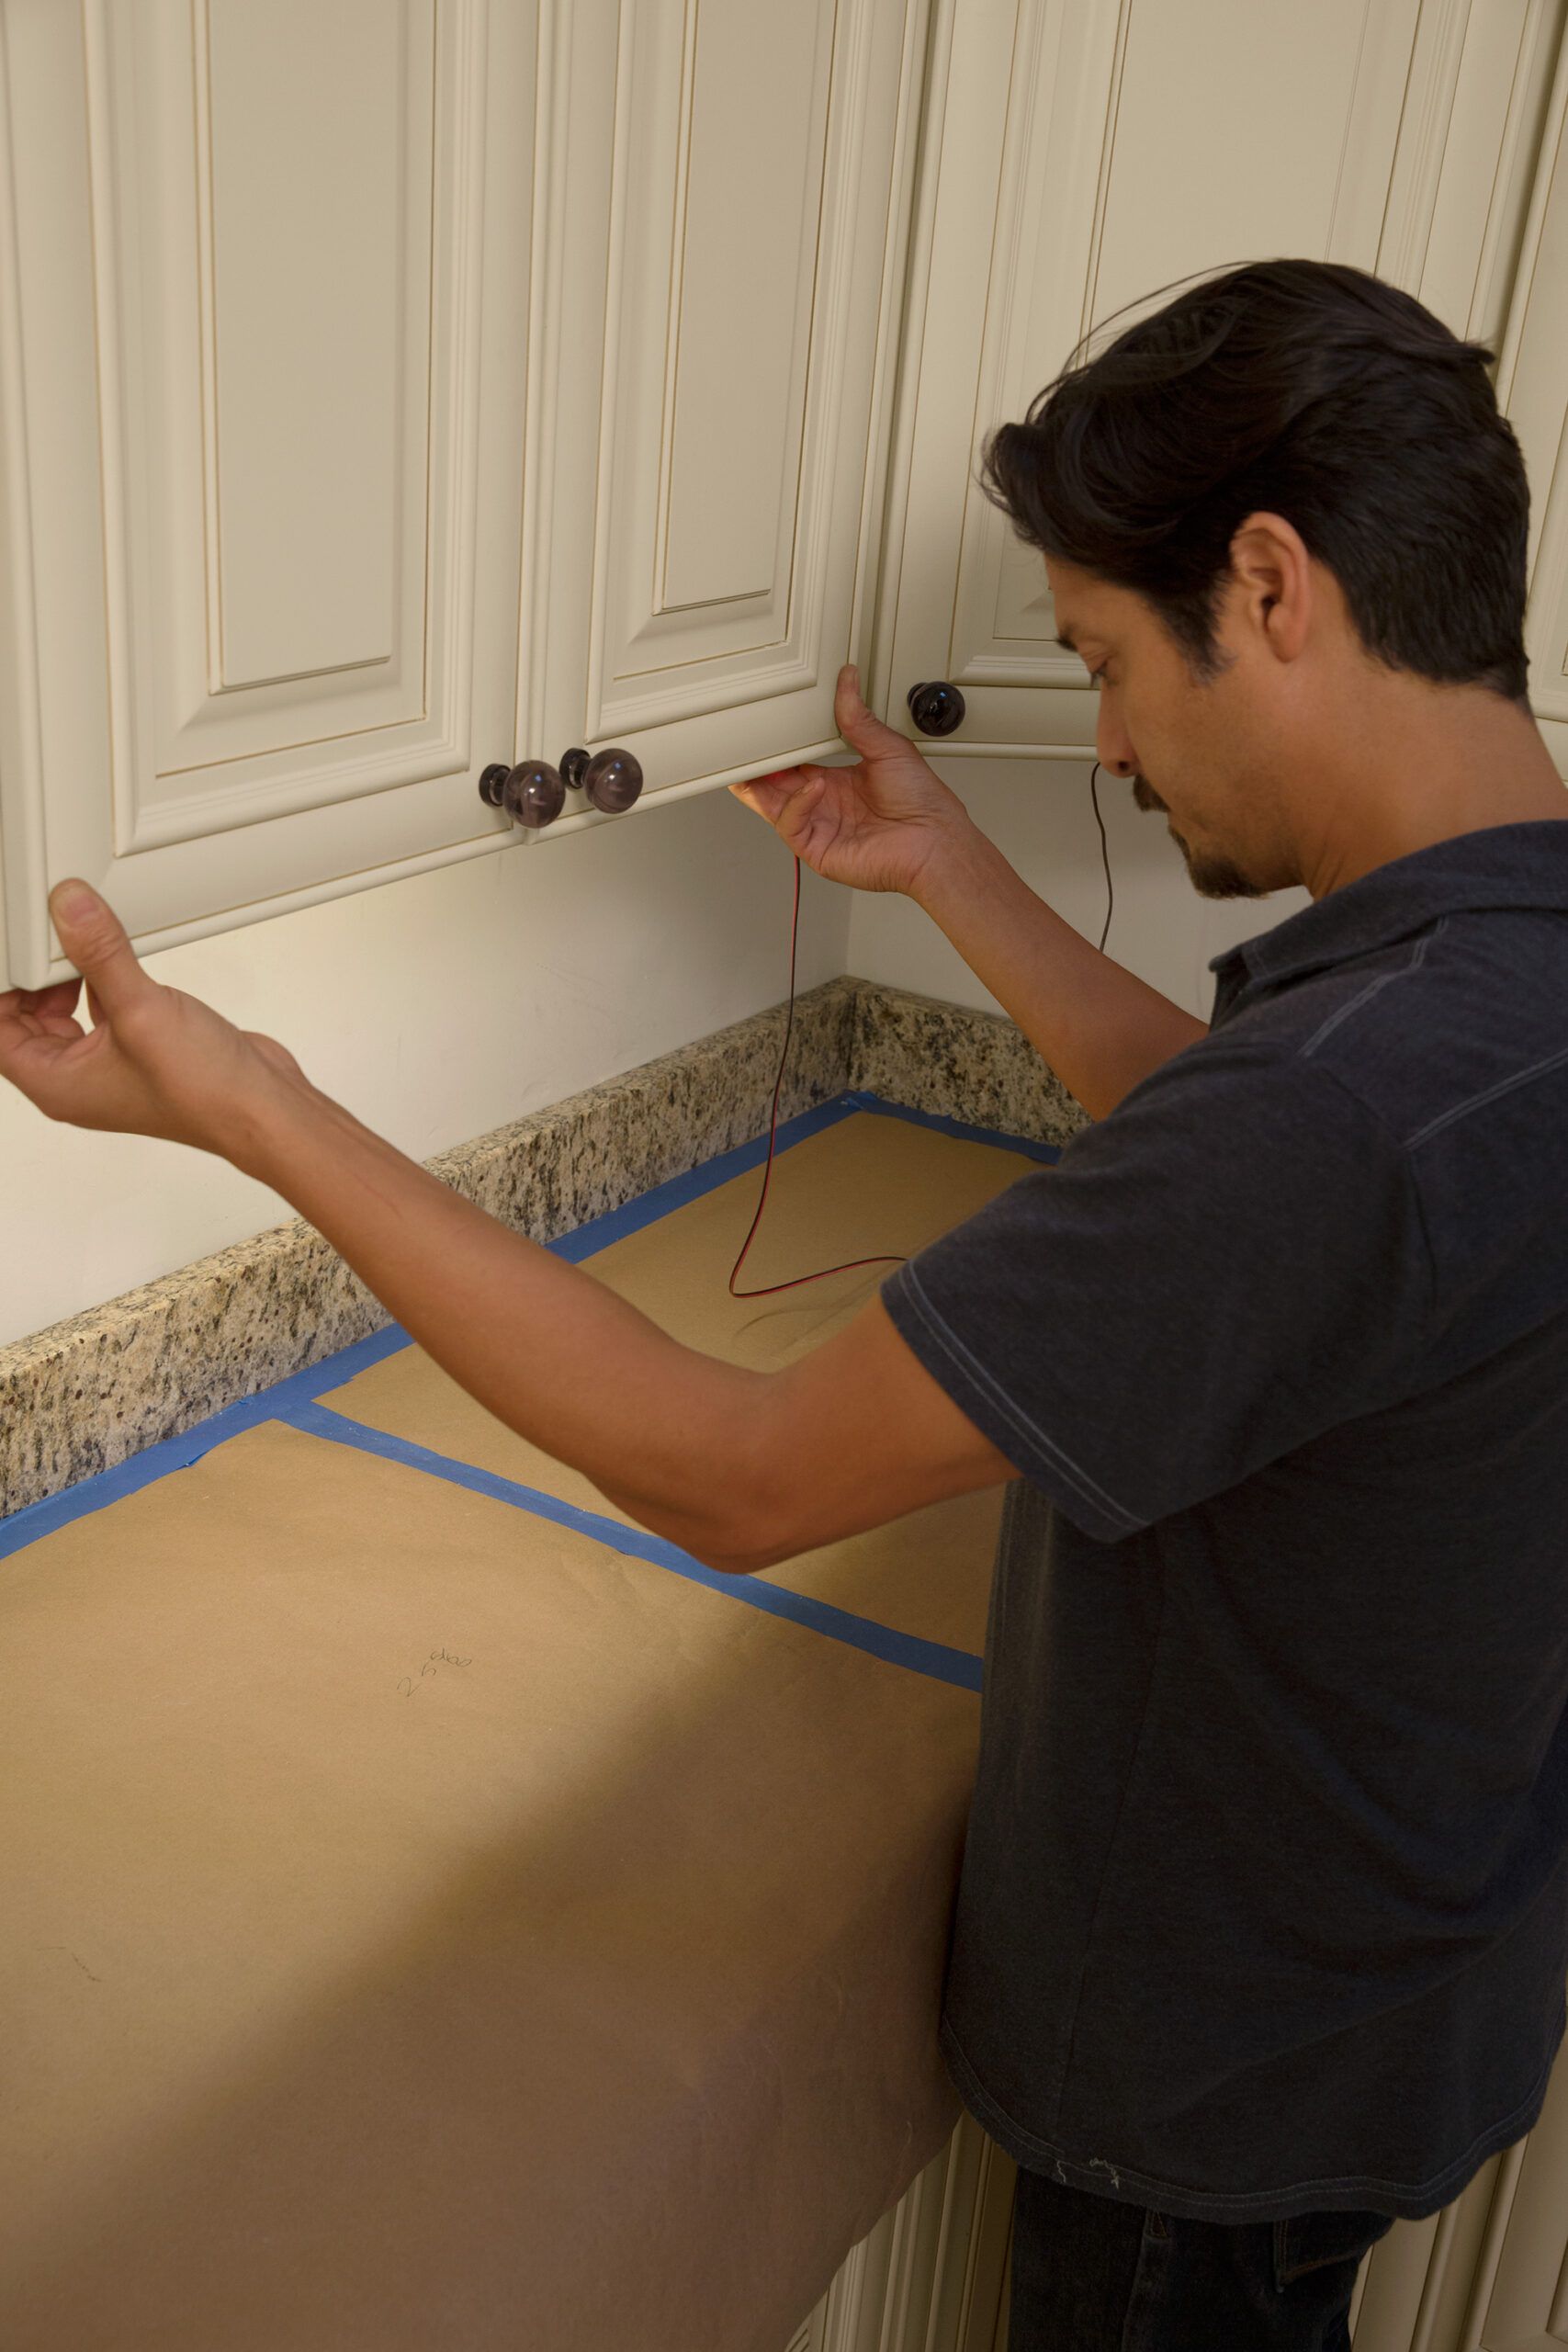
Place the power supply and the dimmer on top of the upper cabinets, and plug the power supply into the new outlet. Cut a length of 18⁄2 solid-core wiring—sold as thermostat wiring—so it’s long enough to reach from the dimmer down the back of, and underneath, the corner cabinet. Drape the wiring along the cabinets, as shown.
Step 5: Wire up the Terminal
Cut the red and black wire so that it reaches the center underneath the corner cabinet. Add the red wire to one end of the terminal and tighten the setscrew, as shown. Repeat the process for the white or black wire. From here, you’ll add wiring to branch in two directions to cover both walls of the L-shaped kitchen.
Step 6: Cut the Tape
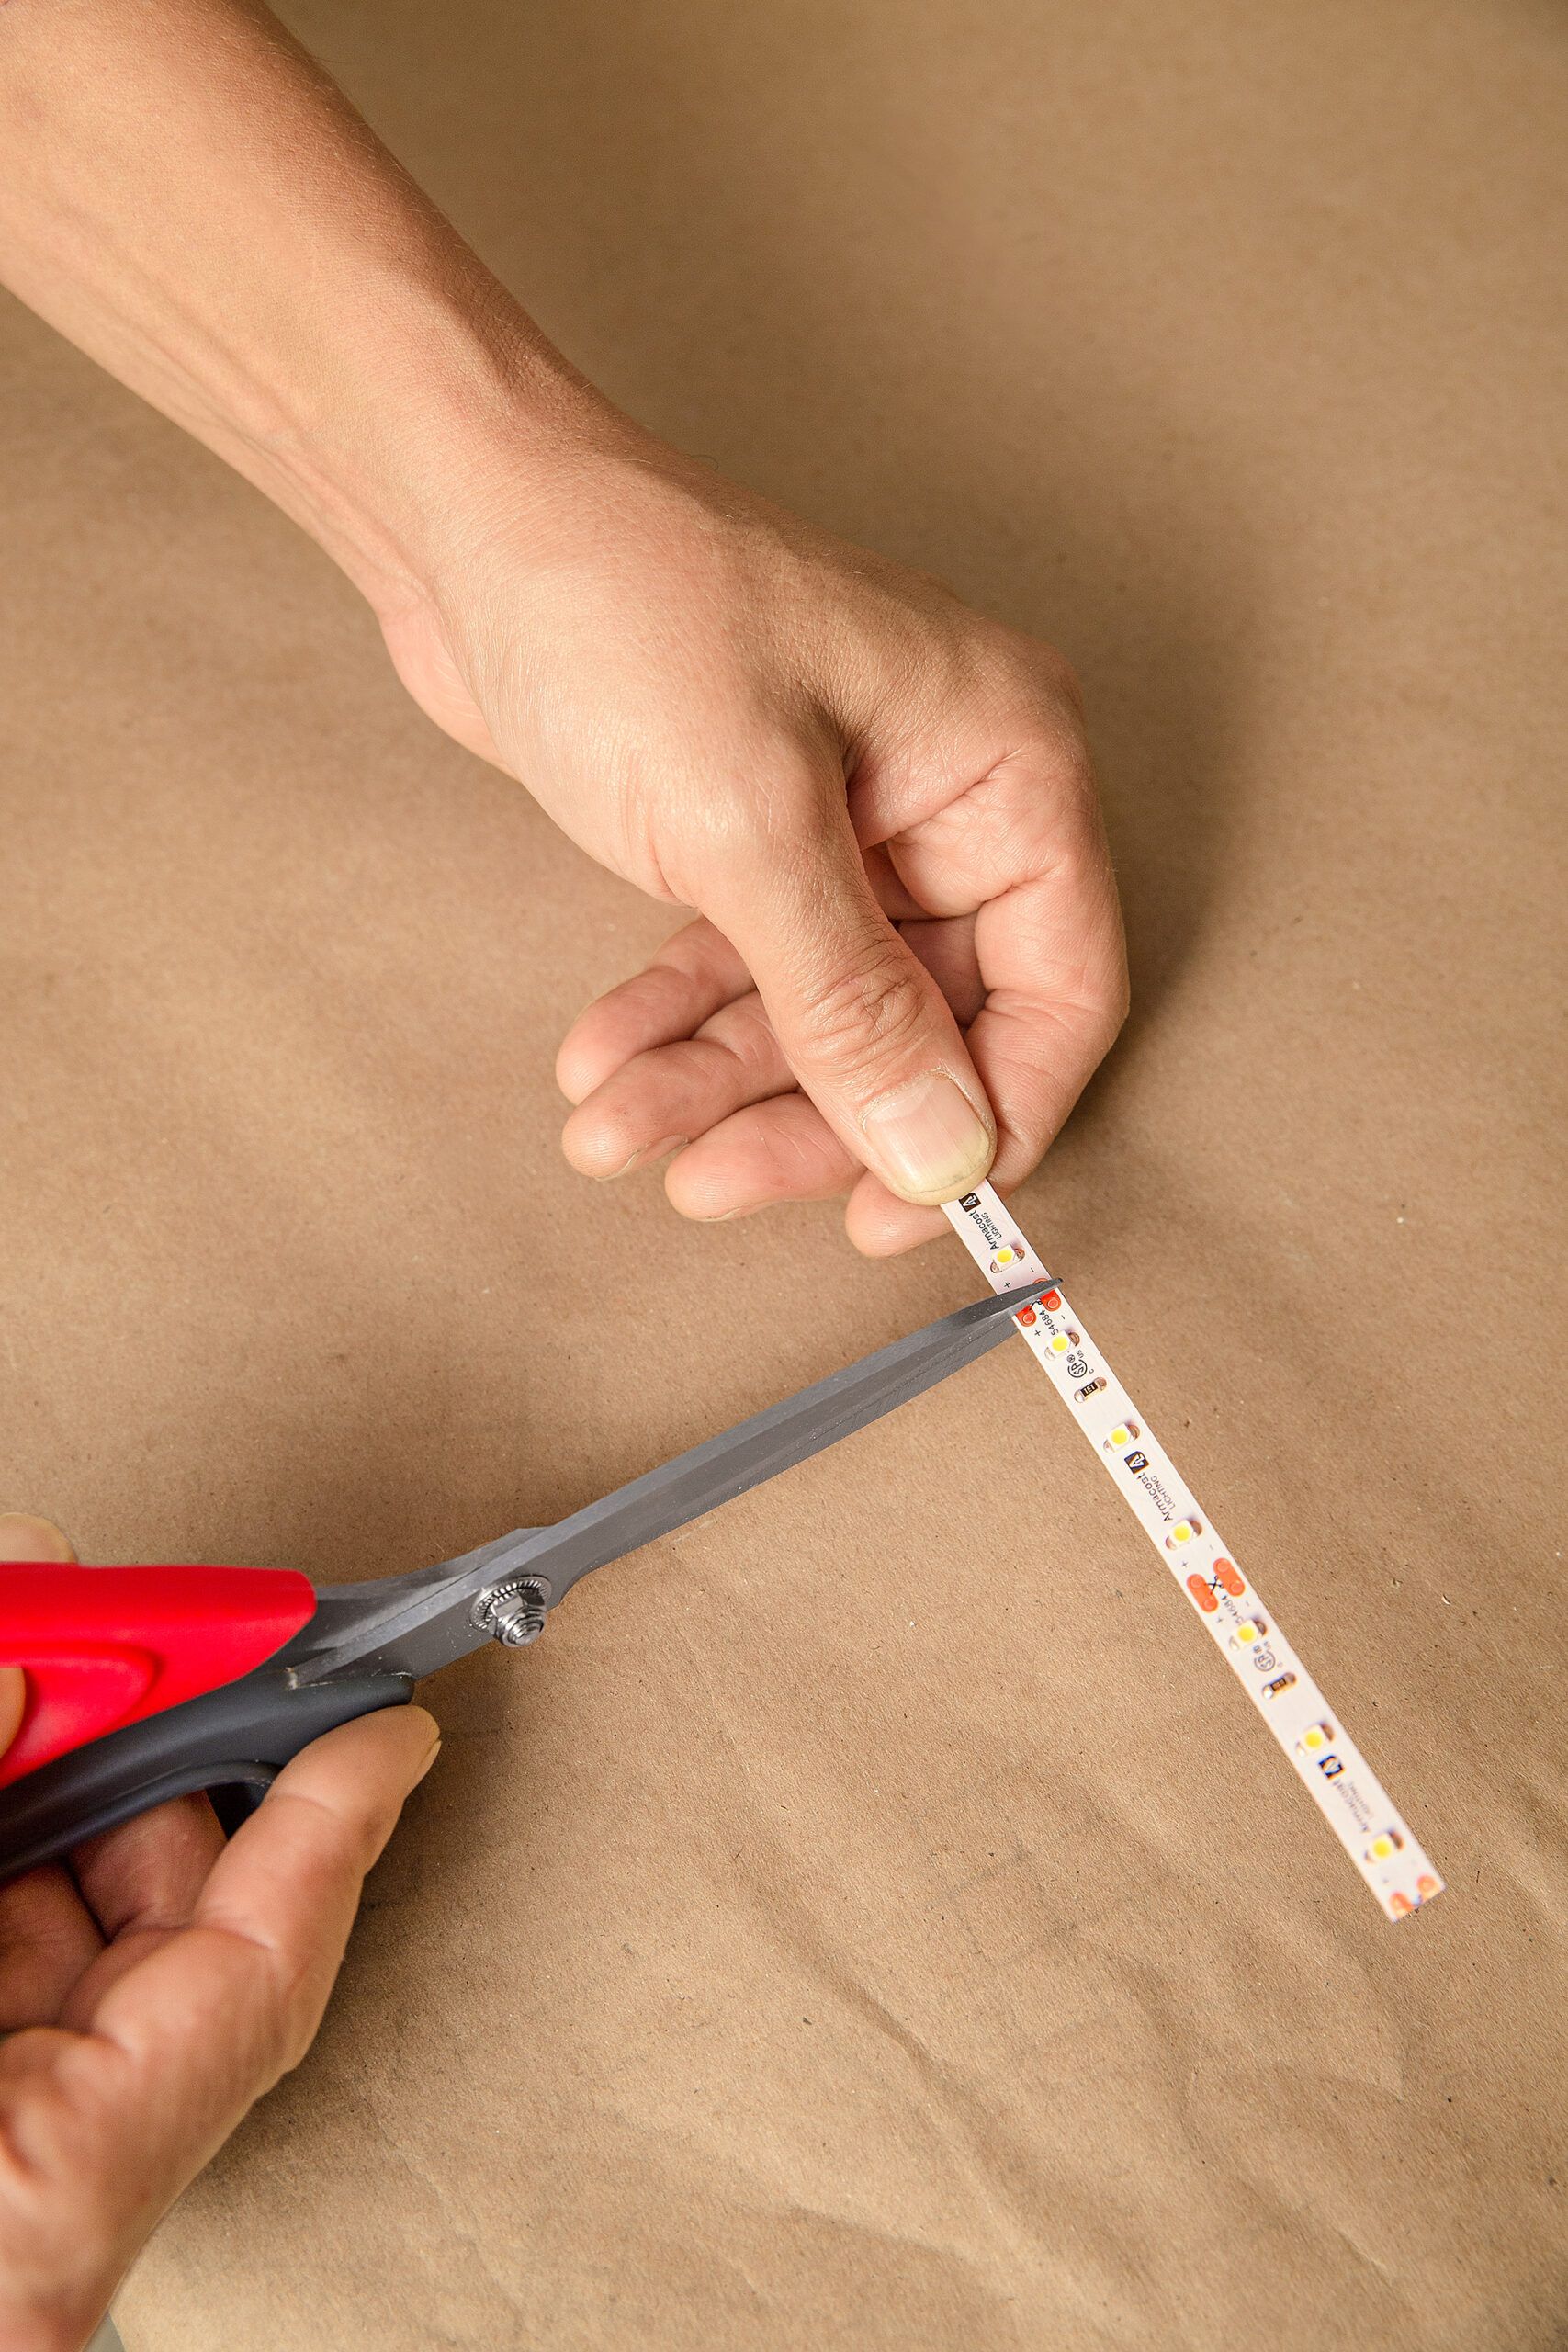
From the middle of the corner cabinet, measure the length of tape needed to cover the cabinets along one wall. Use scissors to cut the LED tape across the center of the copper contacts, as shown. Repeat the process for the other wall of cabinets.
Step 7: Wire up the LEDs
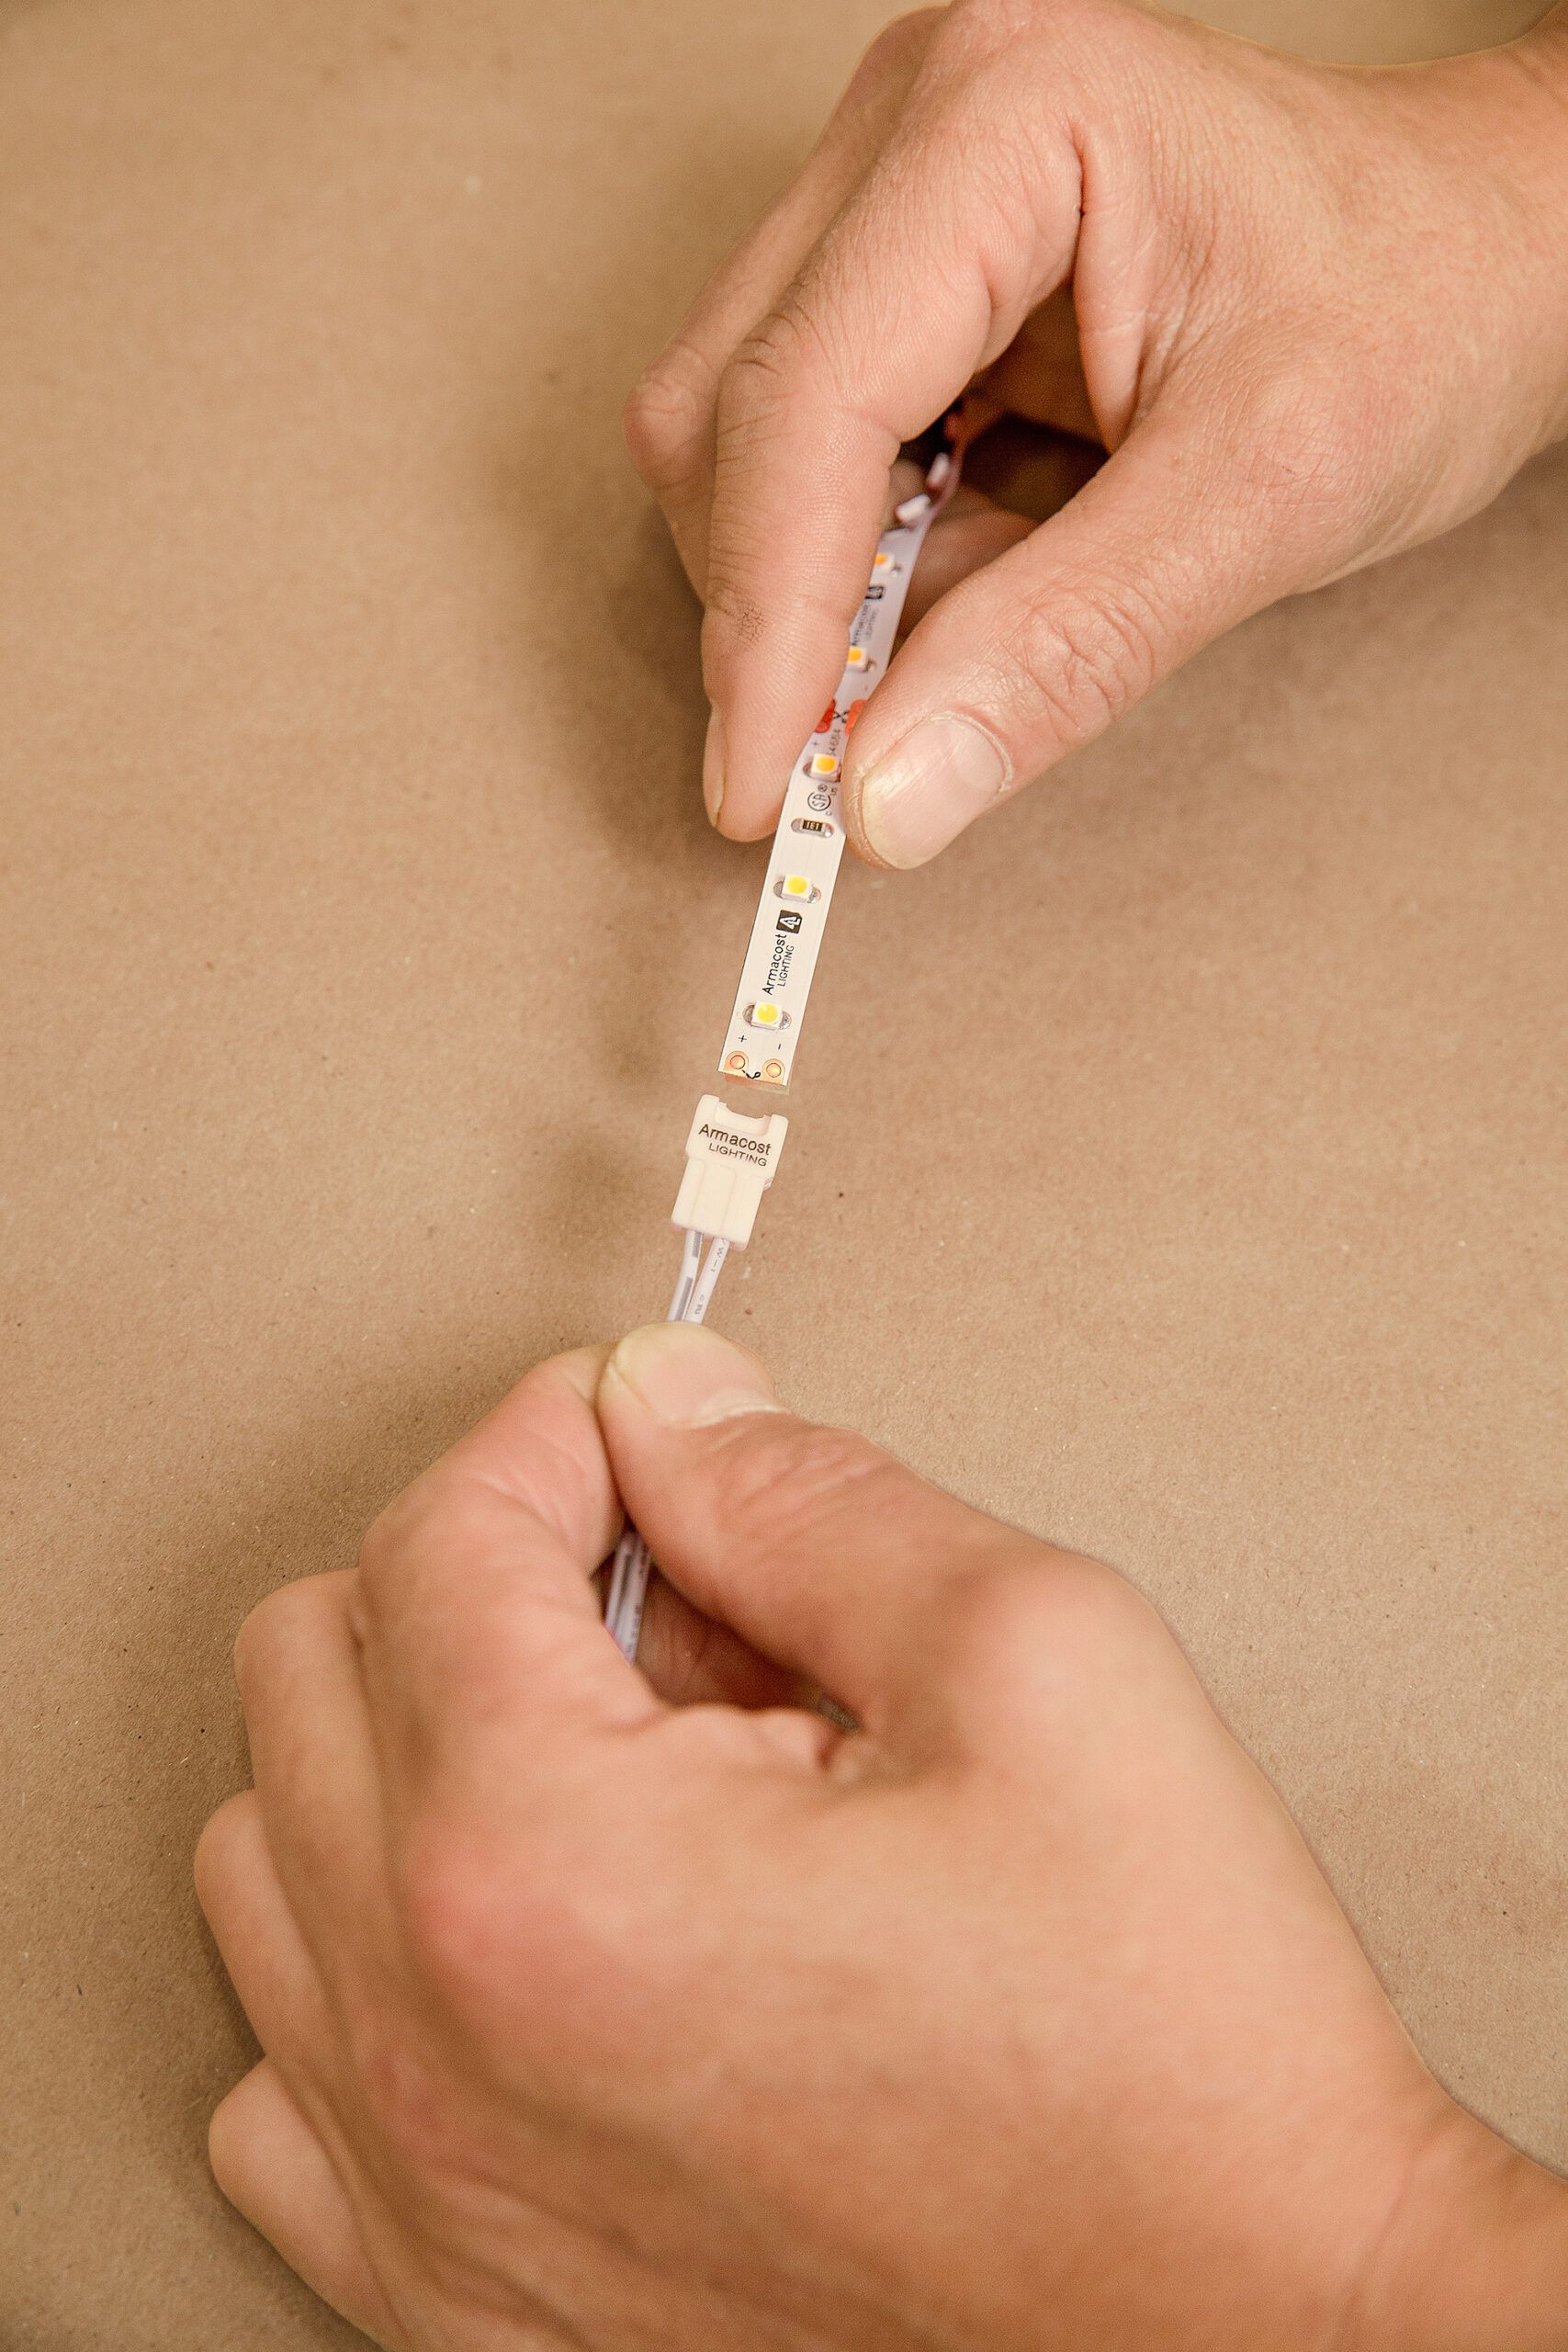
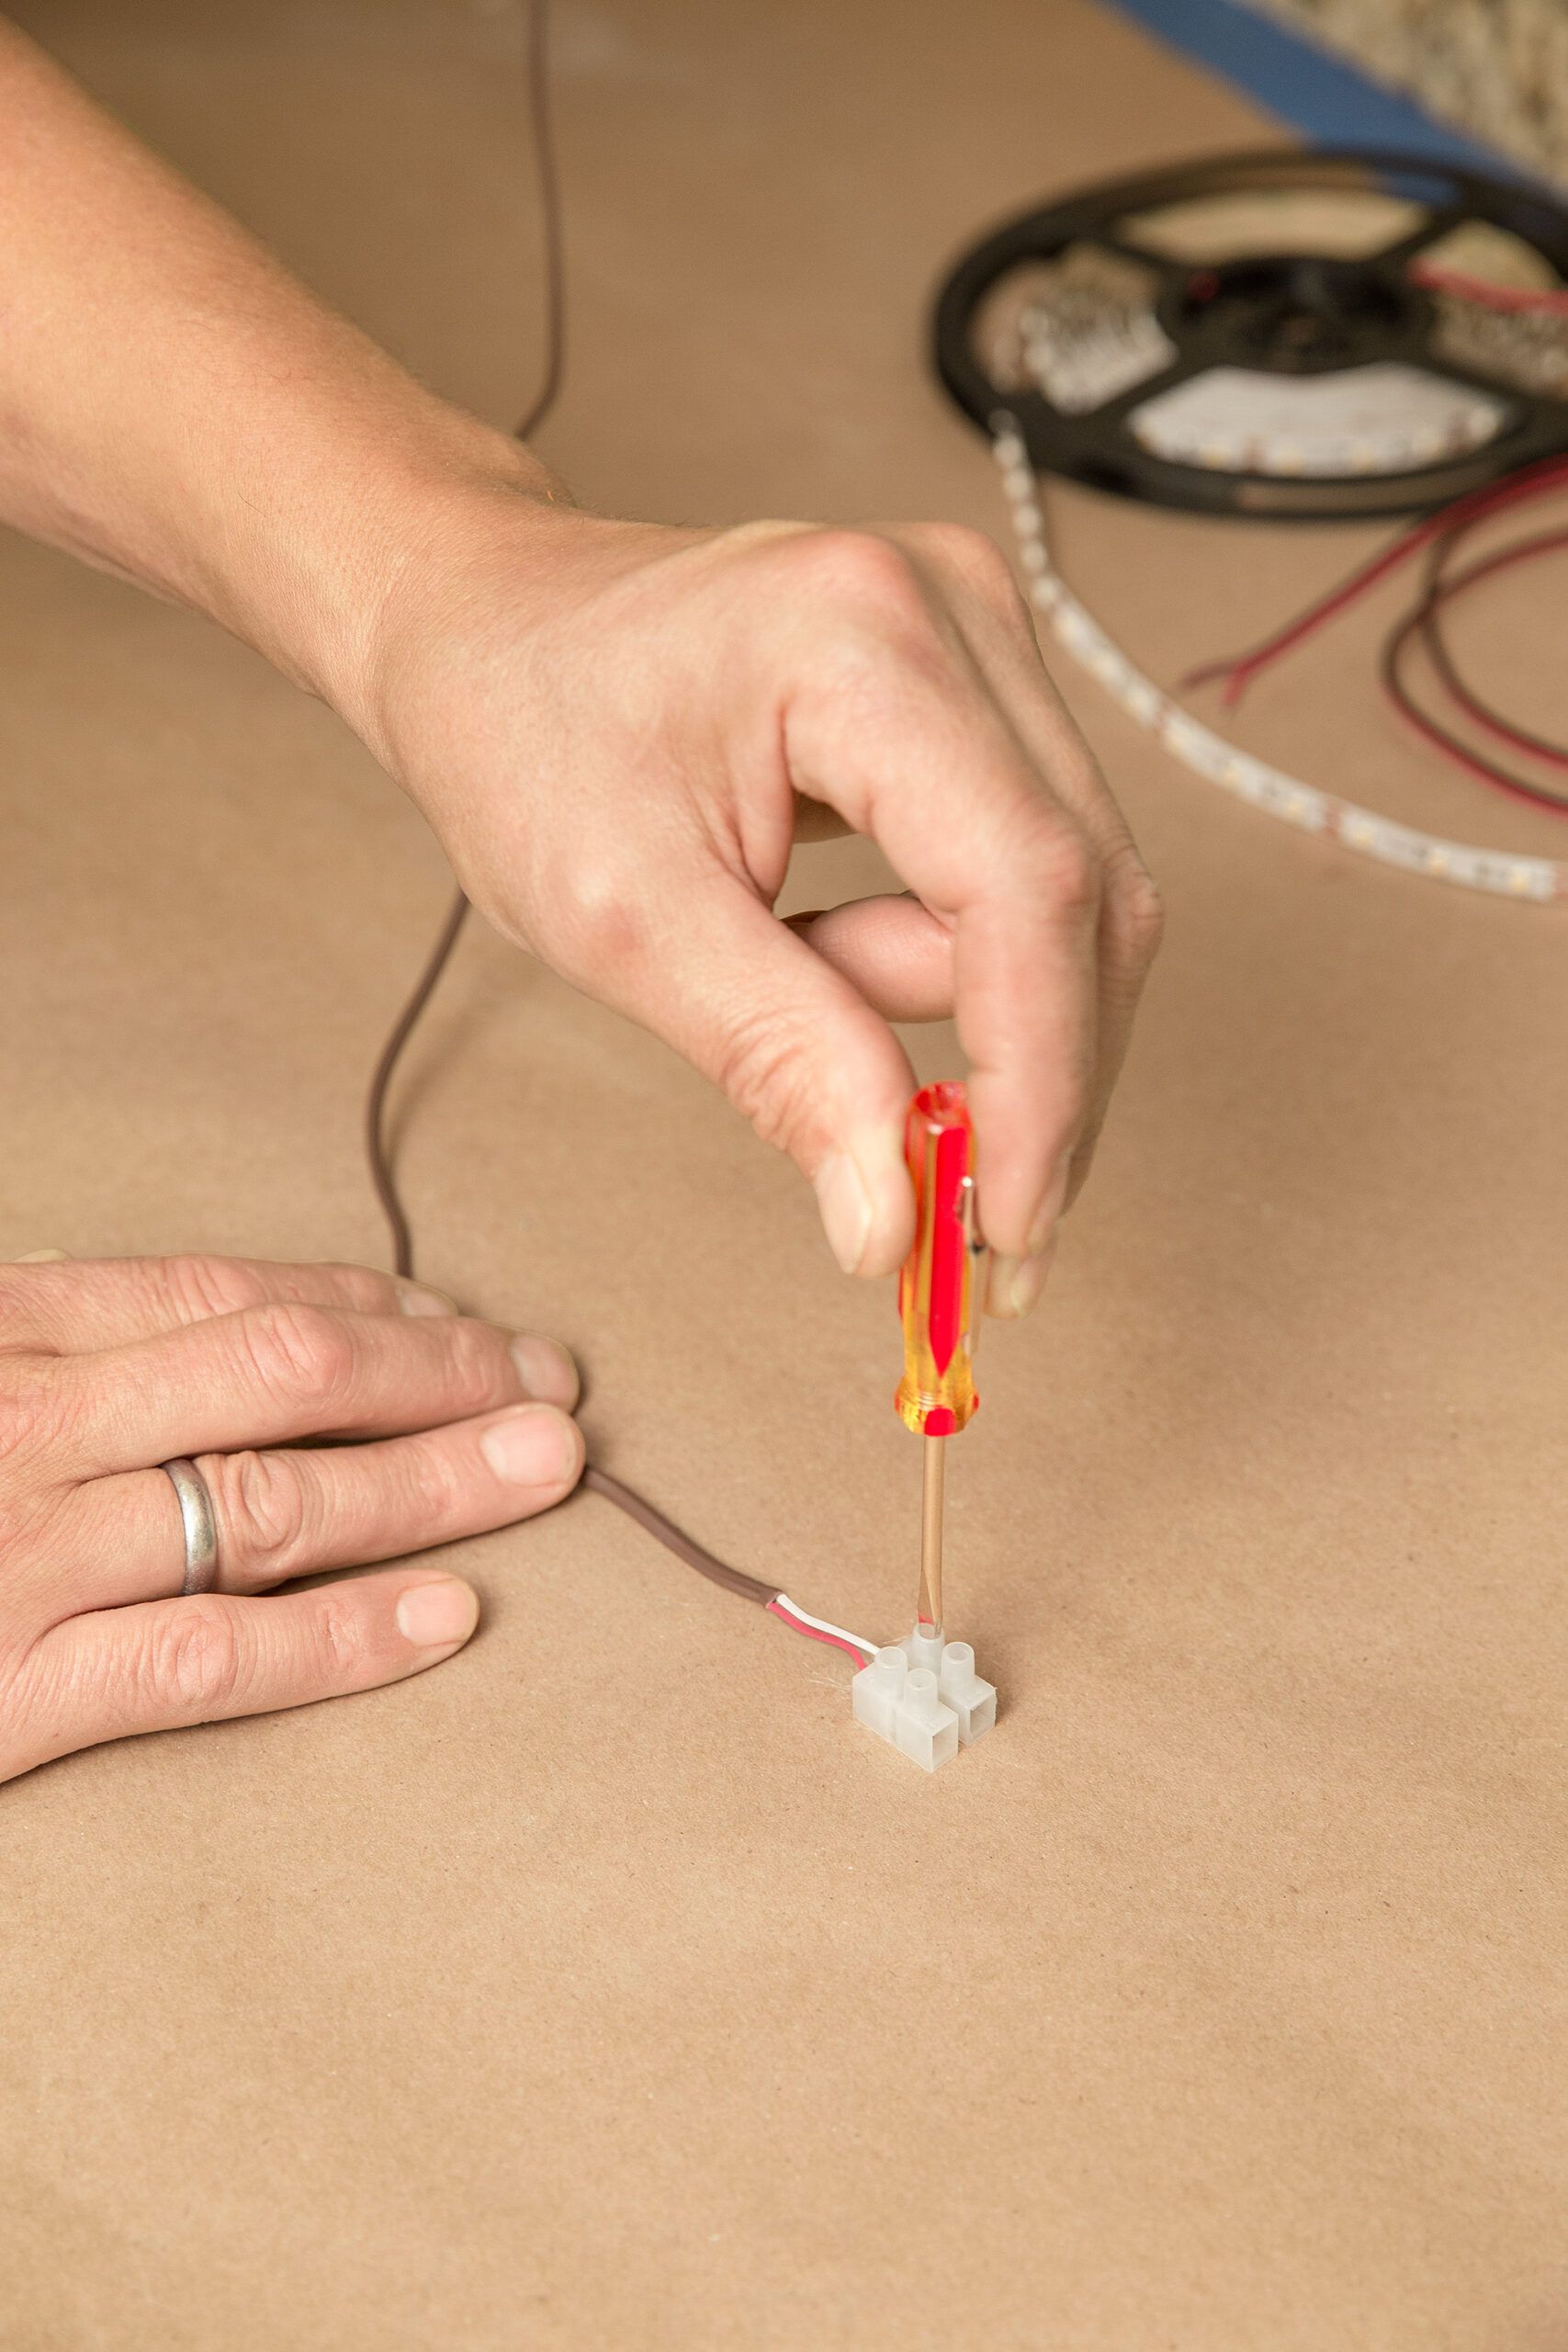
Use LED tape-light extension connections to turn the terminal into a splitter, sending power to both walls. These four-foot extensions have two wires, white for positive and white with a black stripe for negative, with a clamp on one end that grips onto the LED tape.
- Join the tape to the extension by peeling away the adhesive backing under the copper contacts.
- Slide the tape into the connector with the logo facing up, as shown.
- Make sure to align the polarity of the extension to the markings on the tape.
- Wiggle the tape in so it seats completely.
- Flip the connector over and snap the lock closed with a slotted screwdriver.
- Repeat this process for the LED tape running under the other wall of cabinets.
- Twist together the positive ends of the extensions and fit them into the terminal across from the red wire.
- Tighten the setscrew and add both negative wires to the terminal in the same way.
Step 8: Tweak the Beam
Restore the power at the panel before tweaking the beam:
- Hold the tape to the underside of the cabinet and adjust the light’s coverage.
- Keep the strip 1 to 2 inches back from the face frame to distribute the 120 degrees of light evenly across the backsplash and countertop, as shown.
- If you have a dark countertop, install the tape against the back of the face frames with the LEDs pointing toward the backsplash to eliminate bright spots.
Step 9: Create Passageways
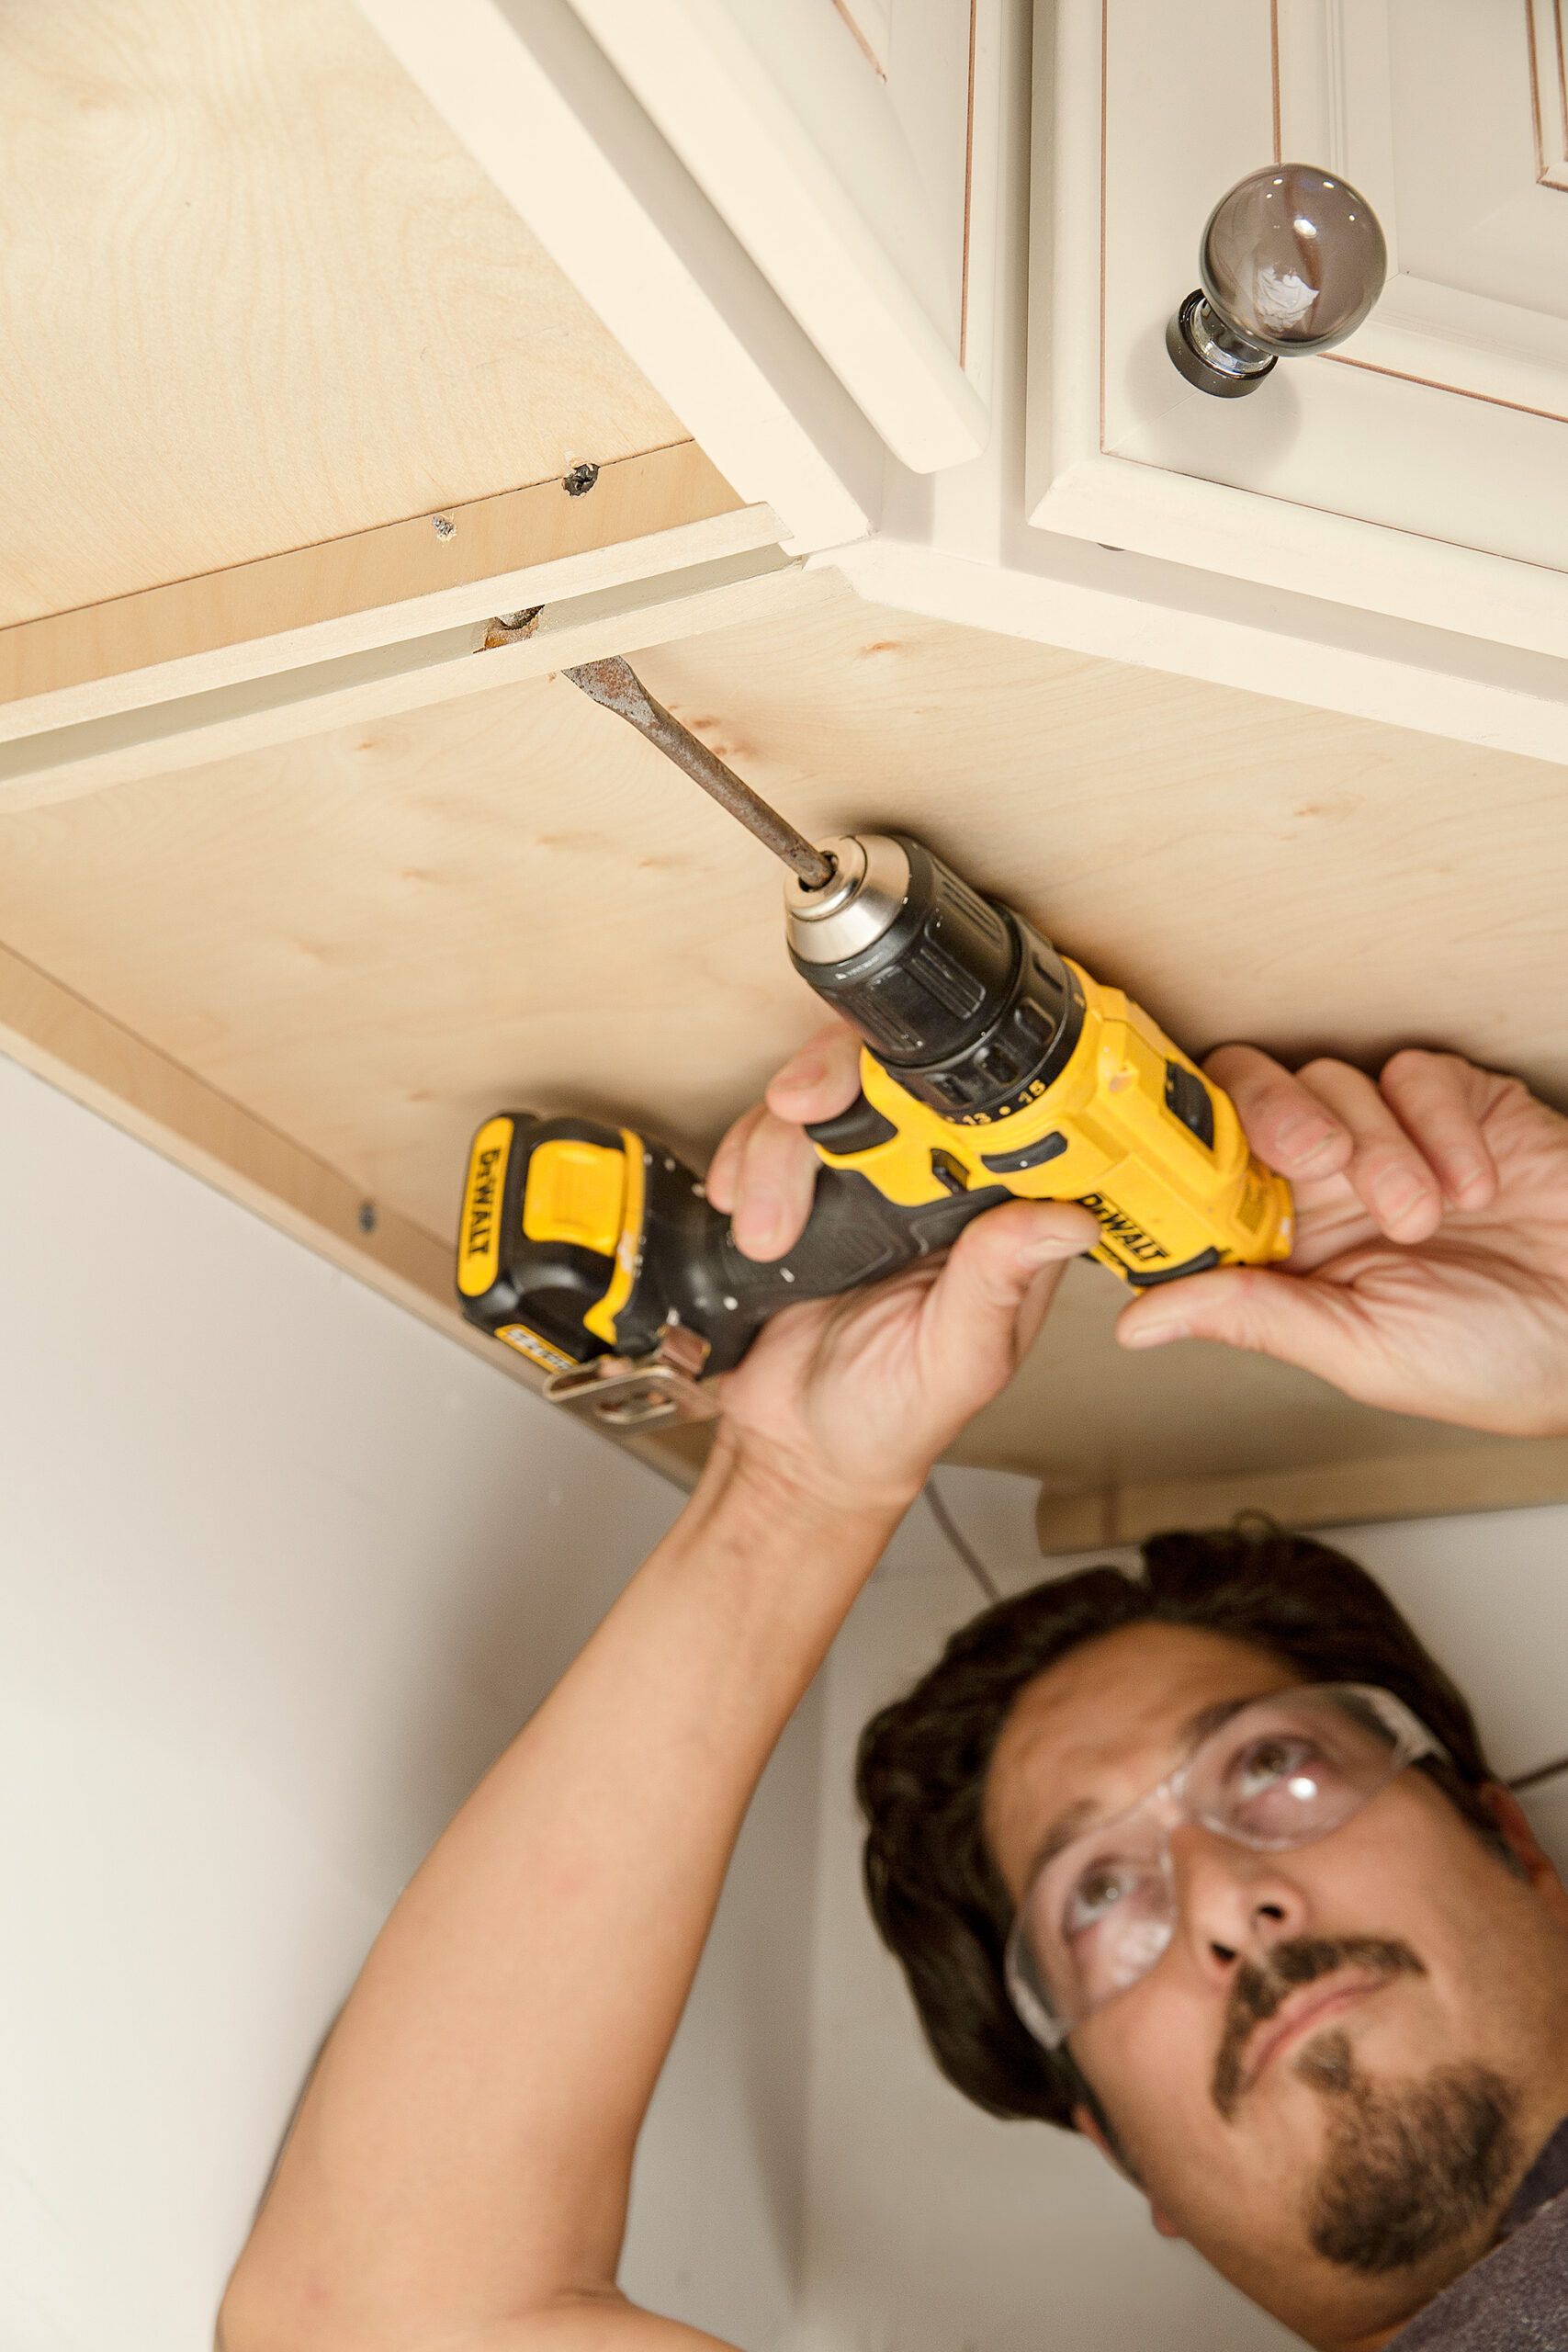
Once you determine the light’s location—ours is about an inch away from the face frame—drill a 1⁄2-inch-wide hole with a paddle bit through the sides of neighboring cabinets at that spot, as shown. This allows the LED tape to travel underneath the cabinets. To install the LEDs against the face frame, slice through cabinet sides with an oscillating tool. Don’t press the tape in place just yet.
Step 10: Get Inside a Cabinet
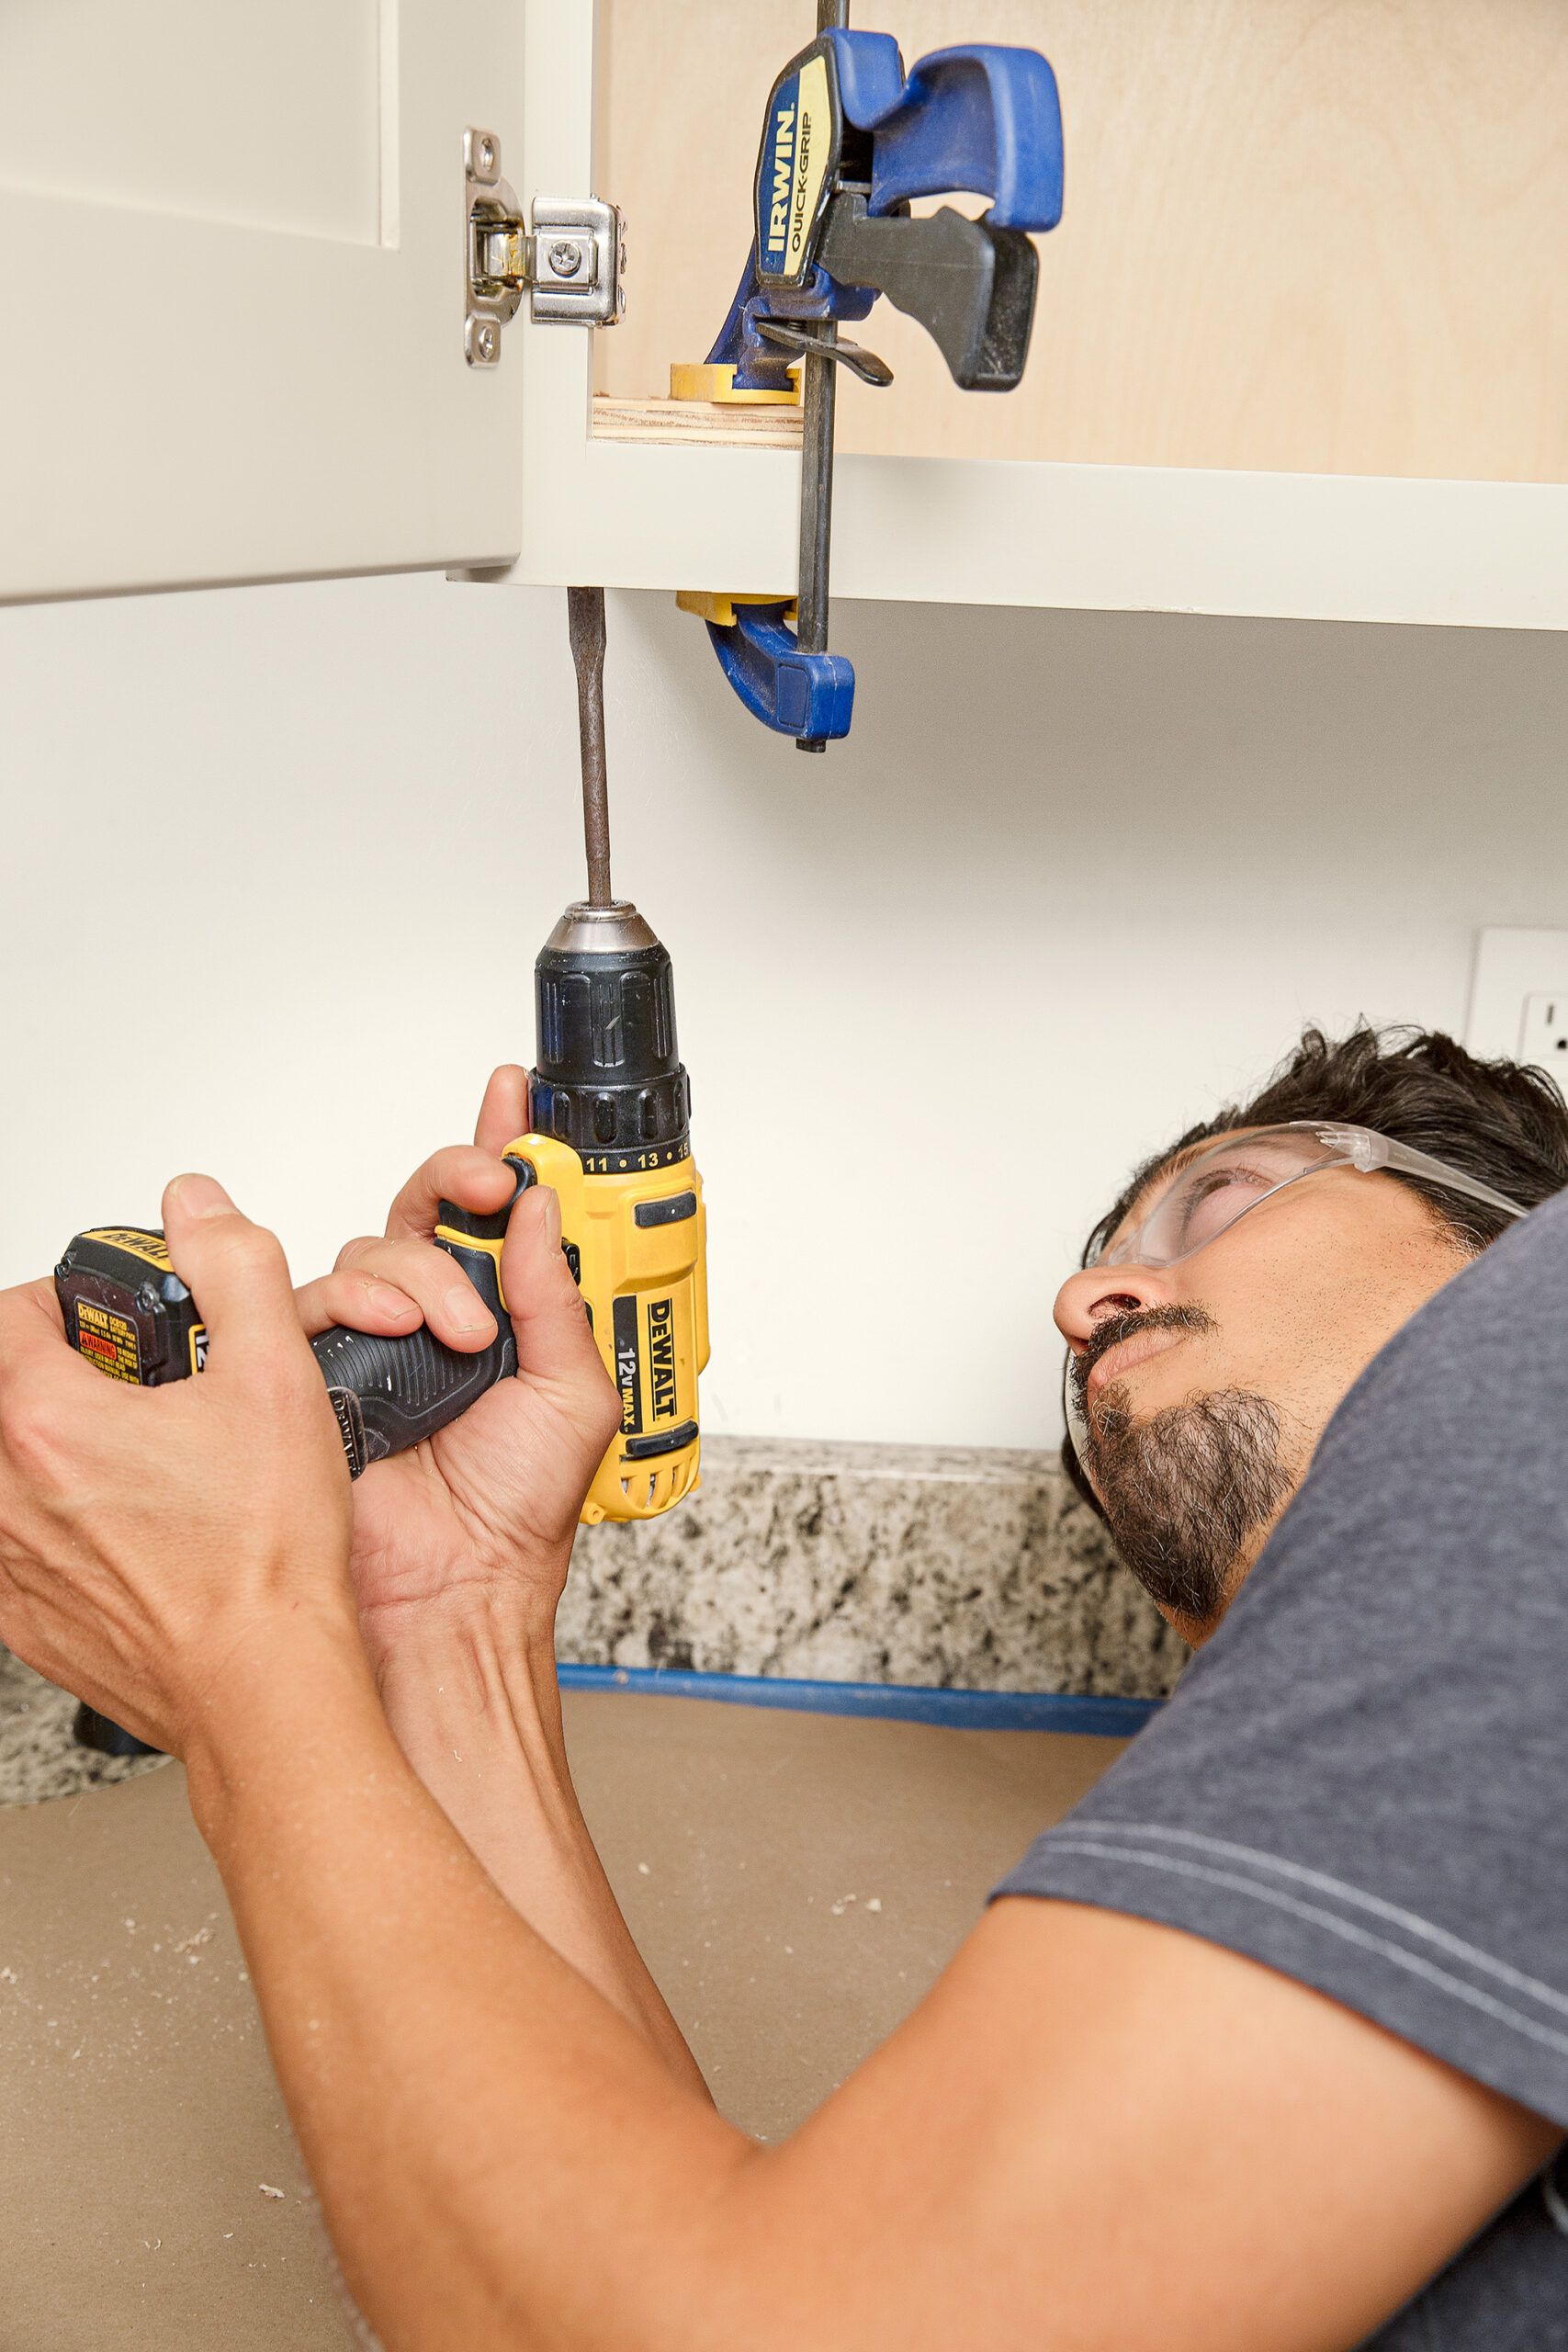
Drill more holes underneath the cabinets to allow the wiring to pass through. In kitchens where wall cabinets change height, such as to a shorter one above a sink, run wiring inside the adjacent taller cabinet. Clamp plywood scrap to the inside of the cabinet to prevent tear out, then drill a 1⁄2-inch-wide hole with the paddle bit in the corner, as shown. Add a second hole, 90 degrees to the first one, through the cabinet wall and in line with the underside of the shorter cabinet above the sink.
Step 11: Press the Tape in Place

Wipe the undersides of the cabinets with denatured alcohol so the tape will stick properly. Peel the backing off the LED tape and press it in place under the straight run of cabinets. The tape on the far end closest to the shorter cabinet above the sink should line up with the hole, as shown.
Step 12: Wire Inside the Cabinet
Follow these steps to wire inside a cabinet:
- Align the polarity of the free end of the tape and an extension, and clamp down the connection.
- Fish the wires up through the hole and into the corner of the cabinet.
- Measure, cut, and add extensions to enough LED tape to cover the underside of the cabinet above the sink.
- Push the wires through the hole in the taller cabinet.
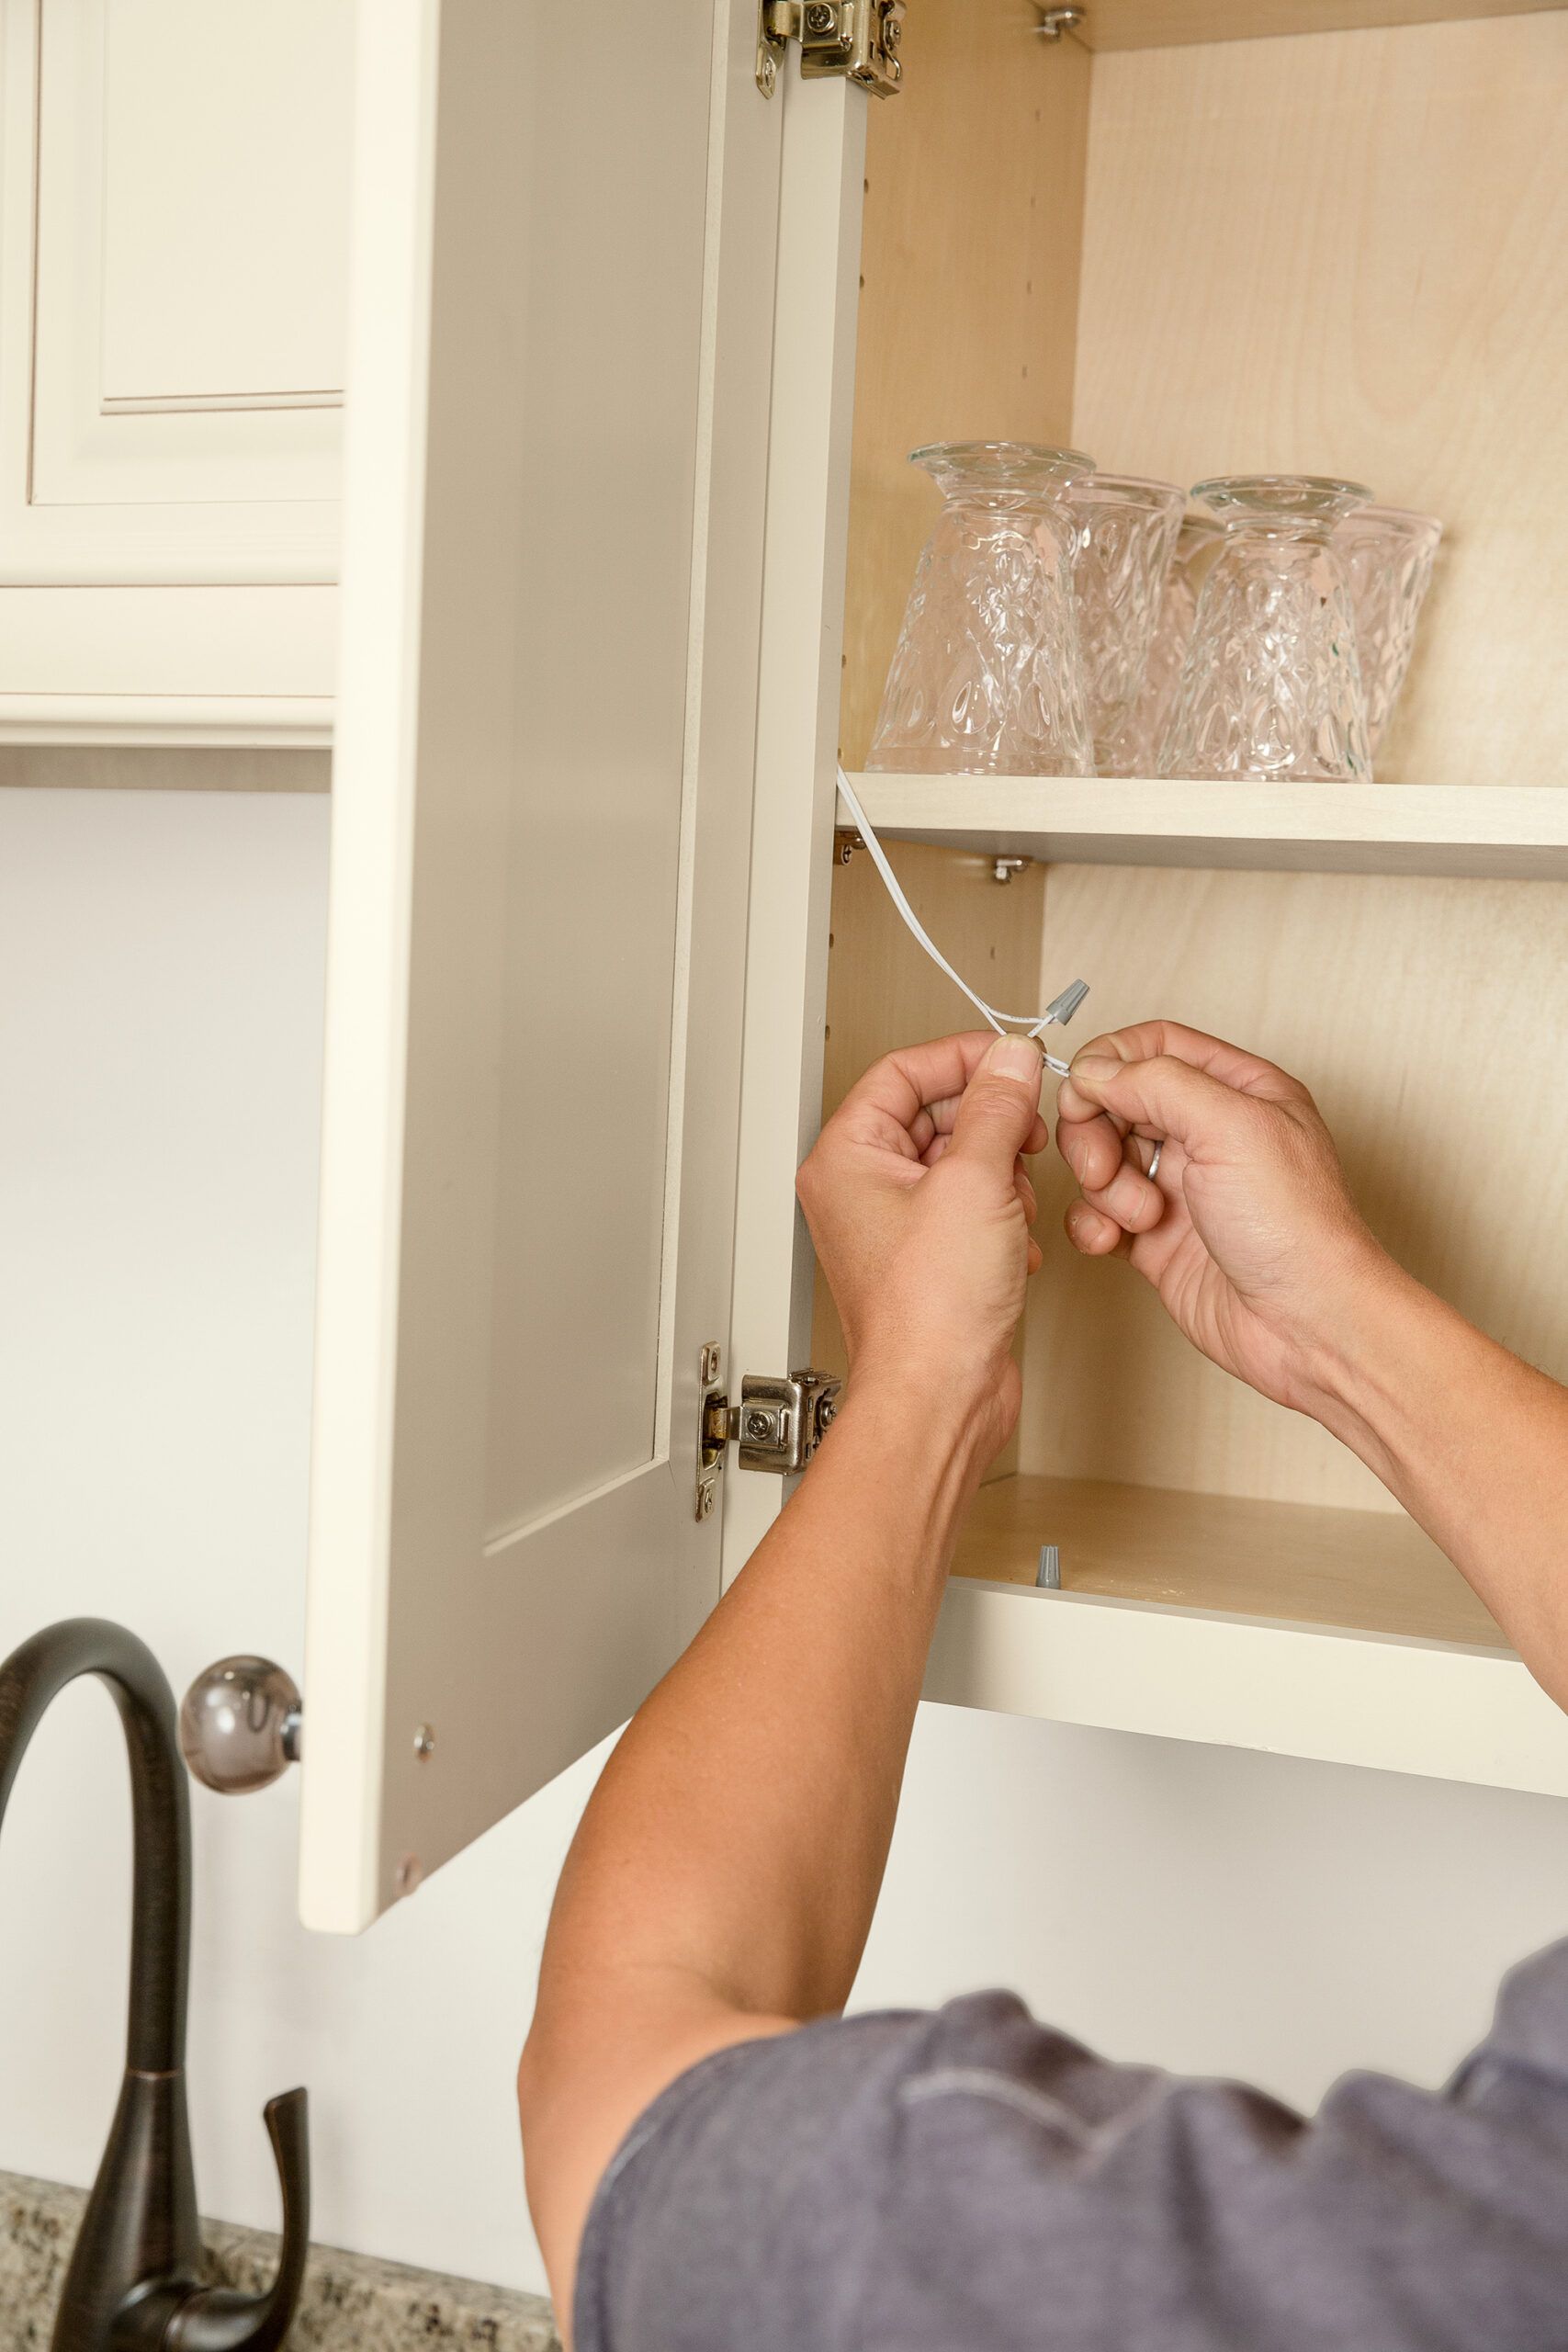
- Twist together the two stripped positive wires and secure them with low-voltage wiring nuts.
- Repeat the process for the negative wires, as shown.
- Tuck the wires into the corner of the cabinet’s face frame.
Step 13: Add the Switch

The final step of the process is adding the switch:
- Peel and stick the LEDs to the underside of the cabinet above the sink.
- Screw the wireless touchpad’s bracket to the wall and install the switch and cover plate.
- Disconnect the power, then plug the power back in. The touchpad should pair with the wireless dimmer.
- Screw the terminal to the underside of the cabinet.
Troubleshooting Common Issues With Undercabinet LED Lighting
Even with careful installation, you may experience a few issues when handling LED lighting.
Addressing Uneven Lighting
If you notice dark spots or uneven illumination, try the following:
- Add additional strips to fill in any gaps.
- Adjust the position of the LED strips for better coverage.
- Use diffuser channels to soften and spread the light more evenly.
Fixing Connection Problems
For flickering or non-functioning sections, check all connections for secure contact, verify that the polarity is correct at each connection point, and replace any damaged strips or connectors.
Dealing with Interference
If your LEDs flicker when other devices are in use, try the following solutions:
- Ensure the power supply is properly grounded.
- Move LED wiring away from other electrical cables.
- Use a separate circuit for LED lighting, if possible.
Enhancing Your Undercabinet LED Lighting
Once your basic system is in place, consider adding motion sensors, incorporating color-changing lights, or syncing the lights with your smart home system.
Adding Motion Sensors
Motion sensors can automate your lighting. Install sensors at cabinet ends or underneath your cabinets, and connect the sensors to the LED power supply. You can adjust sensitivity and timer settings, as necessary.
Incorporating Color-Changing LEDs
For added versatility, you can choose color-changing LEDs instead of solid white lights. Install a compatible controller for color selection, and program different color scapes for different moods, times of day, or special occasions.
Syncing With Smart Home Systems
Integrate your undercabinet lighting with your smart home:
- Choose Wi-Fi or Bluetooth-enabled LED controllers.
- Connect to your preferred smart home platform.
- Create voice commands or automated routines.
Adding Switched Outlets
In some situations, you may want an additional outlet to control with the same switch as your undercabinet lighting. Here’s how to add a switched outlet:
- Identify the circuit and turn off the power at the breaker.
- Install a new outlet box in a convenient location.
- Connect wiring from the existing switch to the new outlet, following local electrical codes.
- Use the switch to control both the LED lighting and the new outlet for added convenience.
Maintaining Your LED Lighting System
Proper maintenance will ensure your LED lighting continues to perform well for years to come.
Cleaning and Care Tips
To keep your lighting in top condition, follow these tips for regular maintenance:
- Avoid using abrasive cleaners, such as bleach or ammonia, that could damage the LEDs.
- Clean any grease buildup with a mild water and detergent solution.
- Dust LED strips regularly with a soft, dry cloth.
When To Replace LED Strips
While LEDs have a long lifespan, they may eventually need a replacement. If you notice significant dimming, color shifts, or lights that don’t work anymore, you may need to replace your LEDs. Consider upgrading to new lights after five to 10 years.
Regular System Checks
Performing regular checks can prevent issues and extend the life of your lighting system:
- Inspect connections and wiring for signs of wear or damage.
- Keep the power supply vented and free from dust accumulation to avoid overheating.
- Test the dimmer switch and other controls periodically to ensure they function correctly.
Our Conclusion
Installing undercabinet LED lighting is a rewarding DIY project that can improve both the function and the look of your kitchen. With careful planning and execution, you can achieve professional-looking results that will brighten your space for many years. Remember to prioritize safety throughout the installation process, and don’t hesitate to consult a professional electrician if you’re unsure about any aspect of the project.