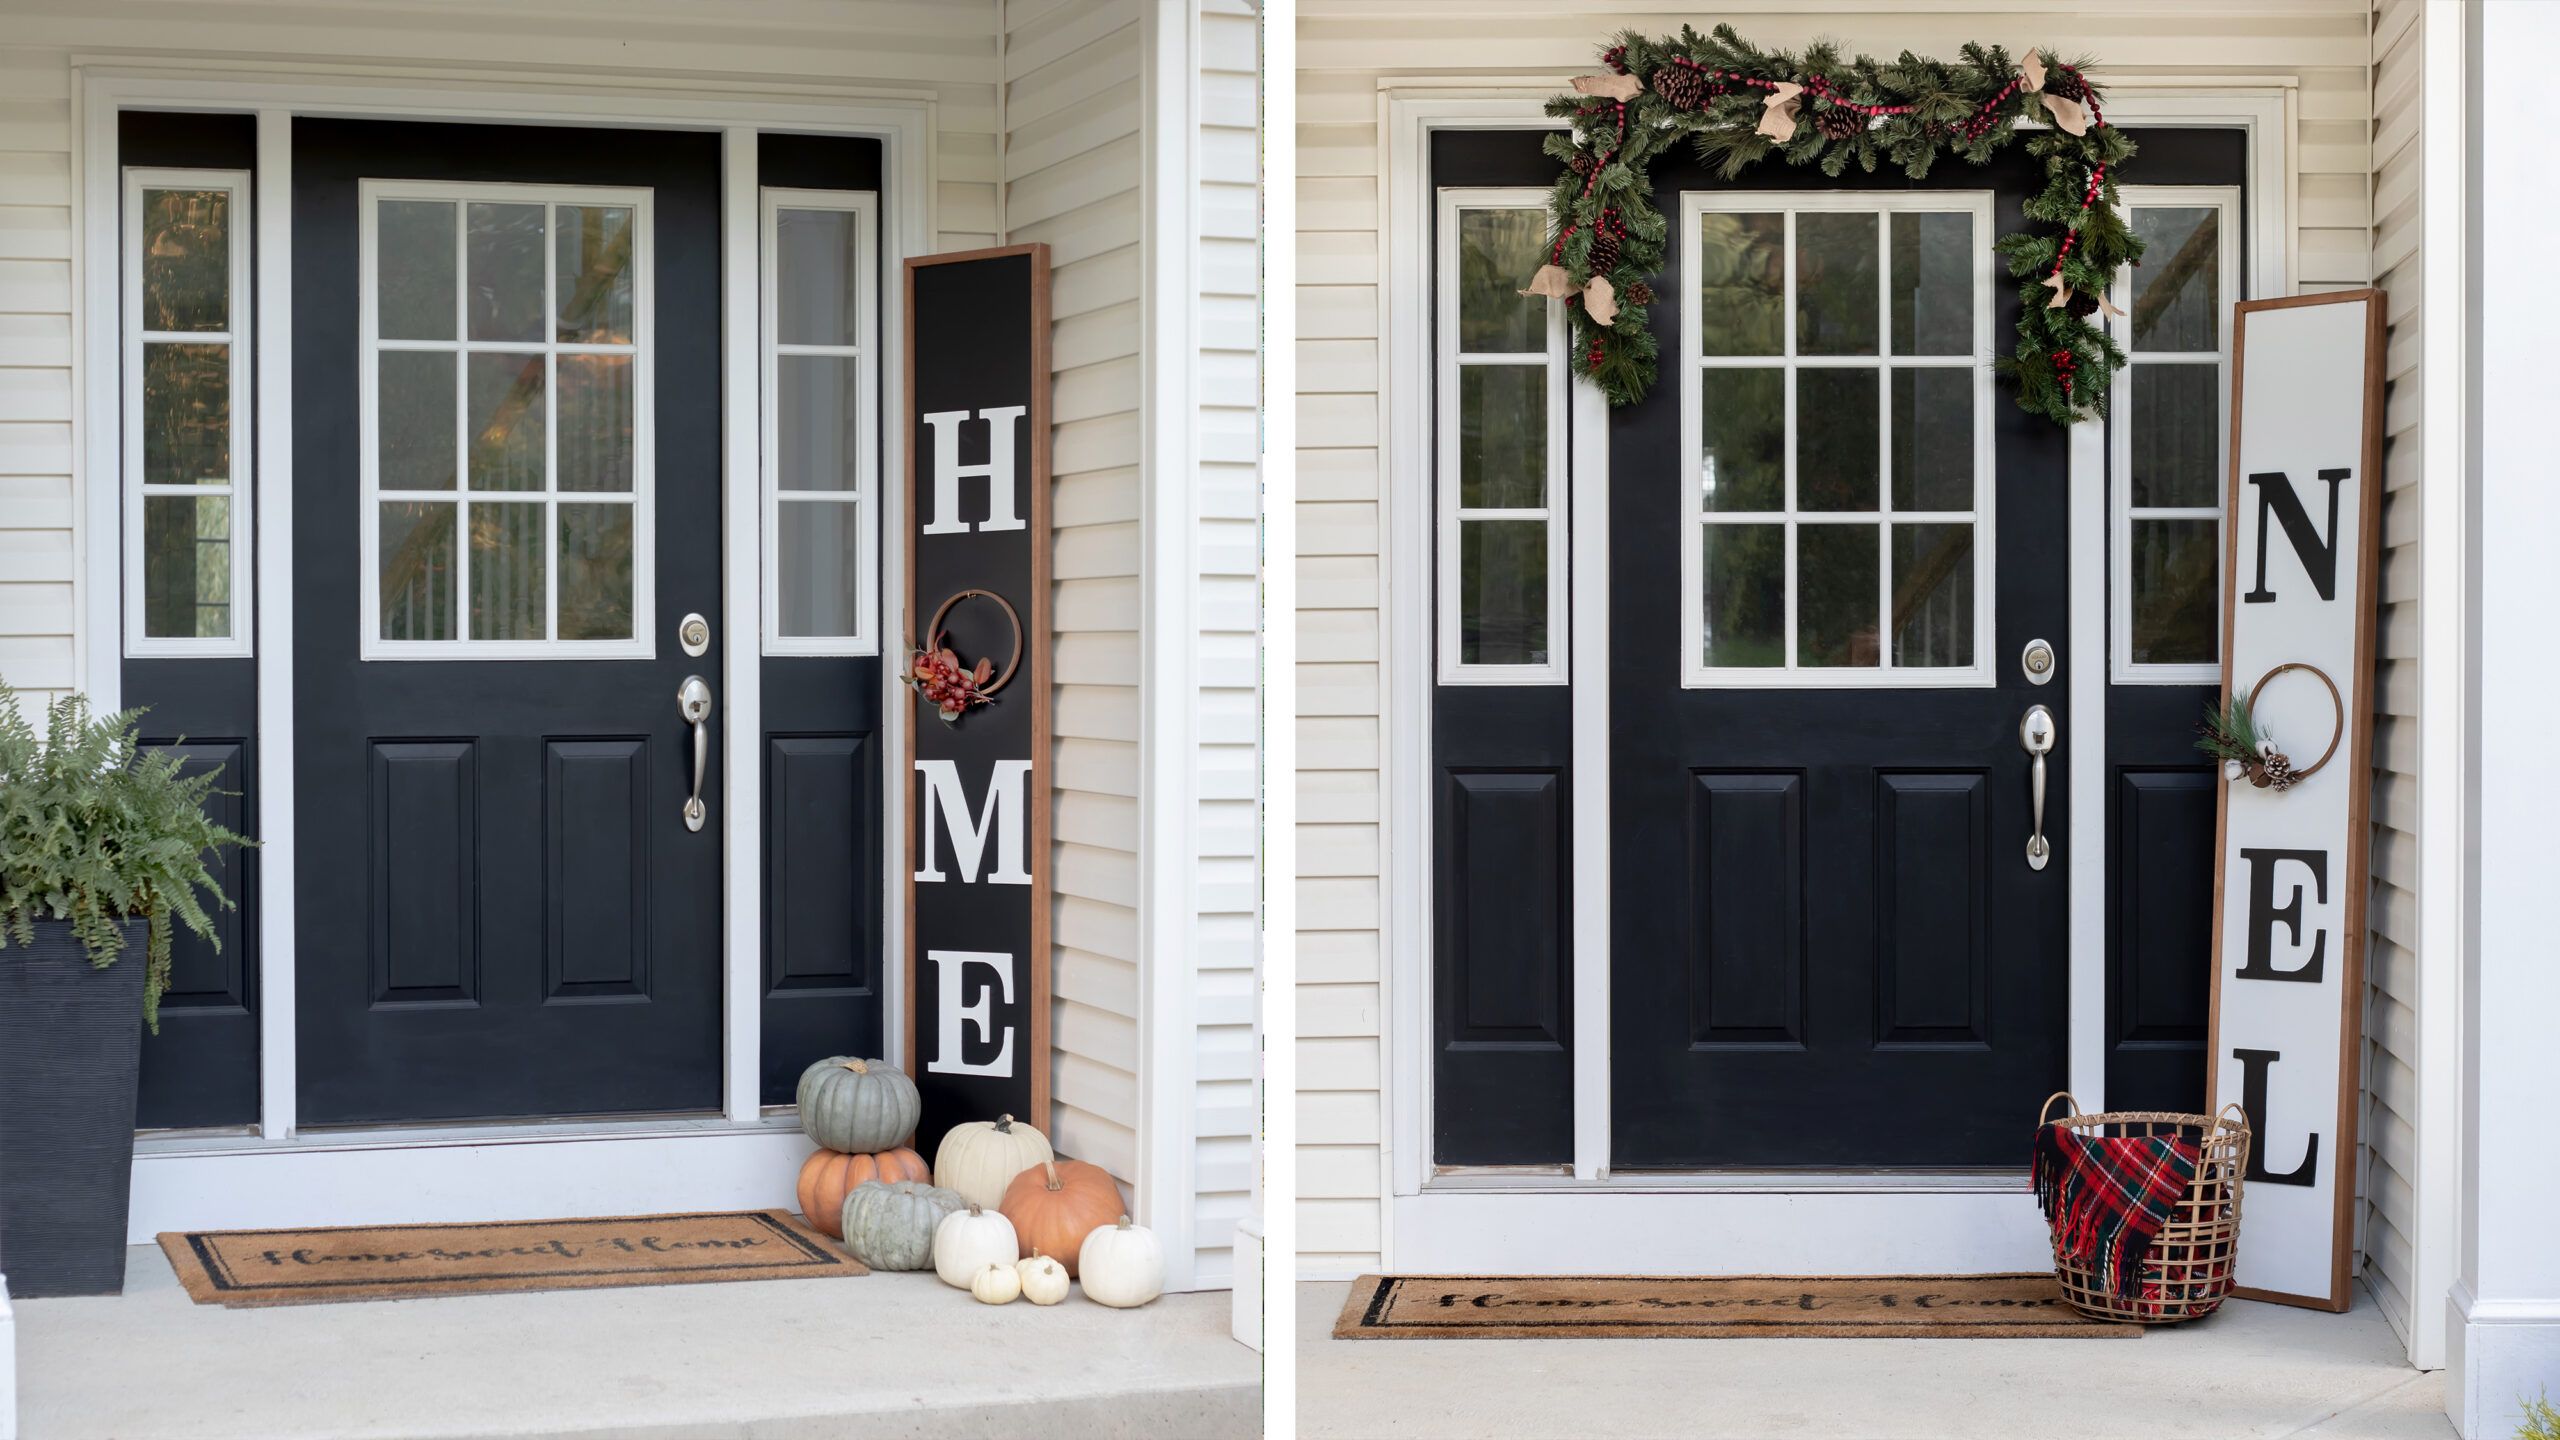
Reversible porch signs are a great way to add seasonal festivity to your front porch without taking up much space. This DIY project allows you to celebrate multiple seasons or holidays with a single piece, reducing storage needs and simplifying your seasonal decor transitions. In the video above, Jenn Largesse from House One demonstrates how to craft a reversible word sign that can be easily flipped and adorned to suit different times of the year.
Materials and Tools Needed for a Reversible Porch Sign
First, gather all your materials and tools, and take a look at the cuts you’ll need to make.
Materials
- 1-by-12-by-6-foot board
- Two 1-by-2-by-8-foot boards
- Two cup hooks
- 5/8-inch nails for securing letters
- 1 1/4-inch nails for securing frame boards
- Craft letters
- Paint or stain
- Polyurethane
- Wood glue
Tools
- Pencil
- Tape measure
- Drill/driver
- Miter saw
- Pneumatic nailer
- Combination square
- Paintbrush
- Small paint roller
Cut List
- Two 1-by-2 frames at 73 1/2 inches (mitered on edge at 45-degrees)
- Two 1-by-2 frames at 12 3/4 inches (mitered on edge at 45-degrees)
Preparing and Assembling the Porch Sign
The first step in creating your reversible porch sign is to prepare the base. This involves sizing the frame pieces and applying finishes to the main board and frame. Then, you’ll attach the letters, secure the frame, and add hooks for hanging wreaths.
Sizing the Frame Pieces
Start with the 1-by-12 board at its full 6-foot height. Measure and miter the 1-by-2 frame pieces on the edge so they wrap around the corners of the board. Use a miter saw to cut the frame pieces according to the measurements above.
Applying Finishes
To create a versatile sign that works for different seasons, you’ll want to apply contrasting finishes to each side of the board. Using a foam roller, apply two coats of white paint to one side of the board. Apply two coats of black paint to the other side of the board.
Paint the craft letters with a contrasting color, starting with the edges and then working across the flat sections. Stain the 1-by-2 frame pieces and follow with a protective coat of polyurethane.
Attaching the Letters
Measure and mark the location of each letter on one side of the board, leaving a gap for the “O” where the wreath will hang. Apply wood glue to the backside of each letter, and nail the letters into place using 5/8-inch nails.
Fill and touch up the nail holes as needed. Repeat the process for the letters on the opposite side of the sign.
Securing the Frame
Apply wood glue to one edge of the board. Place the corresponding frame piece centered on the thickness of the 1-by-12 board, ensuring it overhangs the face equally on each side. Secure the frame piece with 1 1/4-inch nails.
Apply glue to an adjacent edge and the exposed miter, then attach the next frame piece. Continue this process until all frame pieces are attached.
Installing Cup Hooks
To add versatility to your sign, install cup hooks for hanging wreaths by drilling a small pilot hole for the cup hook centered on the width of each side. Twist a cup hook into each pilot hole.
These hooks allow you to easily change out wreaths to match the current season or holiday.
Customizing Your Reversible Porch Sign
Below are some ideas to make your sign unique.
Choosing Words and Phrases
If you use the decorate wreath element, you’ll want to pick words that celebrate the season but feature an “O.” Some ideas include the following:
- Noel
- Joy
- Ho, ho, ho
- Boo
- Welcome
- Home
- Holiday
Selecting Decorative Elements
Enhance your sign with these additional decorative elements:
- Use different wreath styles to match the season (e. g., evergreen for winter, floral for spring).
- Add small hanging elements such as bells or ornaments for holidays.
- Incorporate battery-operated LED lights for a festive glow.
Experimenting With Finishes
While the project demonstrated in the video uses white and black paint, feel free to experiment with different color combinations or finishes.
- Try chalkboard paint on one side for easy customization.
- Use metallic paints for a touch of glamour.
- Experiment with weathered or distressed finishes for a rustic look.
Adding Artistic Touches
Customize the sign by adding artistic touches such as hand-painted designs or stenciled patterns.
- Personalize with family names, monograms, or holiday icons.
- Use stencils to create intricate designs without artistic expertise.
- Embellish with decorative trim or borders using wood appliques or moldings.
Maintaining Your Reversible Porch Sign
To ensure your DIY porch sign stays vibrant and in good condition:
- Apply a clear, weather-resistant sealant to protect the sign from moisture and UV damage.
- Clean the sign with a soft, damp cloth to remove dust and debris.
- Touch up paint or stain as needed to keep the sign looking fresh.
- Store the sign in a dry place during extreme weather conditions to prolong its life.
- Avoid displaying it in direct sunlight.