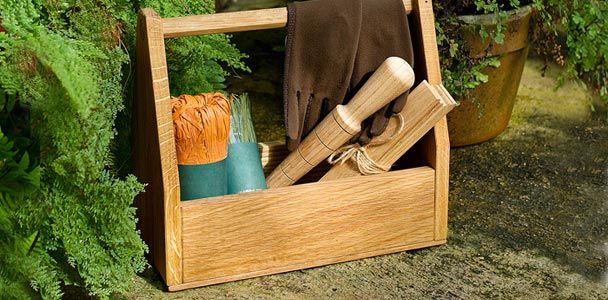
A garden tool tote is a great way to keep your lawn and yard tools organized and easily accessible when you’re out working in the yard. This practical DIY project allows you to customize your storage to protect your equipment. We’ll show you step-by-step how to build a wooden garden tool tote that will last.
Key Features To Consider for Your Tote
There are some design and construction features to take into account when designing your garden tool tote. You’ll need to decide on the following:
- Material: We recommend using either oak or cedar. Oak is strong and sturdy, while cedar offers natural resistance to rot and moisture.
- Size: Ensure the tote is large enough to hold your most-used tools but not too bulky or heavy to carry.
- Compartments: Consider adding divisions for better organization.
- Handle: A comfortable, sturdy handle makes for easy carrying.
- Drainage: Include a way for dirt and moisture to escape.
 Tape measure
- Straight edge
- Pencil
- Circular saw
- Clamps
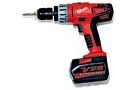
- Drill/driver
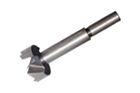
- Forstner bit – 1 5/16-inch
- Masking tape
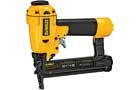
- Brad nailer
- sandpaper – 220-grit
- Tack cloth
- Lint free cloth


Before You Start Making Your Tote
Set up a safe workspace with enough room to complete the project. Clear a large, flat surface and ensure enough lighting and airflow, especially if you’ll be working with paints, finishes, or stains. Organize and layout your tools so that they’re easy to access as you work. Wear the appropriate safety equipment for protection, such as gloves and goggles.
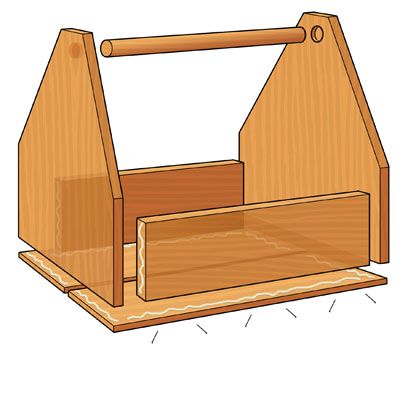
Step 1: Make Your Wood Cuts
For a tool tote that measures 19 and a half inches long by 9 and a quarter inches wide by 17 inches tall, you’ll need the following cuts:
- 1×6 oak for the front and back (two pieces at 18 inches)
- 1×10 oak for the sides (two pieces at 16 1/2 inches)
- 1 1/4-inch oak dowel for the handle (one piece at 18 7/8 inches)
- 1/2-by-6-inch oak pieces for the bottom: (two pieces at 19 1/2 inches, ripped to 4 1/2 inches wide)
Step 2: Cut the Sides
Lay the two blanks for the sides on your worktable, face up. Measure to find the center point along the top of each blank and mark spots at 3/4 an inch to each side of that point. Then measure and mark spots along the sides, 6 1/2 inches up from the bottom. Use a straightedge to draw a line connecting each top mark to its corresponding side mark. Cut along each line with a straightedge and a circular saw or jigsaw to form the gable-shaped sides for the tote.
Step 3: Fit the Handle

Clamp the cut sides to your worktable and measure a spot 1 1/2 inches down from the center peak of each gable. Fit your drill with a 15⁄16-inch Forstner bit and use painter’s tape to mark the bit half an inch up from its tip. Drill into each side at the marked spots to form the holes for the handle, stopping when the tape meets the face of the board.
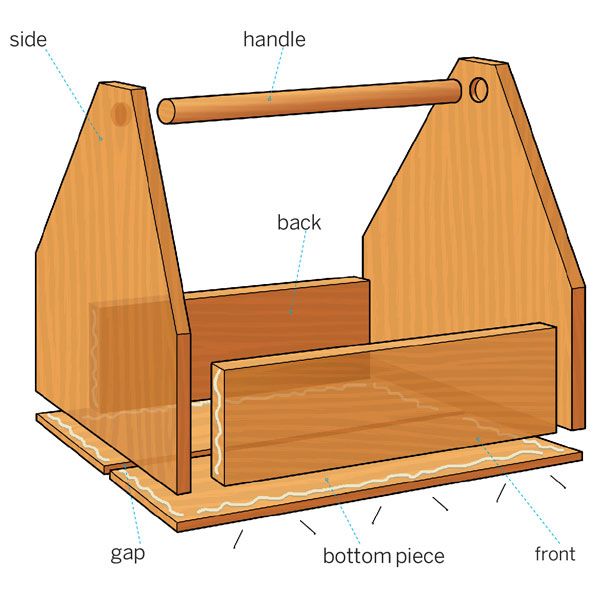
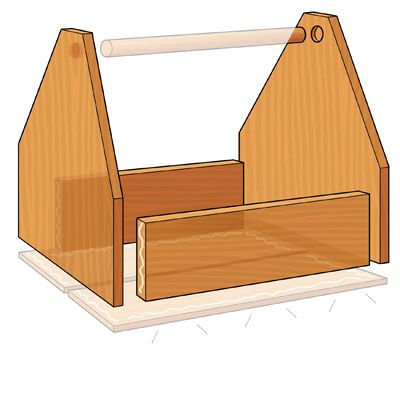
Step 4: Assemble the Box
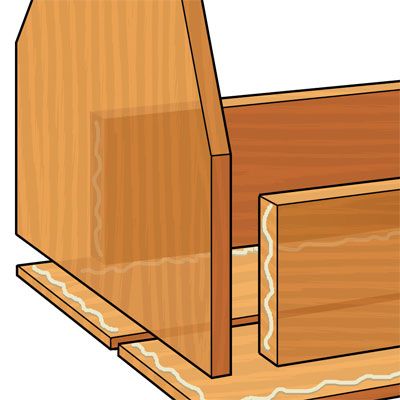
Sandwich the front, back, and handle between the two sides, applying wood glue to the captured edges but not the holes—you want to leave the handle free to spin. Clamp the assembly together, and use a pneumatic nailer with 1 1/2 inch brads to fasten the sides to the front and back. Flip the box upside down and run a bead of glue around its bottom edge. Position the pieces for the bottom of the box so that they’re flush with the front and back, which will leave a quarter-inch gap between them. Clamp the bottom pieces in place and fasten them with brads, fired at a slight angle into the box to provide a better hold.
Step 5: Finish the Box
Fill the nail holes with wood filler and allow it to set. Sand the entire box with 220-grit paper and wipe it clean with a tack cloth. Finish the piece by rubbing it with a mix of equal parts mineral spirits and boiled linseed oil, applied with a lint-free rag.
Customize Your Tote
Once your garden toolbox is complete, check out some of the customization ideas below. Personalize your garden tool tote with stylish designs or extra storage to better fit your style and working needs.
Add Compartments
If you need more specific or dedicated space in your tote, you can cut small pieces of wood to fit inside the tote. Attach these dividers using wood glue and small nails. Consider making some compartments removable for flexibility.
Personalizing with Paint or Stains
Paint your box to add a pop of color that matches your home decor or garden. If you like a more classic look and prefer to enhance the wood’s natural beauty, consider applying a stain. Be sure that the paint or stain of your choice is graded for outdoor use. Sand and prime your tote’s surface. Apply the finish according to the product instructions. For paint, you may need more than one coat. Make sure each coat fully dries before painting the next one. Add designs and decorations through stenciling, etching, or burning. Be cautious when using tools to create these designs.
Maintain Your Garden Tool Tote
Here are some tips to keep your garden tool tote in top condition.
Cleaning and Care Tips
- Remove dirt and debris after each use with a stiff brush.
- Occasionally wipe down the tote with a damp cloth.
- Reapply linseed oil annually to protect and reseal the wood.
Storage Recommendations
- Store your tote in a dry, covered area when you’re not using it.
- Avoid leaving it exposed to direct sunlight or rain for extended periods.
- Consider using a tarp or cover if storing outdoors.
Other Garden Tool Storage Ideas
While a homemade garden tool tote is versatile, portable, and a fun way to personalize your outside space, there are other storage options for your gardening needs, though they may take more time to set up.
DIY Garden Tool Rack
A wall-mounted tool rack can keep tools organized and easily accessible. It can be attached to any wall inside or outside your home, garage, or shed. This option works well for larger tools and can be used alongside your DIY portable tote. To create a simple tool rack, mount a sturdy board to your wall. Attach hooks or pegs at various intervals. Hang your tools by their handles or through pre-drilled holes.
You can learn more about organizing your garden space in our guide on how to build a raised vegetable garden.
Plastic Garden Shed
For those with limited space or an extensive collection of tools, a plastic shed can be an all-encompassing solution. Just choose a weather-resistant plastic shed, and install shelves or pegboards for organization. Use clear plastic bins to categorize smaller items. Make sure the shed is properly ventilated to prevent moisture buildup.
Remember to keep your compost bin nearby for easy access while gardening.