A range hood, also known as a ventilation hood, is a must-have for your kitchen. Not to be confused with an exhaust fan, these handy appliances help keep your kitchen free from pesky particles like smoke, grease, and odors with their filtration systems. Whether you’re renovating your kitchen or upgrading your stove, choosing the right range hood can make a big difference in your cooking experience. Read our tips on how to find the perfect range hood for your kitchen.
What Is a Range Hood?
A range hood is a ventilation system that sits above your cooktop or stove. Range hoods come in various styles and sizes designed to fit different kitchen layouts and cooking needs. They remove and filter out smoke, grease, and other byproducts of cooking so your kitchen doesn’t turn into a stuffy mess.
Why Is Proper Ventilation Important?
Smoke from cooking can be unhealthy. According to the United States Environmental Protection Agency, cooking is a big source of indoor particulate matter. They recommend routing all range hoods to the outdoors so those harmful particles don’t stay in your kitchen.
Types of Range Hoods
Range hoods come in several styles, some of the most popular being wall-mounted hoods, island hoods, under-cabinet hoods, and ductless hoods. Understanding the various types will help you choose the best option for your space.
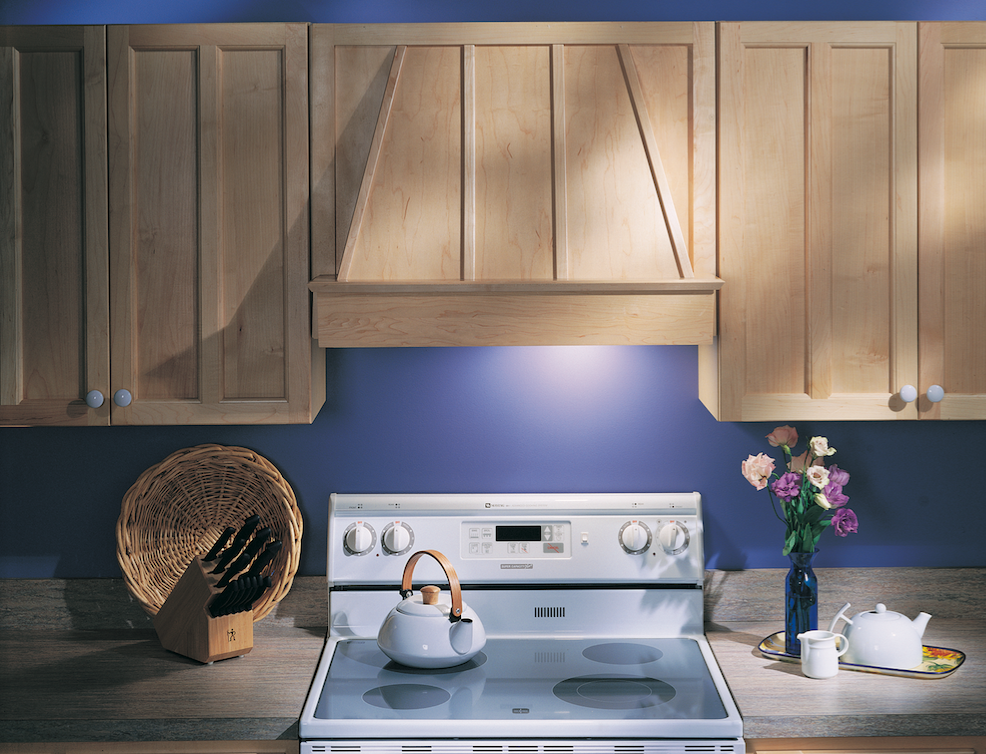
- Wall-mounted hoods: Wall-mounted hoods are a popular choice for kitchens with stoves positioned against a wall. These hoods are typically wider than the cooking surface and extend from the wall for better ventilation.
- Island hoods: Island hoods are designed for kitchens with a cooktop on a central island. These hoods suspend from the ceiling and often feature a more decorative design since they’re visible from all angles. Island hoods require careful planning for ductwork and electrical connections.
- Under-cabinet hoods: Under-cabinet hoods sit beneath kitchen cabinets, making them an excellent space-saving option for smaller kitchens. They’re less visible than other types and can be more economical. However, they often have less powerful ventilation compared to larger hood types.
- Ductless hoods: Ductless hoods are an affordable choice, but they’re not the most effective. You can install them above your stovetop like a wall-mounted range hood, but they don’t connect to any ductwork. They use suction fans to draw in air and push it through a charcoal filter. However, the air recirculates back into your kitchen.
Key Range Hood Features To Consider
Several key features can improve the functionality of a range hood. Research the following factors when choosing your range hood to make the best selection for your kitchen needs.
Filter Types and Maintenance
Range hoods use different types of filters to trap grease and other particles. Baffle filters are durable and easy to clean, while mesh filters are less expensive but require more frequent cleaning. Some high-end models feature self-cleaning systems.
Charcoal filters are typically part of ductless systems, but you can’t clean them. You’ll need to replace charcoal filters regularly. If you choose any other type of filter, regular cleaning is essential to keep your range hood functioning well. Manufacturers recommend cleaning the filters after every 30 hours of use—about every two months—to keep the fan running smoothly.
Lighting Options
Many range hoods include built-in lighting to illuminate your cooking surface. LED lights are energy-efficient and long-lasting, while halogen bulbs offer bright, warm light. Consider models with adjustable brightness for versatility.
Smart Technology Integration
Some modern range hoods offer smart features such as automatic sensors that adjust fan speed based on heat and smoke levels or Wi-Fi connectivity for remote control via smartphone apps. These features can be convenient, but they often come at a price.
CFM Rating
All vents are labeled with a cubic feet per minute (CFM) rating, which measures how much air they move. To find an insert with the right amount of power, use this cheat sheet: For standard cooktops and ranges, calculate 100 CFM for every linear foot of cooking surface. For high-end, pro-style ranges (greater than 60,000 BTU), use 100 CFM for every 10,000 BTUs the appliance generates.
Noise Level
Check the sone rating before buying—it’s a specification most vent manufacturers include—and look for appliances carrying the Home Ventilating Institute (HVI) certification. 1 sone is equivalent to about 40 decibels. While a fan set on low can be under a sone, it can jump to 10 or more on high. Look for an insert that is 8 or fewer sones at 600 CFM.
Range Hood Costs
Range hoods come in a wide variety of price points due to their differences in size, power, features, and design.
What Factors Affect the Cost of a Range Hood?
Several factors influence the cost of a range hood:
- Additional features (lighting, smart technology): Features like integrated lighting, touch controls, or smart technology for remote operation can add to the cost but offer convenience and enhanced functionality.
- Installation complexity: The difficulty of installation, such as requiring new ductwork or electrical upgrades, can significantly affect the overall price.
- Material and finish: Premium materials like stainless steel or custom finishes, such as glass or copper, often raise the price compared to basic metal or plastic options.
- Size and type of hood: Larger hoods or more specialized types, such as wall-mounted or island hoods, tend to cost more due to the increased materials and installation requirements.
- Ventilation power (CFM rating): A higher CFM (cubic feet per minute) rating means stronger airflow, which can increase the cost, especially for powerful hoods designed for high-output cooking appliances.
How Much Do Different Types of Range Hoods Cost?
On average, it costs between $650 and $2,500 to install a range hood. These prices can vary significantly based on what type of range hood you buy:
- Ductless hoods: These tend to be the least expensive option, usually running from $200 to $400 for installation and materials.
- Basic under-cabinet range hoods: These cost between $700 and $1,000 for materials and installation.
- Wall-mounted range hoods: Wall-mounted hoods cost between $700 and $1,000 for the hood and installation.
- Island hoods: Island hoods cost between $500 and $1,400 for the hood and installation.
Cost data in this article was sourced from Angi.
DIY vs. Professional Installation
If you’re a skilled handyman, you may be able to install a range hood and ductwork yourself. However, it’s worth getting a professional to do it for most homeowners. Consider your skills and the complexity of the installation when deciding whether to hire a pro.