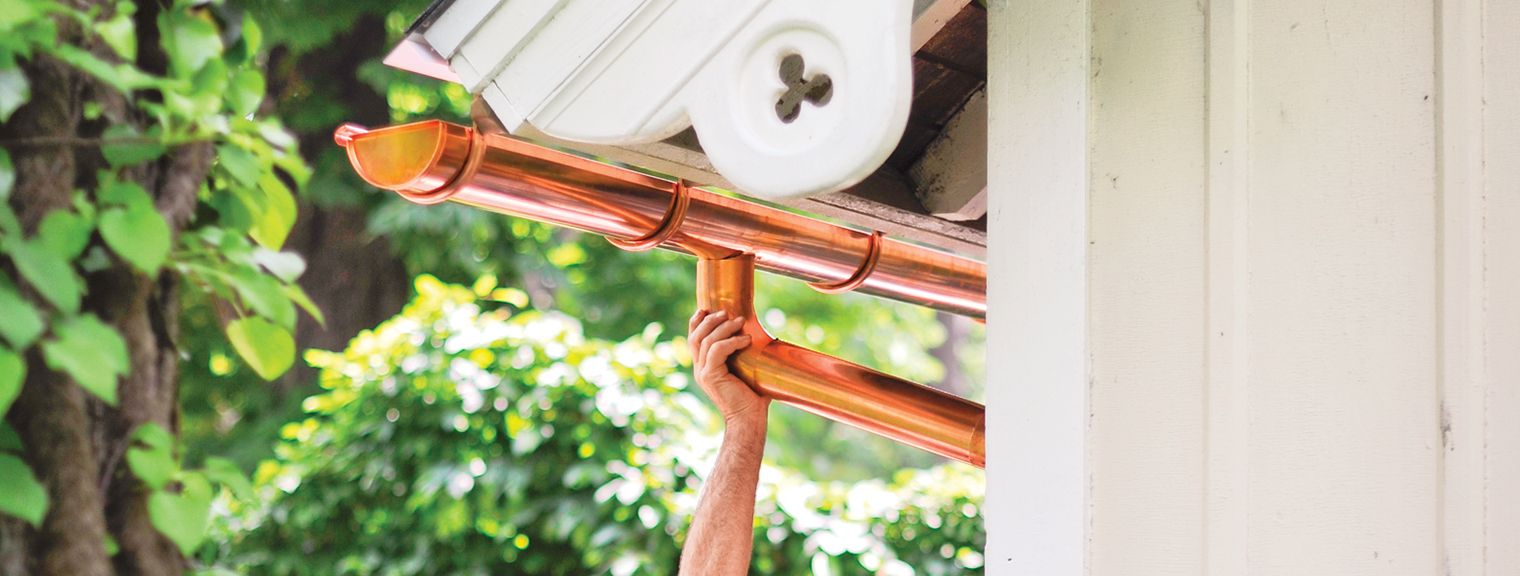
Half-round gutters are one of the most common types of gutters, providing excellent water drainage. In this guide, we’ll walk you through installing half-round gutters, from their benefits to troubleshooting common issues. Whether you’re a DIY enthusiast or want to understand the process better before hiring a professional gutter installer, this article will give you the knowledge to tackle this home improvement project.
What Are Half-Round Gutters?
Half-round gutters, as the name suggests, are shaped like a half-circle or tube cut lengthwise. This design lets the gutters channel water away from your home’s foundation. Unlike K-style gutters, which have a flat back and bottom, half-round gutters have a smooth, curved profile.
Benefits of Half-Round Gutters
Half-round gutters offer many advantages over other gutter styles, one of the biggest benefits being more efficient water flow. The smooth, curved shape allows water to flow more freely, reducing the likelihood of clogs and debris buildup.
This also makes them more durable. With fewer corners and seams, they’re less prone to leaks and corrosion. Because of their open design, half-round gutters are also easier to maintain. They can also be installed on homes with many roof types and pitches.
Materials for Half-Round Gutters
Half-round gutters are available in many materials, each with its own pros and cons.
- Copper: Offers a distinctive look that develops a patina over time. Copper is durable and long-lasting but can be expensive.
- Aluminum: Lightweight, rust-resistant, and affordable. Available in different colors but may dent more easily than other materials.
- Galvanized steel: Strong and durable and more affordable than copper. However, it may rust over time if not properly maintained.
- Zinc: Offers durability and develops a protective patina similar to copper. Zinc is more expensive than aluminum but less costly than copper.
Preparing for Half-Round Gutter Installation
Proper preparation makes for a successful half-round gutter installation. This section covers the tools and materials you’ll need, as well as measuring and planning your gutter system.
Tools and Materials Needed
To install half-round gutters, you’ll need the following tools and materials:
- Chalk line
- Downspouts and elbows
- Drill with bits
- End caps
- Gutter brackets
- Gutter sealant
- Gutter sections
- Ladder
- Level
- Measuring tape
- Outlet fittings
- Screwdriver
- Screws and fasteners
- Tin snips or metal shears
For copper gutters, you may also need:
- Flux
- Solder
- Soldering iron
Measuring and Planning Your Gutter System
Before purchasing materials, measure the length of your roofline where the gutters will be installed. Remember to account for any obstacles, such as chimneys or dormers that may affect your gutter layout. Consider the following factors:
- Roof pitch: Determine the slope of your roof for proper gutter placement.
- Downspout locations: Plan where your downspouts will be placed, typically at corners or low points.
- Gutter size: Choose the appropriate gutter size based on your roof area and local rainfall intensity.
- Bracket spacing: Plan to install brackets every 24 to 36 inches for proper support.
Setting the Pitch and Brackets for a Half-Round Gutter System
Proper pitch is important for water drainage in your half-round gutter system. This section will guide you through determining the high point, calculating the pitch, and attaching the gutter brackets.
Determining the High Point
The high point of your gutter run is typically the farthest point from a single downspout or the midpoint between two downspouts. To find this point:
- Identify the planned downspout locations.
- Measure the distance between them or from one end of the gutter run to the downspout.
- Mark the high point on your fascia board.
Calculating and Marking the Pitch
Half-round gutters require a slight slope for proper water flow. Follow these steps to calculate and mark the pitch:
- Use a water level or laser level to make a mark at the downspout end, which is the level with the high point.
- Measure down from this mark, allowing for a slope of 1/4 inch for every 10 feet of gutter run.
- Mark this lower point on the fascia.
- Snap a chalk line between the high point and the lower point to create a guide for your gutter brackets.
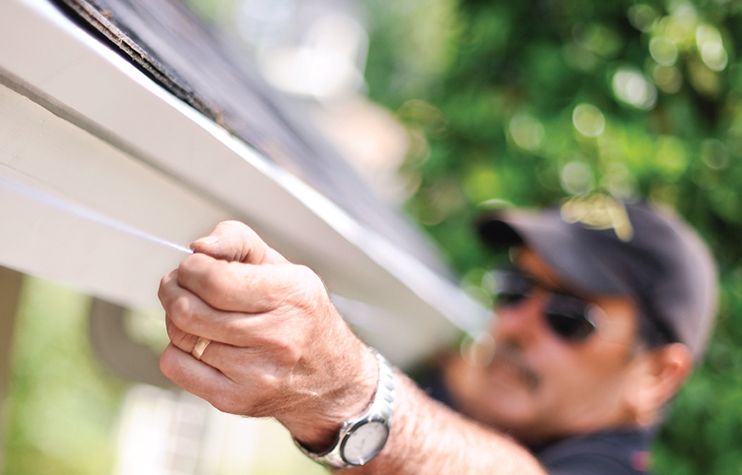
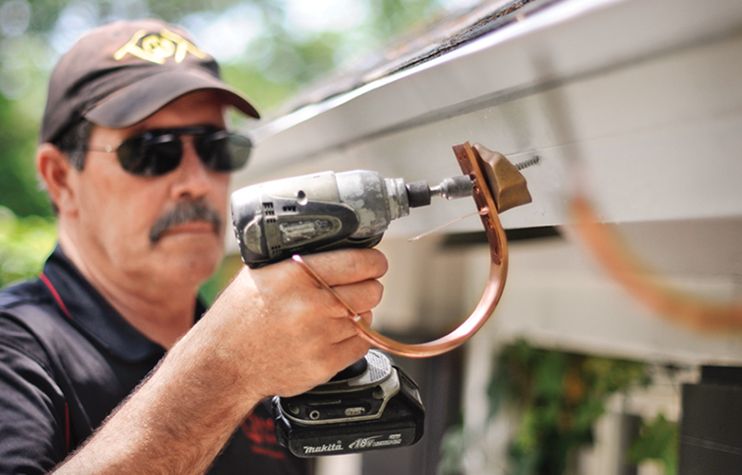
Attaching Gutter Brackets
With your pitch line established, you can now install the gutter brackets:
- Start at the high point and work your way down to the downspout end.
- Space brackets no more than 32 inches apart, aligning them with your chalk line.
- Locate the rafter tails behind the fascia for a secure attachment.
- Drill pilot holes and screw the brackets into place.
- For angled fascia, use wedges so the brackets remain plumb.
Cutting and Shaping the Half-Round Gutters
Once your brackets are in place, it’s time to prepare the gutter sections. This involves measuring, cutting, and creating holes for downspouts.
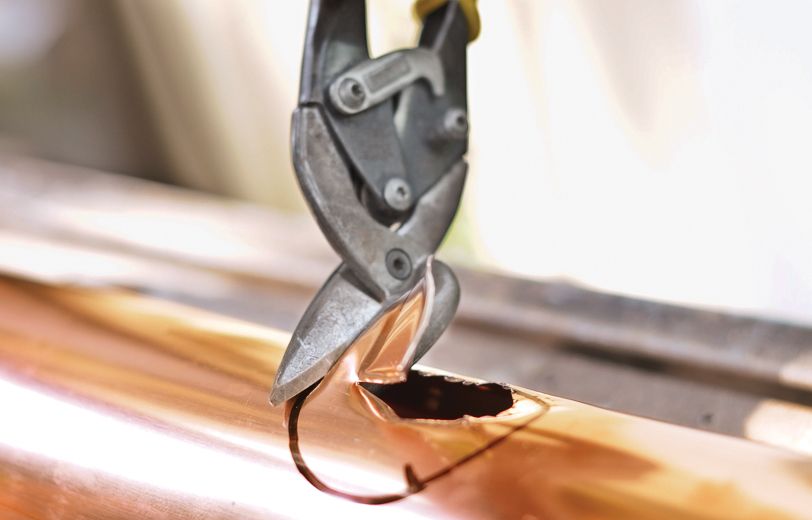
Measuring and Cutting Gutter Sections
For a proper fit, follow these steps:
- Measure the distance between end caps or corners.
- Transfer this measurement to your gutter section with a slight overlap at joints.
- Mark the cutting line with a pencil.
- Use tin snips or a metal saw to cut the gutter section to size.
- Smooth rough edges with a file to prevent injury and provide a tight seal.
Creating Downspout Holes
Proper placement of downspout holes will provide proper water drainage:
- Measure the distance from the end of the roof to the planned downspout location.
- Transfer this measurement to your gutter section.
- Mark the center of the downspout hole.
- Use a hole saw or metal shears to cut the opening, making it slightly smaller than the downspout outlet fitting.
- File the edges of the hole smooth.
Installing the Gutter Sections
With your gutters cut and prepared, you can hang them and join the sections together. This part of the process requires careful handling to avoid damaging the gutters.
Hanging the Gutters
Follow these steps to hang your half-round gutters:
- Start at one end of the gutter run.
- Lift the gutter section into place, hooking the back edge onto the brackets.
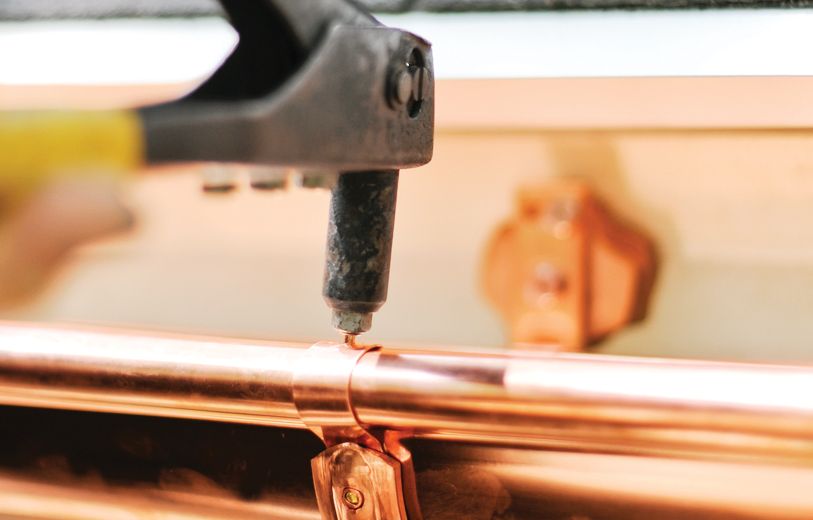
- Secure the front edge of the gutter to the brackets using spring clips, screws, or stainless-steel pop rivets.
- Continue along the run, making sure each section is level and properly aligned.
Joining Gutter Sections
For longer runs, you’ll need to join multiple gutter sections:
- Apply a bead of gutter sealant to the inside of one gutter end.
- Overlap the sections by about 1 inch.
- Secure the joint with rivets or screws.
- Apply additional sealant to the inside of the joint for extra protection.
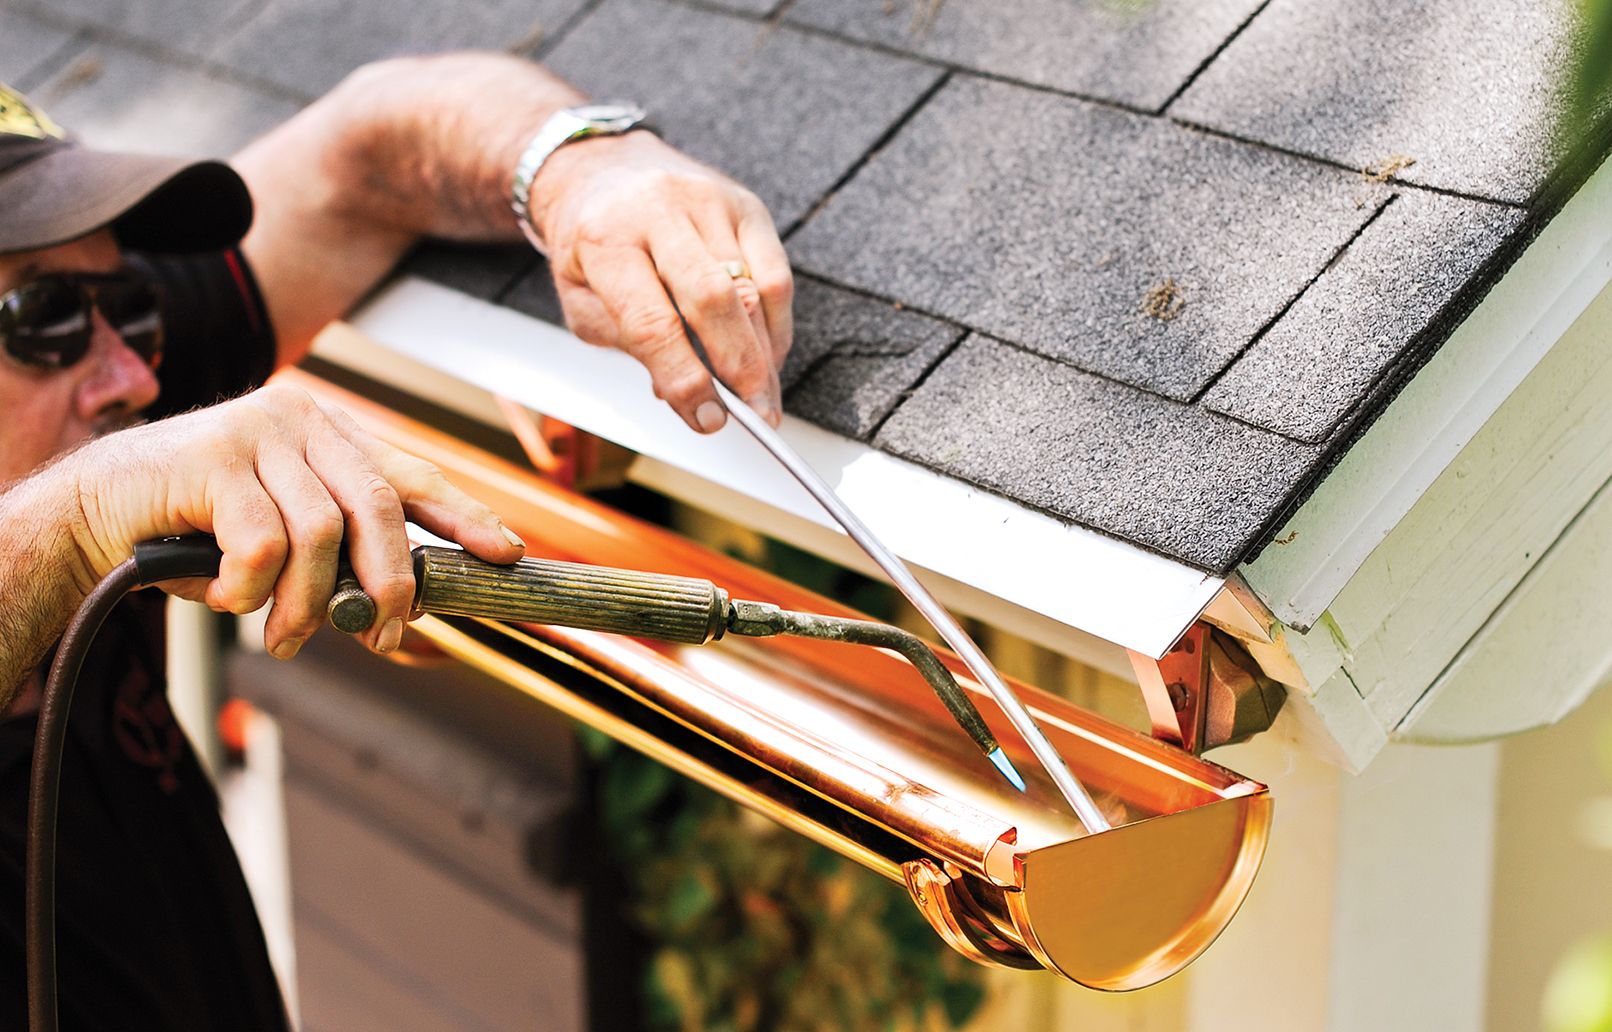
Soldering Seams and End Caps
For copper gutters, soldering provides a watertight seal:
- Clean the areas to be soldered with emery cloth.
- Apply flux to the joint.
- Heat the area with a torch until the flux bubbles.
- Apply 50/50 solder to the heated joint.
- Allow the solder to cool, then clean the area.
Adding Downspouts to Your Half-Round Gutter
Downspouts direct water away from your home’s foundation. This section covers assembling and attaching downspouts to complete your gutter system.
Assembling Downspout Components
Before attaching downspouts to your home, assemble the components:
- Connect elbows to the outlet fitting at the gutter.
- Measure and cut downspout sections to fit between elbows.
- Check that each upper piece fits inside the lower piece for proper water flow.
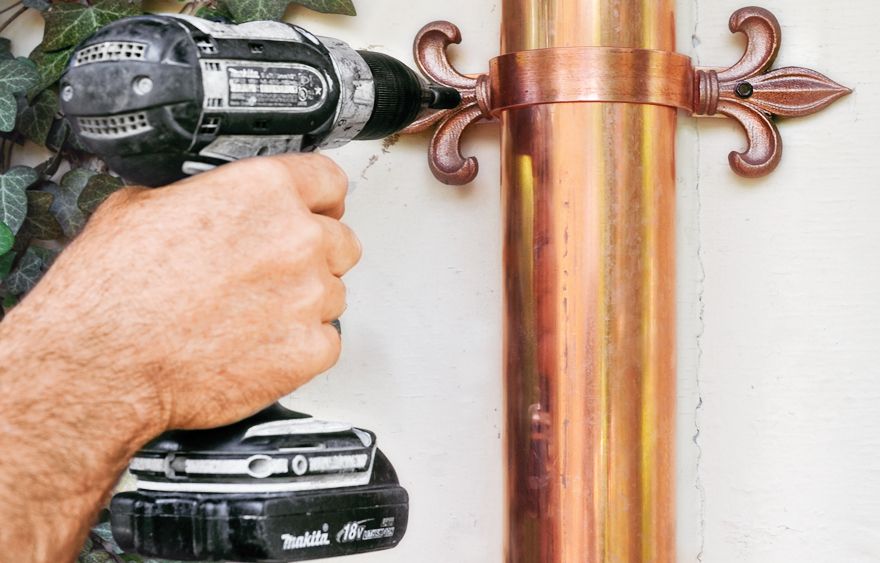
Attaching Downspouts to the House
For good drainage, consider how to drain downspout water flow away from a house to protect your foundation. Secure your downspouts so they remain in place by following these steps:
- Position the top elbow over the outlet fitting.
- Use a level to check the downspout is vertical.
- Attach brackets near the top and bottom elbows and every six to eight feet along the downspout.
- Secure the brackets to the house with screws or masonry anchors.
Half-Round Gutter: Maintenance and Care
Proper maintenance protects the longevity and effectiveness of your half-round gutter system. Regular care can prevent many common issues and extend the life of your gutters.
Cleaning Your Half-Round Gutters
To keep them functioning properly, clean your gutters at least twice a year or more often, depending on how many trees you have nearby. You can remove debris by hand or with a small scoop. Flush the gutters with water to check for proper drainage and leaks, inspecting the brackets and joints for signs of damage and wear.
Preventing Clogs and Damage
To minimize clogs and damage, install gutter guards to reduce debris buildup and trim overhanging tree branches to limit leaves and twigs from falling into gutters. Check for ice dams in winter and use heated cable if necessary. Check that your roof’s drip edge and step flashing are installed correctly to direct water into the gutters.
Half-Round Gutter Installation: Troubleshooting Common Issues
Even with proper installation and maintenance, you may encounter some issues with your half-round gutters. Leaks and sagging gutters are not uncommon, but luckily they can both be fixed fairly quickly.
Addressing Leaks
Inspect all joints and seams for gaps or cracks if you notice leaks in your gutter system. After identifying any leaks, clean the surrounding area and let it dry completely before applying gutter sealant to small gaps or leaks. For larger issues, you may need to replace a section of gutter or re-solder joints in copper systems.
Fixing Sagging Gutters
Sagging gutters can lead to improper drainage and potential damage. Check bracket spacing and add additional support if needed while checking that they’re securely fastened to the fascia board. Confirm that the gutter pitch is correct and adjust it if necessary, replacing damaged or bent gutter sections.