We may be compensated if you purchase through links on our website. Our team is committed to delivering honest, objective, and independent reviews on home products and services.
Project details
Skill
Cost
Estimated Time
Fiberglass gutters are a less common style of gutter offer a durable and attractive solution for homeowners looking to protect their homes from water damage while maintaining a classic style. These gutters combine the traditional look of wood with modern materials that resist rot and never need painting. In this guide, we’ll walk you through the process of installing fiberglass gutters, from understanding their benefits to the final touches of installation.
Preparing for Fiberglass Gutter Installation
Proper preparation is key to a successful fiberglass gutter installation. Here’s what you need to know before you begin.
Tools and Materials Needed
To install fiberglass gutters, you’ll need the following tools and materials:
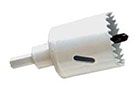
- 2 1/2 inch hole saw bit
- 4-foot spirit level
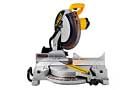
- 12-inch miter saw
- 80-grit sandpaper
- Brad nailer
- Chalk line
- Chip brush
- Drill/driver
- Downspout outlets
- Dust mask
- Fiberglass gutter sections
- Fiberglass mat
- Latex gloves
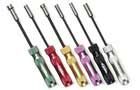
- Nut driver
- Organic-vapor respirator
- Painter’s tape
- Pencil
- Polyester resin and gelcoat
- Safety goggles
- Stainless steel screws and brads
- Tape measure
- Utility knife
 Pencil
- Tape measure
- Brad nailer
- miter saw – 12-inch
- spirit level – 4-ft.
- Chalk line
- Dust mask
- Latex gloves
- Safety goggles
- sandpaper – 80-grit
- Organic-vapor respirator
- Drill/driver
- Painter’s tape
- Chip brush
- Utility knife
- hole saw bit – 2 1/2 inch
- Nut driver


Safety Precautions
Working with fiberglass and resins requires careful attention to safety. Always wear protective gear, including gloves, safety goggles, and a respirator when handling these materials. Check for proper ventilation in your work area, and follow all manufacturer guidelines for handling and disposal of materials.
Measuring and Planning
Before purchasing materials, measure the length of your roofline where gutters will be installed. Plan for a slope of 1/4 inch for every 10 feet of gutter to achieve proper drainage. Mark the locations for downspouts, typically at corners or where water tends to collect.
Step-by-Step Fiberglass Gutter Installation Process
Follow these steps to install your fiberglass gutters correctly and efficiently.
Attaching Stand-Off Blocks
Begin by creating stand-off blocks from cellular PVC trim. Cut 5/16-inch slices and nail them vertically to the fascia at each rafter location using stainless steel brads. These blocks provide a secure mounting point for the gutters and allow for proper water flow behind them.

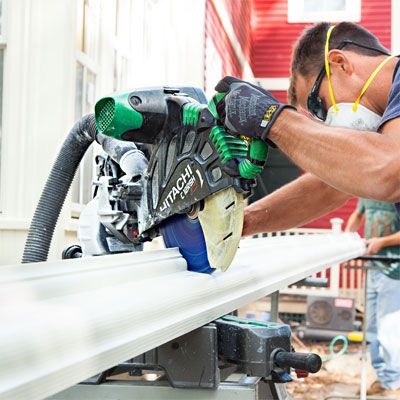
Cutting Gutter Sections to Length
Using a 12-inch miter saw, cut the gutter sections to fit your roofline. For corners, miter the ends at a 45-degree angle. Remember to account for the thickness of the stand-off blocks when measuring for outside corners.
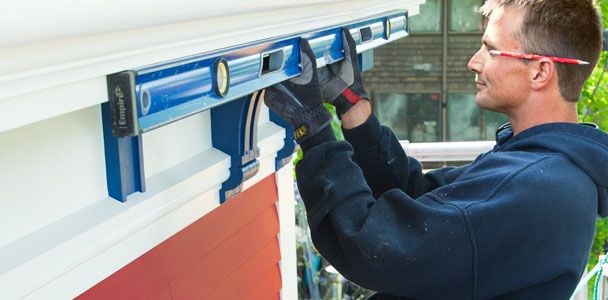
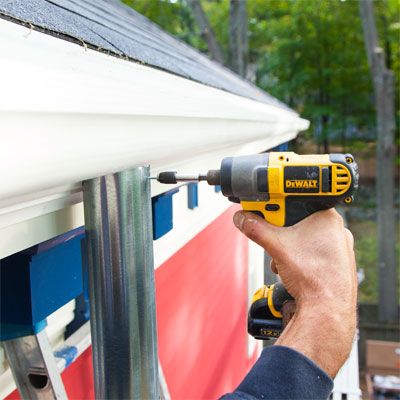
Mounting the Gutter
With a helper, lift the gutter into position against the spacers. Align the back edge with a chalk line snapped to achieve a proper slope. Secure the gutter by driving stainless steel structural screws through the back edge, stand-off block, and into the rafter at each block location.

Sealing the Joints
For a watertight seal at joints and end caps:
- Superglue the pieces together and tape the outside of the joint.
- Cut two 6-inch-wide strips of fiberglass mat to cover the joint inside the trough.
- Mix polyester resin and gelcoat, then brush it onto the sanded surfaces and fiberglass strips until saturated.
- After 30 minutes, trim any excess fibers and remove the tape.
Installing End Caps and Miters
End caps and mitered corners prevent leaks and provide a seamless fit.
To install end caps:
- Apply a bead of marine-grade polyurethane sealant to the end of the gutter.
- Fit the end cap onto the gutter and press firmly.
- Secure the cap with stainless steel screws, creating a tight seal.
To create mitered corners:
- Measure and cut 45-degree angles on the gutter sections to form the corner.
- Join the pieces using the same method as sealing the joints.
- Use additional fiberglass mat and resin to reinforce the corner from the inside.
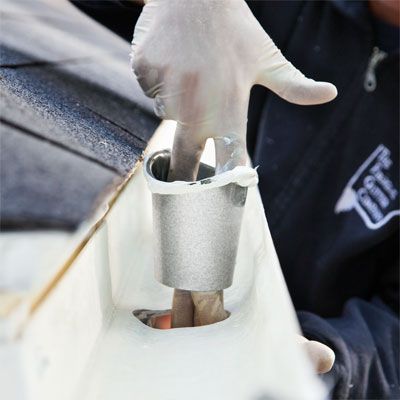
Setting the Outlets
At each downspout location, cut a 2 1/2-inch hole in the gutter bottom. Apply marine-grade polyurethane sealant to the outlet flange and set it into the hole. Allow the sealant to set for about an hour before attaching the downspout.
Downspout Installation for Fiberglass Gutters
Proper downspout installation leads to efficient water drainage away from your home’s foundation.
Cutting Holes for Downspouts
Use a 2 1/2-inch hole saw to cut through the bottom of the gutter trough at marked downspout locations. Make sure the hole is clean and smooth to prevent leaks.
Attaching Downspouts to Gutters
Fit the downspout over the outlet and secure it with three stainless steel sheet-metal screws. Repeat this process at each downspout joint to create a tight connection.
Securing Downspouts to the House
Attach downspout straps to the house siding or exterior wall to keep the downspouts in place. Space the straps every 6 to 8 feet along the length of the downspout for proper support.
Releasing Water Flow
To guarantee that the water flows efficiently through the downspouts, angle the bottom section of the downspout away from the house’s foundation. This prevents water accumulation around the structure, reducing the risk of foundation damage. You can use concrete splash blocks or extend the downspout with an additional piece to channel water further away.
Finishing Touches and Maintenance
Completing the installation with care and maintaining your gutters regularly will guarantee their longevity and performance.
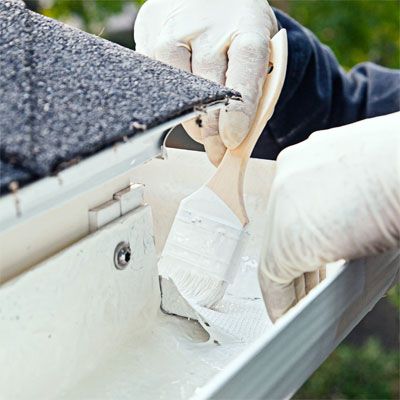
Applying Gelcoat
To finish the installation, apply a gelcoat-resin mix thickened with microballoon filler to the joints on the outside of the gutter. This creates a seamless appearance and provides additional waterproofing.
Cleaning Up the Work Area
Remove all debris and excess materials from the work area. Properly dispose of any chemical waste according to local regulations. Clean your tools thoroughly to make sure they’re ready for future use.
Regular Maintenance Tips
To keep your fiberglass gutters in top condition:
- Check the slope periodically for proper drainage.
- Clean gutters at least twice a year, removing leaves and debris.
- Inspect for any cracks or separations at joints and repair promptly.
- Trim overhanging branches to reduce debris accumulation.
Seasonal Checks
Conduct seasonal checks, especially before winter and during spring. In colder climates, ice damming can occur, damaging gutters. Check that there’s no accumulated ice in gutters during winter. In spring, clear out any debris left from winter storms, making your gutters ready for spring rains. Routine checks can help catch minor issues before they escalate into significant problems.
Troubleshooting Common Fiberglass Gutter Issues
Even with careful installation, issues may arise. Here’s how to address some common problems.
- Addressing sagging gutters: Sagging can occur if gutters aren’t properly supported. Add additional stand-off blocks or hangers to provide more support along the gutter run.
- Dealing with leaks: If you notice leaks, first check the joints and seams. Apply additional sealant or fiberglass patching as needed. For persistent leaks, you may need to replace a section of gutter.
- Handling improper slope: If water isn’t draining properly, re-check the slope of your gutters. Adjust the mounting screws to achieve the correct 1/4-inch slope per 10 feet of gutter length.
Environmental Impact of Fiberglass Gutters
When planning home improvement projects, the environmental impact is an important factor.
- Energy efficiency: Properly installed fiberglass gutters can improve your home’s energy efficiency. By guiding water away effectively, they help maintain your home’s structural integrity, reducing potential energy losses through water damage.
- Reduced waste: Due to their longevity, fiberglass gutters contribute less to landfill waste. Traditional gutters like vinyl might need replacements every few years, filling up landfills quicker. Fiberglass’ long life cycle leads to less frequent replacements and reduced waste over time.
- Sustainable materials: Fiberglass gutters are made using sustainable materials, often involving recycled glass. This minimizes the environmental footprint. Furthermore, fiberglass production requires less energy compared to metals like aluminum or steel.