Project details
Skill
Cost
Estimated Time
We may be compensated if you purchase through links on our website. Our team is committed to delivering honest, objective, and independent reviews on home products and services.
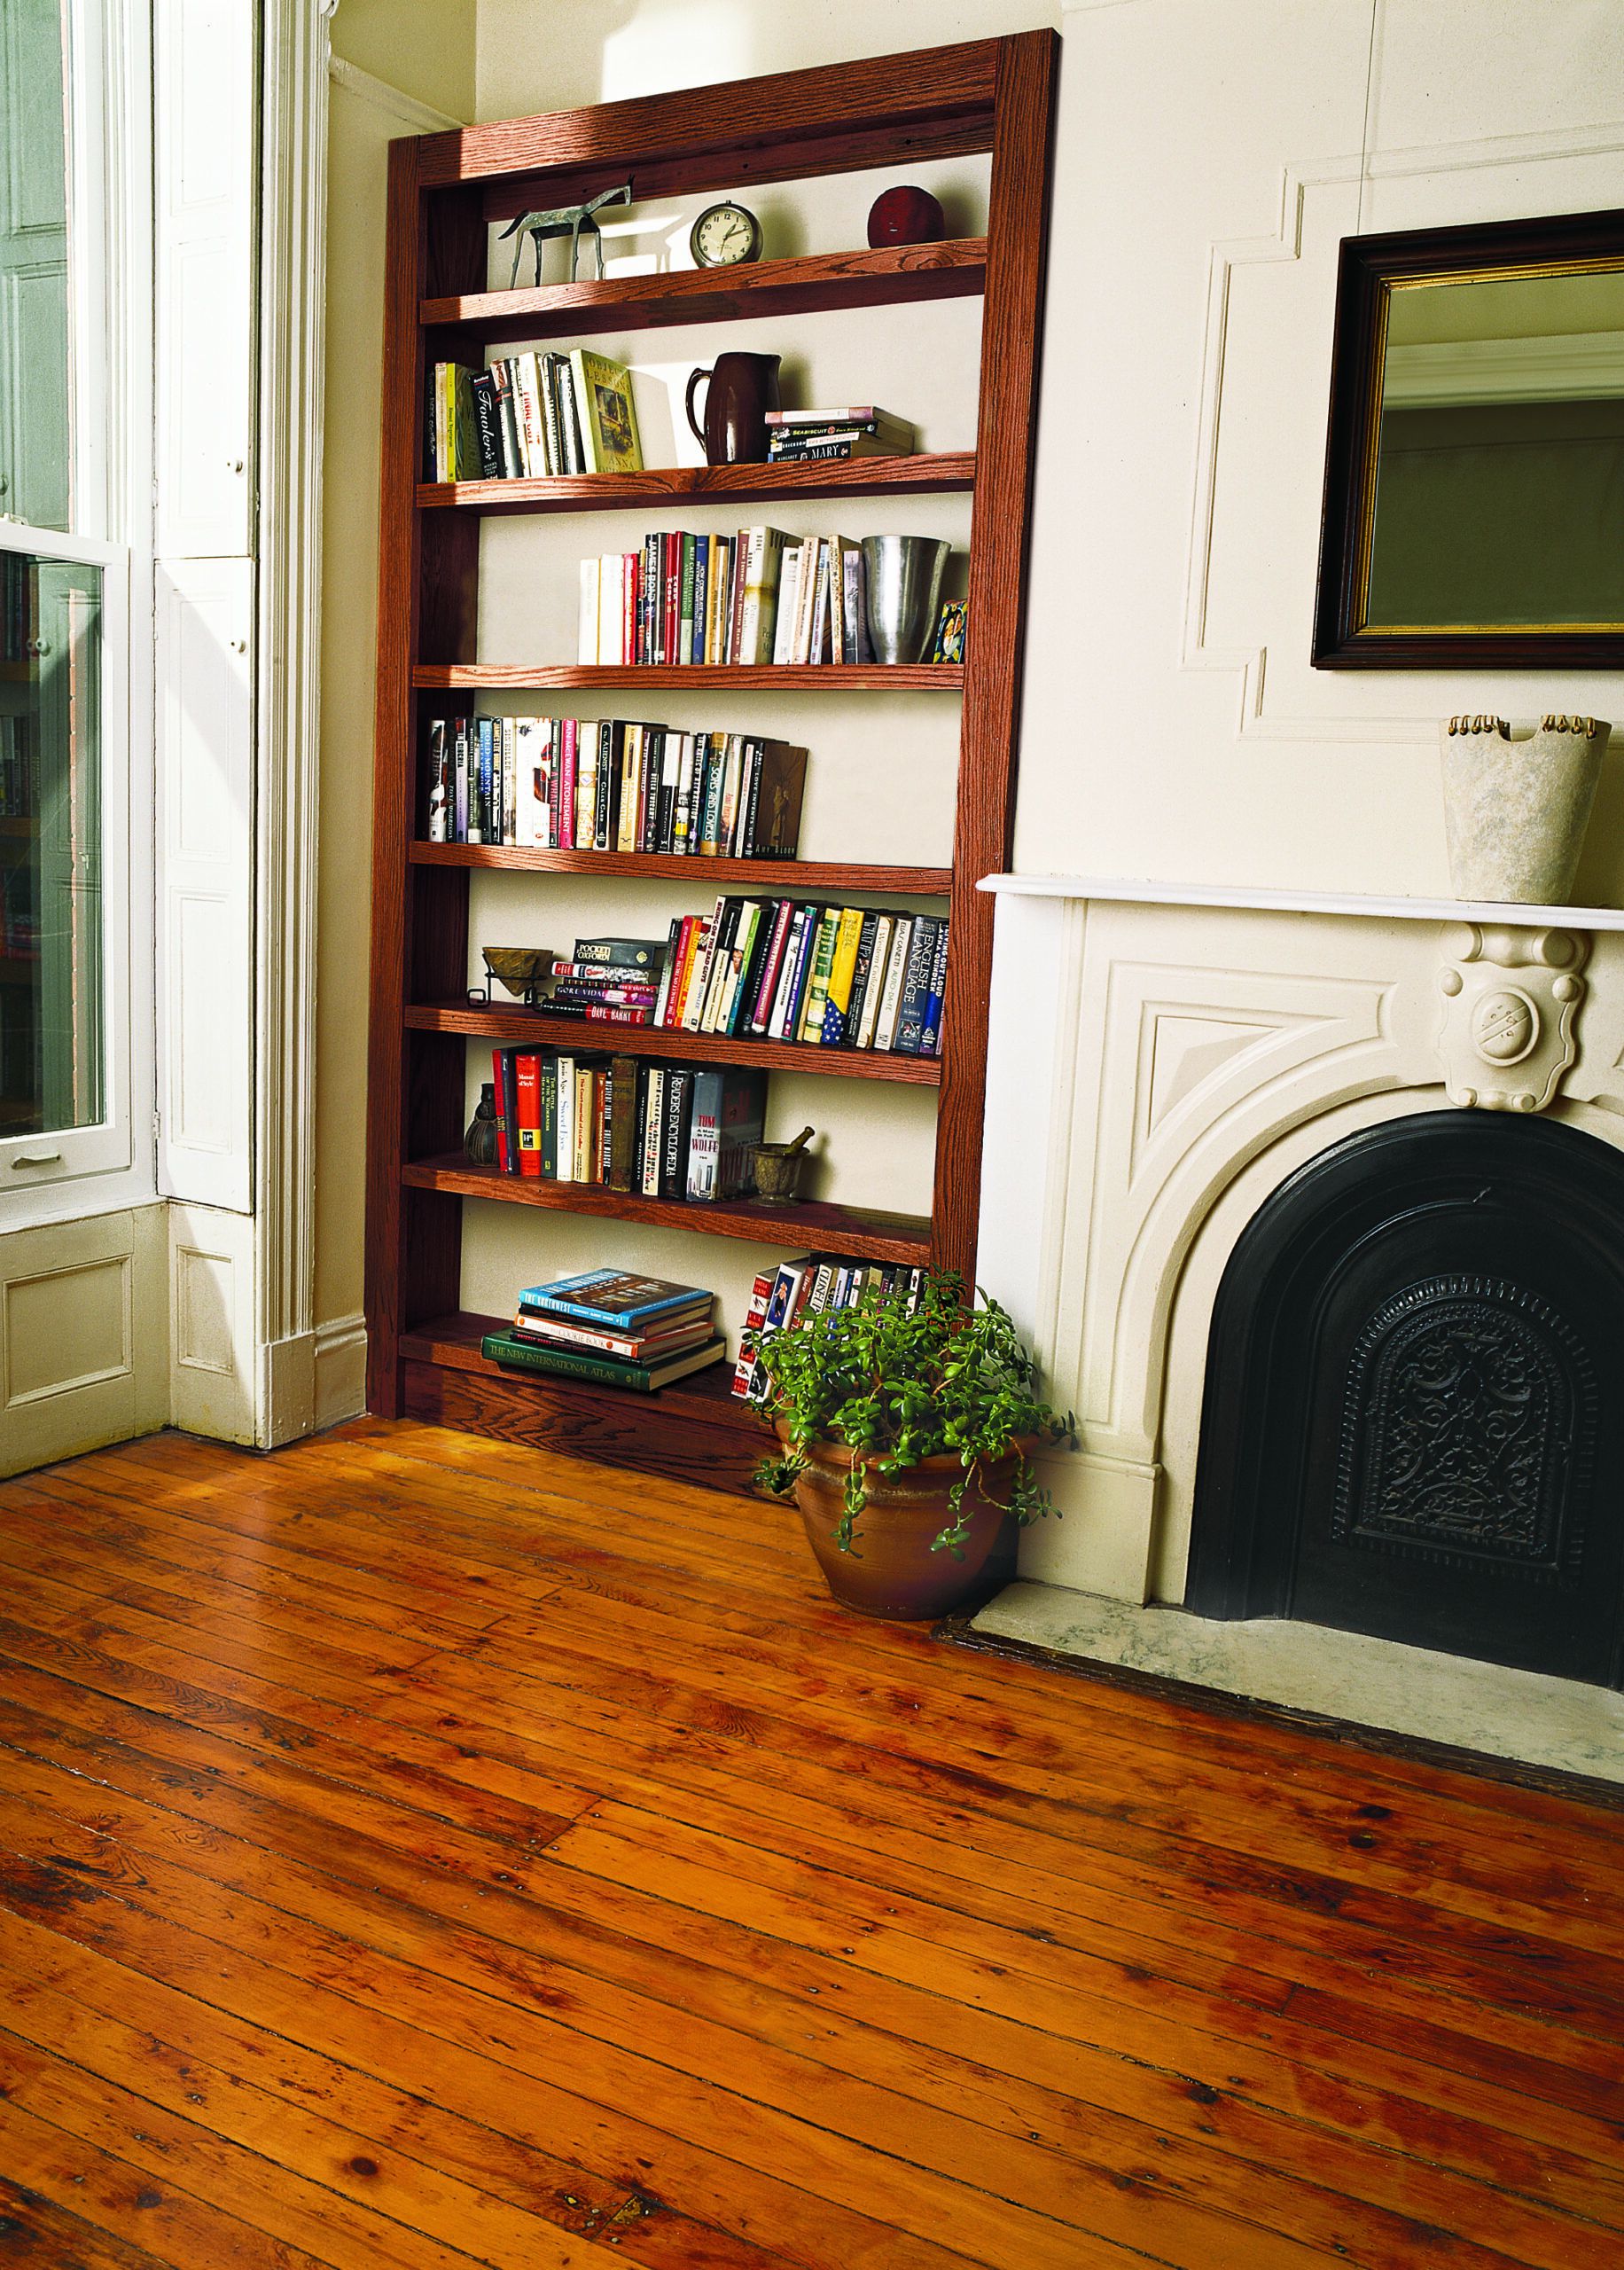
Building your own bookshelf is a rewarding do-it-yourself (DIY) project that adds function and style to your home. Whether you’re a book lover needing more storage or you just want to enhance your living space, you can create a custom bookshelf tailored to your specific needs and decor. In this guide, we walk you through the process of building a bookshelf, from planning and material selection to assembly and finishing touches.
Understanding Bookshelf Building Basics
Before diving into the construction process, let’s review the fundamentals of bookshelf design and the options available to help you decide what type of bookshelf best suits your needs and space.
Types of Bookshelves
Bookshelves come in various styles and configurations, each with its advantages.
- Built-in bookcases: Customized to fit specific wall spaces, these offer a seamless look and maximize storage.
- Corner bookshelves: Designed to fit into room corners, these make use of often-underutilized space.
- Floating shelves: Perfect for minimalist designs or small spaces, these shelves appear to “float” on the wall without visible supports.
- Freestanding bookshelves: These stand-alone units can be moved easily and are ideal for renters or those who like to rearrange their space frequently.
- Ladder-style bookshelves: These lean against the wall and provide a unique, space-saving design.
Choosing the Right Design for Your Space
When selecting a bookshelf design, consider the following:
- Available space: Measure the area where you plan to place the bookshelf, including height, width, and depth.
- Book collection size: Estimate how many books you need to store and allow for future growth.
- Functionality: Decide if you need additional features like adjustable shelves or built-in lighting.
- Room decor: Choose a style that complements your existing furniture and interior design.
Cost Considerations for Bookcases
Understanding the costs involved in building a bookshelf can help you budget effectively and decide whether a DIY approach is right for you.
DIY vs. Store-Bought Bookshelves
Building your own bookshelf is often more affordable than buying a premade unit, especially if you’re shopping for custom sizes and high-quality materials. While DIY may mean a lower upfront cost for larger bookcases, consider the value of your time and any tools you may need to purchase. Here’s a general comparison:
- DIY bookshelf: $400–$1,200, depending on materials and size*
- Store-bought bookshelf: $25–$3,933, depending on materials and size
A Bookshelf We Recommend
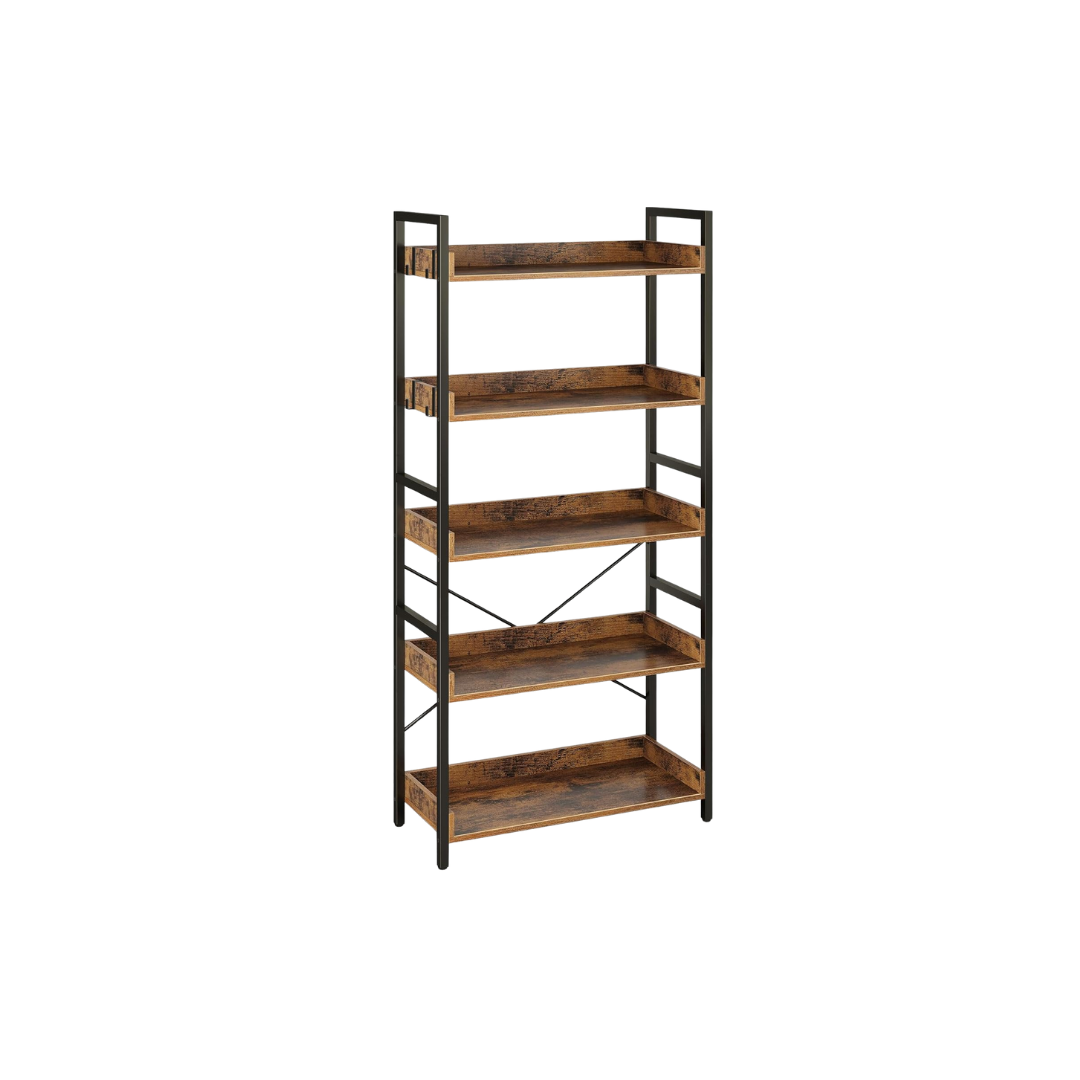
Rolanstar Bookshelf
- $229
Prices taken at time of publishing.
.
Budgeting for Materials and Tools
Remember to factor in the cost of any specialty cuts from the lumberyard and potential waste material when calculating your budget. Also, account for these other expenses:
- Wood (plywood and solid wood for trim): $500–$1,200
- Hardware (screws, nails, glue): $24–$50
- Finishing materials (sandpaper, stain, paint): $7–$80
- Tools (if you need to purchase any): Prices vary
*Cost information is based on2024 reports from Angi and The Home Depot.
Choosing Your Bookshelf Wood Type
Your wood choice significantly impacts your bookshelf’s appearance, durability, and cost. We recommend using oak plywood for its strength and attractive grain pattern. Plywood with a hardwood veneer is not only less expensive but, in many cases, stronger than solid softwoods like pine. Here are the most popular wood options for bookcases:
- Plywood: A cost-effective and sturdy choice, plywood is available in various wood veneers and is less prone to warping than solid wood.
- Medium-density fiberboard (MDF): This engineered wood product is affordable and easy to work with, making it ideal for painted bookshelves.
- Solid wood: Options like oak, maple, or pine offer a classic look but are typically more expensive and may require more maintenance.
Required Tools for Construction
Make sure you have these tools ready to guarantee a smooth construction process and professional-looking results:
- Circular saw or table saw
- Drill with various bits
- Framing square and speed square
- Hammer or nail gun
- Measuring tape and level
- Safety equipment (goggles, dust mask, hearing protection)
- Sandpaper and sanding block
- Screwdriver or power drill with screwdriver bits
- Wood glue and clamps
Planning Your Bookshelf Project
Measuring accurately and creating a detailed design will save you time and frustration during the construction phase.
Measuring Your Space
Before cutting any wood, carefully measure the area where you’re placing the bookshelf. Remember to measure in multiple places, as walls and floors may not be perfectly straight or level. We recommend measuring the width of your space in three places. Consider the following:
- Depth: Decide how far the bookshelf can protrude into the room without impeding traffic flow.
- Height: Measure from floor to ceiling, accounting for baseboards and crown molding.
- Width: Determine the maximum width you can build without obstructing doors or windows.
Creating a Detailed Design Plan
With your measurements in hand, sketch out your bookshelf design. This will help you visualize the final product and make any necessary adjustments before you start cutting wood. Details might include the following:
- Any custom features (adjustable shelves, decorative trim)
- Materials list with quantities
- Number and spacing of shelves
- Overall dimensions
In the video below, This Old House general contractor Tom Silva shows how to build a bookcase with stair tread.
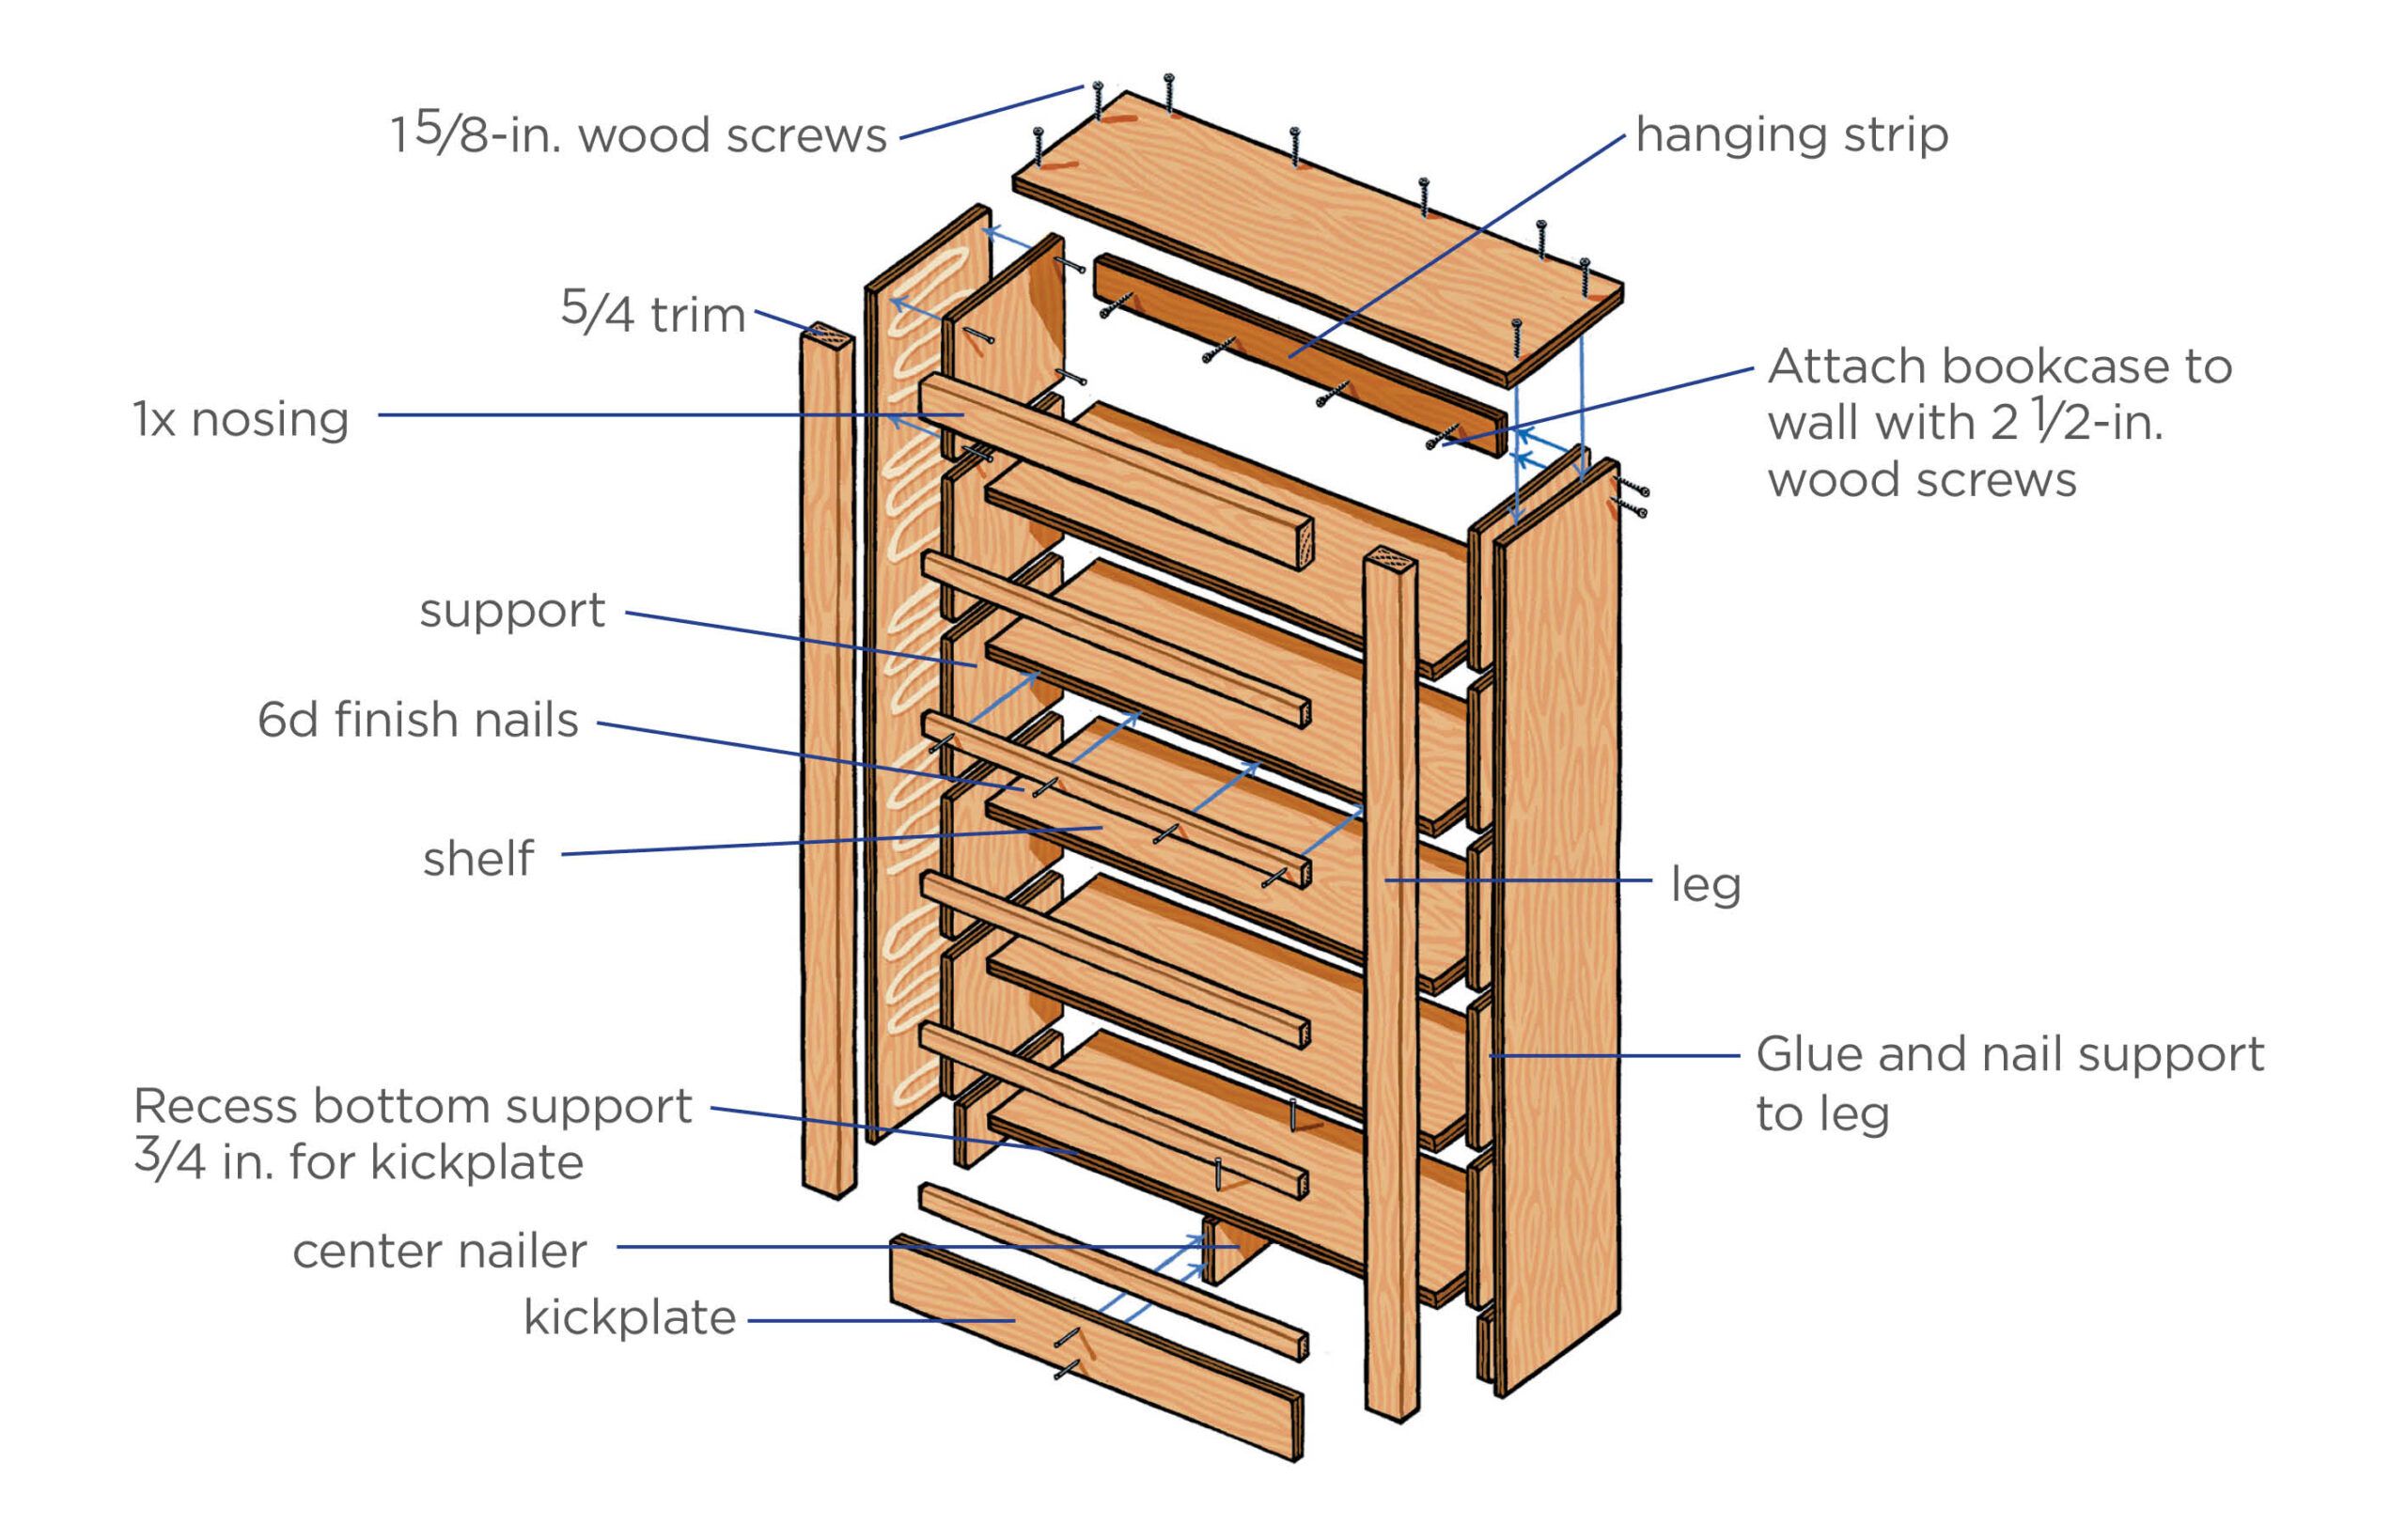
Preparing the Bookshelf Wood
Proper wood prep helps you create a sturdy and attractive bookshelf. This stage involves cutting the components to size and sanding all the wood to a smooth finish.
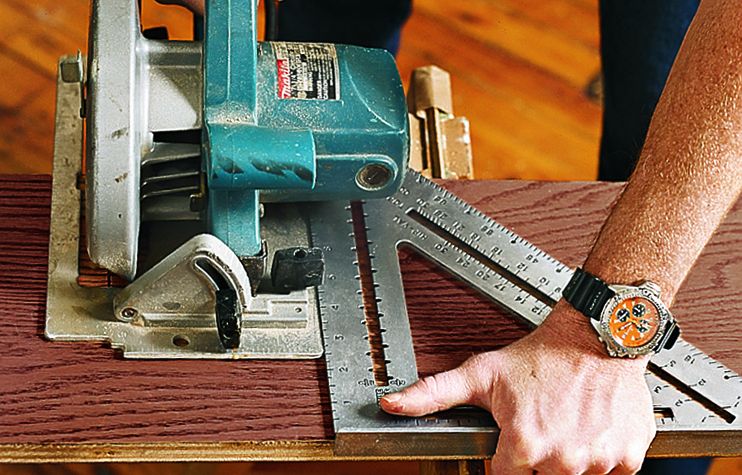
Cutting the Shelves and Supports
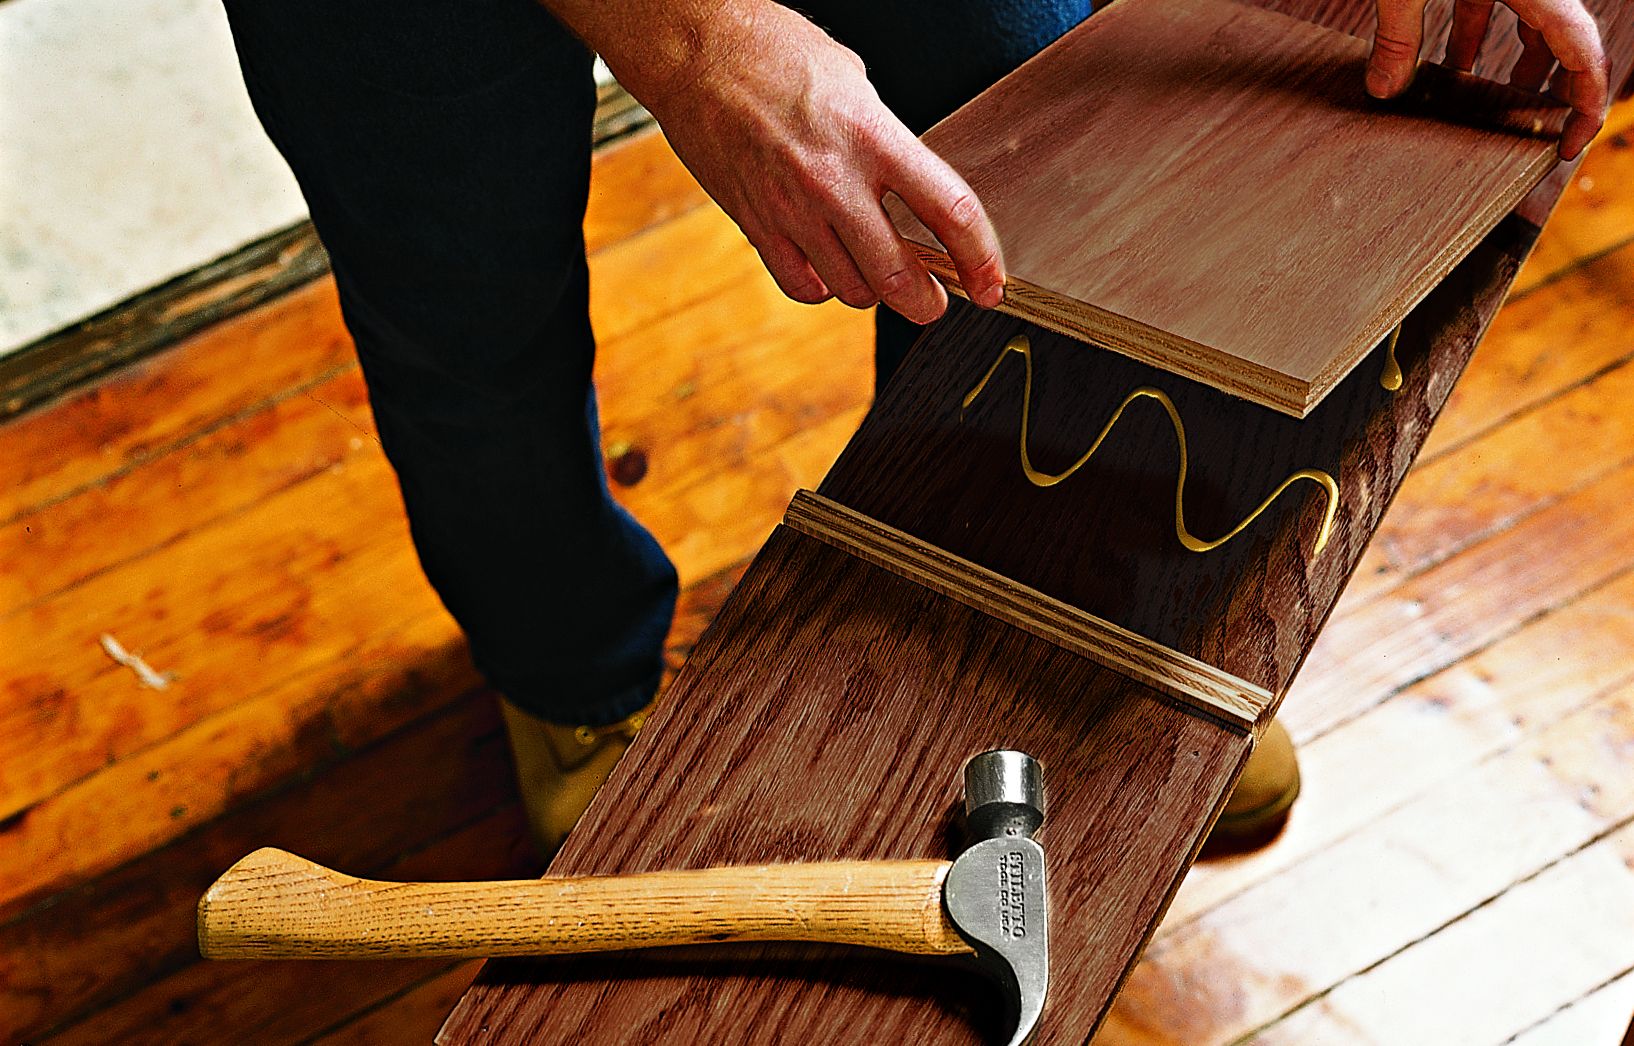
For the strongest frame, we chose oak plywood for our build below. We doubled its thickness for the bookcase sides by gluing and nailing plywood shelf supports onto longer boards. Cutting grooves in a single board would compromise its strength.
Using your design plan as a guide, carefully cut the plywood for your bookshelf components:
- Cut two bookcase legs to the full height of your space.
- Cut shelves to the width determined in your measurements, remembering to subtract one and a half inches for a proper fit.
- Cut support pieces for each shelf, making the top supports three-quarters of an inch shorter than the others.
Sanding and Finishing the Pieces
At this stage, you may choose to stain or prime your wood. Before assembly, take the time to sand all wood pieces:
- Start with a medium-grit sandpaper (120–150 grit) to remove any rough spots or splinters.
- Progress to a finer grit (220–320) for a smooth finish.
- Wipe away all dust with a tack cloth.
Assembling the Bookshelf Frame
With your wood prepared, it’s time to assemble the frame of your bookshelf.
Attaching Supports to the Legs
The key to a strong bookshelf lies in properly attaching the shelf supports to the legs:
- Mark the positions for shelf supports on both legs.
- Apply wood glue in an S-shaped pattern on the leg where you’ll attach each support.
- Position the support piece. Align it with your marks and the back edge of the leg.
- Secure each support with 3D nails in all four corners.
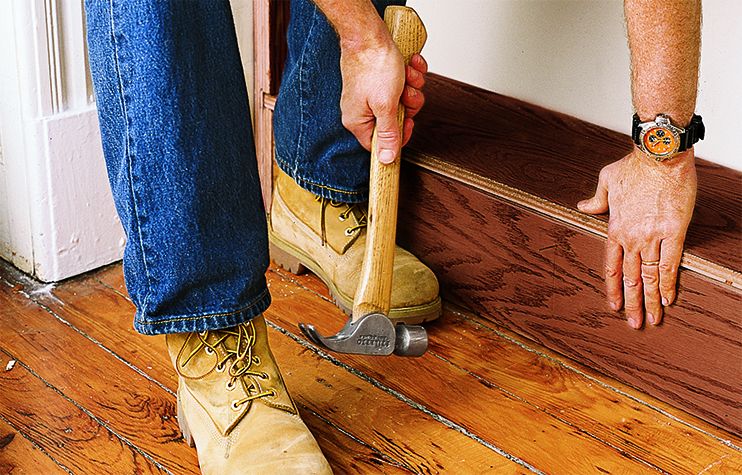
Creating a Sturdy Base
A solid square frame and base add stability but also give your bookshelf a finished look by covering the space under the bottom shelf:
- Cut a kickplate to fit under the bottom shelf, recessing it by three-quarters of an inch.
- Attach a nailer piece under the center of the bottom shelf using 6D finish nails.
- Fit the kickplate into the opening against the nailer and support edges, flush with the bookcase front.
- Secure the kickplate with 6D finish nails at each support and the center nailer.
Installing Shelves and Reinforcements
With the frame assembled, it’s time to add the shelves and ensure the bookcase is securely attached to the wall for safety and stability.
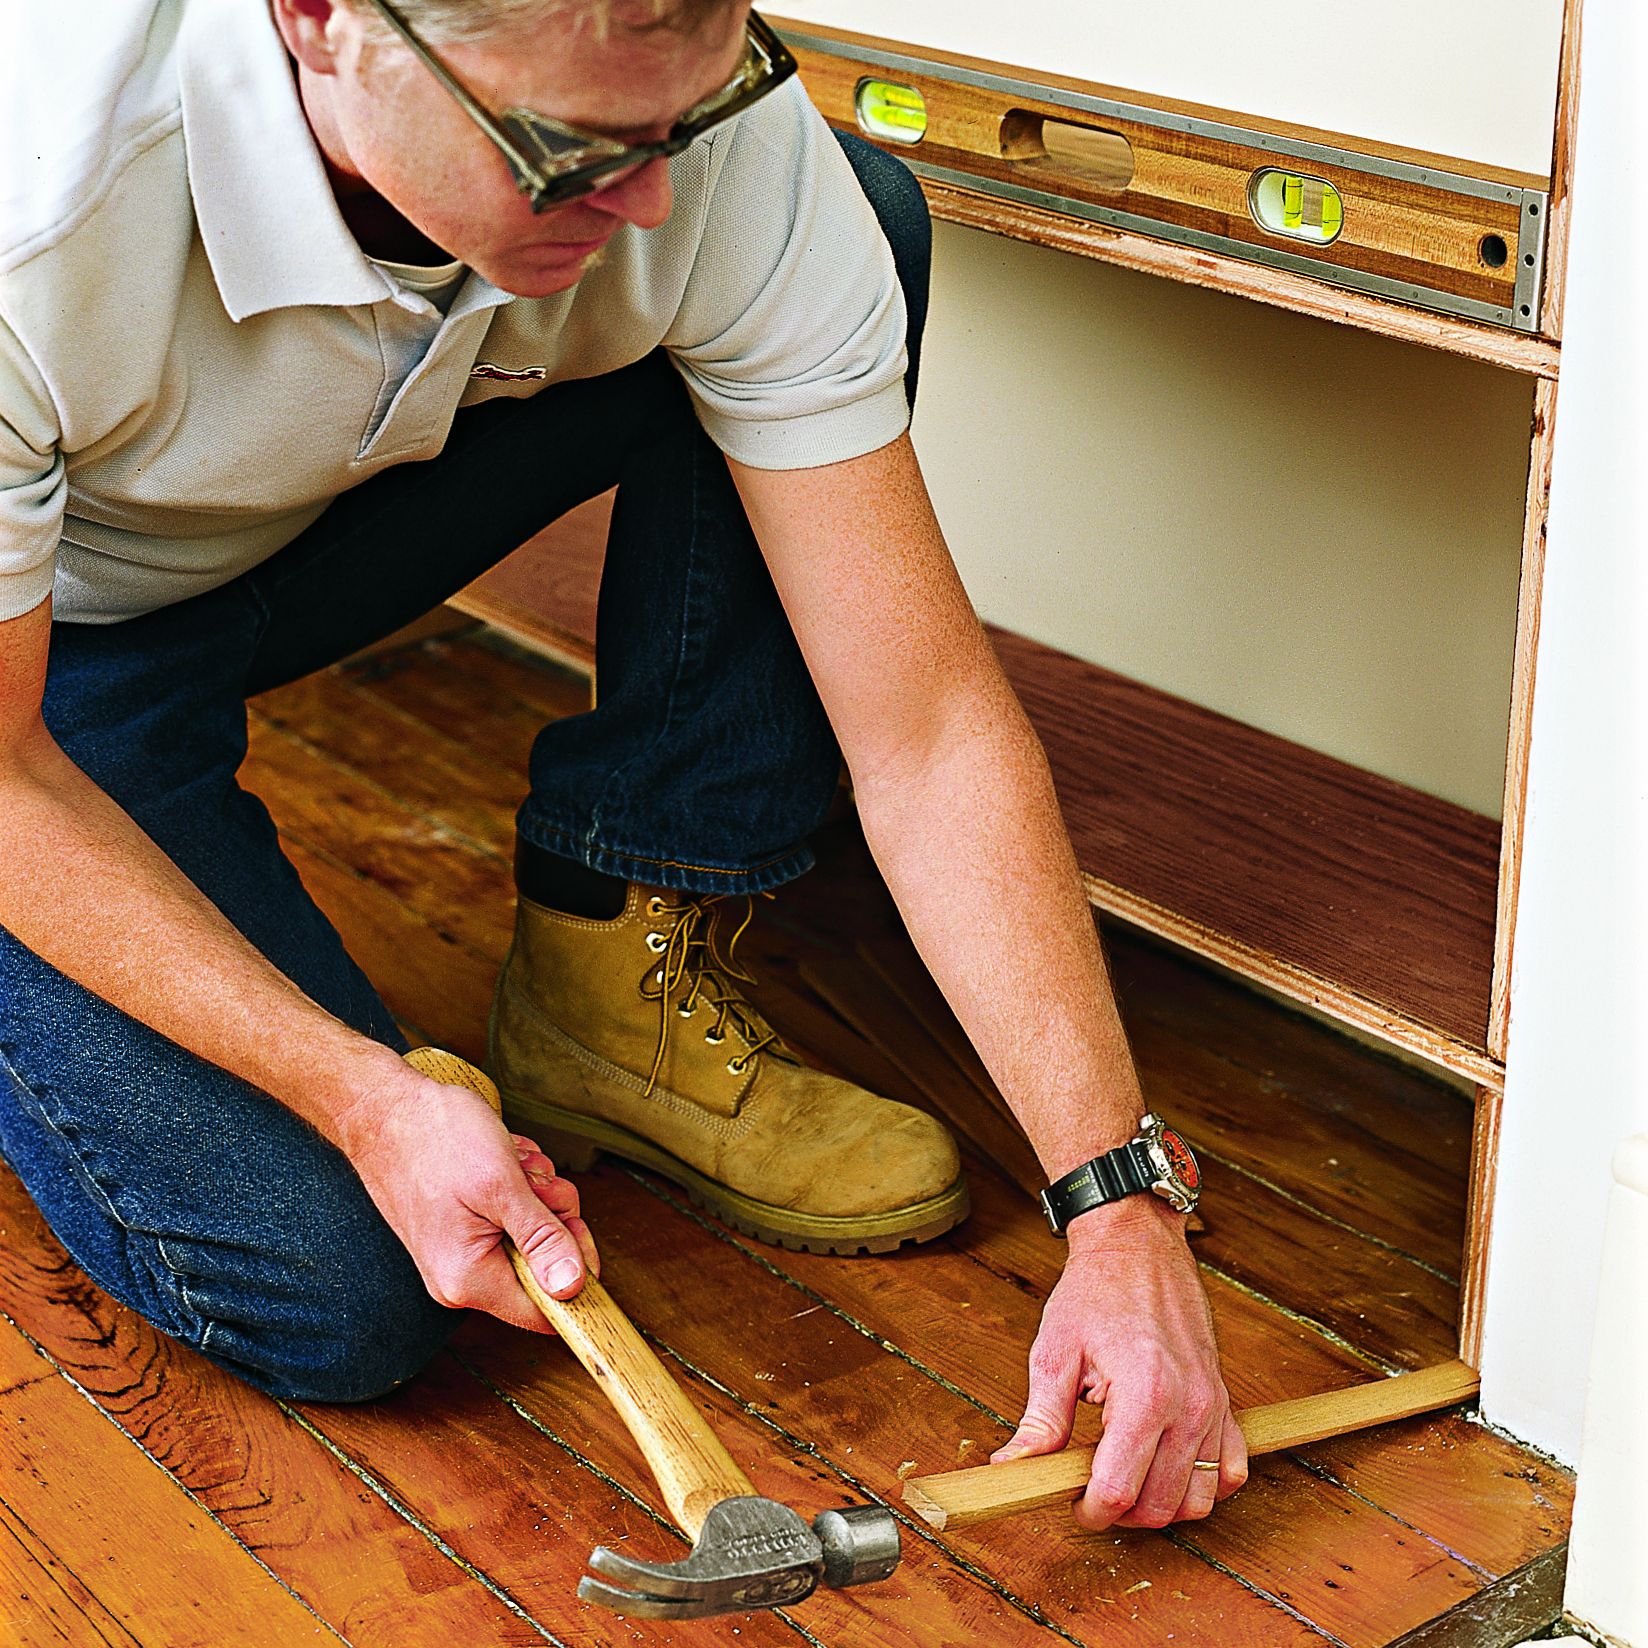
Positioning and Securing Shelves
Carefully install each shelf into the frame:
- Slide shelves into place, starting from the bottom.
- If any shelves are tight, gently tap them into position using a rubber mallet.
- Check each shelf with a level to ensure it’s perfectly horizontal.
- If needed, use thin wood shims under the bookcase feet to level the entire unit.
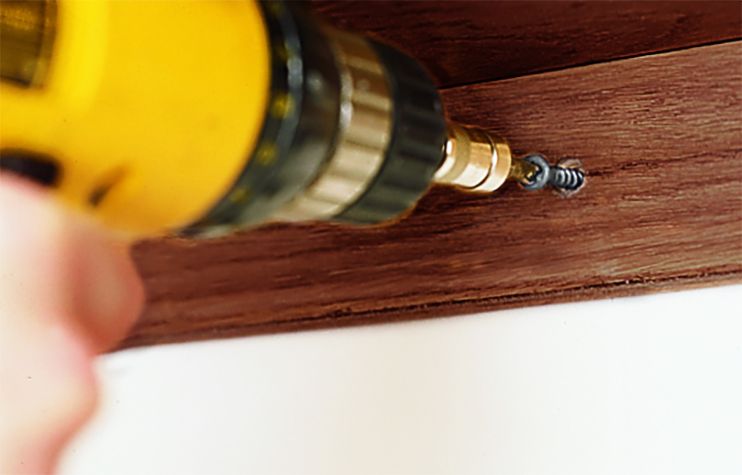
Adding a Hanging Strip for Wall Attachment
To prevent tipping, especially if you have children or live in an earthquake-prone area, attach the bookcase to the wall by following these steps:
- Cut a hanging strip from plywood that is two and a half inches wide and one and a half inches shorter than the shelves.
- Position the strip between the top supports, flush with their tops and back edges.
- Drill pilot holes through the legs and supports and into the hanging strip.
- Secure the hanging strip with two-and-a-half-inch wood screws.
- Use a stud finder to locate wall studs behind the bookcase.
- Drill clearance holes in the hanging strip at stud locations.
- Attach the bookcase to the wall studs using two-and-a-half-inch screws.
Final Touches for the Bookshelf
The final steps in building your bookshelf involve adding trim and checking that the unit is perfectly level.
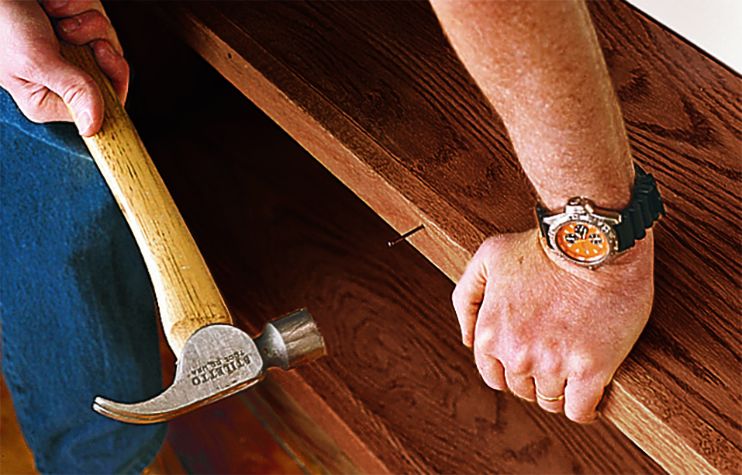
Attaching Trim and Nosing
Trim and nosing enhance the look of your bookshelf and hide any rough edges. We hid the rough ply edges of our bookshelf with solid wood finish trim using these steps:
- Cut pieces of half-inch trim to fit the sides and top of the bookcase.
- Hold each piece of trim in place, mark any necessary adjustments, and cut to fit.
- Attach the trim with wood glue and 6D finish nails.
- For shelf faces, use 1x trim to create a recessed, finished front edge.
- Cut nosing pieces to fit tightly between the side trim.
- Glue and nail the nosing to the front of each shelf, ensuring it’s flush along the top.
Leveling the Bookshelf
Finally, ensure your bookshelf is level and looking great with these steps:
- Use a level to check both horizontal and vertical alignment.
- Add shims where needed to correct any unevenness.
- Once level, secure any gaps between the bookcase and wall with additional shims.
- Trim excess shim material flush with the bookcase edge.
Advanced Techniques for a Professional Bookcase Look
To elevate your bookshelf from a basic DIY project to a professional-looking piece of furniture, you can use these advanced techniques.
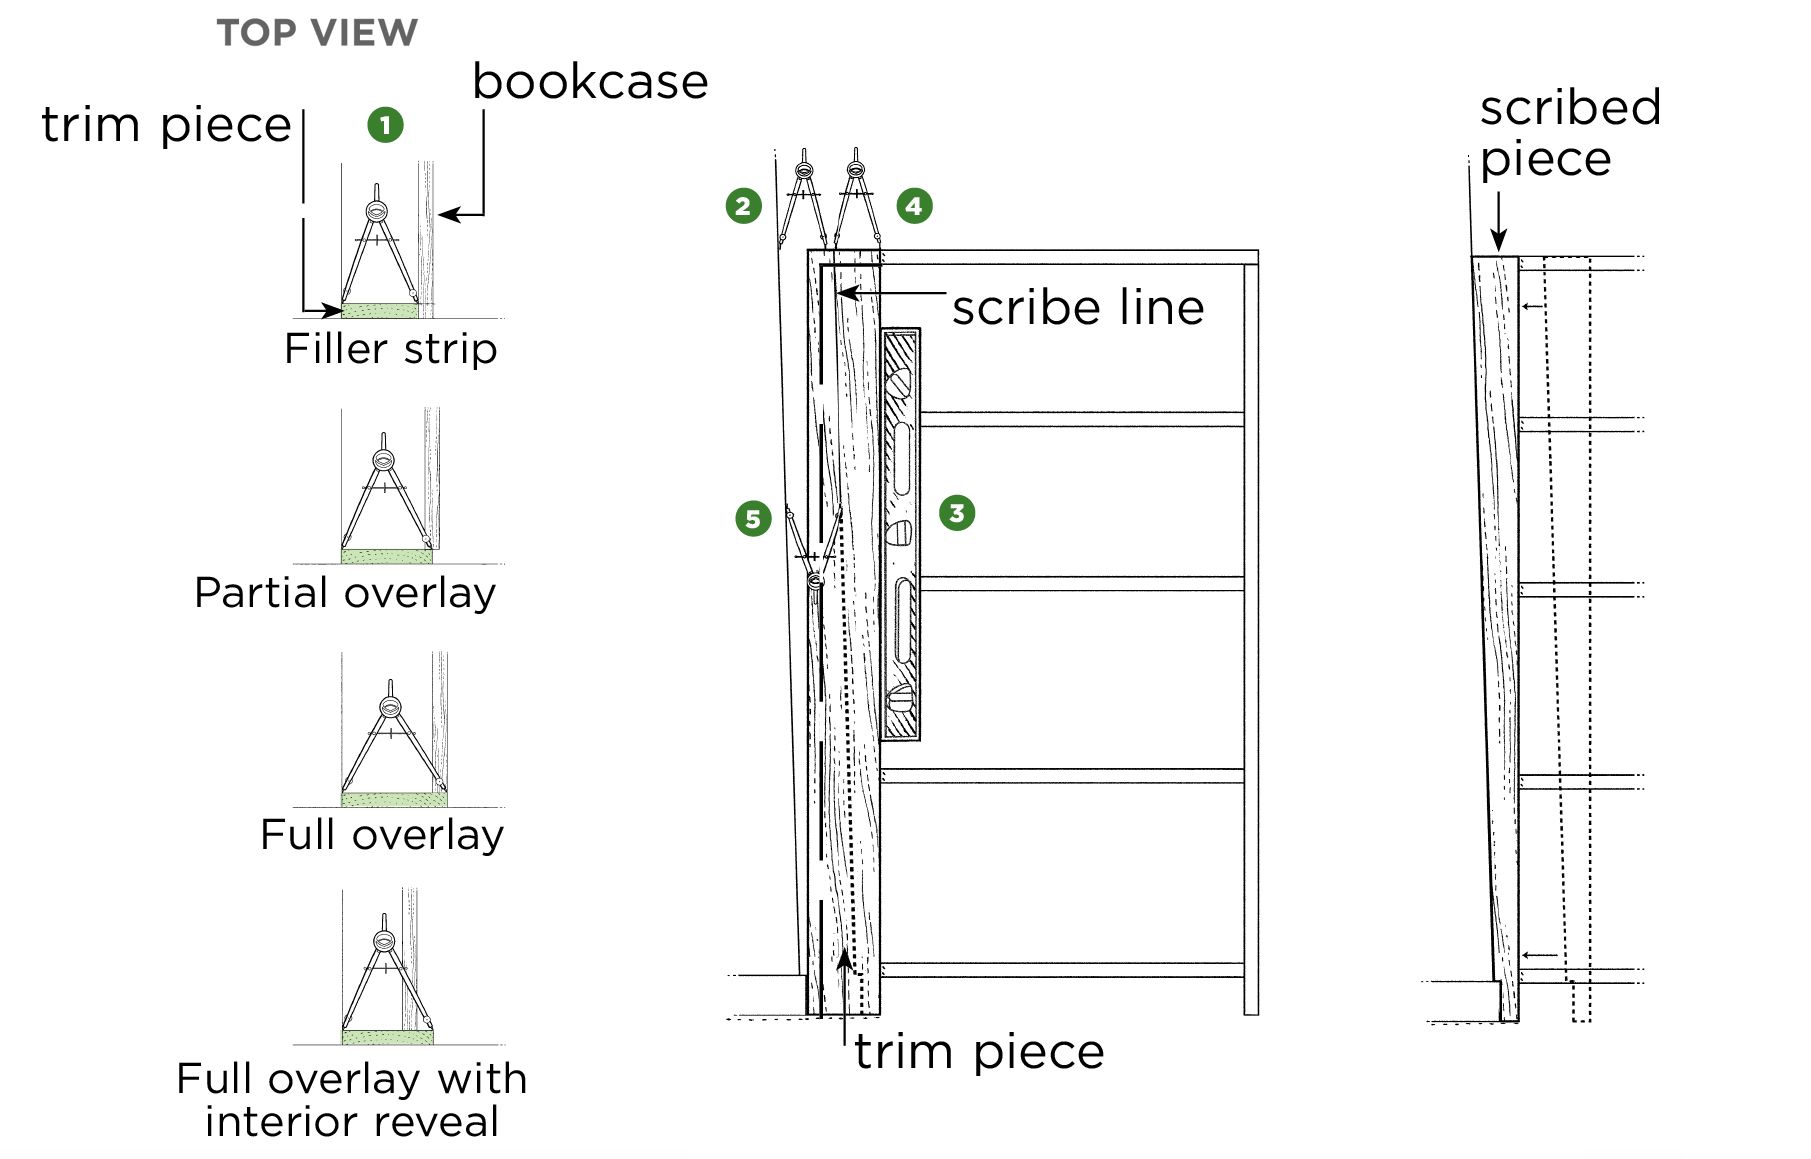
Scribing for a Perfect Fit
Scribing allows you to create a seamless fit between your bookshelf and potentially uneven walls. Follow these steps:
- Hold the trim piece against the wall, ensuring it’s plumb.
- Set a compass to the widest gap between the trim and the wall.
- Run the compass along the wall, transferring the wall’s contours onto the trim.
- Cut along the scribed line with a jigsaw.
- Test the fit and make any necessary adjustments.
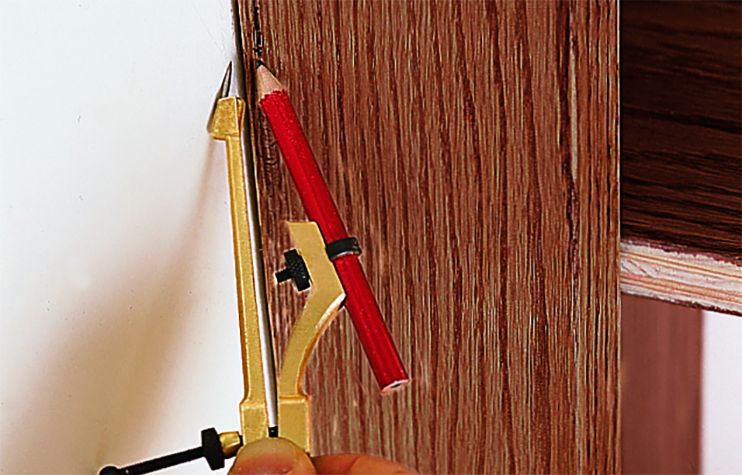
Scribing Tips To Help With Your DIY Bookshelf
This diagram gives you an idea of how you can scribe for your bookcase:
Adding Custom Features
Consider incorporating these custom features to make your bookshelf unique:
- Adjustable shelves: Install shelf pins or tracks for flexibility.
- Built-in lighting: Add LED strips under shelves for ambiance and functionality.
- Crown molding: Install crown molding at the top for a high-end look.
- Decorative backing: Use beadboard or wallpaper on the back panel for visual interest.
Troubleshooting Common Issues
Even with careful planning and execution, you may encounter some challenges during your bookshelf build. Here are solutions to common problems you might face.
Dealing with Uneven Walls
Uneven walls can make it difficult to achieve a flush fit for your bookshelf. Use the scribing technique described earlier to match wall contours. For significant unevenness, consider leaving a small gap and using molding to cover it. In extreme cases, you may need to furr out the wall to create a flat surface before installing the bookshelf.
Fixing Wobbling or Instability
If your completed bookshelf feels unstable:
- Double-check that all shelves and supports are level and securely attached.
- Ensure the bookcase is properly anchored to the wall using the hanging strip.
- Add additional support brackets under shelves if needed.
- For freestanding units, you can attach L-brackets at the top corners to secure the bookshelf to the wall.
Our Conclusion
Building your own bookshelf can be a fulfilling project that results in a beautiful and functional piece of furniture. With careful planning, the right materials, and attention to detail, you can create a custom bookshelf that fits perfectly in your space and meets your storage needs.