Storm windows are an effective and budget-friendly solution for homeowners looking to improve their home’s energy efficiency and protect their existing windows. These versatile additions can reduce drafts, lower energy bills, and extend the life of your primary windows. In this guide, we’ll explore the benefits of storm windows, explain how to choose the right type for your home, and provide step-by-step instructions for proper installation and maintenance.
What Are Storm Windows?
Storm windows are secondary window systems installed either on the exterior or interior of existing windows. They create an additional barrier against the elements, improving insulation and protecting the primary window from weather damage.
Advantages of Installing Storm Windows
Storm windows offer numerous benefits for homeowners:
- Lower heating and cooling costs
- Improved energy efficiency
- Increased home value
- Noise reduction
- Protection for existing windows
- Reduced drafts and air leaks
Tom Silva emphasizes the cost-effectiveness of storm windows, noting, “A good storm window stops air infiltration about as well as most replacement windows, and the upfront costs are much lower. It’s like putting money in your pocket.”
Types of Storm Windows
There are several types of storm windows available, each with its own advantages.
- Exterior storm windows: Exterior storm windows mount outside of your existing windows. They’re particularly effective at protecting your primary windows from the elements and improving insulation. These windows are ideal for homes in regions that frequently experience harsh weather conditions.
- Interior storm windows: Interior storm windows mount inside your existing windows. They’re less visible from the outside and are easy to install and remove for cleaning. They’re an attractive option for those concerned with maintaining the aesthetic appeal of their home’s exterior.
- Triple-track storm windows: Triple-track storm windows are exterior windows that feature two glass sashes and one screen that slides up and down on separate tracks, offering versatility in ventilation and protection. This versatility makes them a preferred choice for homeowners who want a combination of safety and easy accessibility for cleaning and maintenance.
Measuring for Storm Windows
Taking accurate measurements will ensure you have a proper fit for your storm windows. Compare the measurement process for both Eastern-style and Western-style casings.
Eastern-Style Casing Measurements
Here’s how to measure for Eastern-style casings without a recessed stop:
- Measure the horizontal distances between the inside edges of the window casing at the top, middle, and bottom.
- Measure the vertical distance from the bottom outside edge of the head casing to the sill.
- The storm window should be at least 1 ¼ inches wider than the opening’s maximum width and about 5/8 inches taller than the window opening.
Western-Style Casing Measurements
Here’s how to measure for Western-style casings with a recessed stop:
- Measure the horizontal and vertical dimensions of the window opening.
- The storm window’s width and height can be up to ¼ inch less than the opening’s smallest measurements.
Ensuring Accurate Results
Regardless of your casing style, always double-check your measurements and record them carefully. A slight error can result in improper fitting, leading to gaps, leaks, and costly adjustments.
Key Features To Look for in Quality Storm Windows
From material considerations to energy-efficient features, here are a few factors to consider when shopping for storm windows.
Material Considerations
Storm windows are typically made from aluminum, vinyl, or wood. Aluminum is durable and low-maintenance, while vinyl offers excellent insulation. Wood provides a traditional look but requires more upkeep.
Aluminum frames have lightweight and corrosion-resistant properties, making them suitable for coastal areas. We recommend vinyl frames for their cost-effectiveness and energy-saving properties. However, wood offers an unmatched aesthetic appeal and can be customized to suit your home’s decor.
Energy Efficiency Factors
Look for storm windows with low-emissivity (low-E) glass coatings and weatherstripping to maximize energy efficiency. These features help reduce heat transfer and improve insulation.
Low-E glass coatings are particularly beneficial in reducing ultraviolet (UV) and infrared light without compromising the amount of visible light that passes through. This coating also improves thermal efficiency and reduces the fading of furniture and carpets over time. Weatherstripping seals gaps and prevents drafts, so your heating and cooling systems operate more efficiently.
Durability and Longevity
Quality storm windows should have sturdy frames, smooth operating sashes, and durable hardware. Tom Silva advises, “Sure, you can buy a cheap storm window, but why bother? You just end up paying for it later when it leaks, rattles, or doesn’t operate smoothly.”
Additionally, consider storm windows with reinforced corners, corrosion-resistant fasteners, and impact-resistant glass for increased durability. These features extend the lifespan of your storm windows and provide added security against break-ins and severe weather conditions.
Aesthetic and Functional Considerations
While functionality is critical, you shouldn’t overlook the visual appeal of storm windows. Modern storm windows come in various colors, finishes, and styles.
Step-By-Step Storm Window Installation Guide
Installing storm windows is a do-it-yourself (DIY) project for those with basic home improvement skills. Follow these steps for a successful installation.
Prepare the Window Opening
Start by prepping the opening for your storm window:
- Clean the window opening with water and a rag.
- Inspect the area for any damage and repair as necessary.
- Make sure the opening is square and level.
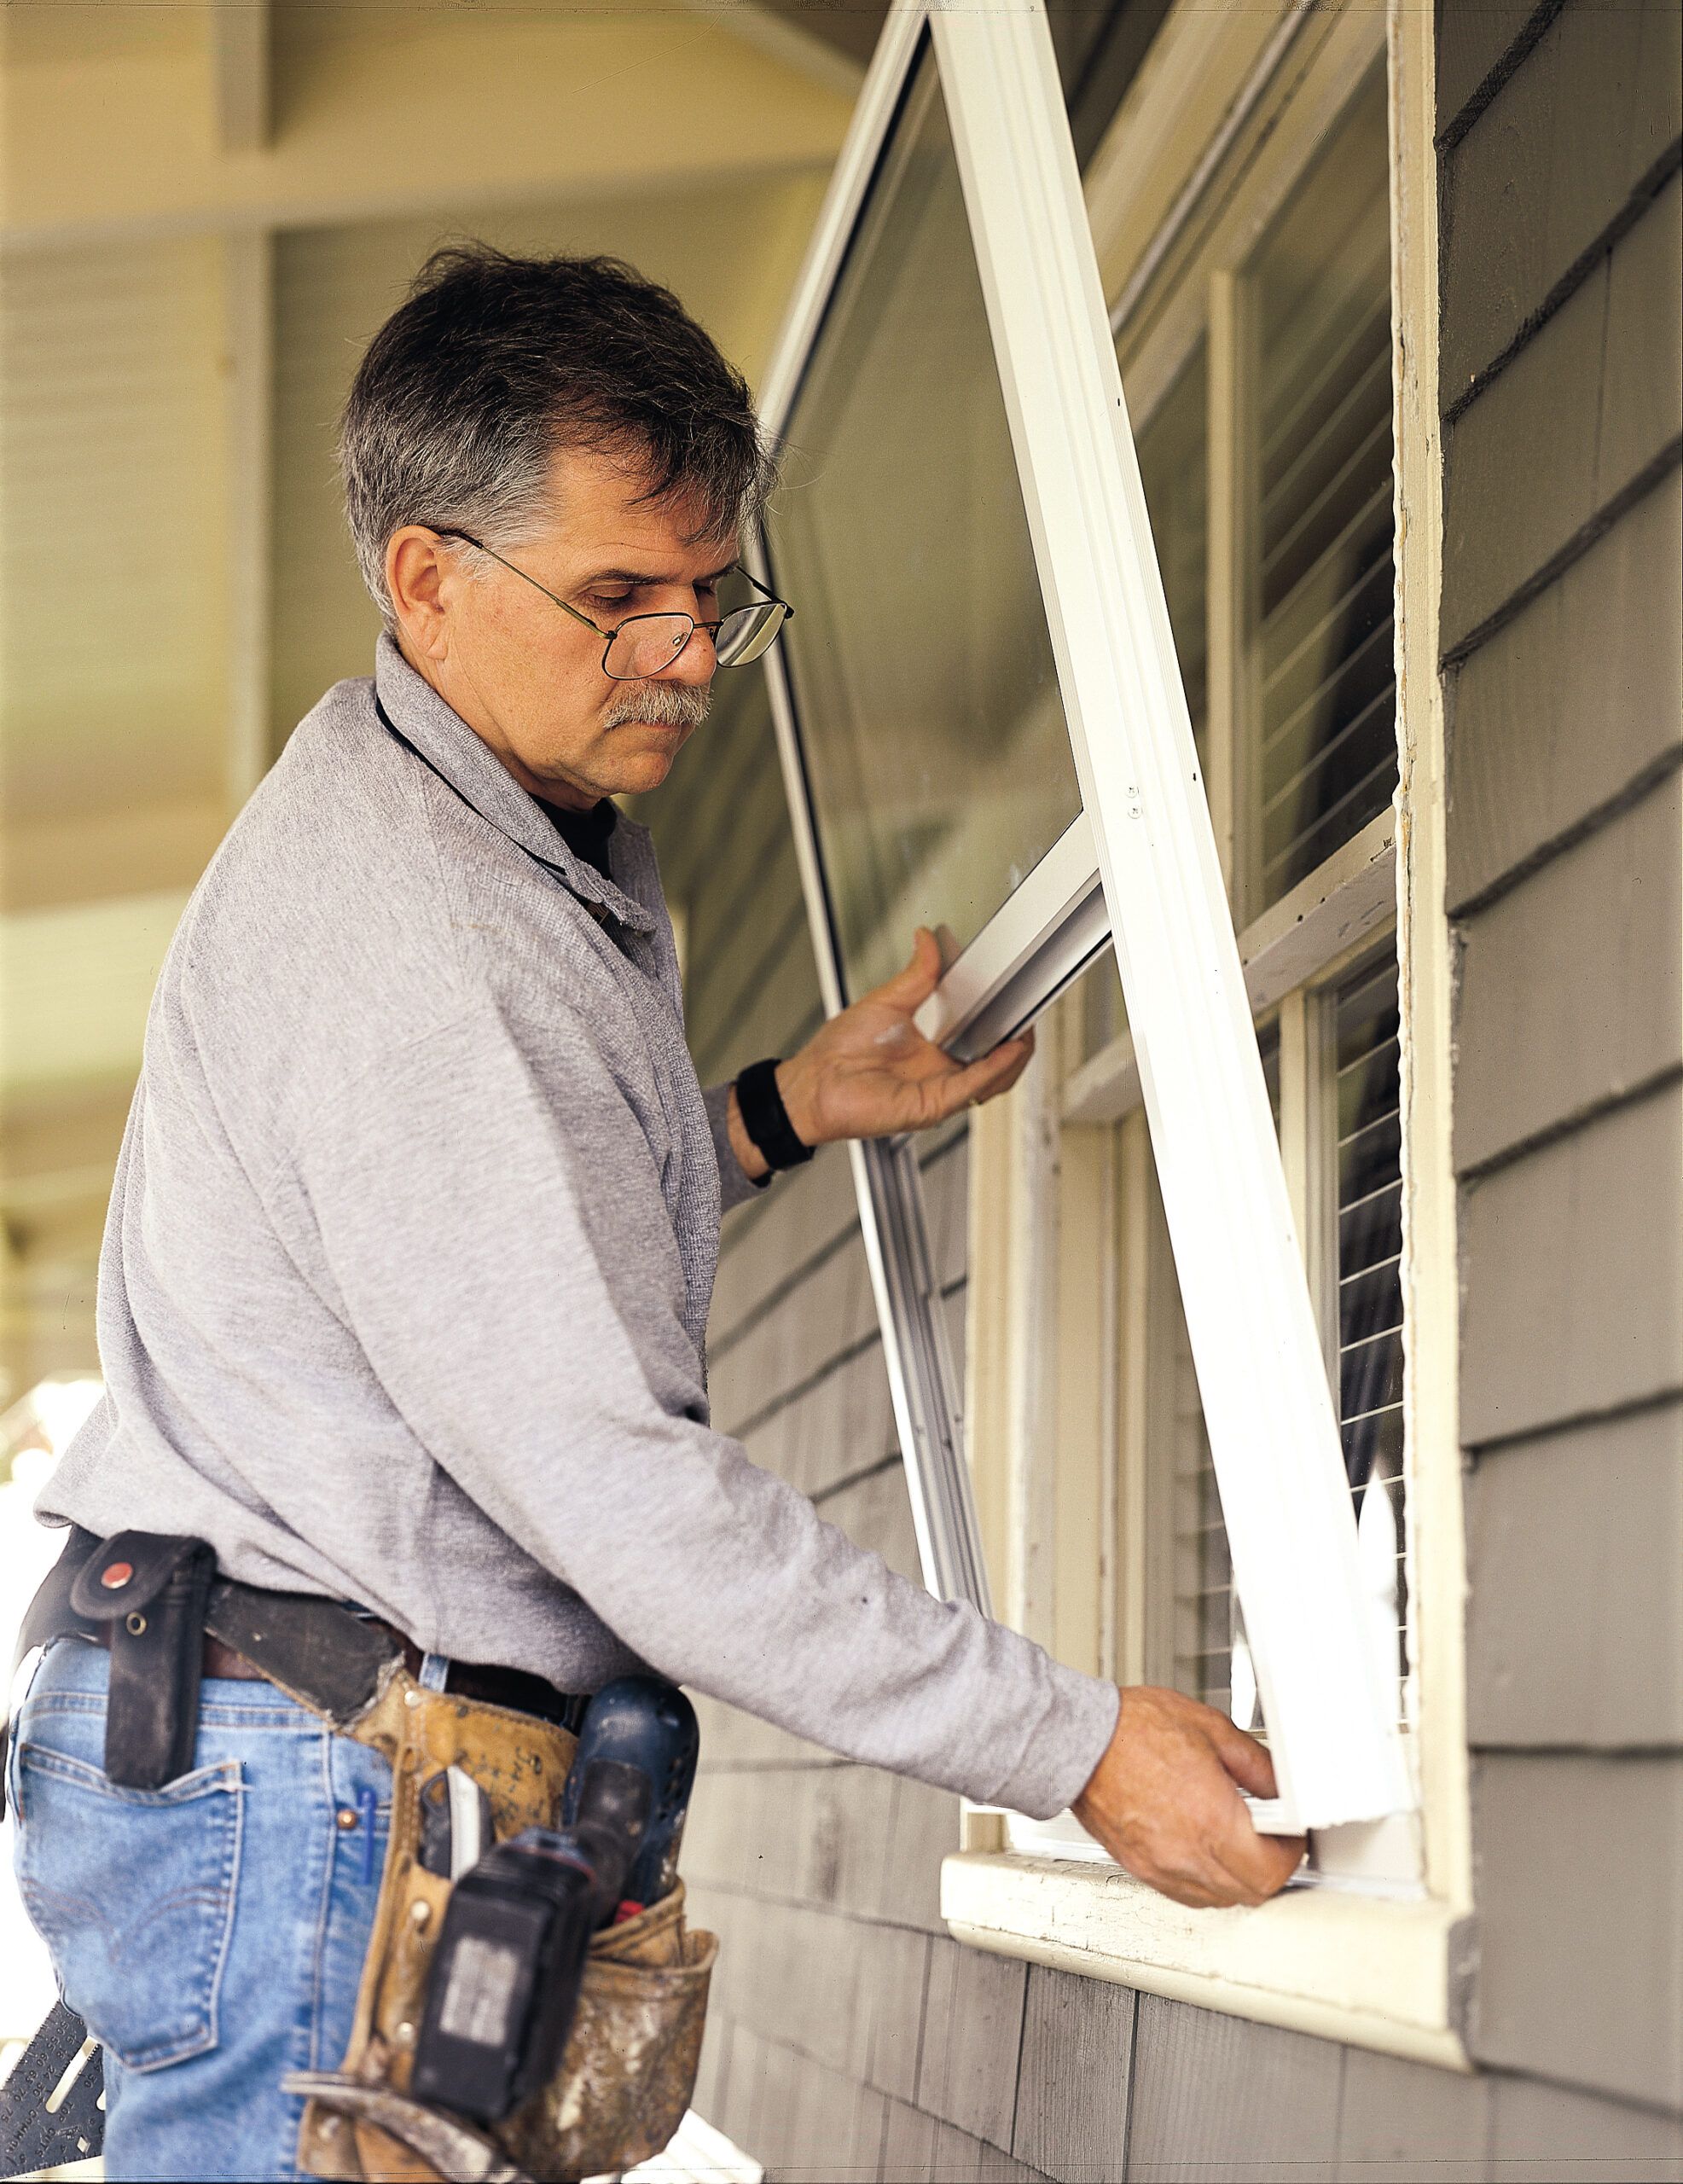
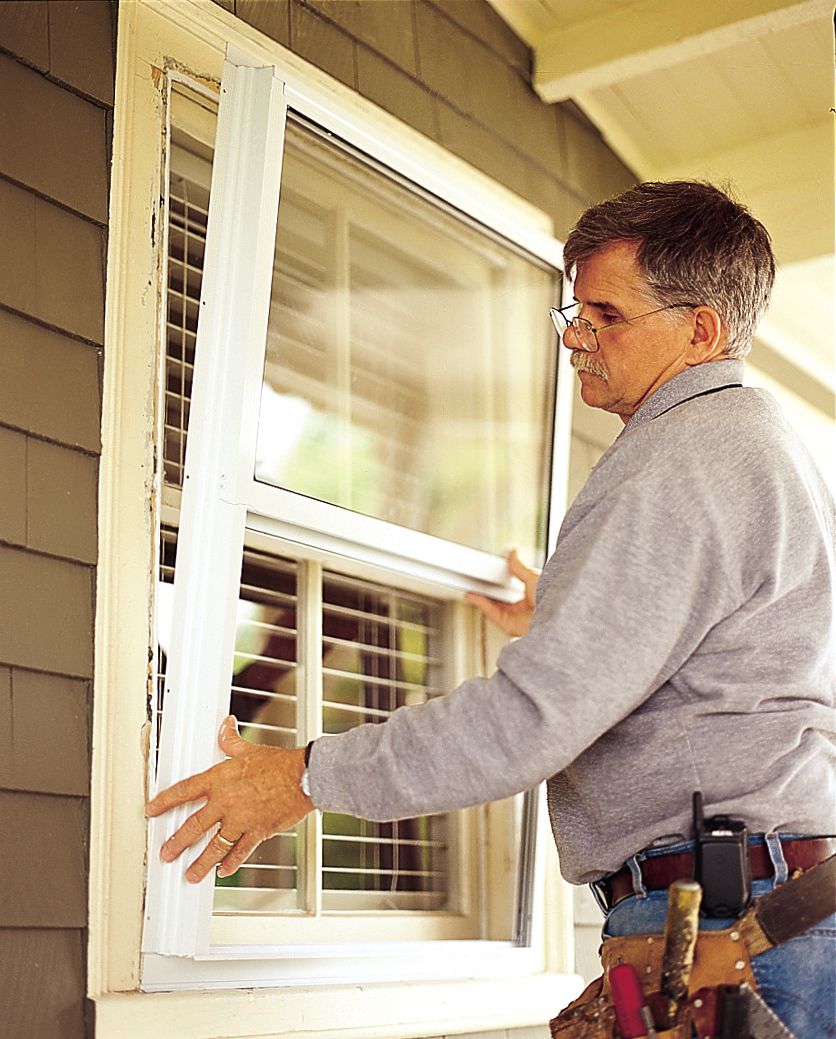
Apply Caulk and Position the Storm Window
Proper caulking prevents water intrusion and air infiltration. Here’s how to caulk and position your storm window:
- Apply a bead of butyl or elastomeric caulk along the casing where the storm window’s fins will attach. Don’t caulk the sill.
- Center the storm window in the opening.
- Push the widow up until the stop hits the bottom edge of the head casing, then lower it about 1/8 inch to allow for expansion.
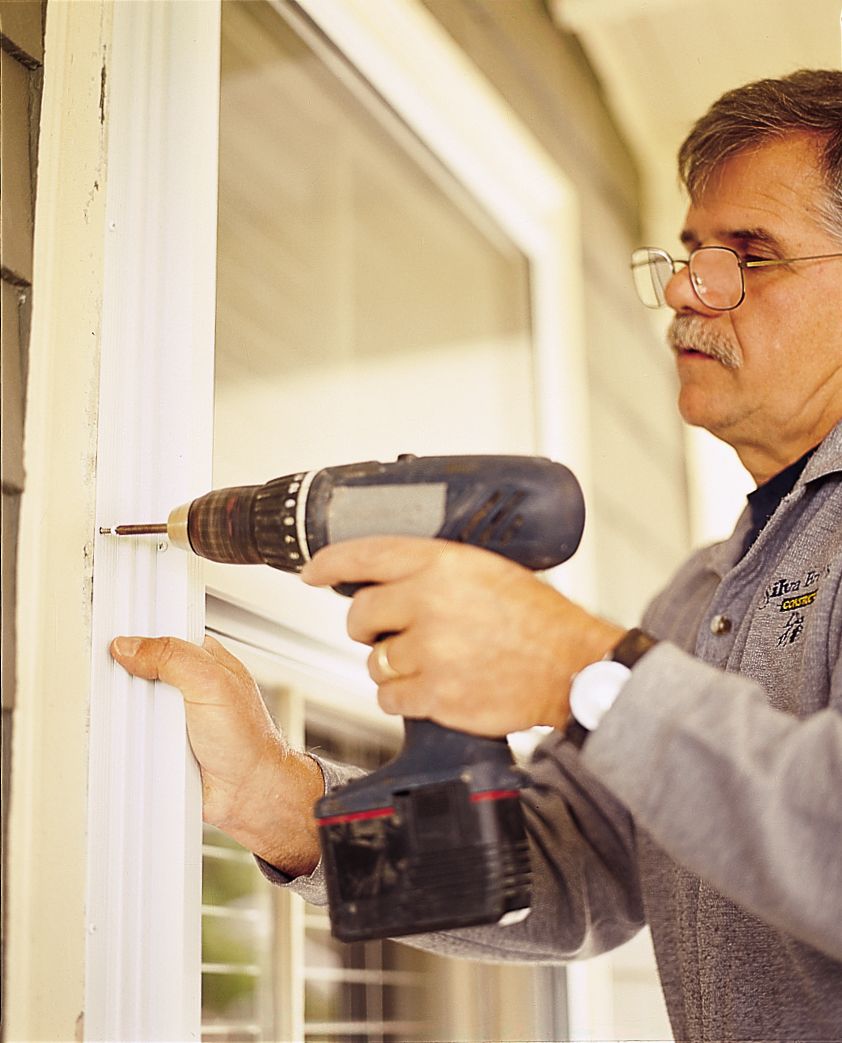
Secure and Adjust the Frame
Make sure the frame is square and adjust as needed. An improperly aligned frame can result in difficulties in opening and closing the window.
- Drive the first screw into the top fin’s center hole.
- Insert two screws into the lowest holes on the side fins, but don’t tighten them.
- Drive and tighten the remaining screws around the perimeter.
- Test the sashes for smooth operation and adjust the frame if necessary.
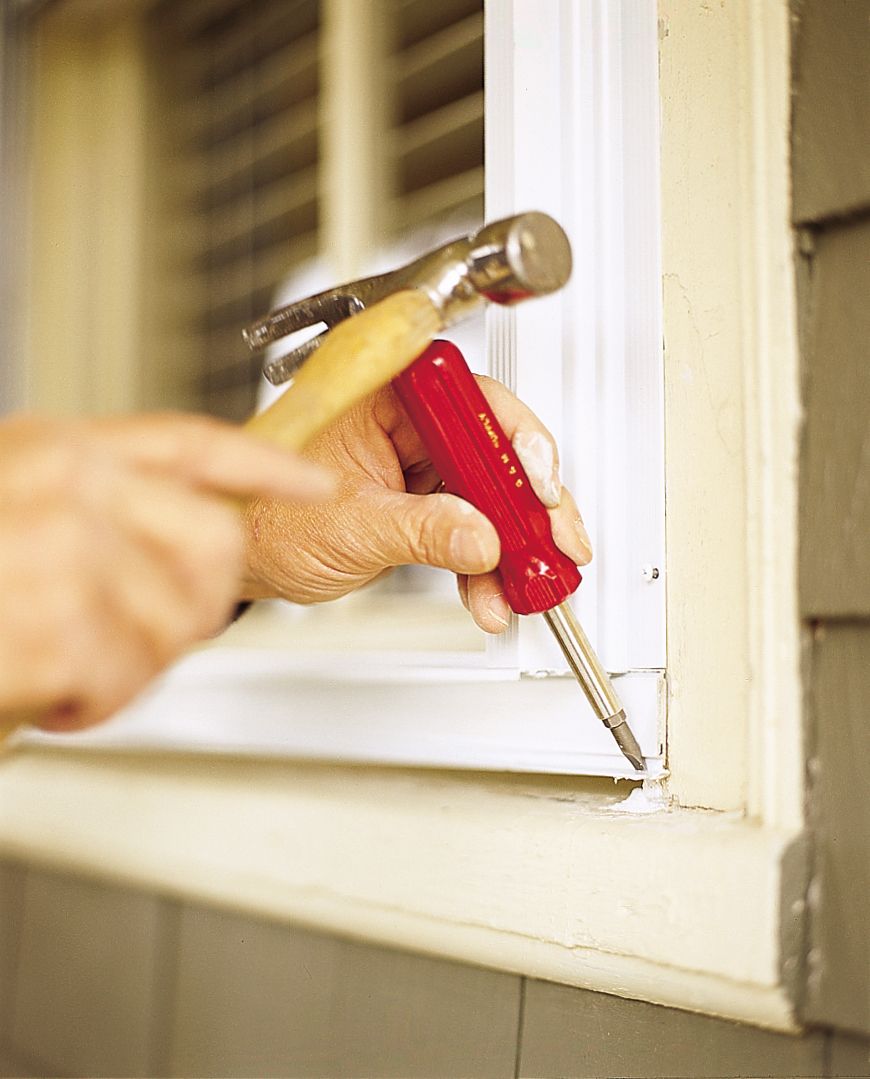
Add Finishing Touches
Once you have the window in place, you can apply the finishing touches.
- Use a screwdriver or putty knife to gently tap the bottom sill extender until it rests against the sill on both sides.
- Double-check all screws for tightness.
- Clean any excess caulk or debris from the installation.
Maintenance and Care for Storm Windows
Proper maintenance helps storm windows continue to perform well for years to come. Follow these tips to keep them in top condition.
Cleaning Tips
Regular cleaning prevents the buildup of dirt and grime, ensuring your storm windows always look their best and function smoothly.
- Avoid using abrasive cleaners that could damage the finish.
- Clean the glass and frames regularly with mild soap and water.
- Lubricate moving parts annually with silicone spray.
Seasonal Adjustments
Seasonal maintenance can help your storm windows perform better throughout the year. Follow these seasonal maintenance tips:
- Adjust sashes for proper alignment in the spring and fall.
- Check weatherstripping and replace it if worn.
- Remove and store screens during the winter months.
Cost Comparison: Storm Windows vs. Replacement Windows
When considering window upgrades, compare the costs and benefits of storm windows against full window replacements.
Initial Investment
While prices vary, expect to pay between $4,209 and $19,830 for professional storm window installation, compared to the average cost of replacement window installation of $1,105–$1,730 per window.
Long-Term Savings
Storm windows can provide energy savings comparable to replacement windows at a fraction of the cost. They also extend the life of your existing windows, potentially delaying the need for full replacements. In the long run, storm windows offer a cost-effective solution to energy efficiency without the high upfront costs associated with full window replacements.
Environmental Impact
In addition to cost savings, installing storm windows allows you to make your existing windows more efficient without needing to dispose of the old ones.
Common Mistakes To Avoid When Installing Storm Windows
Be aware of these common pitfalls to accomplish a successful storm window installation:
- Caulking the bottom edge along the windowsill, which can trap moisture
- Failing to measure the window opening properly
- Not checking for square and level before installation
- Overtightening screws, which can warp the frame
Weatherproofing Beyond Storm Windows
While storm windows are a great weatherproofing option, there are additional steps you can take to improve your home’s energy efficiency and comfort.
- Additional insulation: Consider adding replacement windows in areas where storm windows aren’t practical or sufficient. You can also improve insulation by adding weatherstripping to existing windows and doors to reduce drafts and improve overall energy efficiency.
- Professional energy audits: Schedule a professional energy audit to identify all areas where your home could be losing energy. This comprehensive approach will help you prioritize improvements and maximize your energy savings.
- Sealing air leaks: Identify and seal air leaks around windows, doors, and other openings in your home. Use caulk for small gaps and expanding foam for larger openings. Sealing air leaks can help conserve energy and enhance indoor comfort by maintaining consistent temperatures throughout your home.
Our Conclusion
Storm windows offer an affordable and effective solution for improving your home’s energy efficiency and protecting your existing windows. By choosing high-quality storm windows and following proper installation techniques, you can enjoy significant energy savings and increased comfort in your home. Whether you opt for exterior, interior, or triple-track storm windows, the investment is likely to pay off in reduced energy bills and an extended lifespan for your primary windows.