Compared with other homeowner headaches, a leaky kitchen faucet or toilet tank valve is a minor problem. Yet a steady trickle of water is a waste of water and money and will eventually get on your nerves. Both of these problems can be fixed quickly, and unlike many more involved plumbing jobs, these repairs require only a few ordinary tools. Below, we’ll walk you through these repairs.
To get expert advice on these repairs, we consulted David Sorrell of Goodhill Mechanical Contractors in Woodbury, Connecticut. With years of experience in plumbing repairs, Sorrell provides valuable insights into tackling these common household problems efficiently and effectively.
Fix a Running Toilet by Replacing the Flapper Valve
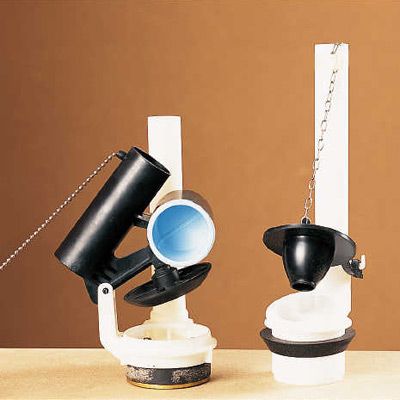
When water seems to trickle through a toilet long after it has been flushed, a worn rubber flapper valve at the bottom of the tank is probably to blame. When you flush the toilet, the flapper lifts, letting water flow into the bowl. As the tank empties, the flapper sinks to block the opening, which allows the tank to refill.
Although durable, the flapper can wear out over time, providing a less-than-perfect seal. The result is an audible trickle, punctuated by an occasional surge of supply water topping off the tank. You might be able to get the trickle to stop by jiggling the handle, but eventually this trick stops working. A faulty flapper valve can drive up water costs, and if the supply line is plumbed with warm water to prevent condensation, heating costs will go up, too.
Changing an old flapper for a new one ($5 or less) is a quick job. Begin by closing the supply line to the tank. If the valve looks corroded or weak, Sorrel recommends turning off the water at the main, not at the tank. Once the water is off, you can begin the process of replacing the flapper valve. Here’s what you’ll need.
- New flapper valve
- Screwdriver (if necessary)
- Emery cloth or fine-grit sandpaper
Step 1: Get a New Flapper Valve
While the basic principle of a flapper valve is consistent across different toilet models, there can be slight variations in design and installation. It’s important to note these differences when purchasing a replacement part. Some flappers simply snap into place, while others may be secured with a small screw or pin.
Although generic flappers are available, stick with a part made for your toilet if possible. When shopping for a new flapper, it’s best to bring the old one with you to ensure an exact match. If that’s not possible, note the brand and model of your toilet before heading to the hardware store.
Step 2: Remove the Old Valve
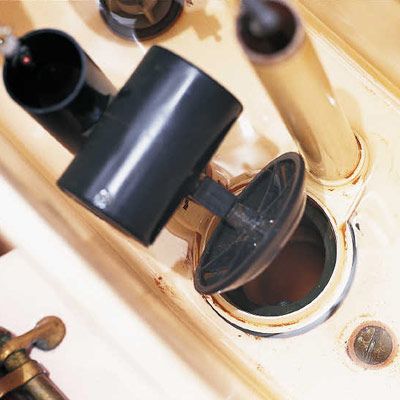
Removing the old flapper is typically a straightforward process. In many cases, you can simply unclip it from the flush lever chain and lift it off the overflow tube. The flapper on the flush assembly in the picture above pops off without any tools. Simply replace the old flapper with a new one. However, be careful not to break off the barbed plastic pin.
For models with a screw attachment, you’ll need a screwdriver to remove it. Once the old flapper is out, take a moment to clean the area around the flush valve opening to ensure a good seal with the new flapper.
Step 3: Clean the Valve Seat
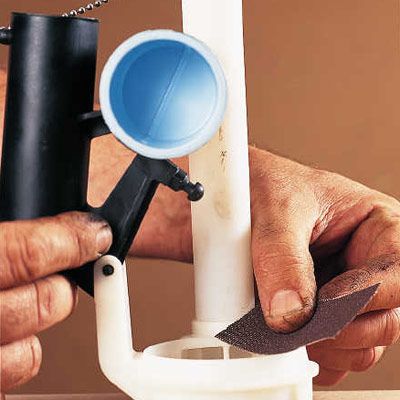
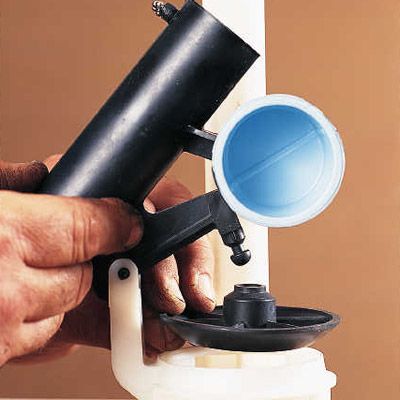
Before installing the new flapper, take a moment to inspect and clean the valve seat—that is, the surface where the flapper creates its seal. Over time, mineral deposits or debris can accumulate on this surface, preventing a proper seal. Use emery cloth or fine-grit sandpaper to gently smooth any rough spots or buildup on the valve seat. This simple step can significantly improve the seal and prevent future leaks.
After cleaning, rinse the area thoroughly to remove any debris. This plumber’s trick can extend the life of your flapper and ensure a more effective repair. Remember, a smooth, clean surface is essential for creating a watertight seal and preventing future running toilet issues.
Step 4: Install the New Valve
When installing the new flapper, make sure it’s properly aligned and securely attached. Reconnect the chain to the flush lever, leaving a small amount of slack to allow for proper operation. After installation, turn the water supply back on and test the flush mechanism to ensure the new flapper is working correctly and creating a proper seal.
Fix a Dripping Faucet by Replacing the Cartridge
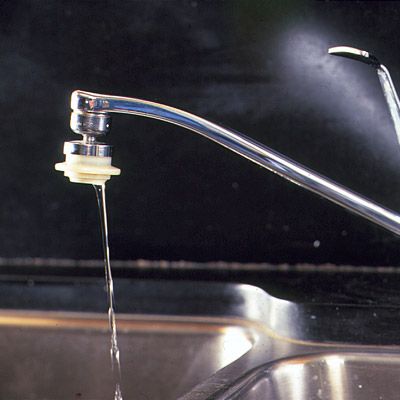
A dripping faucet is another common household annoyance that can waste a surprising amount of water over time. Single-lever faucets, which are now standard in many kitchens and bathrooms, often develop leaks due to wear on the valve-stem assembly. Factors such as frequent use, hard water, or highly acidic water can accelerate this wear.
When you push the lever all the way down and still hear a drip, it’s likely time to replace the valve-stem assembly. Sorrell recommends replacing the O-ring at the same time. This repair typically takes about 20 minutes and doesn’t require dismantling the plumbing or doing any under-the-sink gymnastics. Here’s what you’ll need.
- New valve-stem assembly cartridge
- New O-ring kit (optional but recommended)
- Flathead screwdriver or utility knife
- Philips head screwdriver
- Slip-joint pliers
- Cartridge puller tool (if necessary)
Step 1: Get a Replacement Cartridge
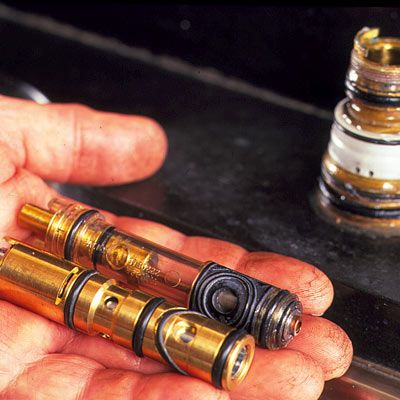
It may actually take you longer to find the right part than it does to make the repair. Most major faucet manufacturers make single-lever faucets, and replacement parts are widely available at home center and hardware stores, but the valve assemblies are not interchangeable. Even different faucet models from the same manufacturer are likely to require different valve replacement parts.
It will be easier to get the right parts if you know the name of the manufacturer and the faucet model number. If you know the manufacturer but not the model, a local plumbing-supply house might be able to narrow the choices for you. If all else fails, pull the old part before buying a new one. That’s not the most convenient option, Sorrell says, but at least it’s foolproof.
We used a Moen faucet for the steps shown here. If your faucet is from a different manufacturer, the parts will look a little different. But, according to Sorrell, the procedure for replacing them is virtually the same. Cartridges are available in both plastic and brass; plastic cartridges work just as well as their brass counterparts, and they are a few dollars cheaper. If you have well water, Sorrell suggests the plastic model because it is less susceptible to damage from untreated water.
Step 2: Pop the Faucet Cap
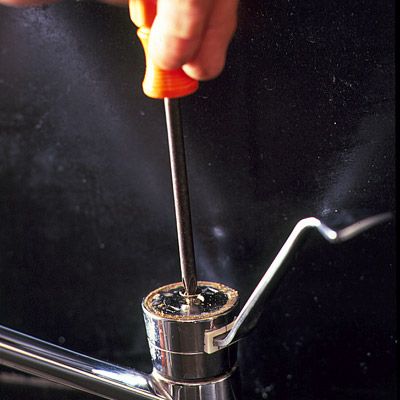
Your first step is to shut off both hot- and cold-water supply lines under the sink, and here Sorrell advises caution. Shutoff valves in older plumbing systems can be corroded, especially when connections are threaded instead of soldered. “I’ve had them crumble right in my hands,” Sorrell says.
An uncontrolled geyser under your sink is no way to get started, so if the shutoff is suspect, use the main shutoff valve, located where the waterline enters the house or at the pressure tank. Another preliminary step: Block off the sink drain with a rag so small parts don’t disappear.
Pop to the cap on the top of the faucet with a flathead screwdriver or utility knife, then remove the single screw to free the faucet lever. You might need to work the lever back and forth gently to pull it up.
Step 3: Free the Retainer Nut
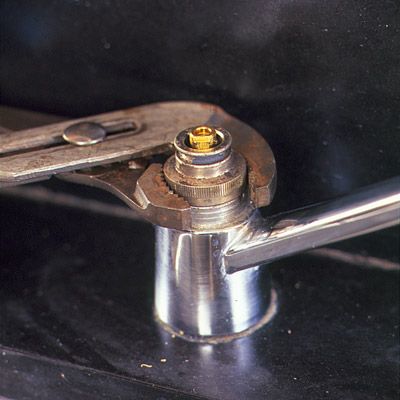
With the lever removed, you’ll see a retainer nut holding the cartridge in place. Use a pair of slip-joint pliers to loosen and remove this nut. Don’t worry about marring the finish of the nut, as it will be covered when you reassemble the faucet.
As you work, keep track of the order and orientation of the parts you remove. Taking photos or making a simple diagram can be helpful when it’s time to put everything back together. Once the retainer nut is removed, you should be able to see the top of the cartridge.
Step 4: Replace the O-Rings
While you have disassembled the faucet, it’s a good opportunity to replace the O-rings on the body of the faucet. These small rubber rings prevent leaks at the base of the faucet and can deteriorate over time. O-ring replacement kits are usually available wherever you purchase cartridges.
To replace the O-rings:
- Use a small flathead screwdriver to carefully remove the old O-rings.
- Clean the grooves where the O-rings sit to ensure a good seal.
- Apply a small amount of plumber’s grease (usually supplied with the replacement kit) to the new O-rings.
- Carefully slide the new O-rings into place, making sure they’re seated properly in their grooves.
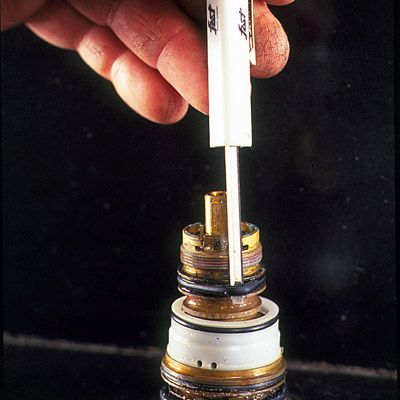
Step 5: Remove the Old Cartridge
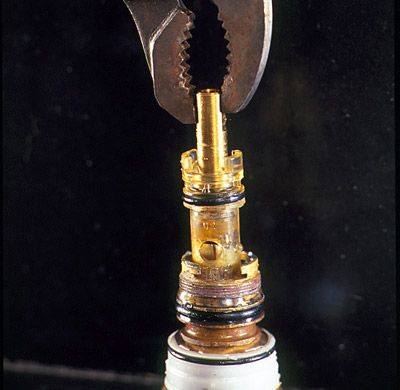
Before removing the old cartridge, take note of its orientation, particularly any notches or markings at the top of the stem. When you install the new cartridge, make sure the notch points in the same direction.
Grip the cartridge firmly and pull straight up, wiggling gently if necessary to break any mineral buildup or corrosion. Usually, you can do this with a pair of pliers, but if the cartridge is stubborn, you may need to use a specialized cartridge puller tool, which can be purchased or rented from most hardware stores.
Once the old cartridge is out, clean the faucet body thoroughly to remove any debris or mineral deposits. This will help ensure a proper seal with the new cartridge. Then, simply reverse the process to install the new cartridge, making sure it’s oriented correctly and seated fully in the faucet body.
Step 6: Fine-Tune Your Repair
After installing the new cartridge and reassembling the faucet, turn the water supply back on slowly. Check for leaks around the cartridge and the base of the faucet. If you notice any drips, ensure all components are seated correctly and tighten as necessary.
Additionally, take a moment to adjust the faucet handle to ensure smooth operation. Sometimes, new cartridges can be slightly stiffer or looser than the old ones, so minor tweaks might be necessary to get the handle working smoothly.
Our Conclusion
Fixing running toilets and dripping faucets are manageable do-it-yourself projects that can save water and reduce utility bills. With the right tools and a bit of patience, most homeowners can tackle these common plumbing issues. Remember to turn off the water supply before starting any repairs, and don’t hesitate to seek professional help if you encounter unexpected complications.
Are your systems and appliances protected? See if a warranty is a good option for your home.