Project details
Skill
Cost
Estimated Time
Learning how to install wainscotting is a rewarding DIY project that can help enhance the aesthetic appeal of your home. However, it requires careful planning and precise measurements and cutting. In the video above, This Old House expert Tom Silva shows his trick to getting the wainscot look for less—keeping the existing molding in place and using the wall to stand in as the frame and panel. Follow along to learn how to install wainscoting the easy way.
*Unless otherwise noted, prices in this article reflect an average of prices that our team found from hardware stores like Lowes and Home Depot, and on Amazon.com.
The Home Behind the Project
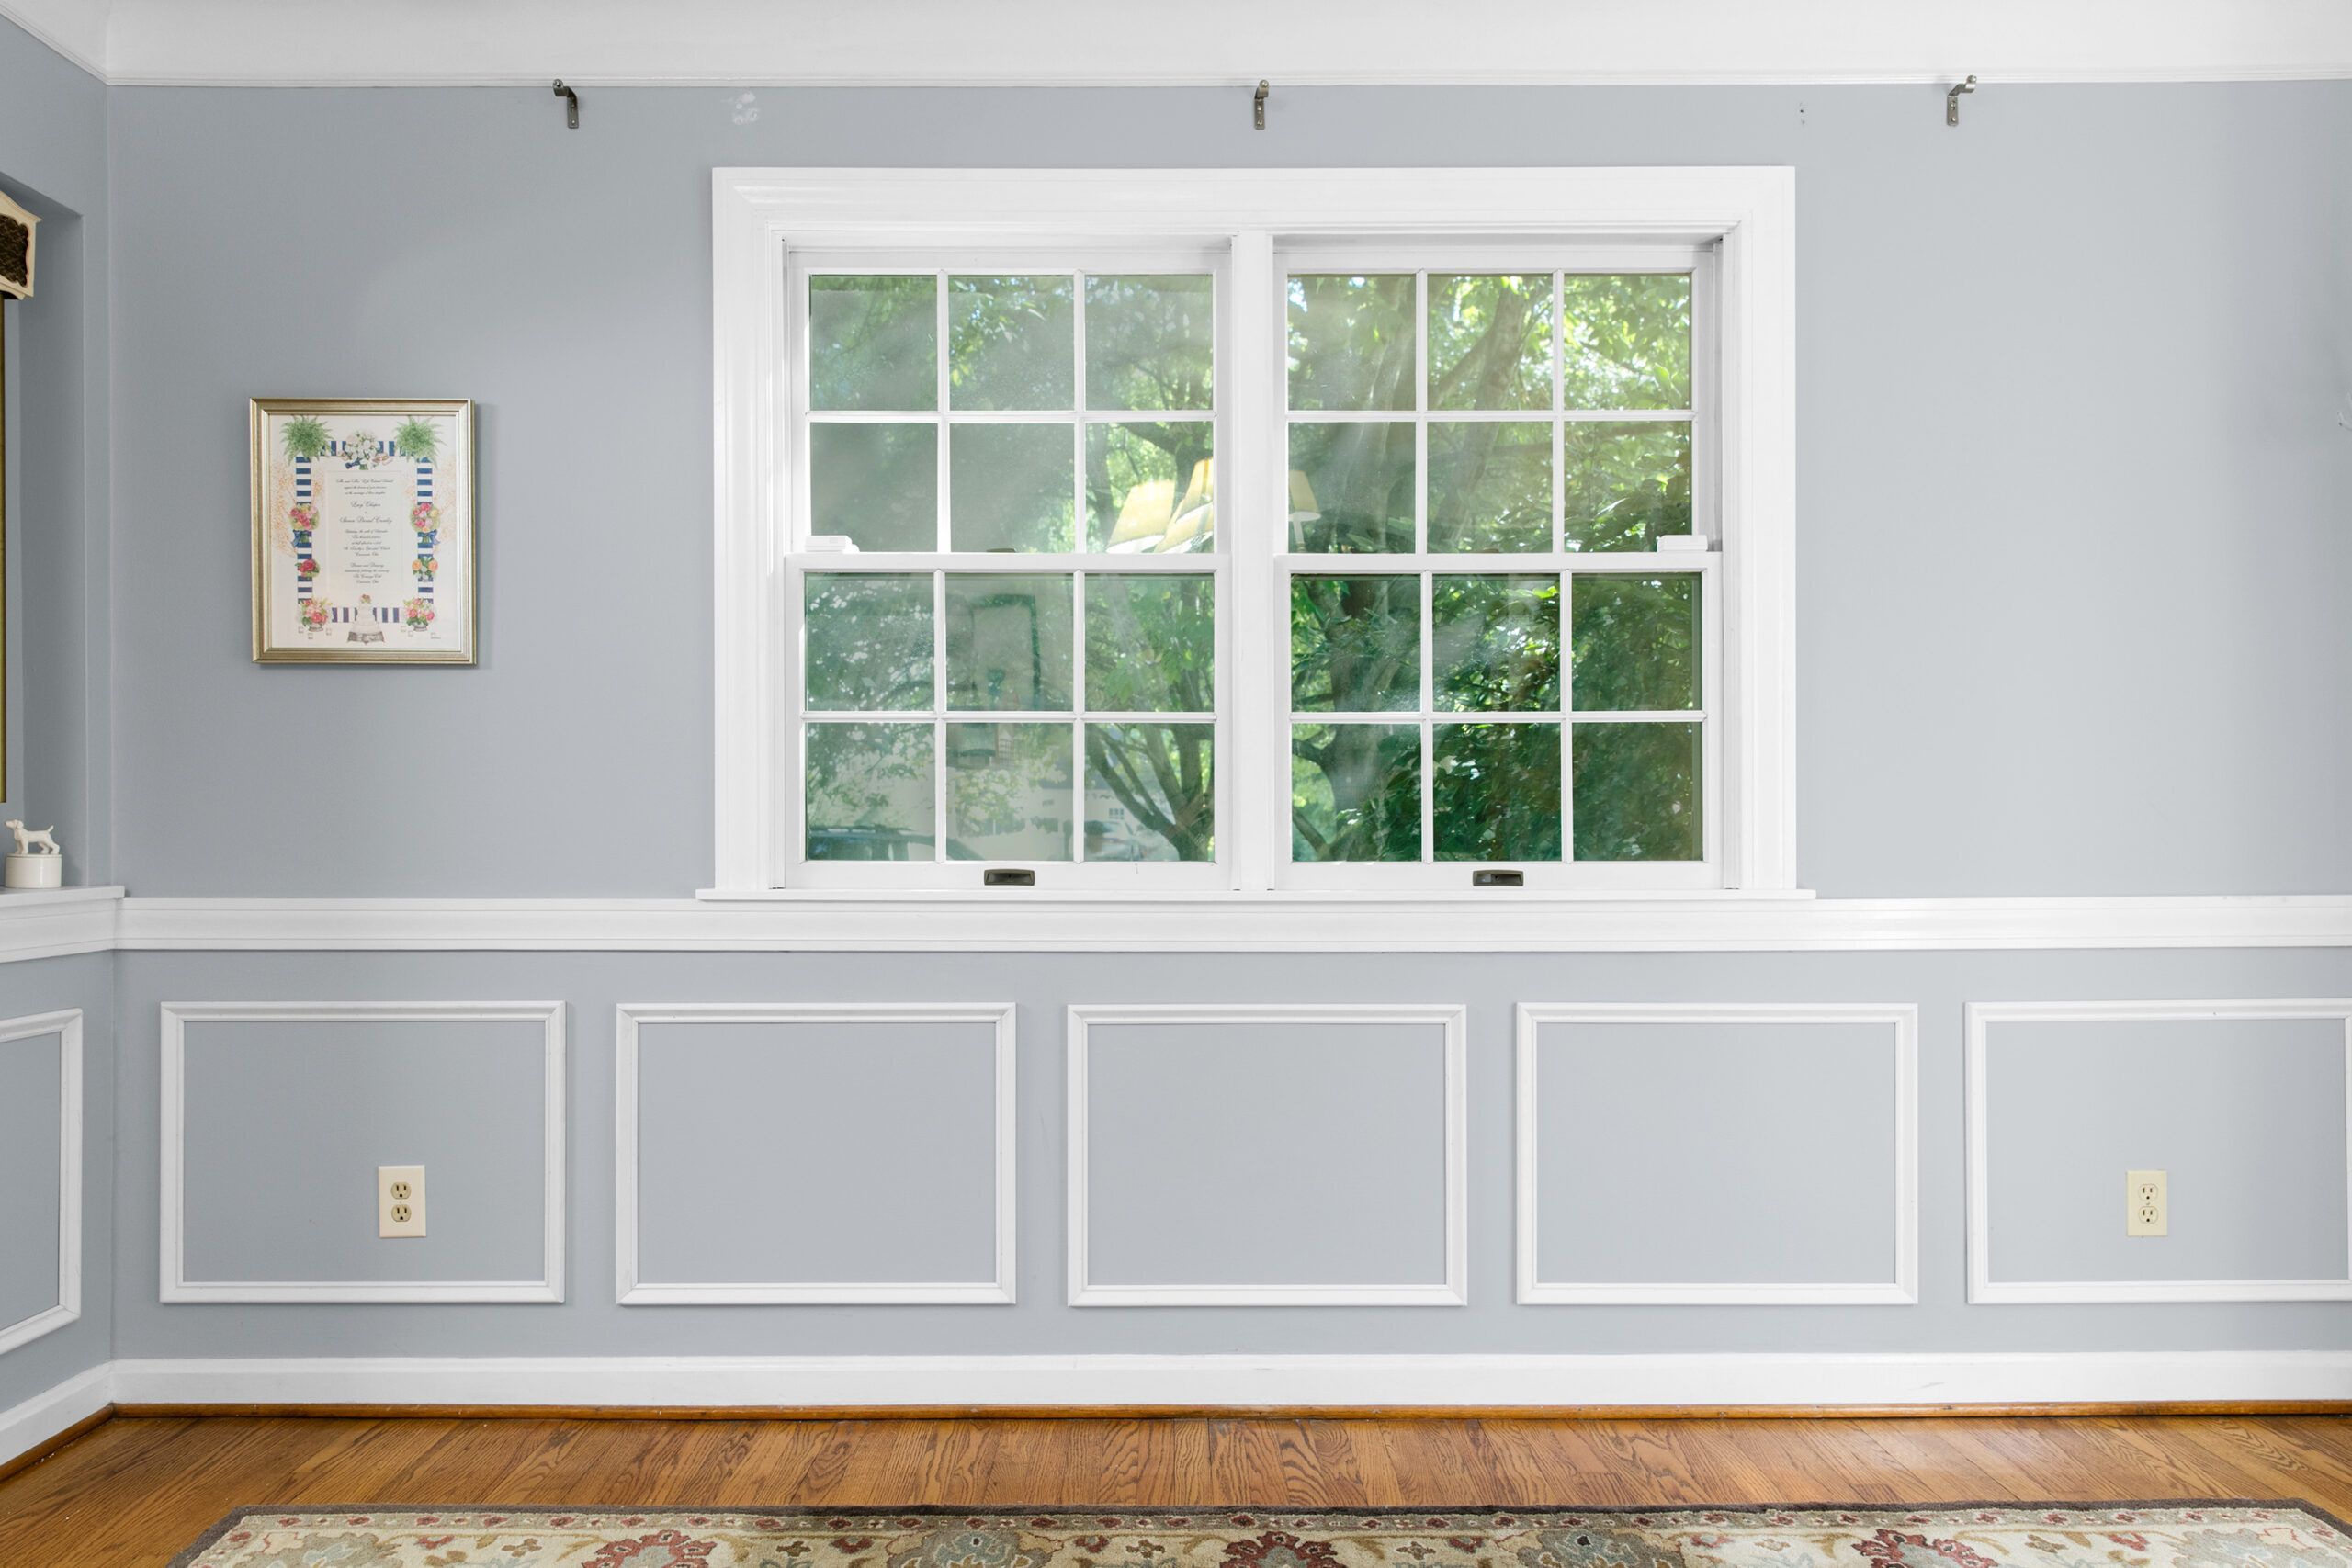
When Lucy and Steve Crowley e-mailed Ask This Old House, seeking help enhancing the dining room walls in their nearly 70-year-old Colonial Revival home in Cincinnati, the space already had decorative baseboard and chair-rail moldings. They thought about changing the look with wainscoting, but Silva had a plan to get that look with less fuss. “Traditional stile-and-rail wainscoting is a nice detail,” he says, “but it’s expensive, and in a finished room it usually means making a mess of your molding.”
Silva builds rectangular picture frames from base cap molding, then spaces them evenly around the room for a custom look, attaching them to the wall with nails and glue. Real wainscoting often calls for twice the work, building frames from square stock around a decorative panel. However, Silva’s easy DIY wainscoting solution can finish 33 linear feet of wall in a day. The base cap stock adds architectural detail and texture to the wall without busting the budget. Additionally, the base cap stock comes in a range of styles to complement the moldings you already have.
What Are Some of the Most Popular Types of Wainscoting?
Before you get started, there are several styles of wainscoting you can choose from. The type you select will depend on your home’s architecture, your personal style, and the level of DIY skill you’re comfortable with. Here are some of the most popular types.
Raised-Panel Wainscoting
Raised-panel wainscoting is the most traditional and formal style. It features recessed panels with raised borders, creating a three-dimensional effect. This type is often seen in Colonial and Georgian-style homes and can add a touch of elegance to formal dining rooms or entryways.
Flat-Panel Wainscoting
Flat-panel wainscoting offers a simpler, more modern look compared to raised-panel designs. It consists of flat panels framed by stiles and rails to create a clean and streamlined appearance. This style is versatile and can complement both traditional and contemporary interiors.
Beadboard Wainscoting
Beadboard is more commonly seen in casual or cottage-style homes. It features vertical planks with distinctive grooves or “beads” between each board. Beadboard wainscoting can add texture and charm to kitchens, bathrooms, or mudrooms.
Board and Batten Wainscoting
Board and batten wainscoting consists of wide boards placed vertically on the wall, with narrow strips (battens) covering the seams. This style has a rustic, farmhouse feel and can create a striking visual impact in living rooms or bedrooms.
How Can You Creatively Use Wainscoting in Your Home?
Wainscoting isn’t limited to traditional applications. Here are some innovative ways to incorporate it into your home decor.
Bathrooms
In bathrooms, wainscoting can provide a water-resistant barrier while adding style. It’s smart to choose moisture-resistant materials and seal all joints thoroughly to protect against humidity.
Dining Rooms
Dining rooms are classic spaces for wainscoting. For a dramatic effect, try extending it higher up the wall or even to the ceiling. Pair it with a bold paint color above for a striking contrast.
Home Offices
Incorporate wainscoting into your home office to create a sophisticated atmosphere. Opt for a dark stain or color to add a touch of elegance. This addition can help define the space and make it feel more professional and organized.
Hallways
Hallways are often overlooked when it comes to interior design, but wainscoting can add charm and interest. This is especially useful in narrow hallways—it can make the space feel more refined and less cramped. Use lighter colors to brighten up the area.
Living Rooms
Wainscoting can serve as a beautiful backdrop for furniture and artwork in living rooms. Different styles of wainscoting can delineate various areas within a large living room, such as a reading nook or entertainment area. Mixing styles can provide a unique, customized look.
Combining Styles
Don’t be afraid to mix and match different wainscoting styles within the same room. For instance, you can combine beadboard with flat-panel wainscoting to create a unique visual texture that adds depth to the room.
Tools and Materials Needed for Wainscoting Installation
Before you begin your wainscoting project, gather the following tools and materials:
- Measuring tape
- Level
- Pencil
- Stud finder
- Circular saw or miter saw
- Jigsaw (for cutting around outlets)
- Nail gun or hammer
- Wood glue
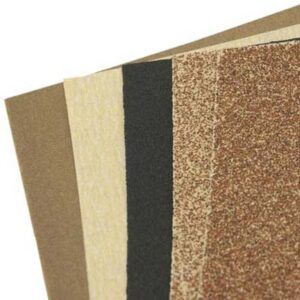
- Sandpaper
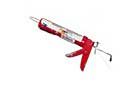
- Caulk and caulk gun
- Primer and paint
- Wainscoting panels or boards
- Chair rail molding
- Baseboards (if not already installed)
- Finishing nails
- Wood filler
How Do You Install Wainscoting?
Follow these steps to install wainscoting on your home’s walls.
1. Pick Your Look
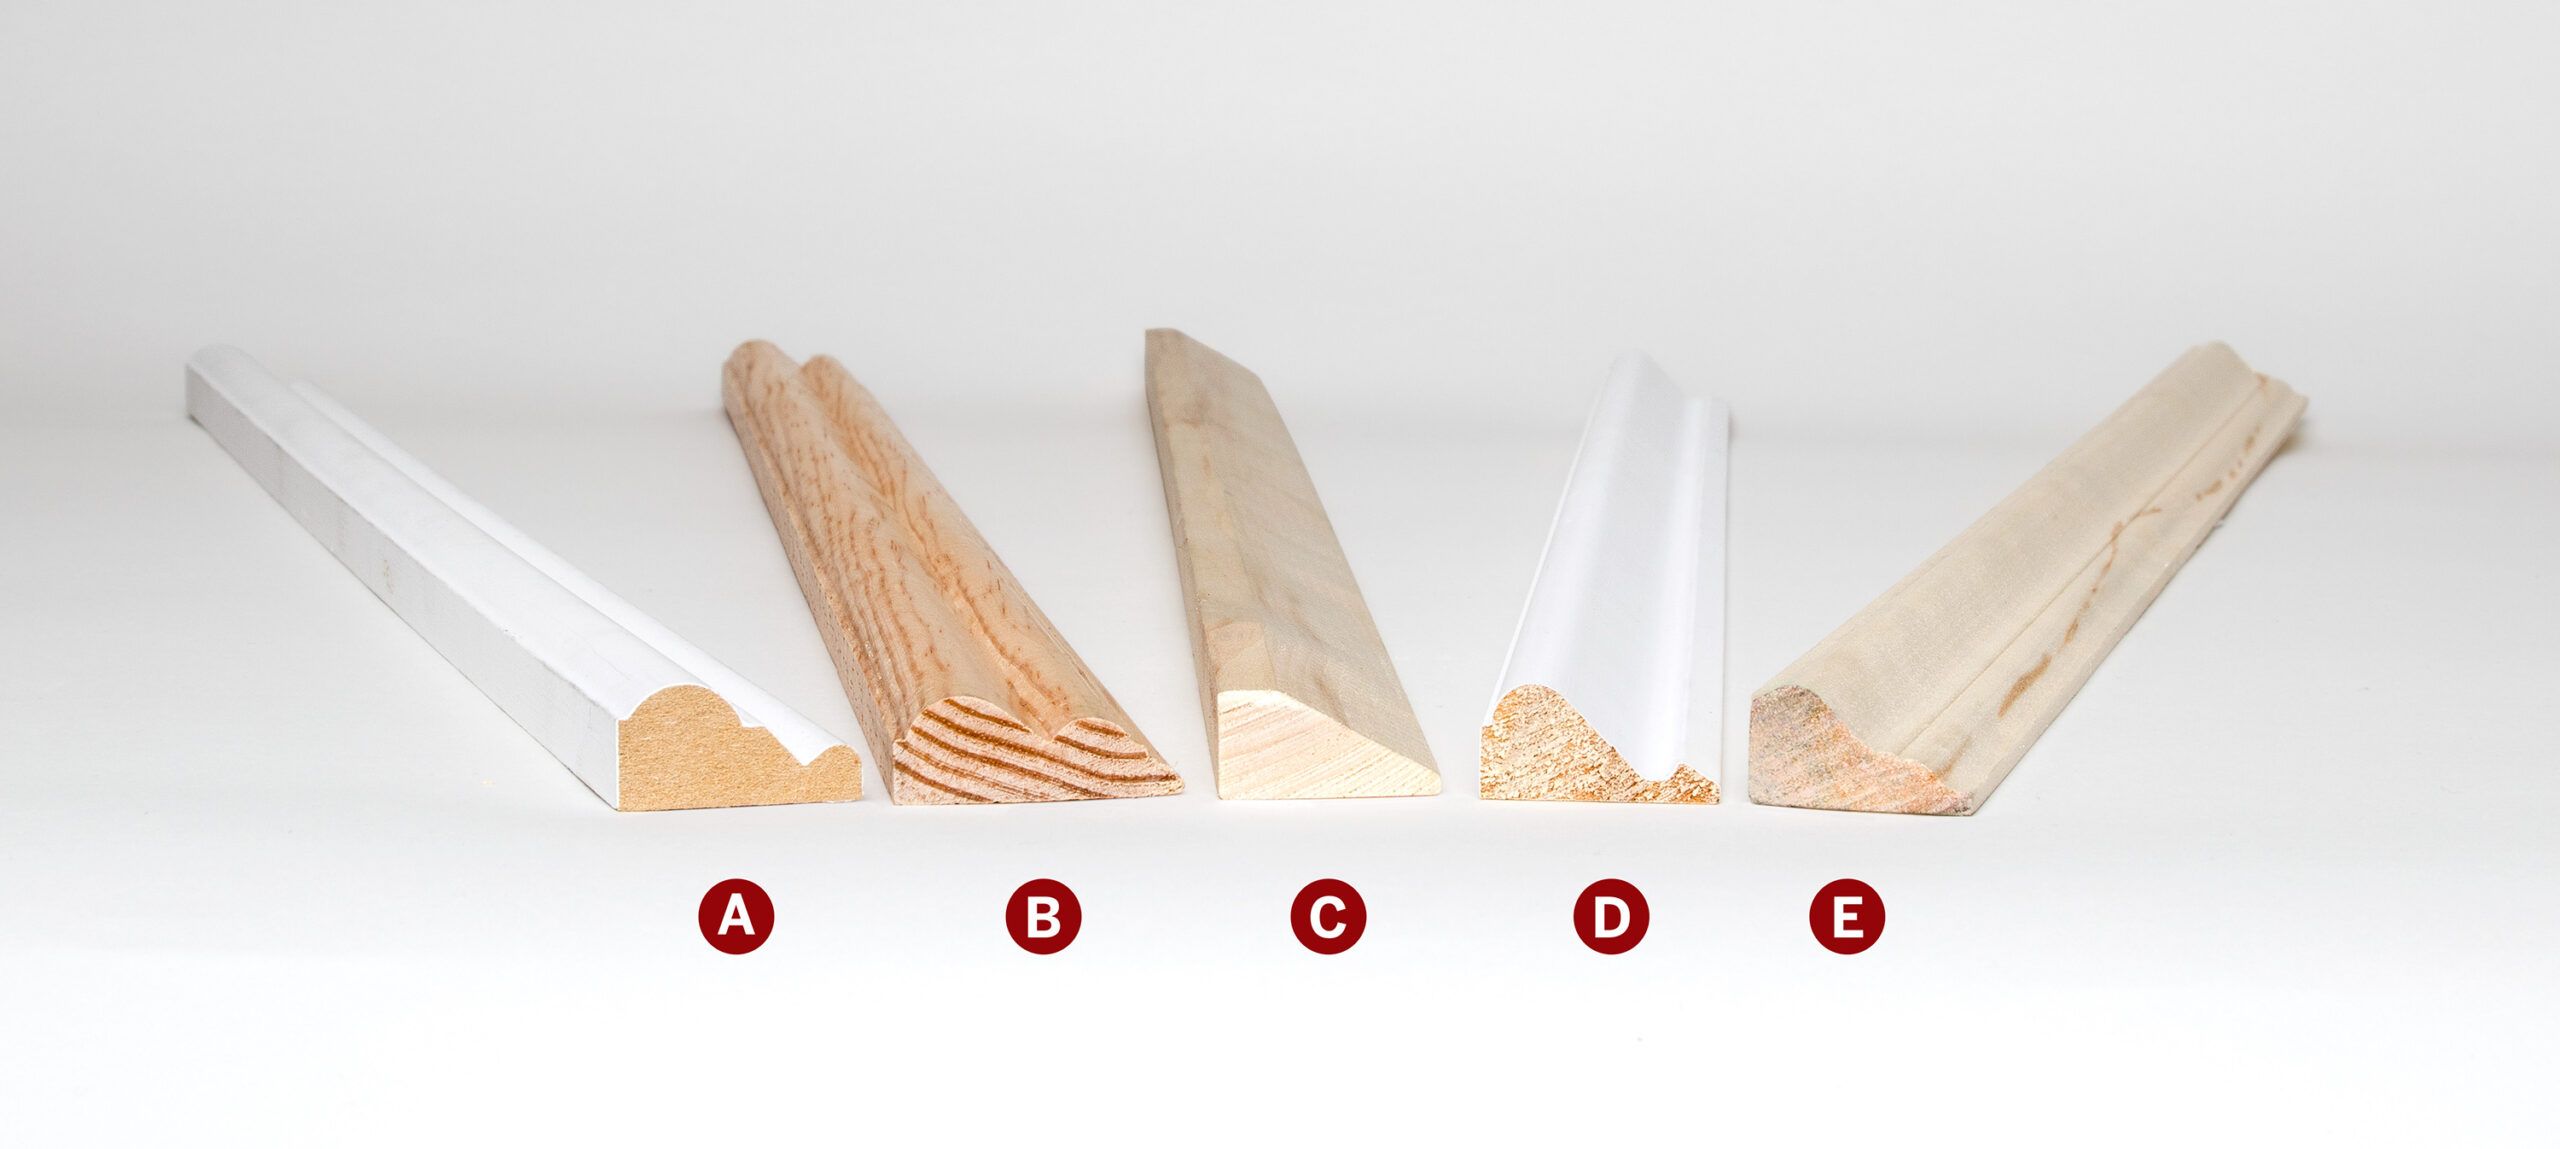
You can find base cap molding, which has flat sides that rest against the baseboard and the wall, in 8-foot lengths starting at just under $2 per linear foot. Home centers usually stock profiles made from primed pine or MDF (medium-density fiberboard), though PVC is also an option for outdoor projects. Styles range from simple coves to ornate ogees. Panel molding—which can also be used for wall frames—is usually wider, thicker, and sometimes includes a rabbet that fits over a piece of square stock, giving the frame a more substantial look.
Above are some common base cap profiles:
A: 3⁄4-by-1 3⁄8 primed MDF
B: 5⁄8-by-1 5⁄8 pine
C: 3⁄4-by-1 1⁄4 aspen
D: 11⁄16-by-1 3⁄8 primed poplar
E: 3⁄4-by-1 1⁄4 aspen
2. Prepare Your Wall
Start by removing any existing baseboards and chair rails. Use a stud finder to locate and mark wall studs, as you’ll need to nail into these for secure attachment. Repair any damage to the wall surface, such as holes or cracks, using spackle or joint compound. Once dry, sand the repaired areas until it’s smooth. For textured walls, you may need to sand them lightly to create a flat surface for the wainscoting panels to adhere to properly.
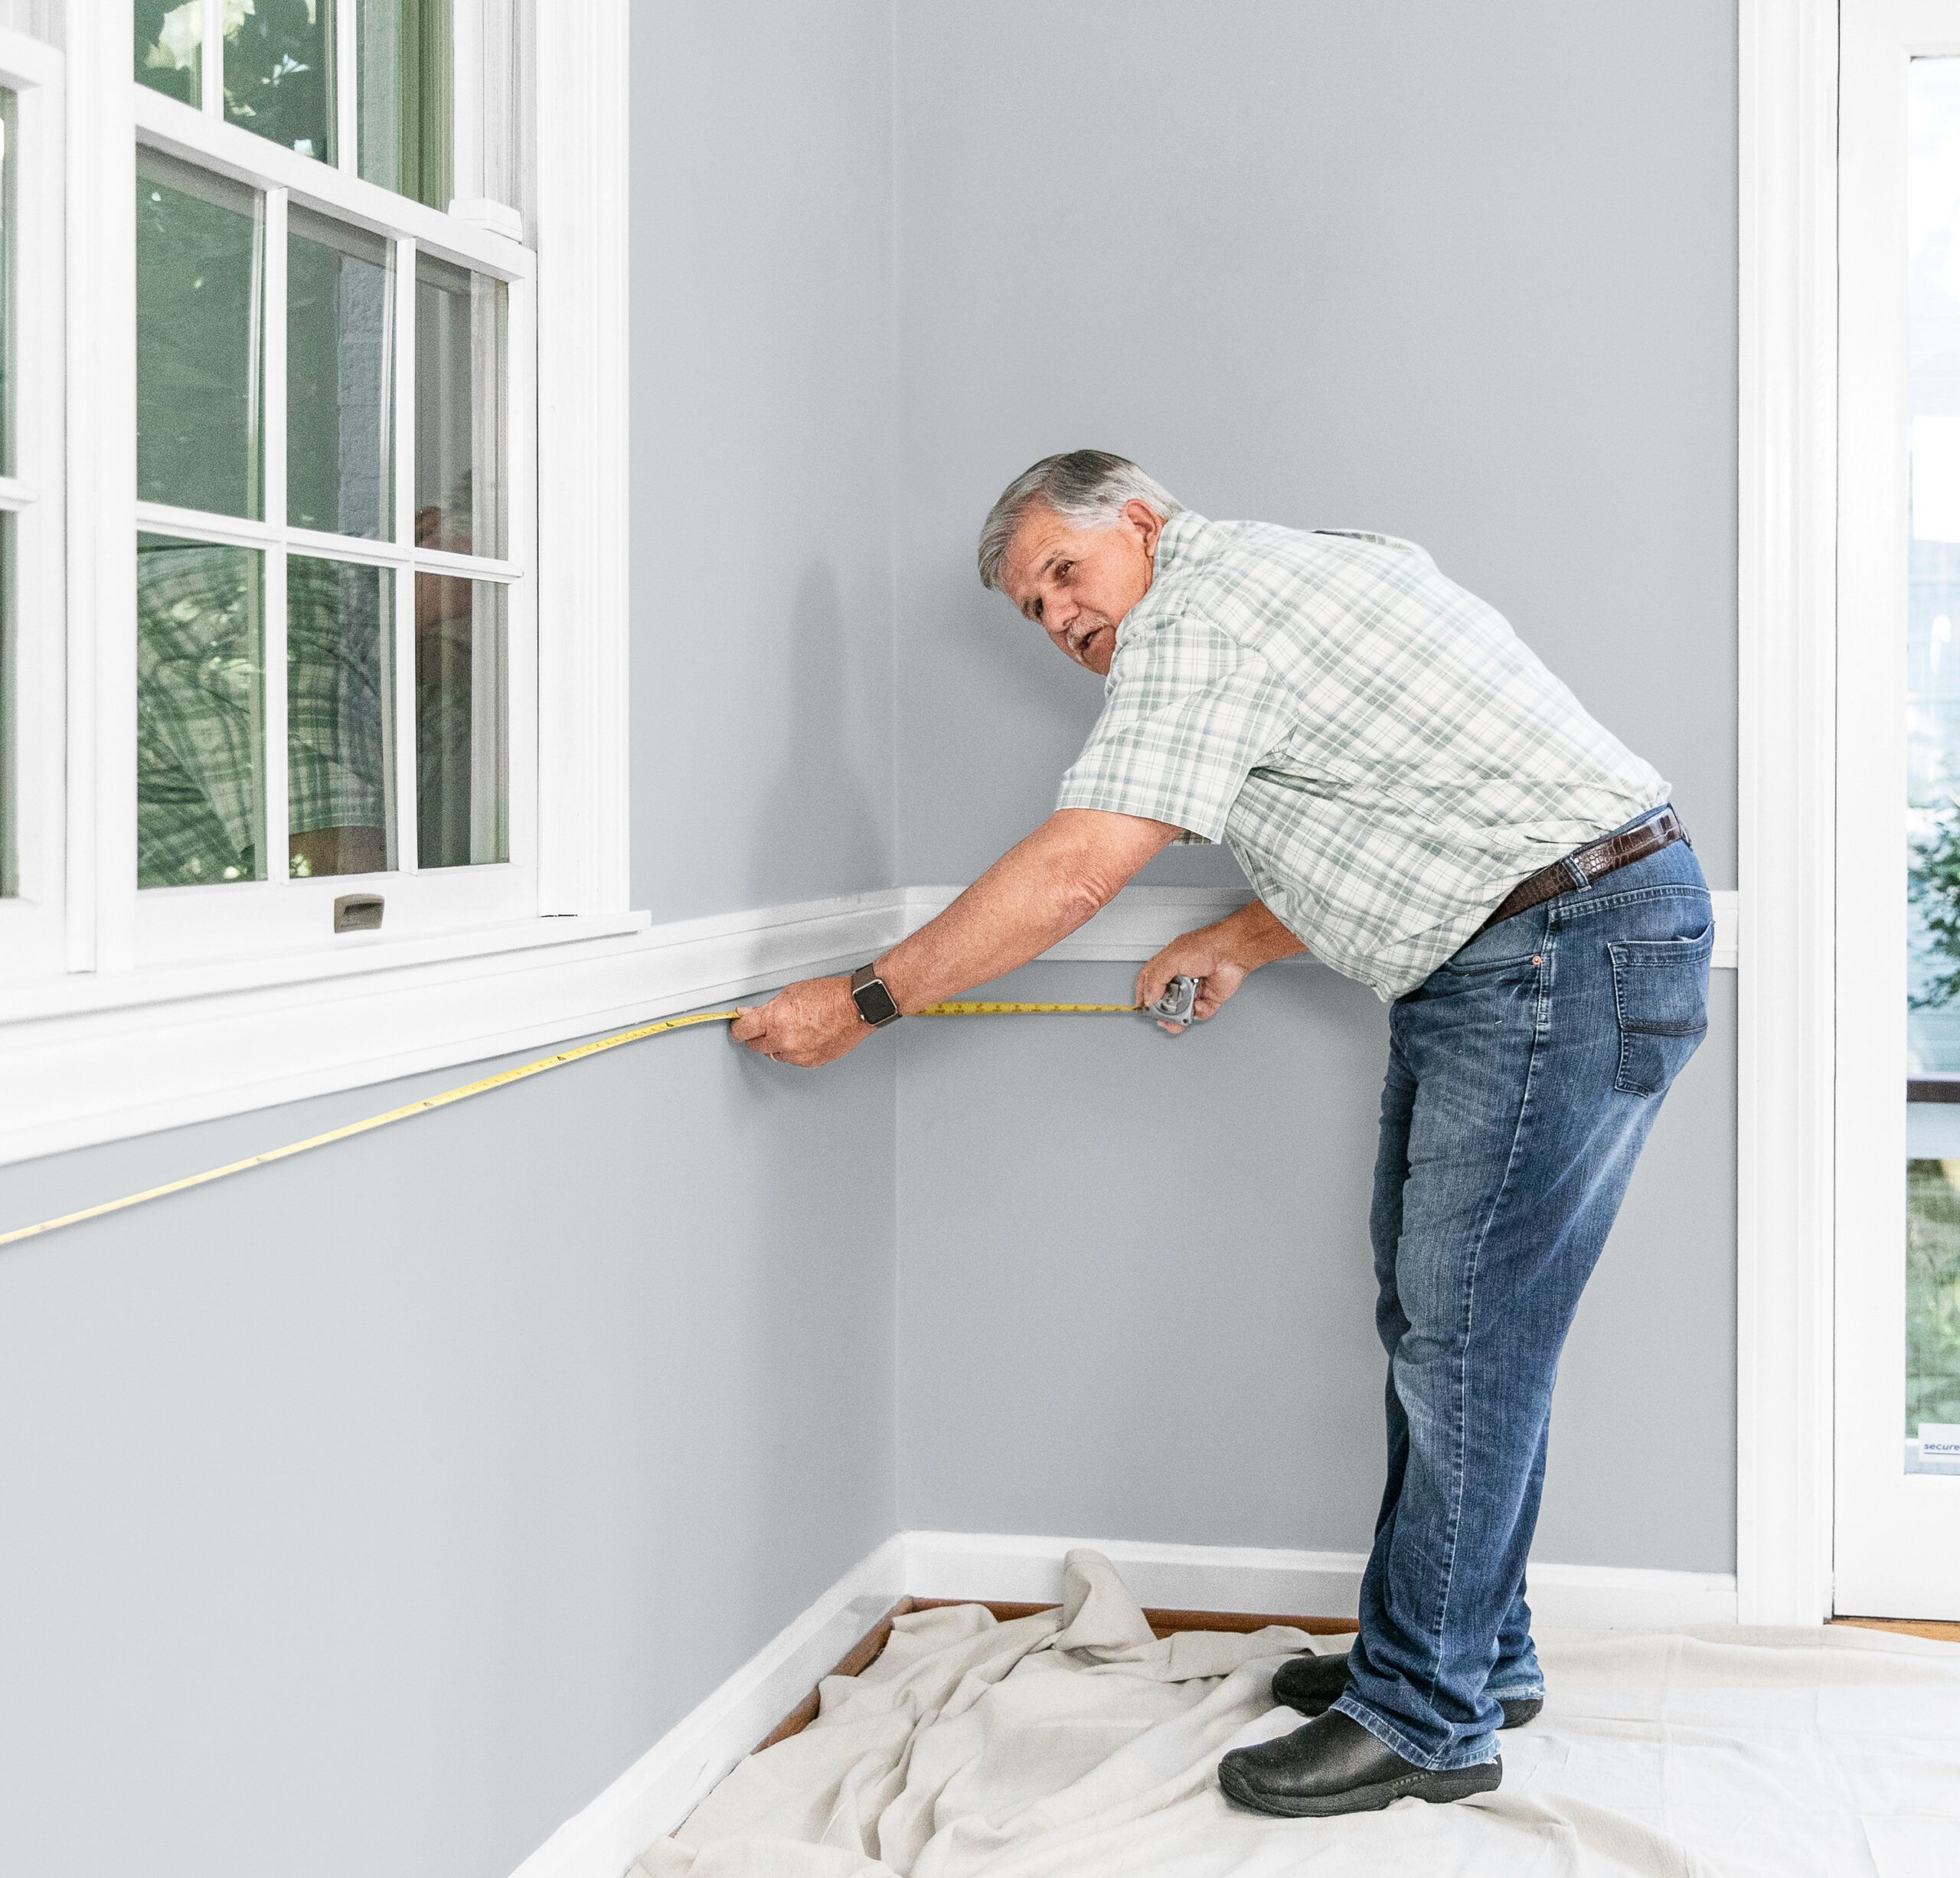
3. Size Up Your Wall Frames
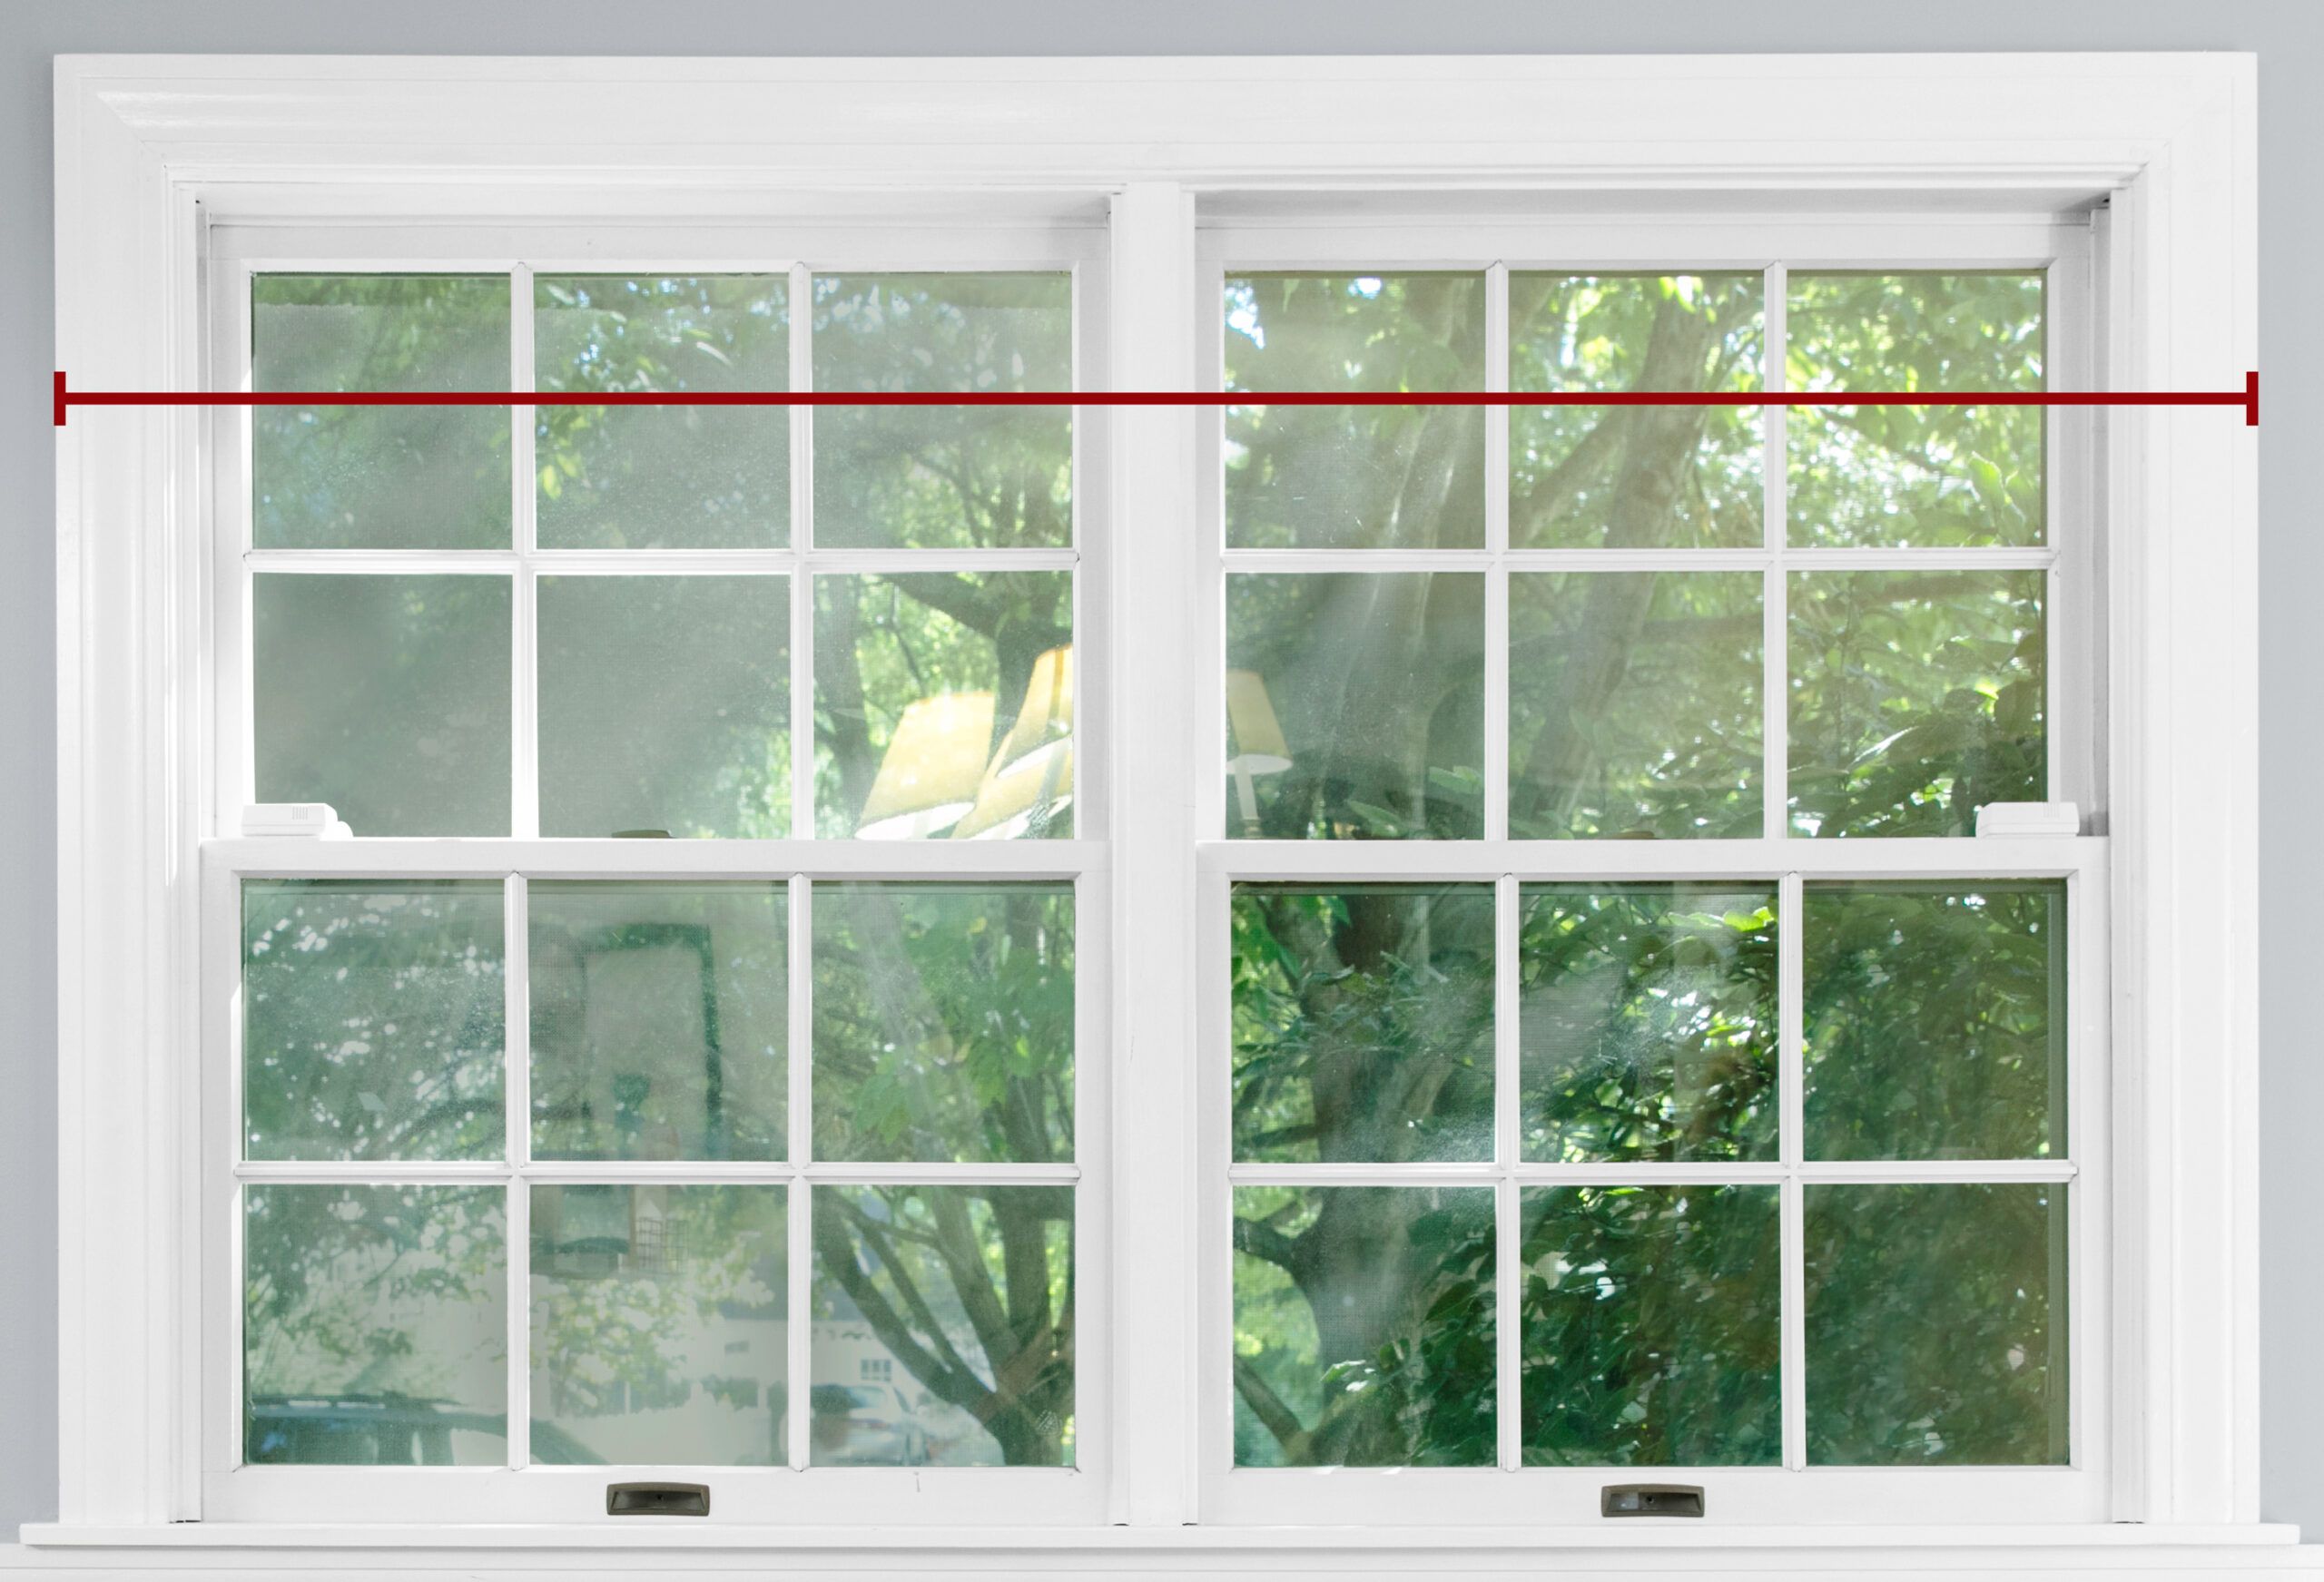
Measure the width of the window, including the casing. Divide the number in half for a double window.
4. Take the Distance Between the Baseboard and Chair-Rail Molding
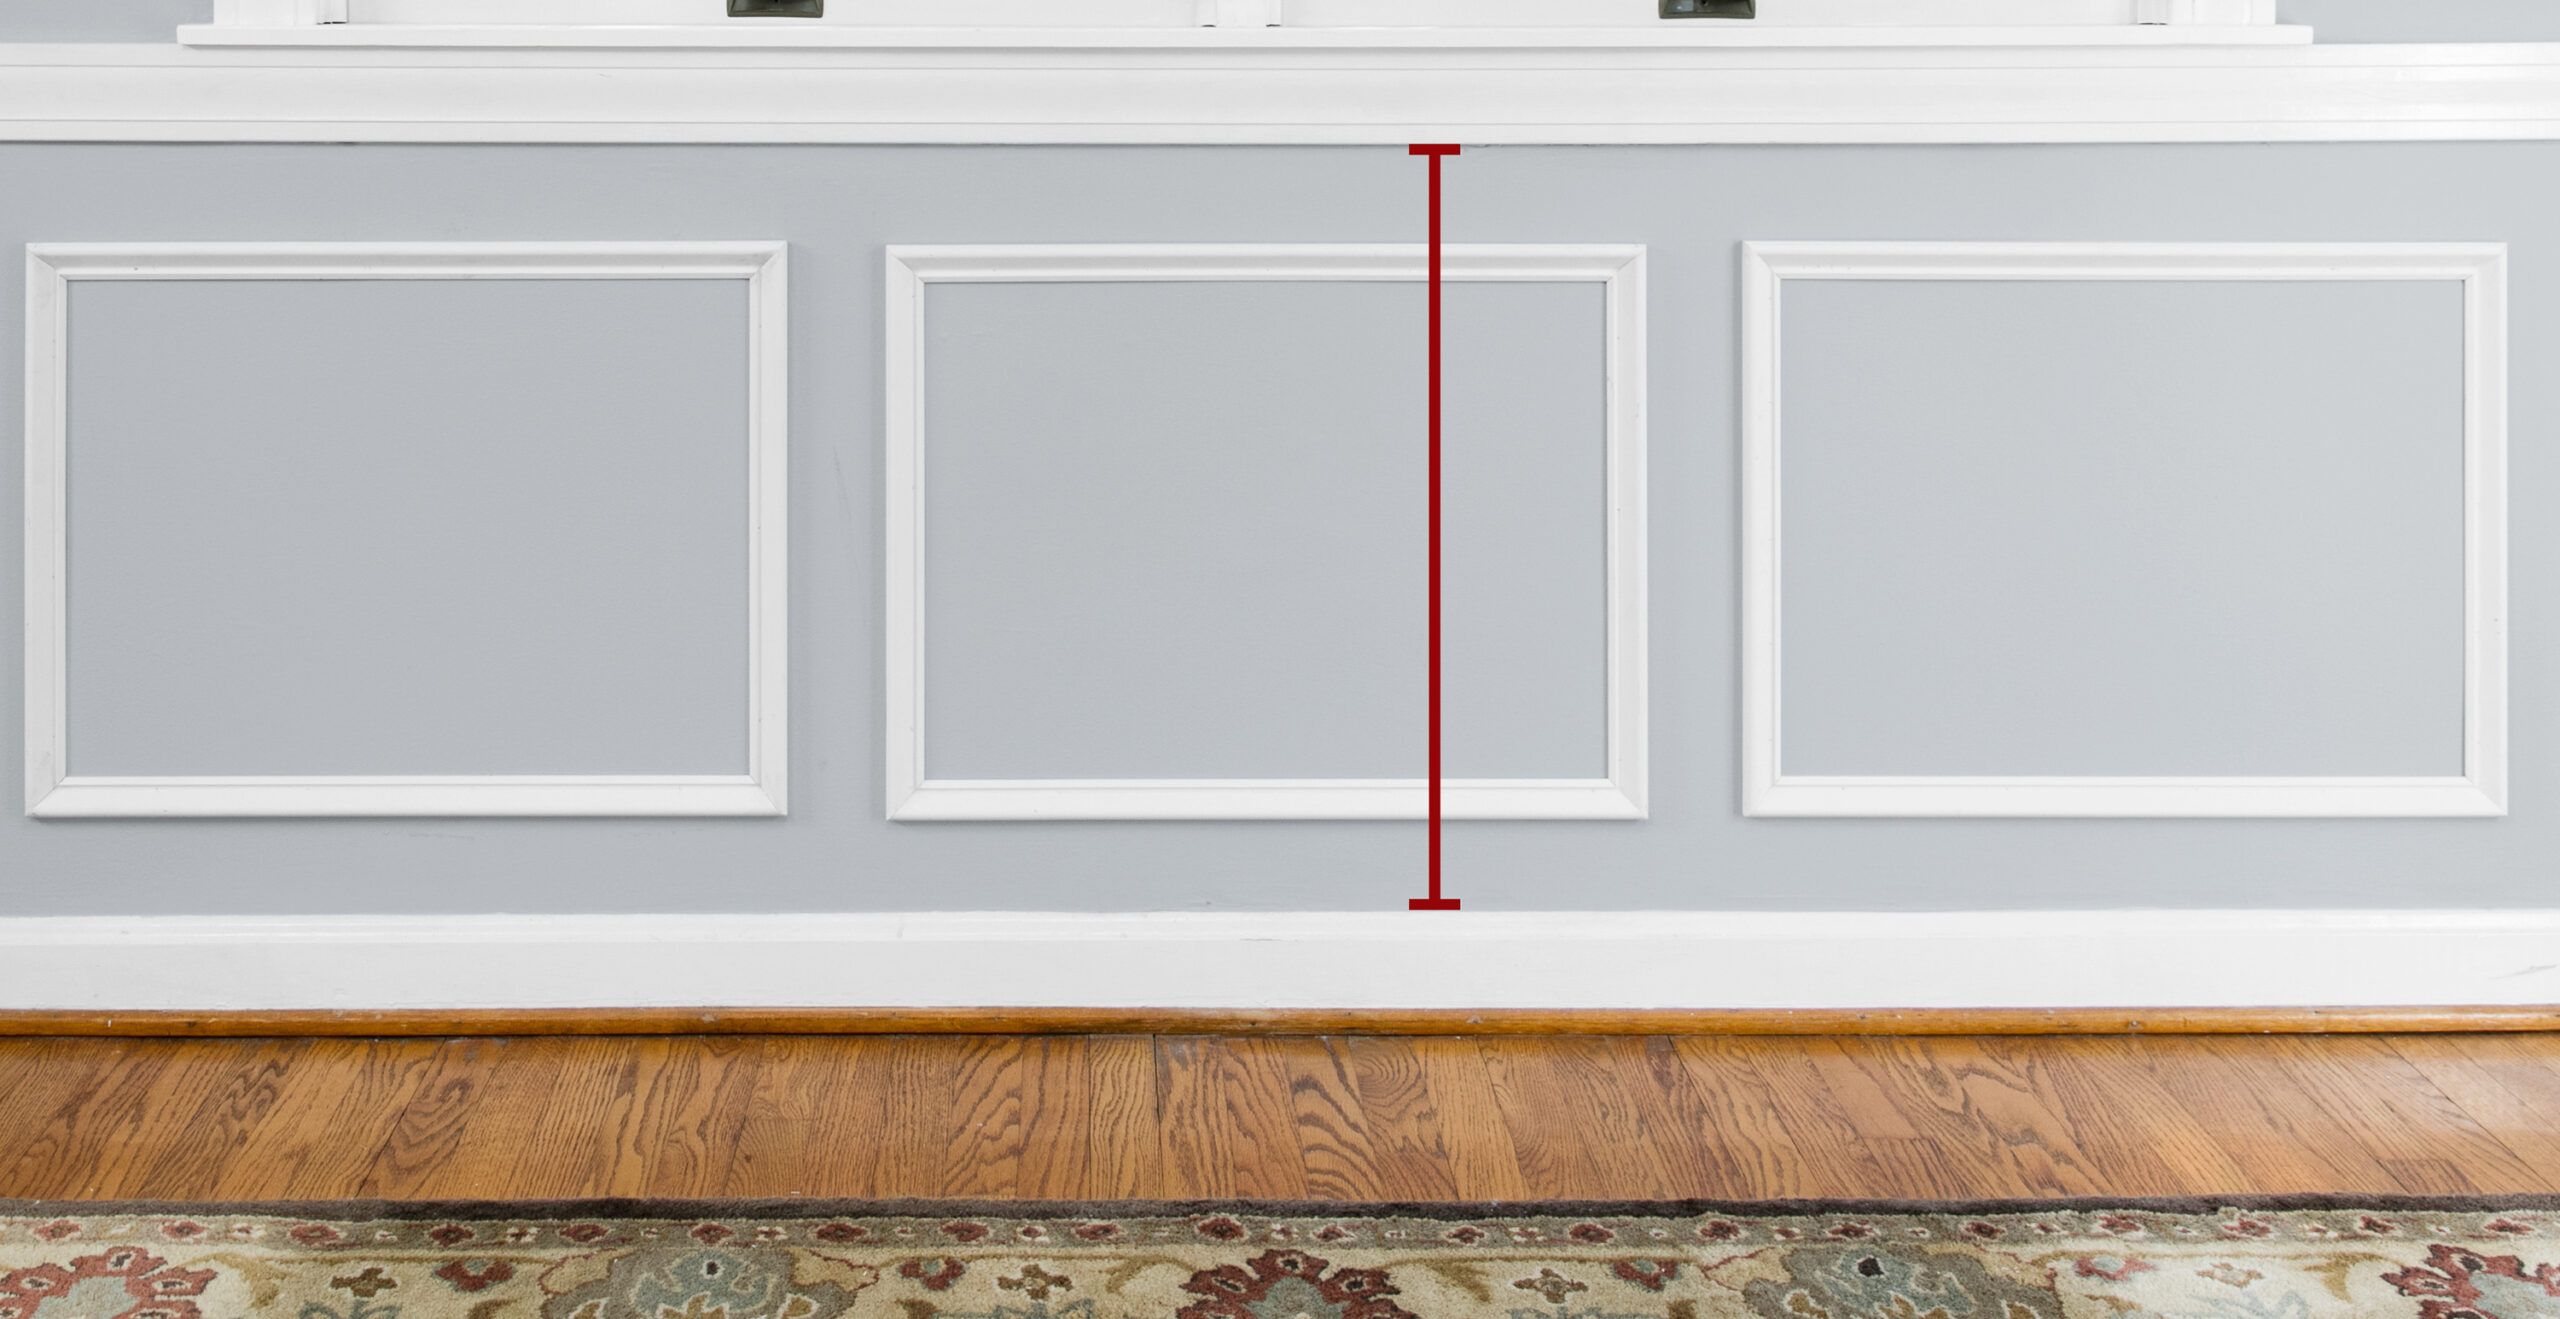
After finding the distance between the baseboard and chair-rail molding, subtract 7 inches. This accounts for a 3 1/2-inch space top and bottom, or the width of two 1×4 “rails.” The calculations in Steps 1 and 3 provide a rough frame size.
5. Divide the Wall Length by the Rough Width of a Frame
Next, stretch or narrow the rectangles until you can fit full frames that start and end with space for a “stile.” This Old House general contractor Tom Silva likes an odd number of frames—the ones he installed here are about the width of a window sash.
6. Determine the Number of Wall Frames
Note each wall’s length on paper. Every wall will have one more stile than the wall frame. Chances are you won’t get a whole number when you divide the wall by the rough frame size, so adjust the frame’s width until you do. Repeat the process on the remaining walls and jot down how many panels the room needs.
7. Cut the Parts
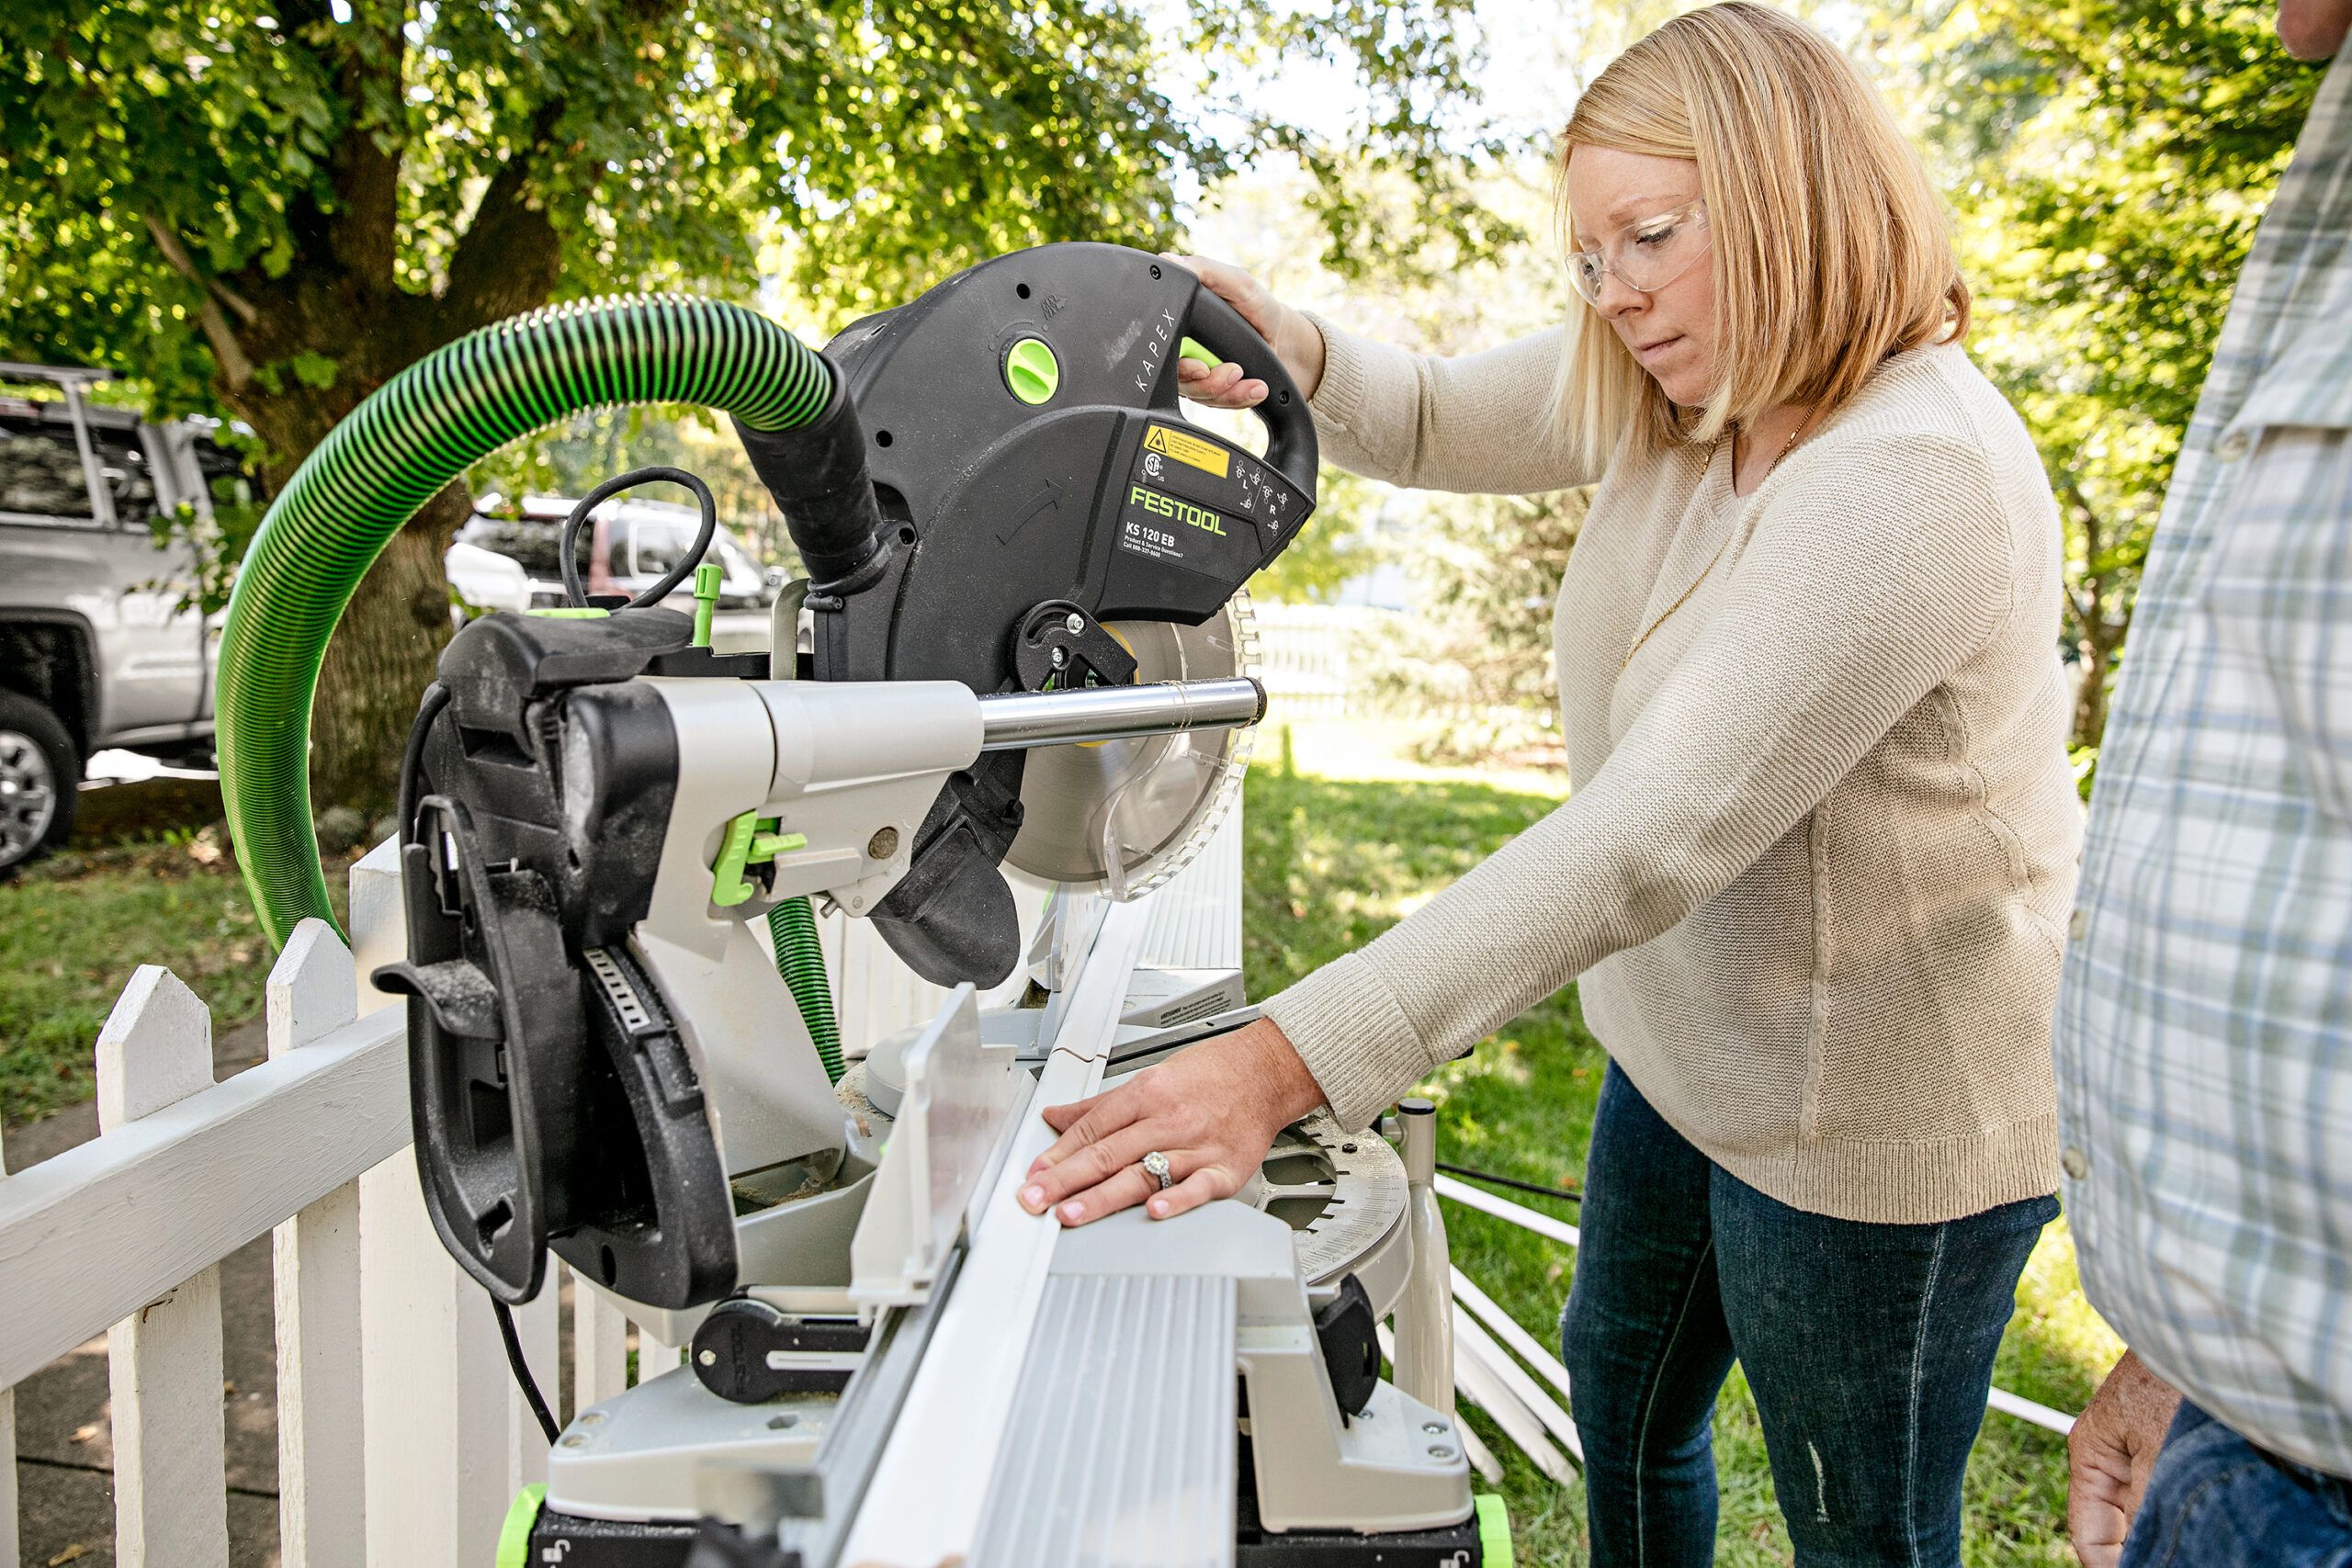
Set the miter saw 45-degrees to the right. Measure between the baseboard and chair rail, subtract 7 inches, and mark that length on the saw stand from the blade’s left face. With the widest part of the molding against the fence, miter the profile’s left end, slide the wood to the left 1/2 inch past the mark, and make another cut. Cut the remaining vertical pieces the same way. Now swing the saw 45 degrees to the left, align the molding’s left long point with the mark, and trim to the final length. Trim the horizontal parts the same way according to the wall frame’s width.
8. Glue up the Miters
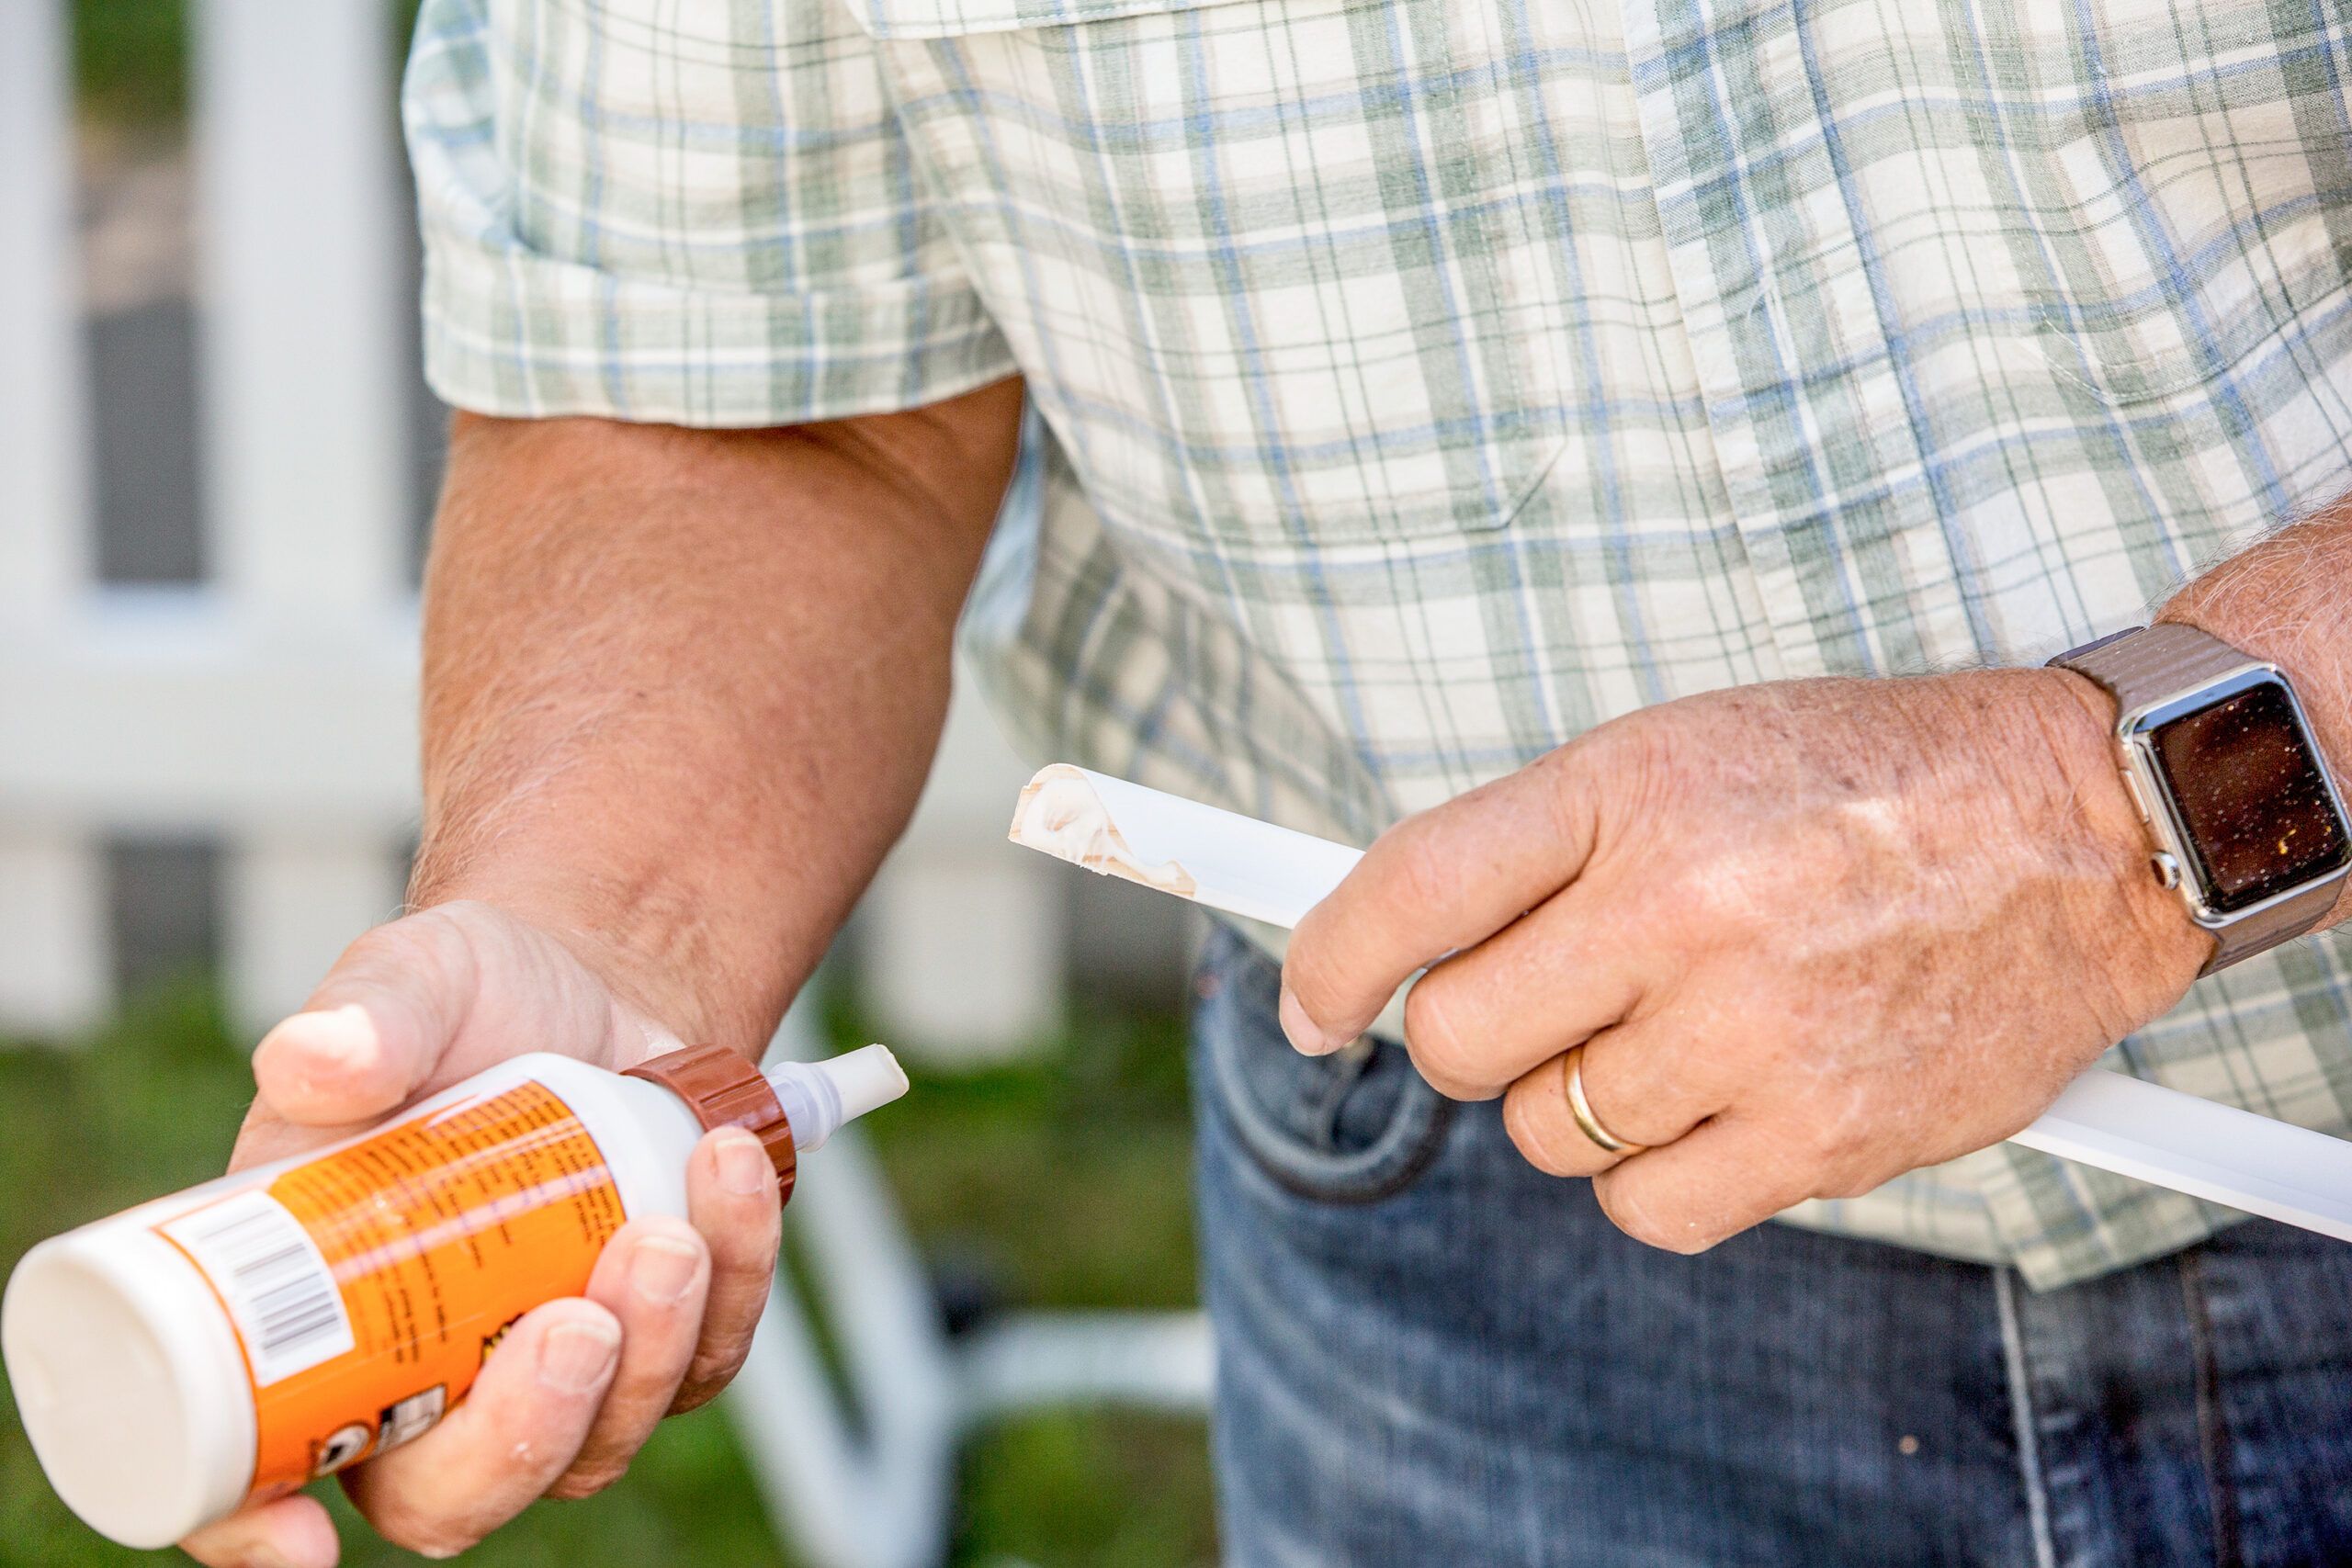
Gather the moldings onto the workbench and dry-fit a panel together to ensure that you have the right parts. Add wood glue to one end of a miter joint, as shown.
9. Make a Corner
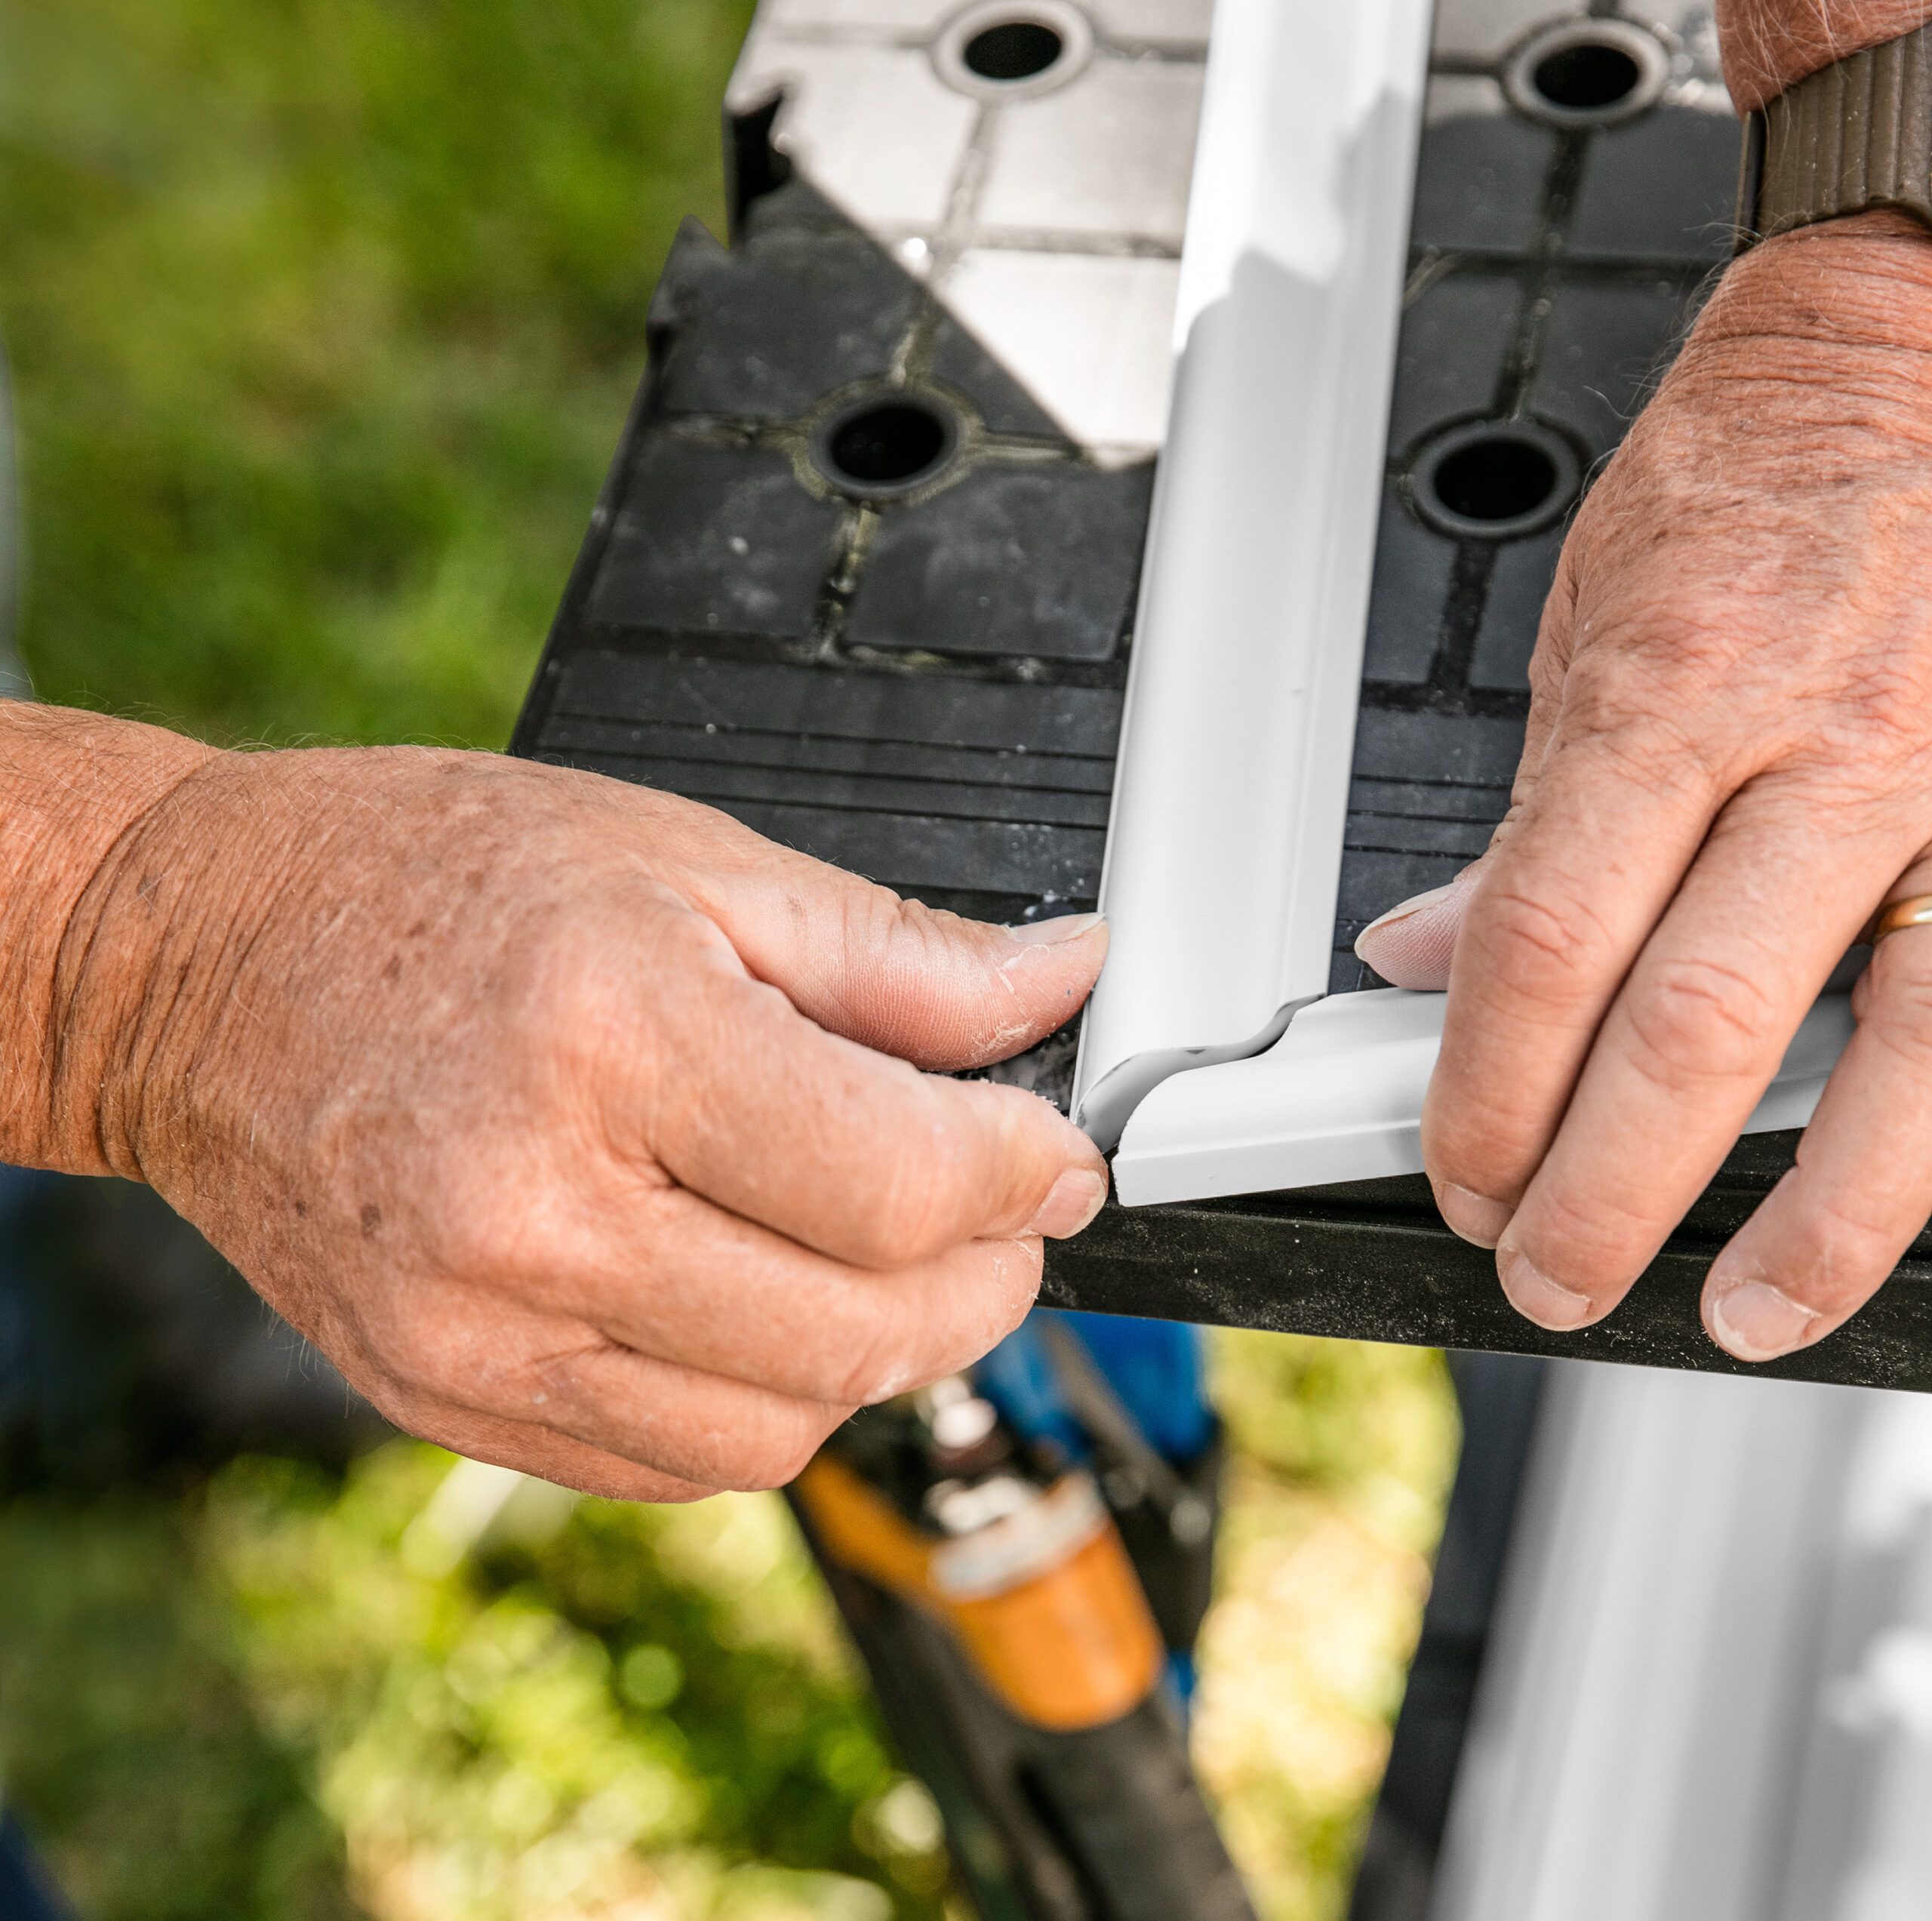
Bring the miter joint together while holding both pieces of wood down on the workbench, as shown. Work the miter back and forth to distribute the glue. Wipe any squeeze-out with a damp rag or your finger.
10. Hold the Joint with Nails
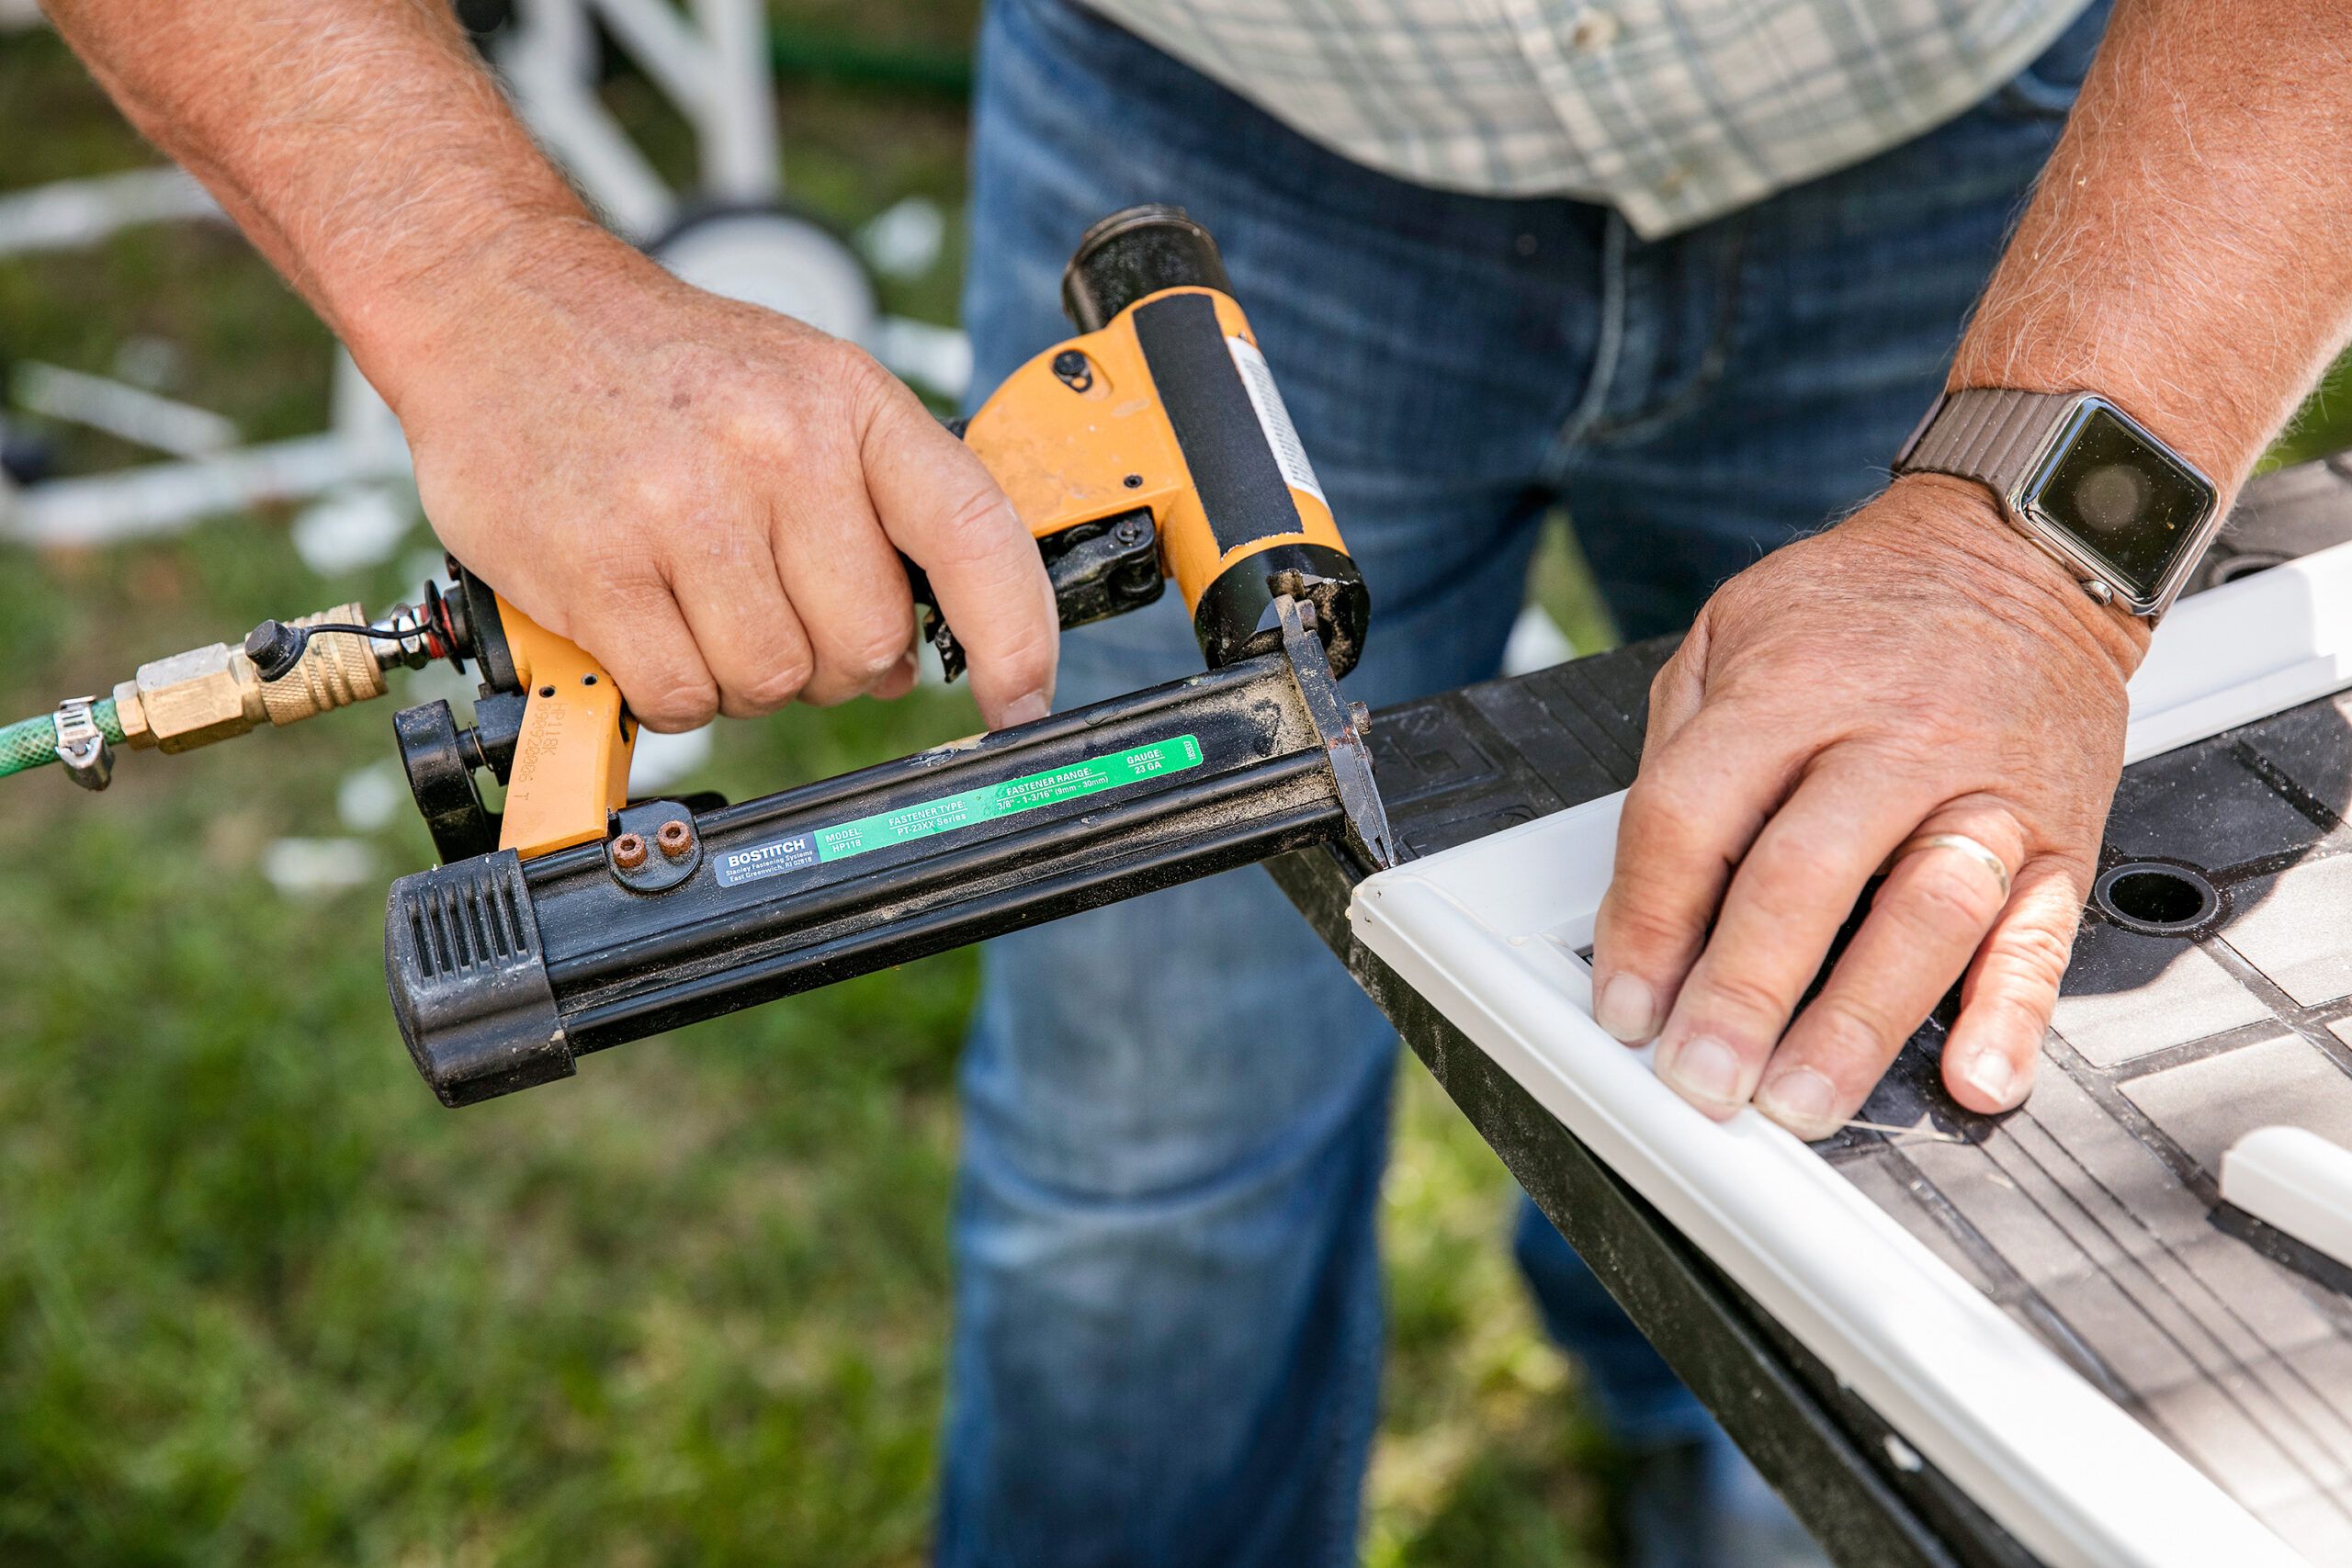
Drive a pair of 1-inch-long 23-gauge nails at a slight downward angle from one side of the miter into the other, then repeat in the opposite direction. You can use 1-inch-long 18-gauge nails, but you’ll have to fill the holes with putty before painting. Once you’ve made a corner, complete the wall frame by gluing and nailing the last two pieces in place.
11. Sand the Squeeze-Out
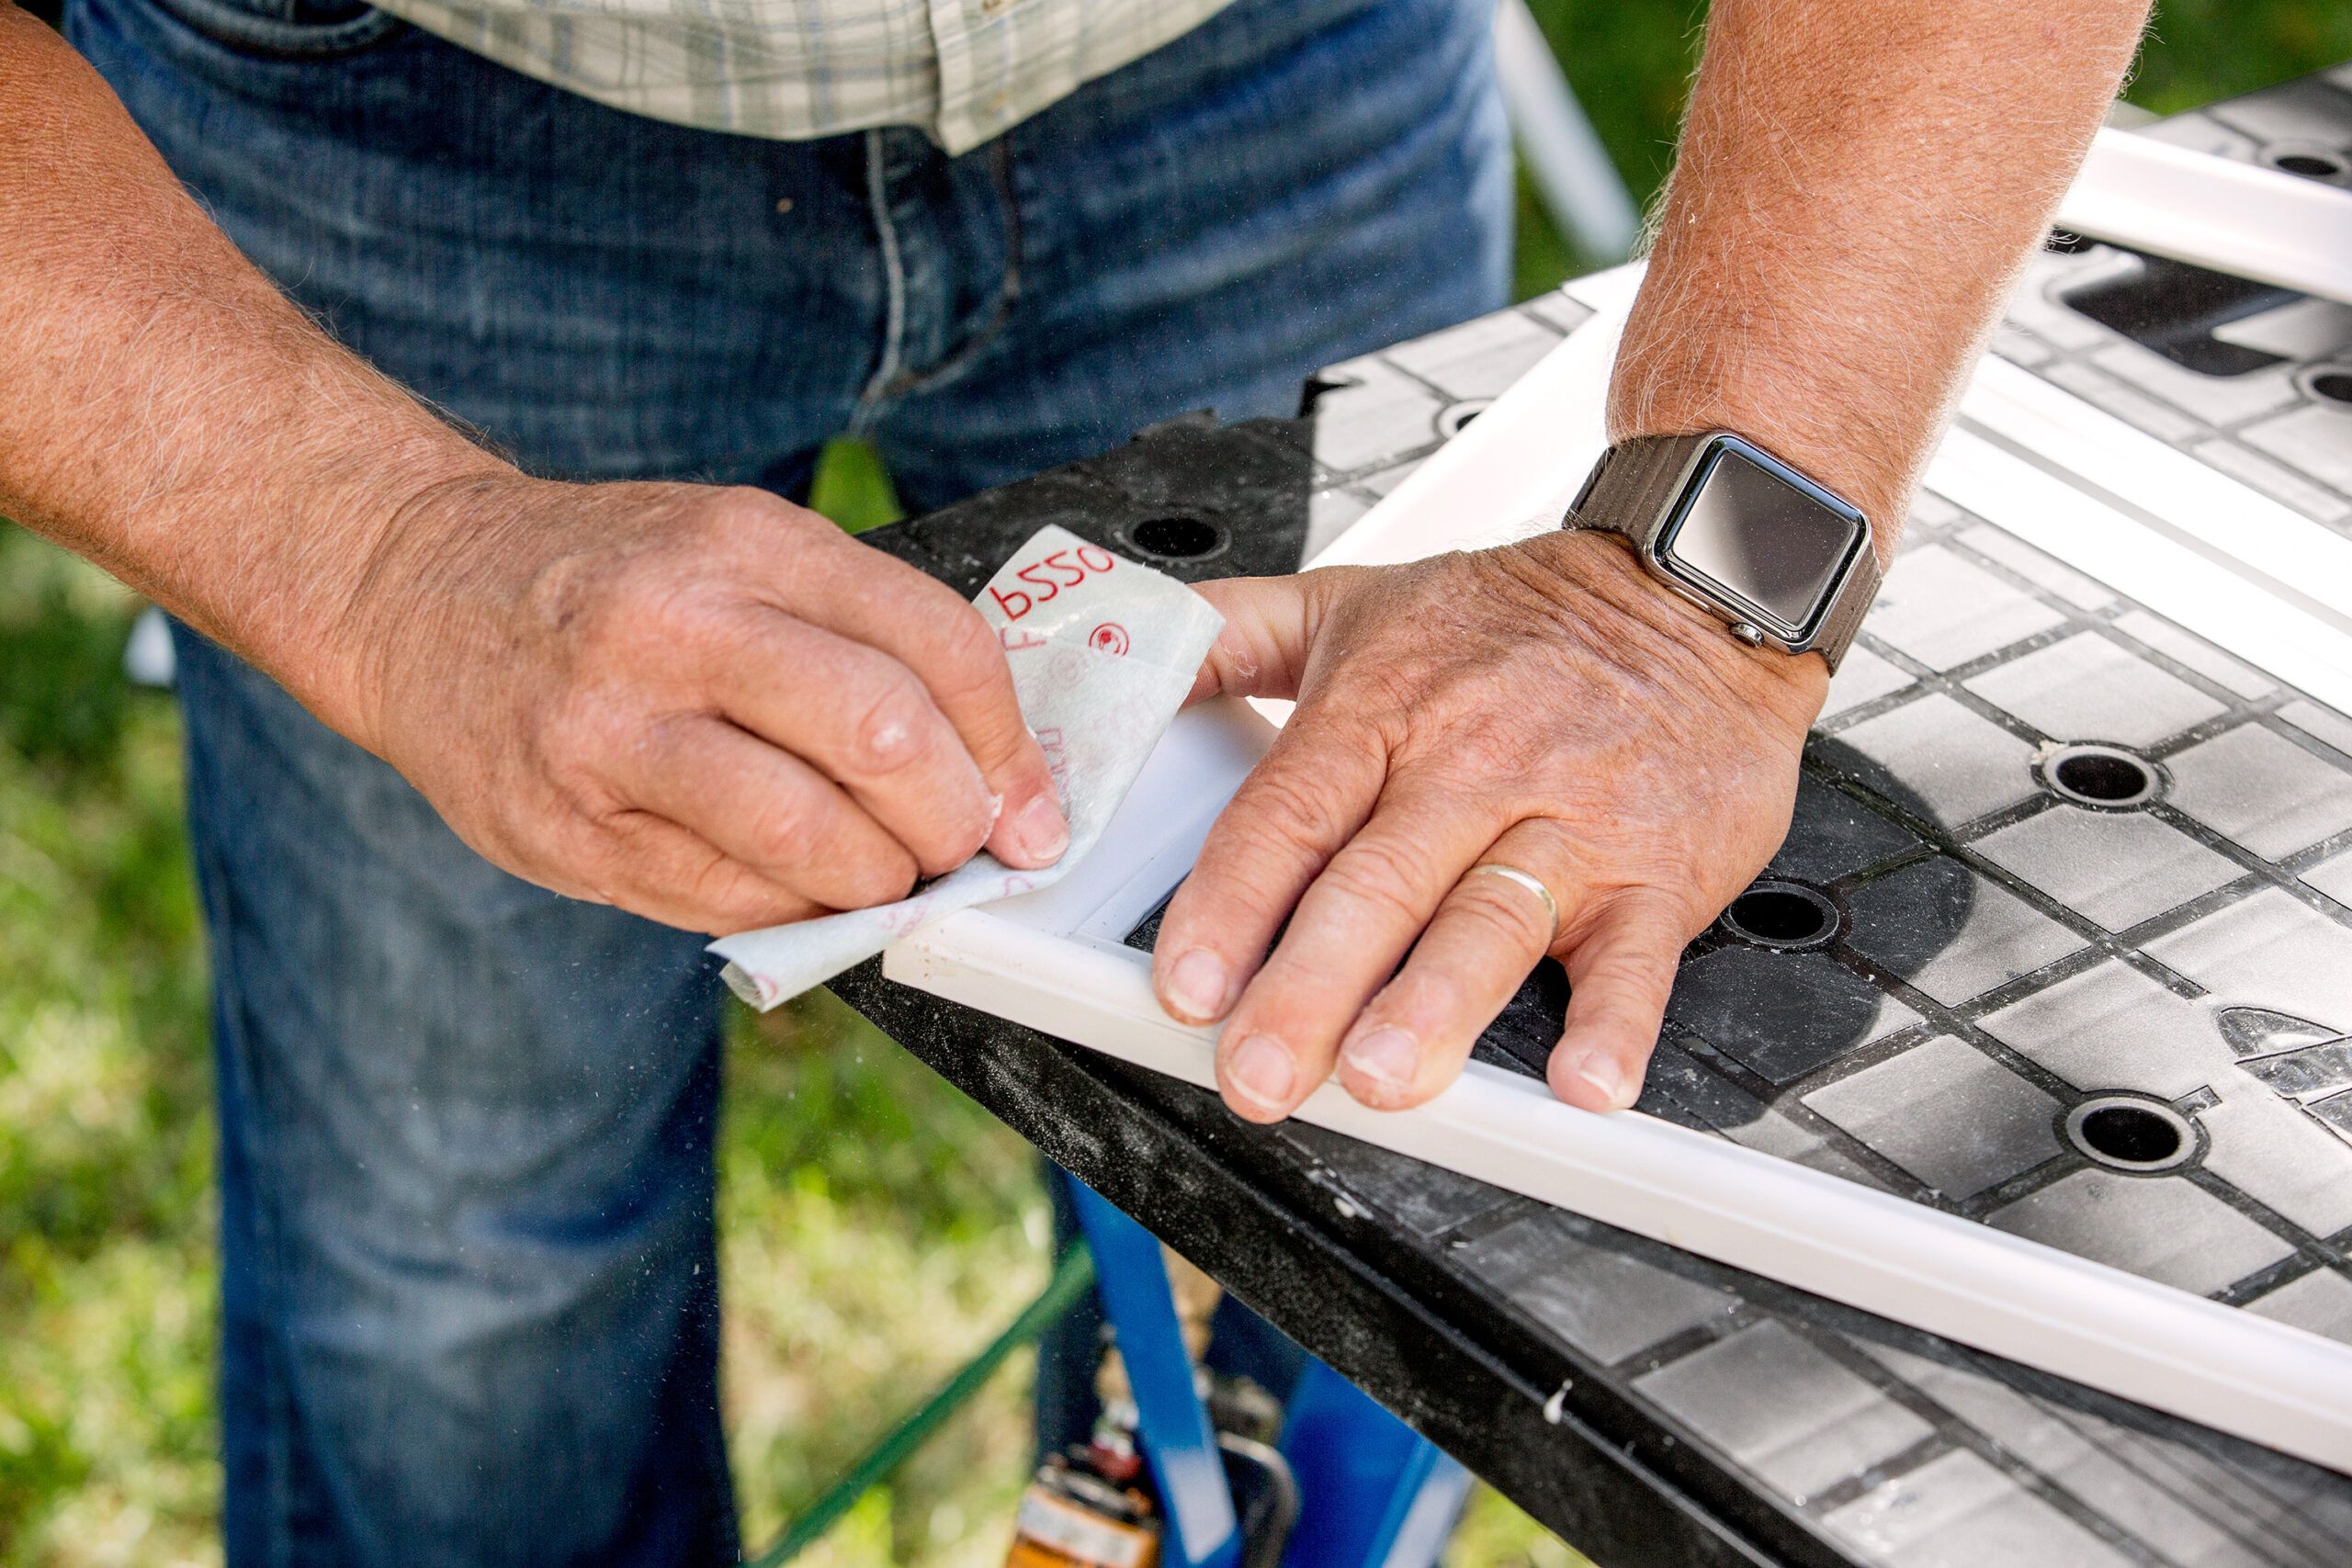
Make all the wall frames first, which gives the glue that squeezed out of the miter time to tack over. Before installing the DIY wainscoting, rub each miter with sandpaper to remove any glue, as shown. Don’t worry about the holes left behind by the 23-gauge nails—paint will fill those spots.
12. Use the Spacer Block
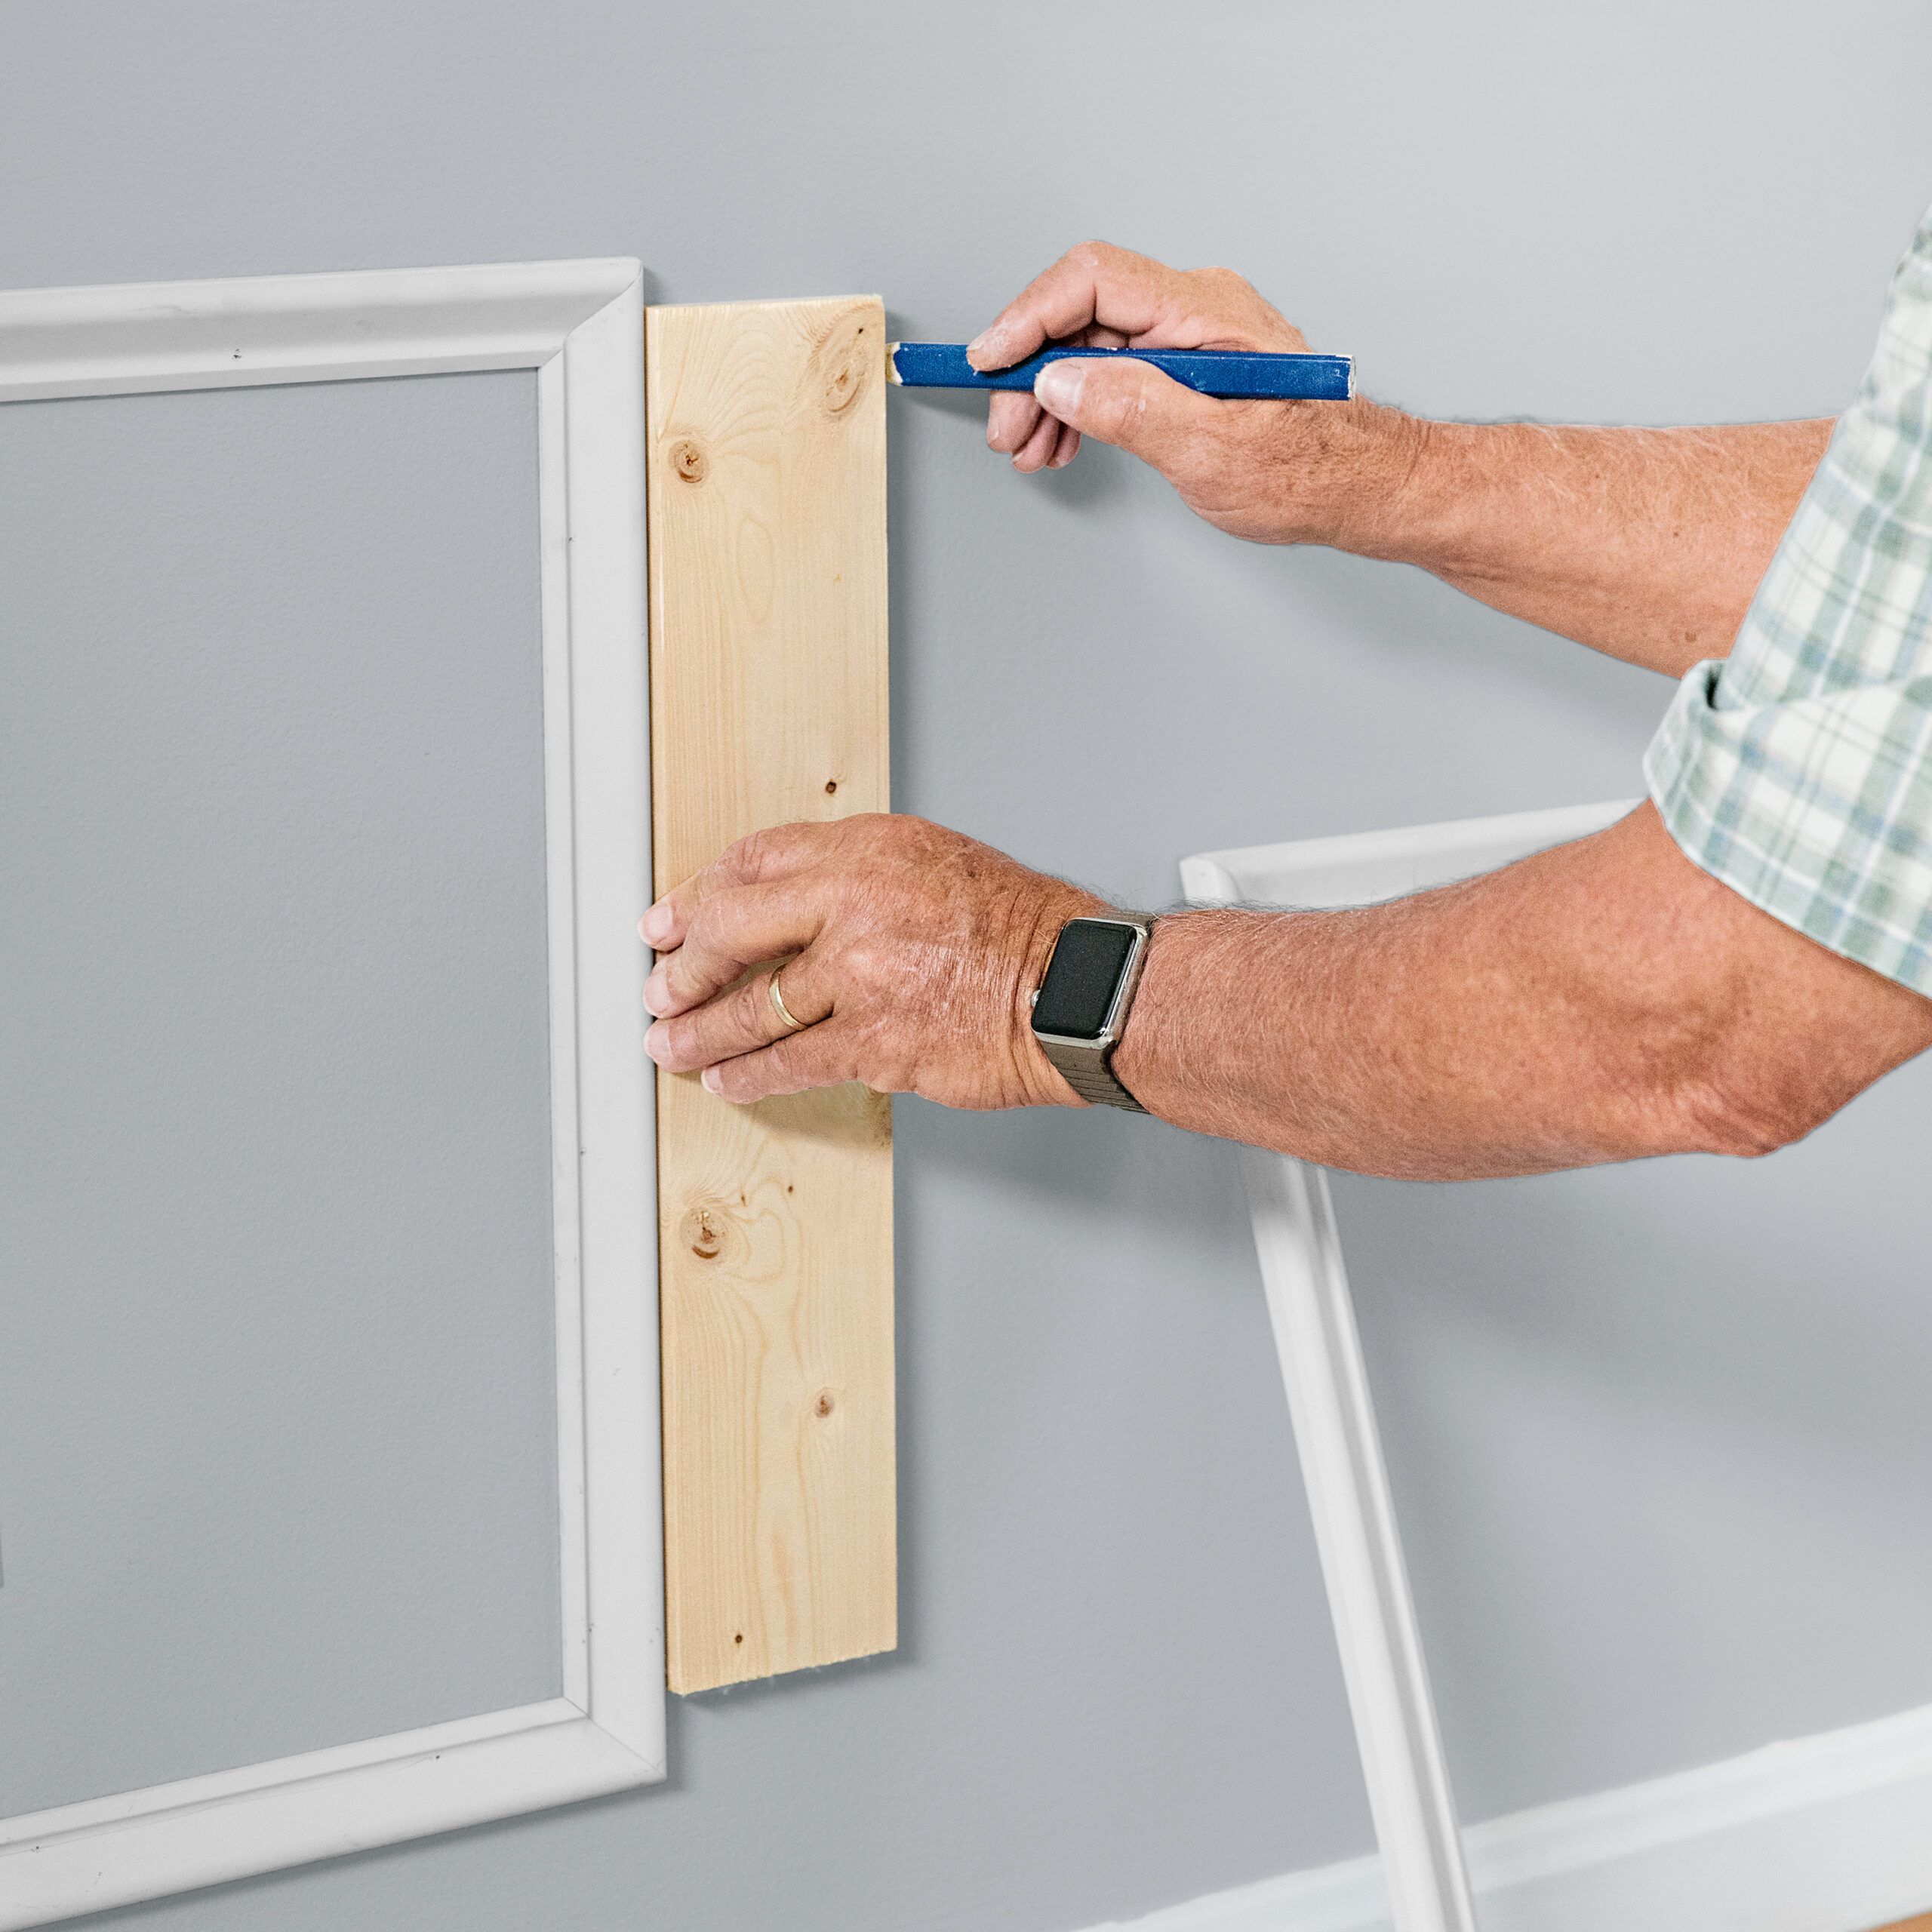
Place a 1×4 scrap tight in a corner of the room, then strike a line, as shown, to represent the position of the wall frame’s side. Remove the scrap, but keep it nearby to set the top edge of the wall frame.
13. Glue the Wall Frames
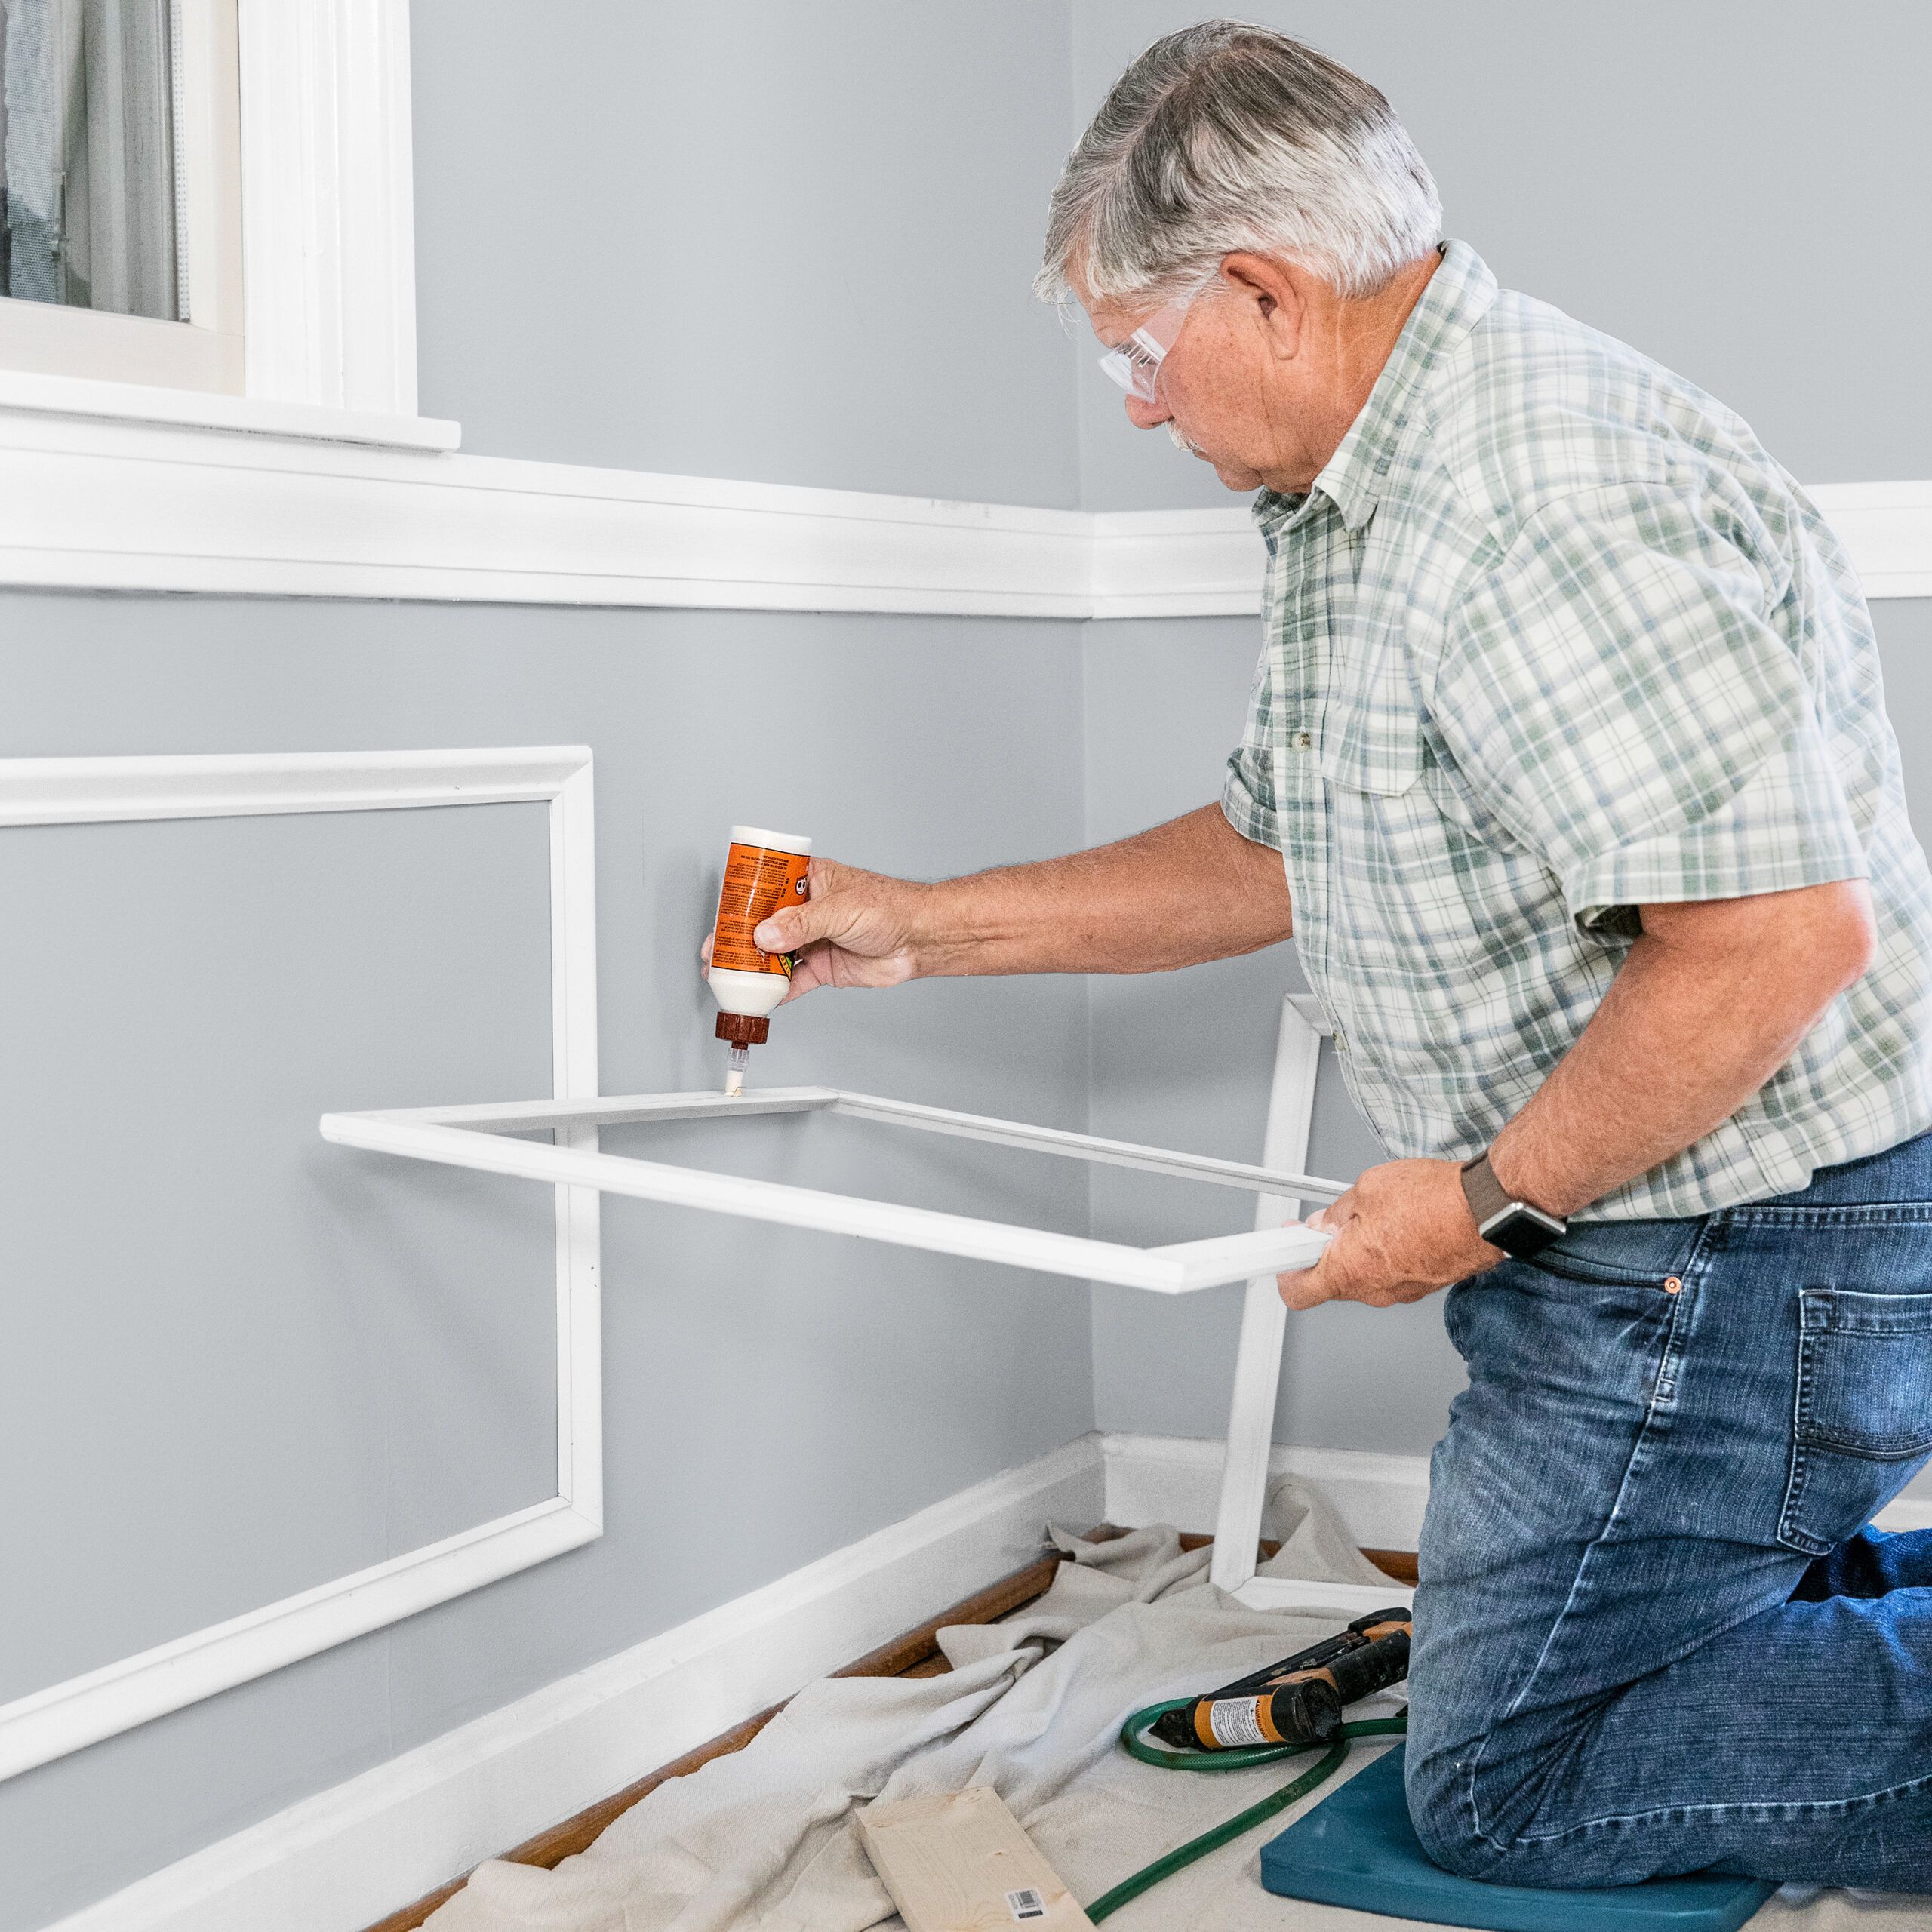
Keep your nailer nearby. Add a bead of wood glue along the back side of the panel.
14. Attach the Panels

Hold the spacer block underneath the chair rail. Butt the top of the wall frame tight to the spacer and even with your pencil lines on the wall. The spacing underneath the wall frame should be the same, which you can check with a second spacer block. Drive 23-gauge nails every 5–8 inches along the molding, as shown, or space 18-gauge nails about every 10 inches.
15. Finish the Room
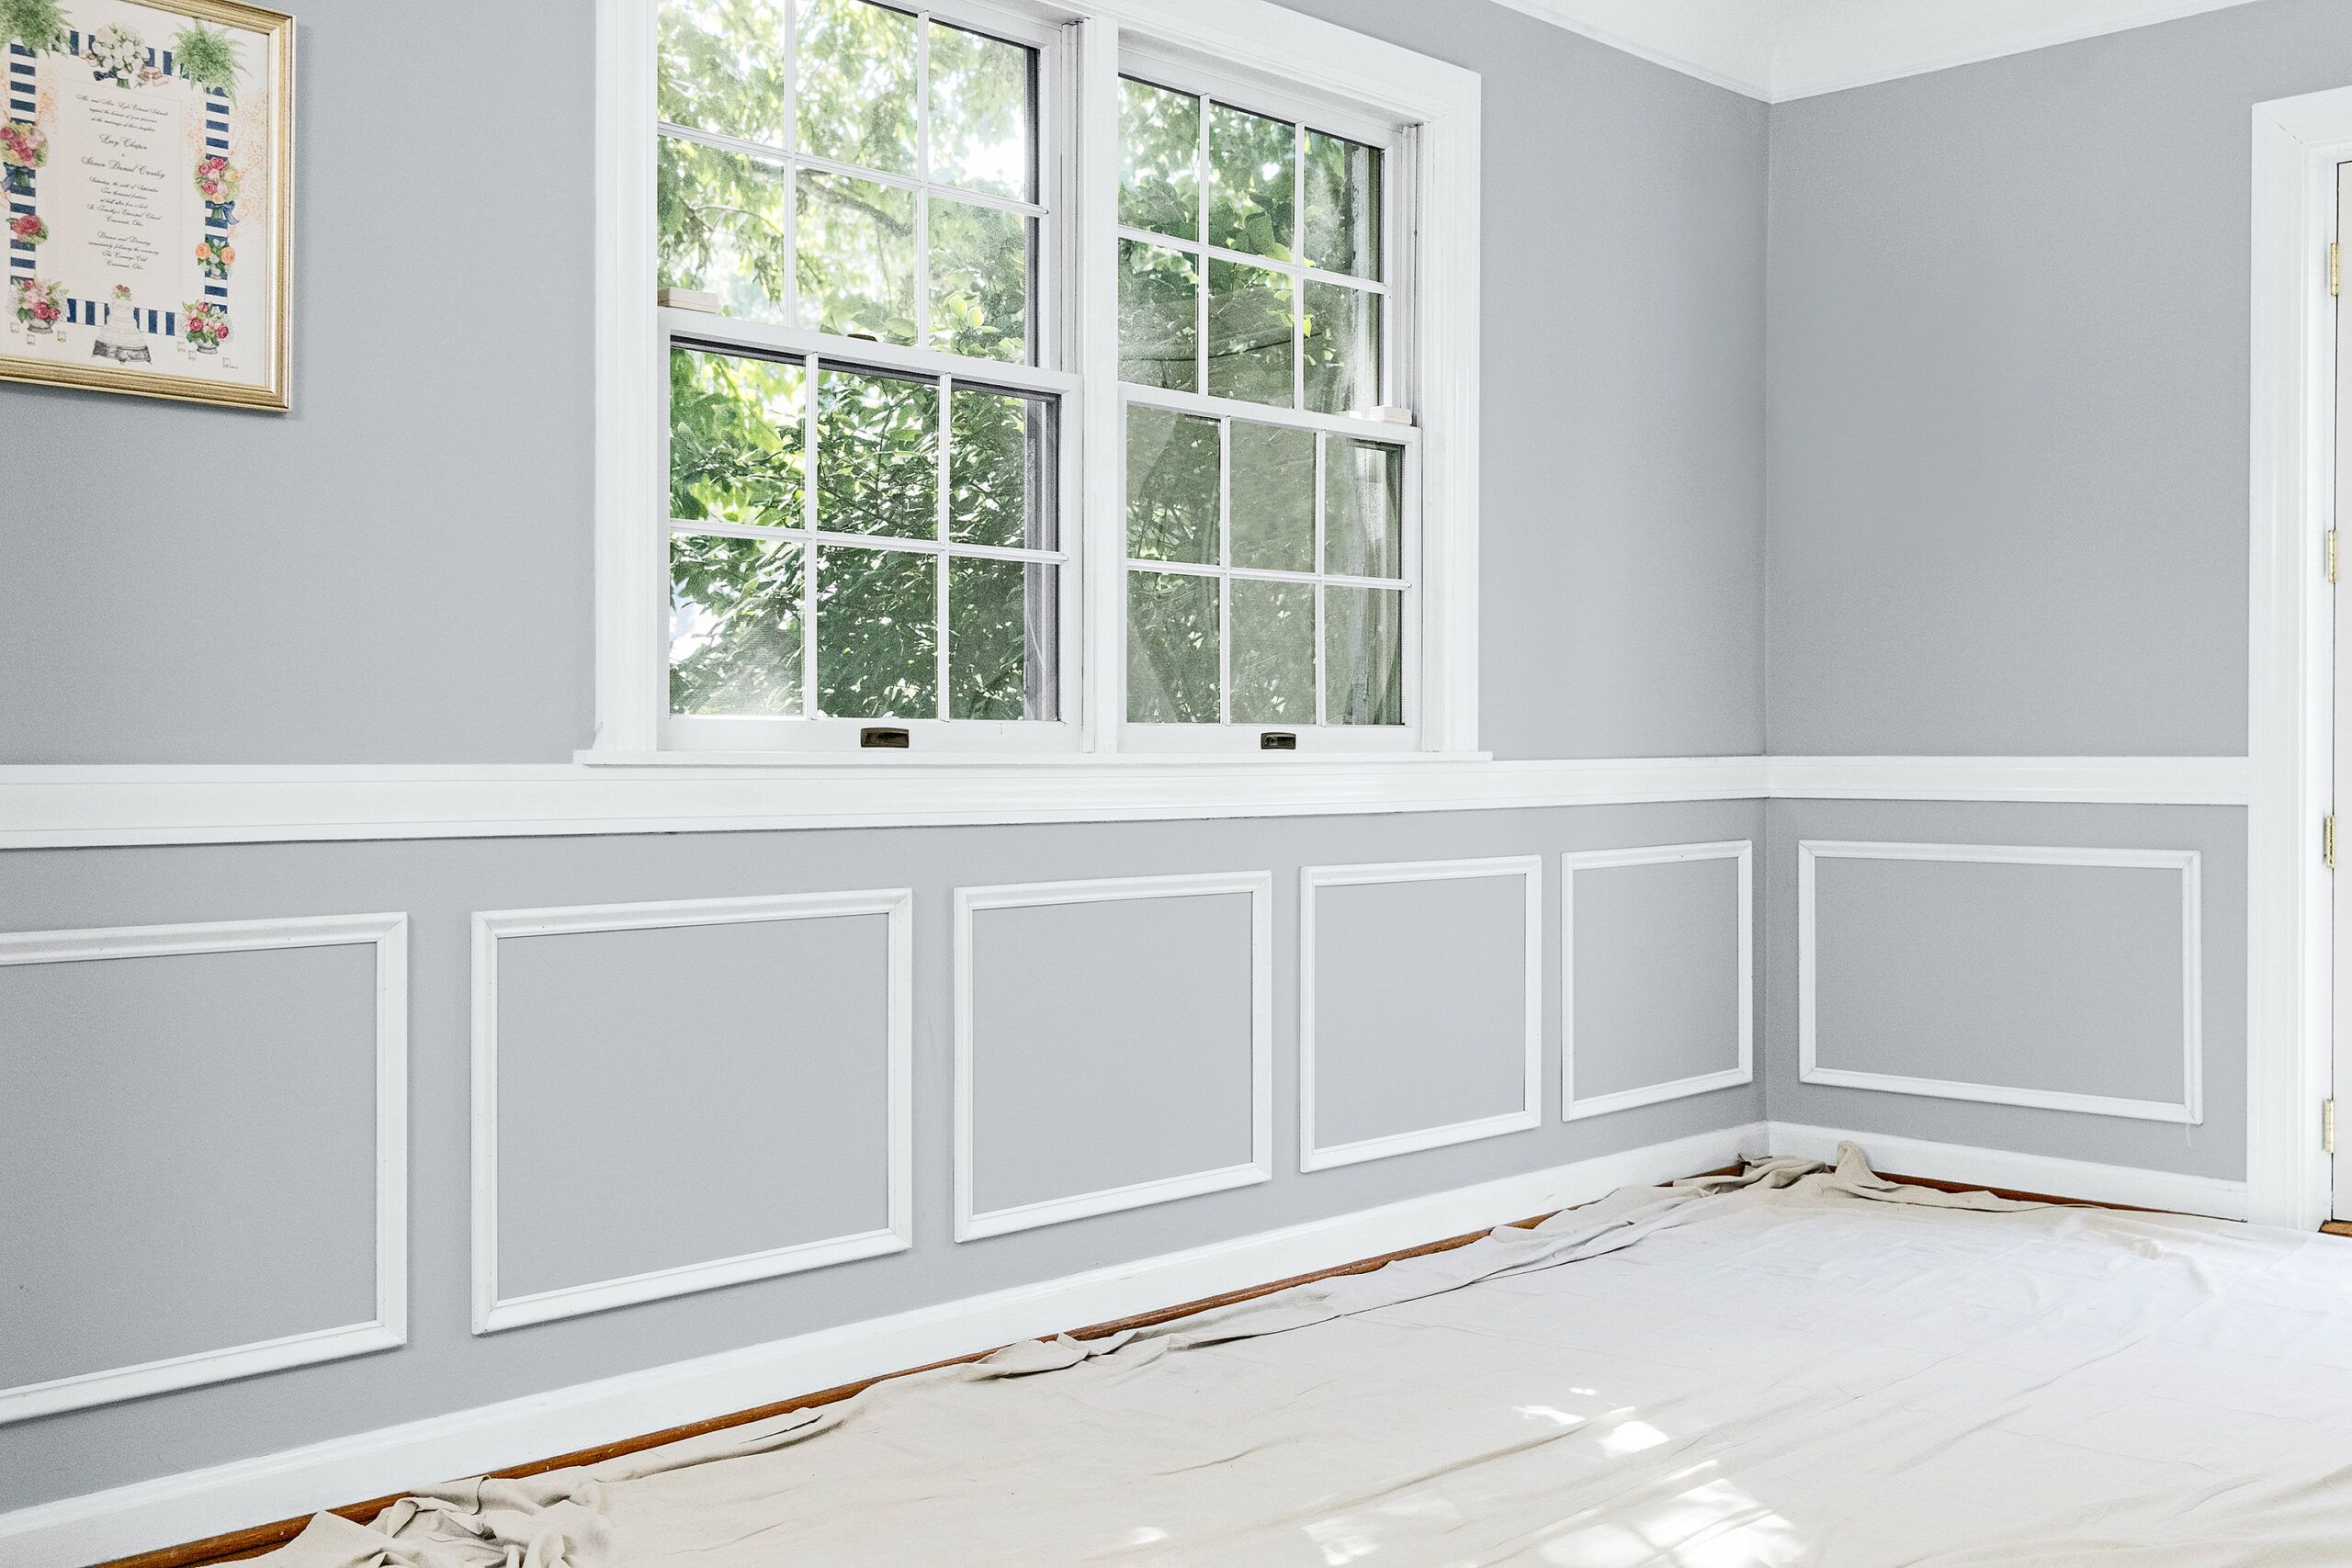
Reposition the spacer block for the next frame and continue working around the room. Add putty to any 18-gauge nail holes, then sand them smooth. Fill in any gaps between the frames and the wall with acrylic caulk. Once the filler is dry, sand the entire wainscoting surface lightly to ensure a smooth finish. Pay special attention to filled areas and joints between panels.
The final finish step is to paint or stain your wainscoting to achieve the desired look. If painting, start with a coat of primer, especially if you’re using raw wood. For a smooth finish, use a foam roller for flat surfaces and a brush for detailed areas. Apply at least two coats of paint, sanding lightly between coats. If staining, choose a stain that complements your home’s decor and apply it according to the manufacturer’s instructions.
What Are Common Wainscoting Installation Issues?
Even with careful planning, you may encounter some challenges during installation. Here are solutions to common issues.
- Uneven walls: Use shims behind the panels to create a level surface.
- Gaps between panels: Fill small gaps with caulk before painting. For larger gaps, you may need to adjust the panel fit.
- Misaligned patterns: Dry-fit your panels before attaching them permanently to ensure patterns line up correctly.
- Splitting wood: Pre-drill holes for nails in areas prone to splitting, especially near the edges of panels.
How To Maintain Your Wainscoting
To keep your wainscoting looking its best, dust it regularly with a soft cloth or vacuum attachment. Clean painted wainscoting with a mild soap solution as needed. For stained-wood wainscoting, use a wood cleaner and polish periodically to maintain its luster. Touch up any chips or scratches promptly to prevent further damage.
Wainscoting Cost Considerations
Installing wainscoting is a cost-effective way to enhance your home’s interior. However, costs can vary widely based on the materials you choose and whether you opt for professional installation. According to Angi, most homeowners spend between $1,575–$1,600, but it could be higher if you choose a higher-end wood or plan on wainscoting more than one room. For example, MDF and plywood start at $6 per square foot, but mahogany can cost as much as $40 per square foot for materials alone. If you DIY this project, it can save you between $50 and $125 per hour on labor.
Environmental Concerns When Installing Wainscoting
When installing wainscoting, there are potential environmental considerations when it comes to your material choices. Opt for sustainably sourced wood or eco-friendly composite materials whenever possible. Many companies offer wainscoting panels made from reclaimed wood or recycled composites, which can add a unique and environmentally friendly touch to your home. If you’re painting or staining your wainscoting, choose low-VOC (volatile organic compounds) products. These are better for indoor air quality and reduce harmful emissions. While they may cost slightly more, the health benefits may be worth the investment.
Safety Precautions To Consider During Wainscoting Installation
Safety should always be a top priority when undertaking a DIY project. Here are some key safety precautions to consider during your wainscoting installation.
- Protective gear: Wear appropriate protective gear such as safety goggles, gloves, and a dust mask. This will help protect you from wood dust, sharp edges, and potential chemical fumes from paints and adhesives.
- Tool safety: Ensure you’re familiar with the safe operation of all tools you’ll be using. Follow the manufacturer’s instructions and take appropriate precautions, such as keeping hands away from saw blades and using clamps to secure materials while cutting.
- Ventilation: When painting or applying adhesives, work in a well-ventilated area to avoid inhaling fumes. Open windows and use fans to circulate air, or use a respirator if adequate ventilation isn’t possible.
Tools and Materials
 Tape measure
- Miter saw
- 23-gauge or 18-gauge nailer
- 80- or 100-grit sandpaper
- Pencil
- Caulk gun