We may be compensated if you purchase through links on our website. Our team is committed to delivering honest, objective, and independent reviews on home products and services.
Project details
Skill
Cost
Estimated Time
*Cost information in this article sourced from Angi.
Rotted wood is a common problem many homeowners face, especially in climates prone to humidity and heavy precipitation. Fortunately, there’s a solution that doesn’t require complete replacement: epoxy compound. This versatile material can restore rotted wood, saving time and money on extensive repairs.
In this article, we’ll explore how to fix rotted wood using epoxy, guided by the expertise of This Old House general contractor Tom Silva. In the video above, you can watch Silva demonstrate this repair process from start to finish on a rotting windowsill.
Understanding Wood Rot and Epoxy
Wood rot occurs when moisture and fungi combine to break down the cellulose in wood, causing it to decay. If ignored, rotted wood can lead to more severe structural problems. Epoxy, a two-part adhesive, can repair and restore rotted wood by filling in the damaged areas and bonding with the remaining solid wood.
What Causes Wood Rot?
The primary causes of wood rot include:
- Excessive moisture
- Fungal growth
- Lack of proper maintenance
- Poor ventilation
These factors create an environment where fungi can thrive, breaking down the wood fibers and leading to decay.
Benefits of Using Epoxy for Wood Repair
Epoxy offers several advantages for repairing rotted wood:
- Adheres strongly to wood
- Cost-effective compared to a full replacement of the wood
- Expands and contracts with the wood
- Highly malleable when wet and easy to sand once dry
- Resists moisture and decay
Epoxy’s durability and resilience make it an ideal choice for long-lasting repairs in areas prone to moisture and wood rot.
Preparing for the Epoxy Repair
Before applying epoxy, we recommend taking the following preparatory steps for a smooth repair.
Assessing the Damage
Carefully inspect the rotted area to determine the extent of the damage. Minor surface rot can usually be repaired with epoxy, but extensive rot that compromises the structural integrity might require a professional evaluation.
Consider the location and depth of the rot, and assess any surrounding areas that might also be affected. If the damage is limited and localized, proceeding with epoxy repair is a viable option.
Gathering Tools and Materials
To fix rotted wood with epoxy, you’ll need:
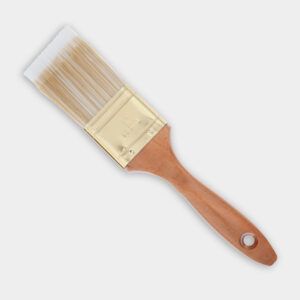
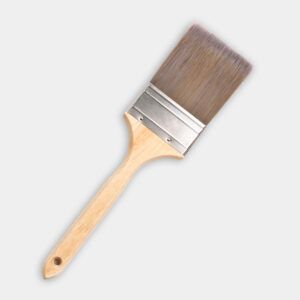
- 1-inch and 3-inch paintbrushes
- Aviation snips
- Double-barrel epoxy gun
- Epoxy bonding agent
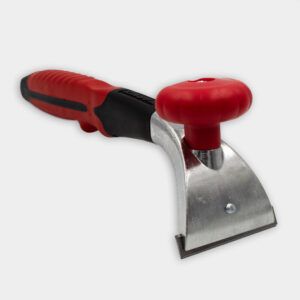
- Paint scraper
- Plastic putty knife
- Primer and paint
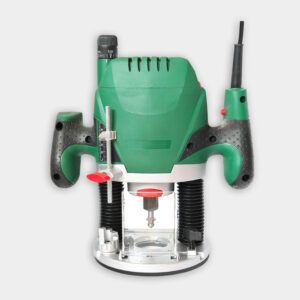
- Router or rotary cut-out tool with a V-shaped bit
- Sandpaper
- Two-part epoxy filler
Safety Precautions
When working with epoxy and power tools, always:
- Follow the manufacturer’s instructions for epoxy mixing and application
- Unplug power tools when not in use
- Wear protective eyewear and gloves
- Work in a well-ventilated area
Safety is paramount when working with chemicals and power tools. Taking the necessary precautions will prevent accidents or costly structural damage.
Removing Rotted Wood
The first step in repairing rotted wood is to remove all the decayed material.
Using a Router or Rotary Tool
Silva demonstrates using a trim router or rotary cut-out tool fitted with a V-shaped bit to grind out the rotted wood. Continue grinding until you reach solid, undamaged wood.
This step is crucial because epoxy won’t bond properly with rotted material. Using precise tools allows for the controlled removal of only the damaged wood, preserving as much of the original structure as possible.
Scraping and Cleaning
After removing the rotted wood, use a paint scraper to remove any remaining loose material and old paint. This step creates a clean surface for the epoxy to adhere to—any remaining debris can affect the bonding strength of the epoxy, leading to potential future issues.
Applying the Epoxy
Now that you’ve removed the rotted wood and cleaned the surface, it’s time to apply the epoxy.
Preparing the Surface
Before applying epoxy, use a narrow paintbrush to apply a bonding agent to all exposed wood surfaces. The bonding agent acts as a primer for the wood, creating a surface that the epoxy can adhere to more effectively and ensuring a robust, lasting repair.
Mixing the Epoxy
Silva uses a compound that comes with an epoxy-specific gun for proper mixing ratios. Remember, you typically have about 30 minutes to work with the mixed epoxy before it begins to set. Thorough mixing of both parts is essential for proper curing, and using a calibrated gun helps maintain the correct ratio, preventing issues related to improper curing.
Filling and Shaping
Force the mixed epoxy into the cavities where the rotted wood was removed. Use a putty knife to smooth the surface and remove any excess. For straight edges, like windowsills, use a straightedge to create a clean line.
Working with the epoxy while it’s still pliable allows for easy manipulation and shaping, ensuring the repair blends seamlessly with the existing structure.
Matching Wood Profiles and Details
Some additional steps are necessary to ensure the repaired area matches the original wood profile. We recommend the following steps.
Creating a Custom Profile Tool
Tom demonstrates an effective method for matching complex profiles:
- Hold a plastic putty knife against the undamaged section of the wood.
- Trace the profile onto the putty knife.
- Cut out the traced profile using aviation snips.
This custom tool allows you to shape the epoxy to match the original wood profile perfectly.
Shaping the Epoxy
While the epoxy is still pliable, shape it with your putty knife, matching the surrounding wood details. This step ensures a seamless repair that blends with the existing woodwork.
Attention to detail during this stage guarantees that the repair will function well and maintain the structural integrity of the original woodwork.
Finishing the Epoxy Repair
After the epoxy has cured, a few final steps will complete the repair process.
Sanding
Once the epoxy has fully cured (typically overnight), sand the repaired area until it’s smooth. Start with a coarse-grit sandpaper and progressively move to finer grits for a polished finish.
Proper sanding preps the surface for painting and is key to attaining a professional-looking finish.
Priming and Painting
To protect the repair and blend it with the surrounding wood:
- Apply one coat of primer suitable for both wood and epoxy.
- Once the primer is dry, apply two topcoats of paint that match the existing finish.
Epoxy Maintenance and Wood Rot Prevention
Preventing future wood rot involves ongoing maintenance and timely intervention. Preventative maintenance includes addressing moisture problems promptly, applying protective coatings to exposed wood, and ensuring moisture-prone areas receive proper ventilation. We also recommend that you regularly inspect wood surfaces for signs of damage or decay.