We may be compensated if you purchase through links on our website. Our team is committed to delivering honest, objective, and independent reviews on home products and services.
Installing a glass tile backsplash can transform your kitchen. This project is an excellent way to update your kitchen’s look without breaking the bank or requiring extensive renovation skills. In the video above, This Old House general contractor Tom Silva demonstrates a fast, no-fuss method for tiling a kitchen backsplash.
Tools and Materials for Installing Glass Tile Backsplash
To install a glass tile backsplash, you’ll need the following tools and materials:
- Chalk line
- Utility knife
- Steel straightedge
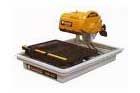
- Wet tile saw
- Rubber grout float
- Margin trowel
- Grout sponge
- Bucket
- Cotton cloth
- Glass tile sheets
- Tile adhesive strips
- Premixed tile grout
- Masking tape
Glass Tile Backsplash Installation Process
Before diving into the project, clear your countertops so you have plenty of space to work. Pull any appliances away from the wall if they’ll be in your way, taking care to disconnect them safely. Cover your countertops with a sheet to protect them from tools and debris. Now, you’re ready to begin.
Preparing the Wall Surface
First, you need to prepare the wall where the tiles will adhere. Here’s how to do it:
- Clean the wall thoroughly, removing any grease, dirt, or debris.
- Repair any damaged areas of the wall, ensuring a smooth and even surface.
- Sand the wall lightly to create a slightly rough texture for better adhesion.
- Wipe down the wall with a damp cloth to remove any dust from sanding.
Marking the Layout
Marking the layout is the backbone of a neat installation. Use a chalk line or laser level to mark the top and bottom of the space you want the tiles to go in so they’re placed uniformly.
Applying Adhesive Strips
We recommend using adhesive strips to adhere the tiles instead of mortar because the mortar may show throw some of the glass pieces.
Use a utility knife and steel-rule straightedge to cut five 3/8-inch-wide strips of tile adhesive. Notch the adhesive strips, if necessary, to fit around obstacles. Peel off the protective membrane from the back of the tile-adhesive strips and press them to the wall inside the chalk lines. Ensure there aren’t any bubbles and that it’s completely flat.
Cutting and Preparing Tiles
Cut the tile sheets into 5 1/2-inch-wide strips by slicing through the mesh on the back of the sheets with a utility knife. Repeat to cut enough tile to cover the backsplash wall. Use a wet saw to square-cut the end of the first glass tile strip. Allow the tile strip to dry completely before proceeding.
Installing the Tiles
Peel off the protective membrane from the tile adhesive on the wall. Lay the steel rule on the countertop and up against the backsplash wall to create an even grout-joint space beneath the tile. Lightly set the first tile sheet into place against the tile adhesive. Once satisfied with its positioning, firmly press the tile to the wall. Repeat to install the remaining tile sheets.
Grouting and Finishing Your Tile Backsplash
Grouting completes the installation by providing a polished finish. Applying grout seals the tiles and creates a uniform look.
Applying and Cleaning Grout
Use a rubber float to force premixed tile grout into the joints between the tiles on the backsplash wall. Apply at a 45-degree angle, working diagonally. Scrape away excess grout from the countertop with a margin trowel. Allow the grout to firm up for about 10 minutes, then wipe the tiled surface clean with a sponge and clean water.
Wait about five hours for the grout to harden, then use a slightly dampened cotton cloth to buff off any hazy grout residue from the tiled surface.
Maintenance and Care for a Glass Tile Backsplash
Some regular maintenance will keep your new backsplash looking its best. Here are some tips for caring for your tile backsplash:
- We suggest sealing the tiles to protect them from staining.
- Clean the surface regularly with a mild cleaner and a soft cloth. Avoid using harsh chemicals or abrasive materials that could scratch or damage the glass tiles.
- Seal the grout lines annually to prevent staining and moisture penetration.
- Address any chips or cracks promptly to prevent further damage.
Alternative Design Ideas for a Glass Tile Backsplash
If you’re looking for design alternatives, consider these creative twists for your glass tile backsplash:
- Mix and match: Combine glass tiles with other materials, such as stone or metal, for a unique, textured look.
- Color patterns: Play with different shades of glass tiles to create eye-catching patterns or murals.
- Statement pieces: Incorporate decorative tiles sporadically among regular ones for a more personalized design.
Tools
 Chalk line
- Utility knife
- Steel straight edge
- Wet tile saw
- Rubber grout float
- Margin trowel
- Grout sponge
- Bucket
- Cotton cloth