Project details
Skill
Cost
Estimated Time
Plaster walls consist of multiple layers of plaster applied over wooden lath strips. These walls create a strong, sound-dampening surface but are also prone to cracking over time. Repairing cracked plaster walls ensures your home’s structural integrity and you can do these repairs yourself with the right tools and materials. In this segment, This Old House expert painter Mauro Henrique walks Kevin O’Connor through effective methods for patching different types of cracks and repairing your plaster walls.
Composition of Plaster Walls
Understanding a plaster wall’s composition can help you determine how to make the necessary repairs. A typical plaster wall is made of the following:
- Wood lath: Thin strips of wood nailed horizontally to wall studs
- Brown coat: The first layer of plaster applied over the lath
- Finish coat: The final, smooth layer of plaster
Assess the Plaster Damage
Plaster walls can develop cracks and other damage due to factors like house settling, temperature and humidity fluctuations, vibrations from nearby construction, water damage, and age. Before beginning repairs, assess the type and extent of damage to your plaster walls to determine the best repair method.
Hairline Cracks
Hairline cracks are thin, superficial fissures that don’t penetrate deeply into the plaster. These cracks are often the result of minor settling or temperature changes and you should be able to repair them with minimal effort.
Larger Cracks and Holes
More substantial cracks and holes, caused by deep settling, impact damage, or long-term neglect, may require a more time-consuming repair process.
Loose or Separating Plaster
In some cases, the plaster may separate from the lath behind it, producing a hollow sound when you tap it. This requires a different approach to securely reattach the plaster to the lath.
Locating the Cracks
A common place to check for cracks is above doorjambs and windows. You might also find cracks at joints between the drywall and plaster. Pay close attention to these and other areas, especially ones that may be hidden or not as noticeable.
Tools and Materials for Plaster Repair
You’ll need the following tools and materials to complete your plaster repair:
- Fiberglass mesh drywall tape
- Flexible patching compound
- Joint compound
- Paint and paintbrush
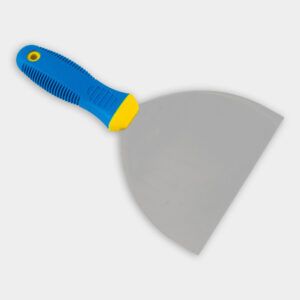
- Putty knife
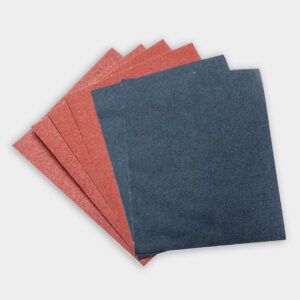
- Sandpaper (220-grit)
- Tack cloth
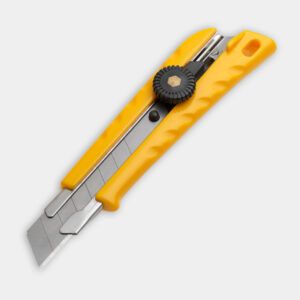
- Utility knife
Repairing Small Cracks in Plaster
Henrique recommends using a flexible patching compound for minor cracks, as follows. This method is quick and easy. The patching compound is not sandable, so you can paint or stain your surface once it’s dry.
- Clean the crack using a utility knife to remove debris such as old compound, paint flakes, or loose plaster.
- Apply the flexible patching compound using a putty knife, starting at the top of the crack and working your way down.
- Press the compound into the crack to completely fill the hole.
- Remove the excess compound by angling the putty knife and dragging it across the crack.
- Allow the compound to dry for at least two hours.
- Apply a second coat of compound, following the same process as the first application.
- Be sure that no high spots or ridges are left behind. Allow this coat to dry before painting.
Fixing Larger Cracks and Holes in Plaster Walls
For more severe damage, you can use joint compound instead by following these steps:
- Clean out the damaged area with a utility knife, removing debris such as old compound, paint flakes, or loose plaster.
- Apply a thin coat of joint compound to the crack or hole using a putty knife.
- Press fiberglass mesh tape into the wet compound, covering the entire damaged area. Starting at the top, lightly press the mesh tape into the bed of the compound before using the putty knife to cut it at the bottom.
- Immediately apply a second coat of joint compound over the tape, feathering the edges to blend with the surrounding wall.
- Allow the compound to dry for 45 minutes to an hour.
- Lightly sand the repaired area with 220-grit sandpaper to smooth any high spots or ridges.
- Clean the sanded area with a tack cloth to remove dust.
- If necessary, apply a third coat of compound and sand again once dry.
Additional Tips for Large Repairs
Here are some steps you can take to reinforce larger repairs for durability:
- Feather edges: Feathering the edges of each layer helps blend the repair area seamlessly with the surrounding wall, making the repair virtually invisible once painted.
- Monitor drying times: Be patient and allow ample drying time between each layer of joint compound. Rushing this process can lead to shrinkage and cracking.
- Use multiple layers: Apply several thinner layers of joint compound rather than one thick layer. This approach allows each layer to dry and harden properly, providing a more solid repair.
Using Adhesives for Separated Plaster
When the plaster has separated from the lath, you’ll need to take a more specialized approach with adhesives. Here’s what you can do:
- Locate the loose areas by gently tapping the wall and listening for a hollow sound.
- Drill small holes through the plaster, stopping when you hit the lath.
- Vacuum out any dust from the holes.
- Inject a plaster adhesive, such as Big Wally’s Plaster Magic, into the drill holes.
- Temporarily clamp the plaster to the lath using drywall screws and plastic washers.
- Allow the adhesive to set for 24-48 hours.
- Remove the screws and washers, then fill the holes with joint compound.
- Sand and paint the repaired area to match the surrounding wall.
Additional Tips for Loose Plaster
When reattaching loose plaster with adhesives, keep these tips in mind:
- Secure the plaster: Use drywall screws with plastic washers to hold the plaster in place while the adhesive sets. Make sure the screws are not too tight to avoid damaging the plaster.
- Use the proper adhesive: Choose a high-quality plaster adhesive designed specifically for repairing plaster walls to ensure a strong bond between the plaster and lath.
Painting Repaired Plaster Walls
Once your repairs are complete and fully dry, you can paint your repaired wall as follows:
- Use a high-quality primer to seal the repaired areas.
- Allow the primer to dry completely.
- Apply paint that matches the existing wall color, using a brush for cut-in areas and a roller for larger surfaces.
- Apply a second coat if necessary for even coverage.
Choosing the Right Paint and Primer
The right paint and primer will help you achieve a lasting and attractive finish. Consider the following tips:
- Buy quality materials: High-quality paint and primer provide better coverage and durability, giving your walls a clean, long-lasting finish.
- Choose a stain-blocking primer: This primer type can cover up any discoloration or stains that may have occurred during the repair process.
- Match the paint sheen: For a consistent look, use paint with the same sheen as your existing wall paint. Standard sheens include flat, eggshell, satin, and semigloss.
Preventing Future Plaster Damage
Here are some preventive measures you can take to avoid future plaster wall damage:
- Address any water leaks immediately.
- Avoid hanging heavy items directly on plaster walls without proper support.
- Control indoor humidity levels using a dehumidifier.
- Regularly inspect walls for early signs of damage.
- Use the appropriate wall anchors for the weight and size of the object you want to mount.
Resources
In this segment, Henrique shares the best techniques for patching and repairing cracks in plaster walls. His go-to material is a flexible patch compound, Sheetrock® Brand Dust Control Patch and Repair Compound, specifically used for stress cracks on the wall. He also uses Dynamic 2″ x 150′ (50mm x 45.72m) Fiberglass Drywall Tape.