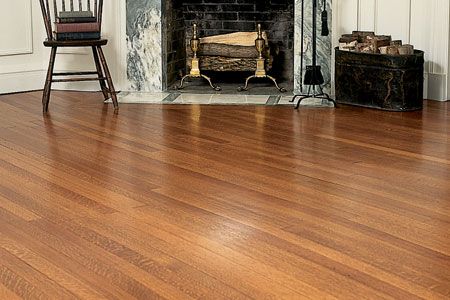
Hardwood floors provide a timeless look but can become dull, scratched, or worn. Even when well-maintained, you may eventually need to refinish your floors to return them to their original beauty.
Hardwood floor refinishing is the process of restoring your wood floor’s protective layer and appearance. This can involve either screening, which removes only the top layer of finish, or sanding, which strips the floor down to bare wood. The choice between these methods depends on your floor’s condition and your current finish.
Our guide covers how to identify when your floors need attention, choose the right finish, and maintain your newly restored floors.
Signs Your Hardwood Floor Needs Refinishing
You’ll notice when your hardwood floors start wearing out. Here are some signs it may need refinishing:
- Bare wood exposed in high-traffic zones
- Discoloration or gray areas where the wood has been exposed to sunlight or moisture
- Dullness or lack of shine across large areas
- Scratches, especially those that penetrate the finish
- Water stains, which indicate the protective finish has been compromised
Types of Hardwood Floor Refinishing Methods
The two primary methods for refinishing hardwood floors are screening and sanding. Each has different advantages and works for different situations.
Screening
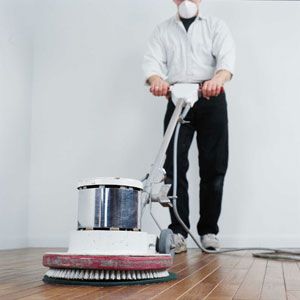
Screening, also known as buffing, is a less invasive refinishing method that removes only the top layer of polyurethane finish without touching the wood itself. This process is ideal for floors with light wear and tear, where the damage hasn’t penetrated the wood.
Screening is done with a floor polisher equipped with a synthetic wool pad and a sanding screen. It’s a relatively quick process that produces less dust than full sanding. However, screening is only effective on polyurethane finishes and can’t address deep scratches or wood stains. It’s a good option for regular maintenance to keep floors looking fresh.
Sanding
Sanding is a more thorough refinishing method that removes the entire finish and a thin layer of wood. This process is necessary in these circumstances:
- The floor has a wax finish on top of polyurethane
- The finish has worn through to the bare wood
- The floor has been stained or significantly damaged
Sanding requires heavy equipment such as a drum sander and an edger. It’s a more time-consuming and dust-intensive process, but it makes for a complete restoration of the floor, including the ability to change the wood’s color with stain. This method is ideal for floors with significant damage or for homeowners seeking a new look.
Essential Tools for Hardwood Floor Refinishing
The tools you’ll need depend on whether you’re screening or sanding your floors. Here’s a breakdown of the essential equipment for each method.
Screening Tools
- 16-inch floor polisher (rental cost: around $25 per day)
- Palm sander for edges and corners
- Sanding screens in various grits (60, 80, 100, and 120)
- Synthetic wool pads
- Tack cloths
- Vacuum cleaner
Sanding Equipment
- Drum sander (rental cost: around $55 per day)
- Edger sander
- Floor scraper for corners
- Protective gear (respirator, safety glasses, ear protection)
- Sanding disks in various grits
- Tack cloths
- Vacuum cleaner
Regardless of the method, you’ll also need plastic sheeting and masking tape to seal off the work area and contain dust.
Step-by-Step Guide To Screening Hardwood Floors
Screening is a more accessible do-it-yourself (DIY) option for homeowners looking to refresh their hardwood floors. Here’s how to do it:
Preparation for Screening
- Clear the room of all furniture and remove any floor coverings.
- Seal off doorways, duct registers, and cabinet doors with plastic sheeting and tape.
- Open windows for ventilation and set up a fan to blow dust outside.
- Remove baseboards or quarter-round molding along the walls.
- Ensure all flooring nails are countersunk.
The Screening Process
- Start with a 60-grit screen, working your way up to 120-grit for a smooth finish.
- Before attaching each screen to the polisher, lightly sand it with 100-grit sandpaper to prevent deep cuts in the finish.
- Make overlapping passes with the floor polisher, keeping it moving to avoid creating swales.
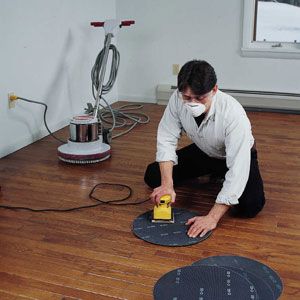
- Use a palm sander with 100-grit sandpaper for edges and corners.
- Vacuum thoroughly between grits and after the final pass.
- Wipe the entire floor with a tack cloth to remove all dust particles.
Remember to work systematically across the room, maintaining a consistent technique to ensure an even finish.
Sanding Hardwood Floors: When and How
Sanding is a more intensive process that’s often best left to professionals, but for those confident in their DIY skills, here’s what you need to know:
When To Sand Your Floors
Sand your hardwood floors in these circumstances:
- The wood is visibly damaged or deeply stained
- The floor has been sanded and refinished multiple times before
- There’s significant unevenness between boards
- You want to change the color of the wood
The Sanding Process
- Start with coarse-grit sandpaper (36- or 40-grit) to remove the old finish and level the floor.
- Progress through medium (60–80 grit) and fine (100–120 grit) sandpaper.
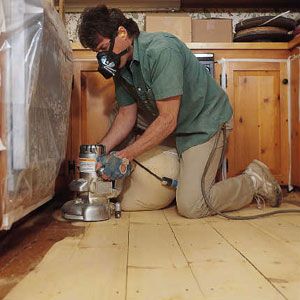
- Sand in the direction of the wood grain, making steady passes with the drum sander.
- Use the edger sander for areas near walls and corners.
- Hand-scrape corners and other hard-to-reach areas.
- Vacuum and tack between each grit change and after the final sanding.
Always keep the sander moving to prevent gouging the floor, and be extra cautious when starting and stopping the machine. Proper technique will leave you with a smooth, flat finish.
Choosing the Right Finish for Your Hardwood Floor
The finish you choose affects your hardwood floor’s appearance and durability. Below are the most common options.
Oil-Based Polyurethane
Oil-based polyurethane is a popular choice for its durability and rich, amber color. It costs around $25 per gallon and covers about 400 square feet. Benefits include the following:
- Can be worked while wet, allowing for corrections
- Enhances the natural warmth of wood
- Provides long-lasting protection
However, it has a strong odor and requires longer drying times between coats, though the level of protection makes it a favorable choice for high-traffic areas.
Water-Based Polyurethane
Water-based polyurethane is popular due to its quick drying time and low odor. It costs about $40 per gallon and covers approximately 600 square feet. Advantages include the following:
- Dries quickly (can apply multiple coats in one day)
- Has a clear finish that doesn’t yellow over time
- Has low VOC emissions
The main drawback is that it’s less durable than oil-based finishes and may require more frequent reapplication. Its clear finish is ideal for preserving the natural color of your wood.
Penetrating Oils and Sealers
These finishes soak into the wood, providing a more natural look. They’re ideal for those who prefer a matte or satin finish. Benefits include the following:
- An enhanced natural wood grain
- Easy spot-repair
- Little maintenance
However, oils and sealers offer less protection against wear and moisture compared to polyurethane finishes. They’re suitable for low-traffic areas or for achieving a specific look.
Applying Finish To Your Refinished Hardwood Floor
Take the time to apply finish carefully and evenly for a beautiful and long-lasting result.
Preparation for Finishing
Ensure the floor is completely clean and dust-free. Vacuum thoroughly and use a tack cloth to remove any remaining particles. Maintain proper room temperature and humidity as specified by the finish manufacturer.
Application Techniques
- For edges and corners, use a high-quality brush or painting pad.
- For open areas, use a lamb’s wool or synthetic applicator.
- Apply thin, even coats, working with the grain of the wood.
- For oil-based polyurethane, use long, smooth strokes and maintain a wet edge.
- For water-based finishes, work quickly to avoid lap marks.
- Allow proper drying time between coats as specified by the manufacturer.
- Lightly sand between coats with 220-grit sandpaper for better adhesion, except for the final coat.
Remember to ventilate the area well during application and curing periods. Following these steps helps to ensure a durable, attractive finish.
Troubleshooting Common Refinishing Issues
Even with careful preparation and application, issues may arise during the refinishing process. Here are some common problems and solutions:
- Bubbles in the finish: This is usually caused by shaking the finish or applying it too thickly. Sand out the bubbles and reapply a thin coat.
- Dust nibs: These are tiny bumps caused by dust settling in wet finish. Sand them lightly and apply another coat in a dust-free environment.
- Orange peel texture: A pitted texture is often caused by applying finish in high temperatures or humidity. Sand smooth and reapply under proper conditions.
- Streaks or lap marks: You’ll get these due to uneven application or working on a partially dried area. Sand the affected area and reapply, maintaining a wet edge.
Maintaining Your Newly Refinished Hardwood Floor
Follow these tips to protect your investment and extend your refinished hardwood floor’s lifespan:
- Avoid using water or steam mops, which can damage the finish.
- Clean regularly with a soft broom or dry mop.
- Clean spills immediately to prevent staining.
- Place mats at entrances to trap dirt and moisture.
- Reapply a maintenance coat of finish every few years, depending on wear.
- Use felt pads under furniture legs to prevent scratches.
Adhering to a maintenance routine can help prevent damage and keep your floors looking better for longer.
Spot Repairs and Stain Removal on Hardwood Floors
For minor damage or stains, you may not need to refinish the entire floor. Here are some spot repair techniques:
- Heel marks: Buff out with fine steel wool and apply a small amount of finish if needed.
- Pet stains: These often require sanding and wood replacement for severe cases.
- Scratches: Use a touch-up marker or fill stick that matches your floor color. For deeper scratches, sand lightly and apply a small amount of finish.
- Water stains: Try rubbing with fine steel wool and floor cleaner. For deeper stains, lightly sand and apply matching finish.
Always test repair methods in an inconspicuous area first. Spot repairs can significantly extend the life of your floor without requiring full refinishing.
Our Conclusion
Refinishing hardwood floors is a rewarding project that can dramatically improve your home’s look and value. We detail some DIY options above, but for those unsure of their skills or dealing with unique or historic floors, we suggest hiring a professional to handle refinishing.
To understand the financial investment associated with this project, see our guide explaining the cost of refinishing hardwood floors.