Private Updates Worth Sharing
Whatever’s going on in the other rooms of your house, a beautiful master bathroom provides a temporary escape to refresh and regroup. In our annual Reader Remodel Contest, readers were proud to show off renovations of these typically private spaces. We were wowed by surfaces covered in marble, steam showers, and built-ins that wouldn’t look out of place in a Presidential library. See the best renovations of bathrooms, as chosen by the editors of This Old House.
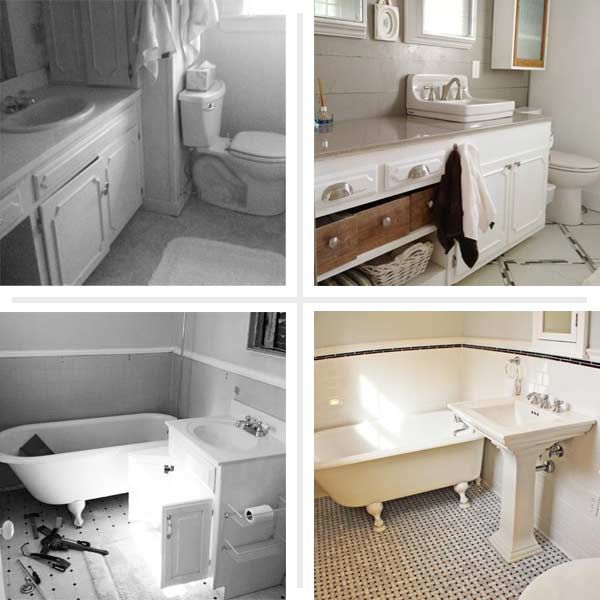
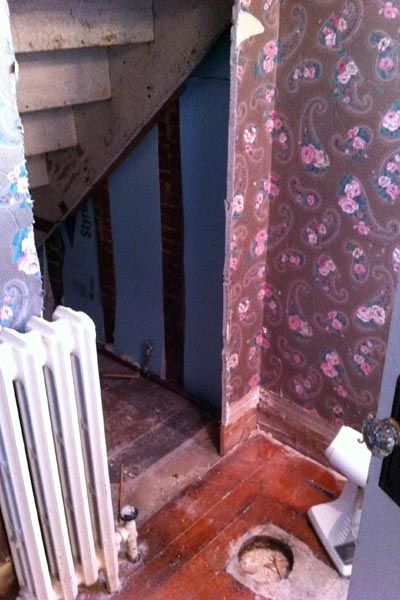
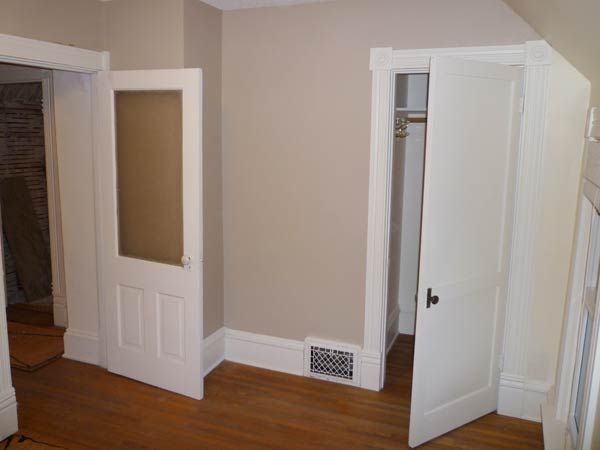
New Sink Spurs Full Reno in This Powder Room: Before
Who: Jeff T.
Where: St. Charles, IL
I recently replaced all of the plumbing in our Greek Revival house. This bathroom’s sink was the last thing I needed to finish. I promised my wife that she would have a new bathroom sink by the end of the weekend. To do this I had to replace the cast-iron toilet pipe. The force from breaking the pipe also broke the bottom of the antique toilet. A year later she had a new bathroom!
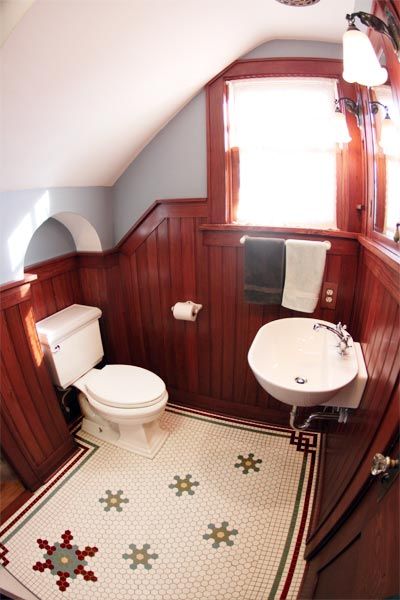
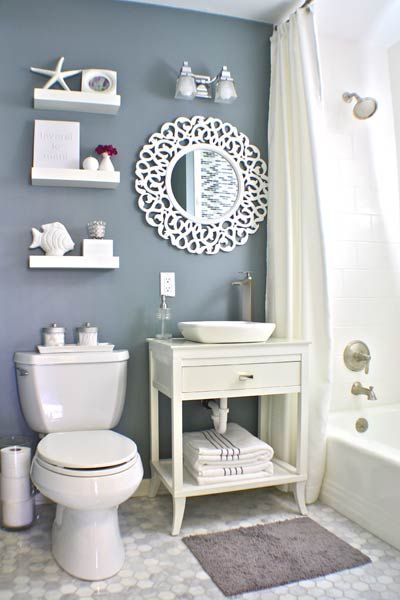
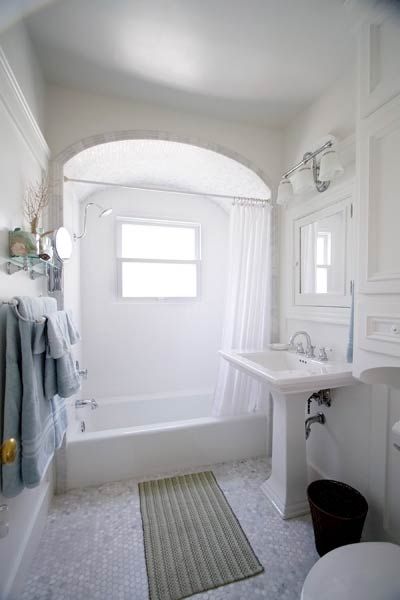
New Sink Spurs Full Reno in This Powder Room: After
Who: Jeff T.
Where: St. Charles, IL
My main focus, besides asthetics, was the use of space, because the room is small and also has two doors. To do this I flipped the main door so it would open to the wall instead of into the room. I took out the radiator and replaced it with in-floor heat. I recessed the toilet into an arched alcove and used a wall sink instead of a pedestal.
Who did the work: I did all the work myself.
Cost: $1,000-$5,000
See all the images from this entry.
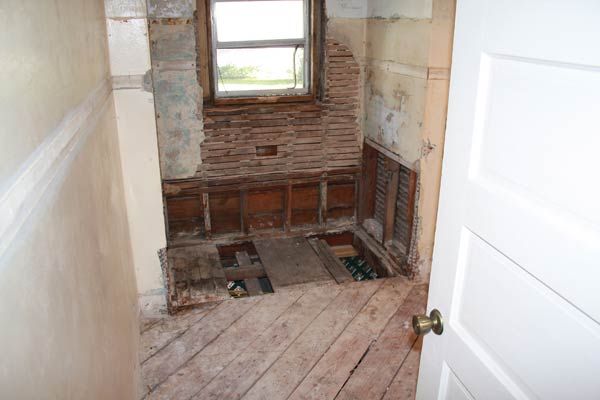
No Simple Job in an 1850s Home: Before
Who: Greg B. and Jessica H.
Where: Norwichtown, CT
We had no idea that there were three prior renovations layered beneath the floor and under the walls. When we finally got it all torn out, there was a 6-inch step down into our bathroom.
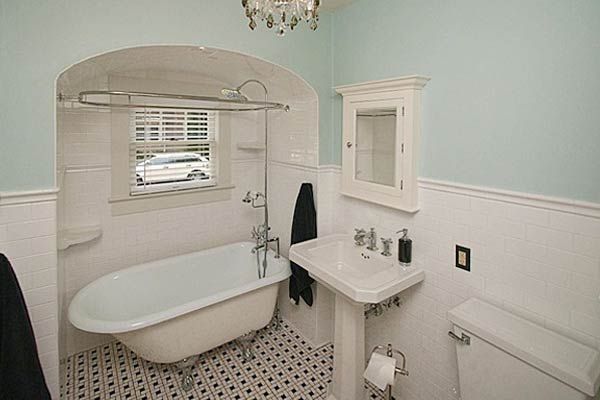
No Simple Job in an 1850s Home: After
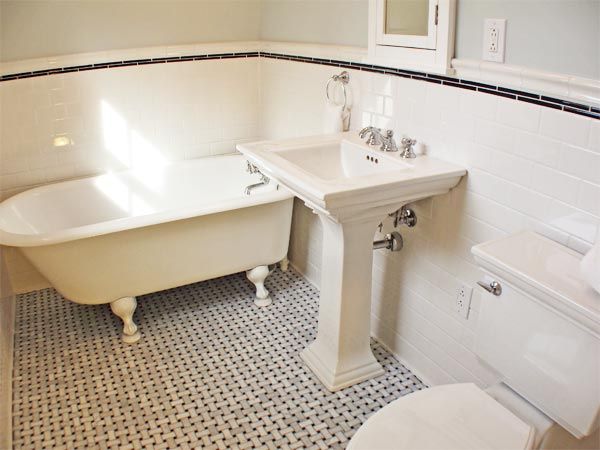
Who: Greg B. and Jessica H.
Where: Norwichtown, CT
We love the clean look that the marble basketweave and white subway tile create. The pure white claw-foot tub, sink, and toilet combined with chrome accents complete the classic look. Every part of this room and new and updated and we love that!
Who did the work: We did all the work ourselves.
Cost: $1,000-$5,000
See all the images from this entry.
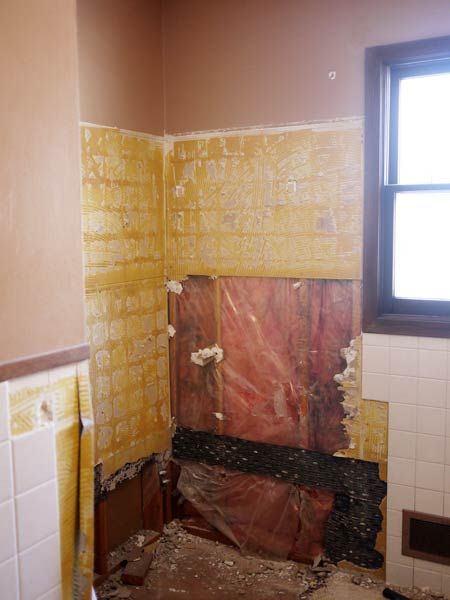
Imparting Work Ethic to Children: Before
Who: Michael and Brett B.
Where: Pittsford, NY
We gutted the entire bathroom and knocked down the wall to the closet to gain 20 inches of space for a 60-inch shower/tub combo. We (with the help of a licensed contractor) also ripped out all the drain pipes, sewer pipes, and hot/cold feeds for both bathrooms.
Imparting Work Ethic to Children: After
Who: Michael and Brett B.
Where: Pittsford, NY
The bathroom is not only clean and updated but also done properly, and the rest of the house benefited from this project. We put all new shutoffs on the plumbing from the basement up, resupported the whole house, and insulated the garage to create a more efficient and comfortable living space.
Who did the work: We did most of the work ourselves.
Cost: $5,000-$10,000
See all the images from this entry.
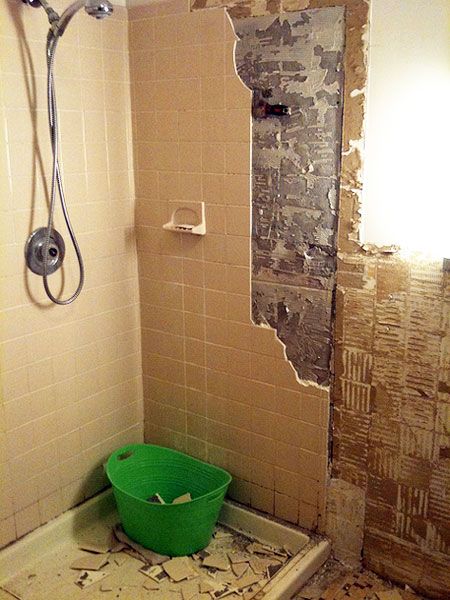
Bathroom Gutted Down to the Studs: Before
Who: Joellyn C.
Where: Fort Benton, MT
This was part of an overall basement renovation that included gutting the entire basement and changing the heat system to forced air. This room was gutted down to the studs.
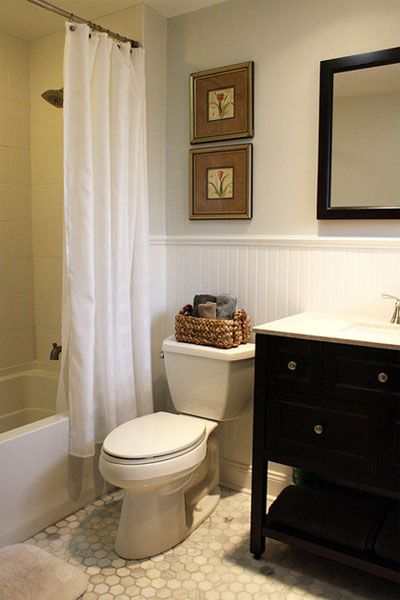
Bathroom Gutted Down to the Studs: After
Who: Joellyn C.
Where: Fort Benton, MT
The bathroom looks like a sleek, modern space. Before, the finishes were the cheapest possible options at the time, and now it feels expensive. We installed dual showerheads also, so everyone in the family often uses this bathroom!
Who did the work: We did most of the work ourselves.
Cost: $1,000-$5,000
See all the images from this entry.
Salvaged Materials Add Character to Bathroom Remodel: Before
Who: Geral D.
Where: Garland, TX
My wife and I gutted the bathroom to the studs. We removed the wall that separated the toilet/bath from the sink area. We replaced everything and used a tub that had been in my family since 1929. The vanity was built from lumber milled from our horse farm in Louisiana.
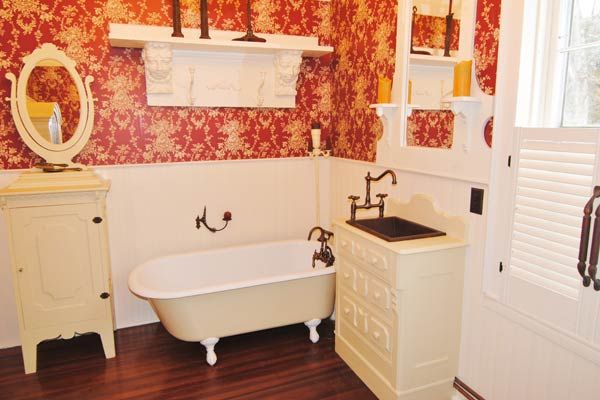
Salvaged Materials Add Character to Bathroom Remodel: After
Who: Geral D.
Where: Garland, TX
I love the open feeling connecting the two rooms gave, as well as the tub. My wife and I were not tub people and used it purely for the look and after using it we have fallen in love with it.
Who did the work: We did most of the work ourselves.
Cost: $1,000-$5,000
See all the images from this entry.
Learning Experience Concludes with Beautifully Finished Bathroom: Before
Who: Jenni D.
Where: Kansas City, MO
I gutted my bathroom down to the studs and built it all back up again completely on my own, which is probably why it took nearly 18 months to complete! The only part I hired out was having a plumber install new pipe for a showerhead.
Learning Experience Concludes with Beautifully Finished Bathroom: After
Who: Jenni D.
Where: Kansas City, MO
I love my marble hex floor as well as the glass mosaic inset at the end of the tub. I also love how the vanity turned out, since I really kind of figured that one out as I went. The bottom part was a nightstand, but I had to remove the top and build a new custom top to accommodate the vessel sink.
Who did the work: I did all the work myself.
Cost: $1,000-$5,000
See all the images from this entry.
Retaining Original Character: Before
Who: Ben D.
Where: Orlando, FL
The room was restored down to the studs where needed, but I retained all original hinges, doorknobs, doors, base molding, floors, etc.
Retaining Original Character: After
Who: Ben D.
Where: Orlando, FL
I really splurged on this house. I did not save money during the remodel, to be honest.
Who did the work: I did all the work myself.
Cost: $5,000-$10,000
See all the images from this entry.
Unique Bathroom with Reclaimed Wood Sink and Custom Concrete Counters: Before
Who: Greg F.
Where: Minneapolis, MN
We made our own custom concrete countertop; tiled the floor and tub in slate tile; made a tub skirt and wall panels with reclaimed walnut; made a custom wooden sink with reclaimed walnut using a CNC router; and built new medicine cabinets with reclaimed walnut.
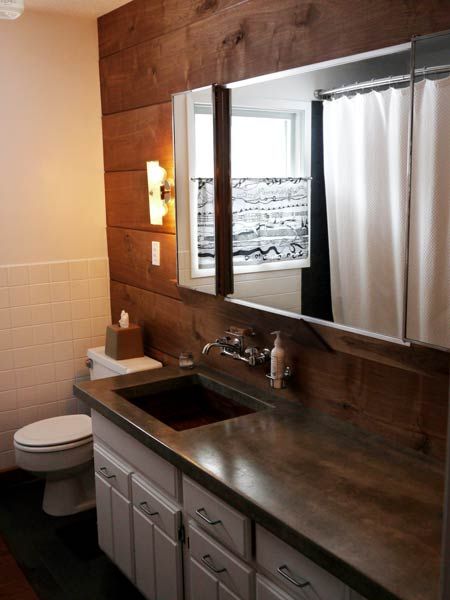
Unique Bathroom with Reclaimed Wood Sink and Custom Concrete Counters: After
Who: Greg F.
Where: Minneapolis, MN
Our favorite part of our remodel is our reclaimed walnut undermount sink and concrete countertop. We sourced the walnut from “Wood from the Hood,” a local company that salvages downed trees. We designed the wood sink in CAD software, and then used a ShopBot CNC router to carve the drain pan so that it would drain flawlessly.
Who did the work: We did all the work ourselves.
Cost: $1,000-$5,000
See all the images from this entry.
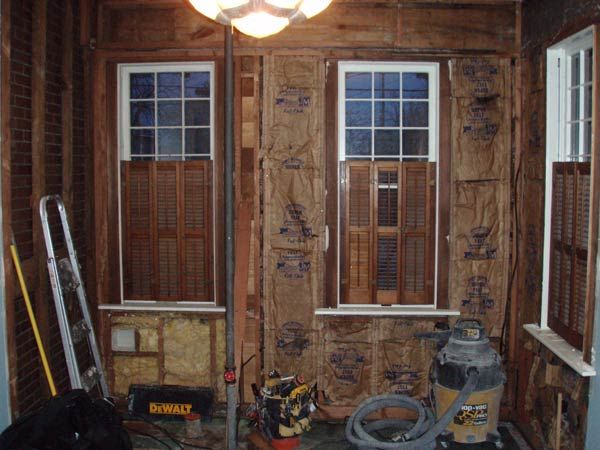
Charming Character in Bathroom: Before
Who: Bev F.
Where: Didsbury, AL
We removed the lath and plaster back wall into a closet to make a bigger room. We installed new windows in the character of the house with the same style wood and muntins. We kept and refinished the wood sill and trim around the windows as well as the original door. All new plumbing was installed down two floors, as it kept leaking into the room below.
Charming Character in Bathroom: After
Who: Bev F.
Where: Didsbury, AL
The thing I like best about the remodel is taking relaxing bubble baths that are so special in a beautiful place!
Who did the work: I did some of the work myself but a contractor did most of it.
Cost: $10,000-$25,000
See all the images from this entry.
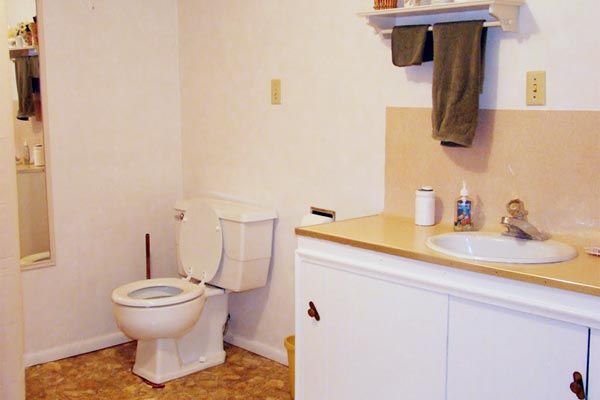
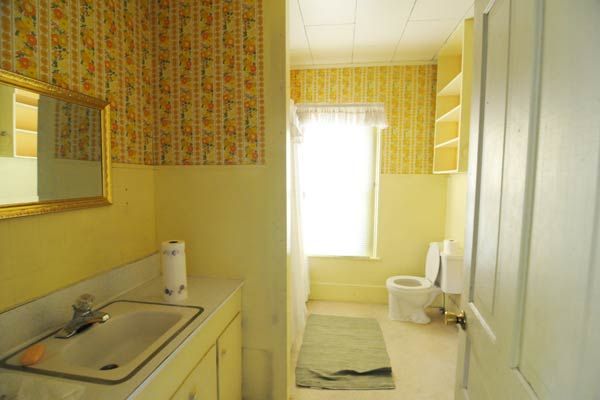
Sink From Junk Store Serves as Inspiration: Before
Who: Robin G.
Where: Denison, TX
I removed the flooring and replaced the subfloor to be level with the rest of the house. A wonky storage unit was at the end of the vanity, eating up precious space and causing the toilet to be placed in the middle of the room, an unattractive focal point from the living room.
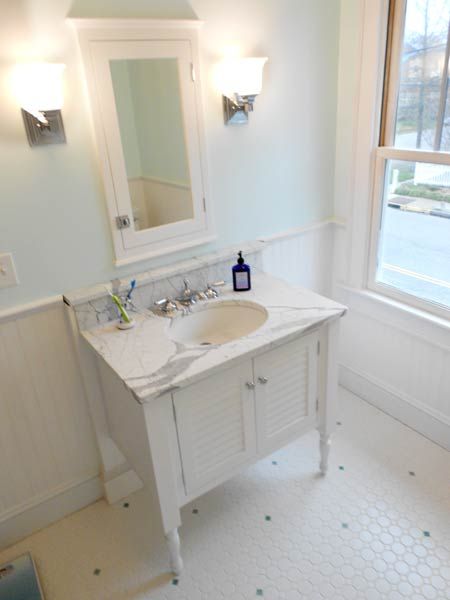
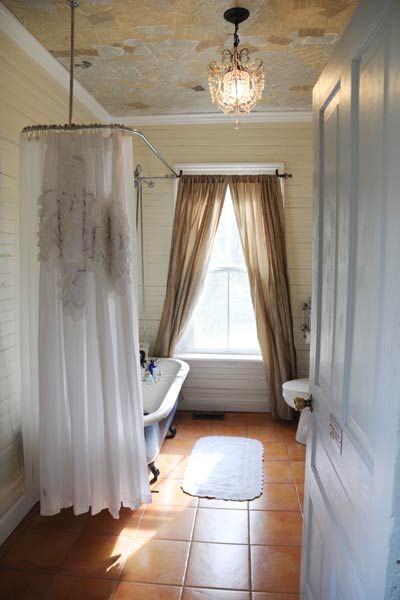
Sink From Junk Store Serves as Inspiration: After
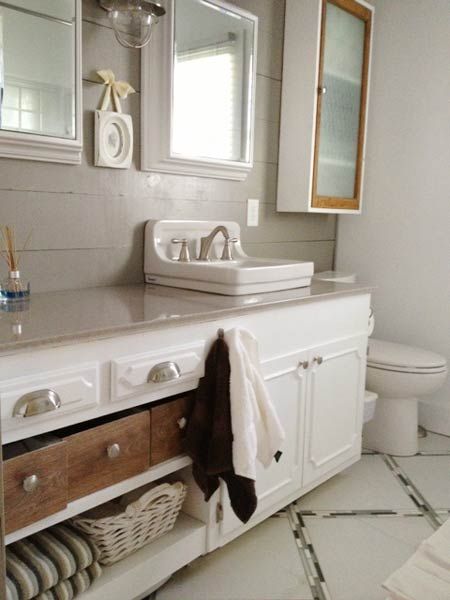
Who: Robin G.
Where: Denison, TX
I like that we no longer have a clear view of a toilet from our living room, not tripping every time we enter the bathroom door (from the improperly repaired subfloor), and having streamlined storage. But what I love is the overall feeling of the whole makeover. It is a very bright, clean bathroom now with a cottage spa feeling!
Who did the work: I did most of the work myself.
Cost: $1,000-$5,000
See all the images from this entry.
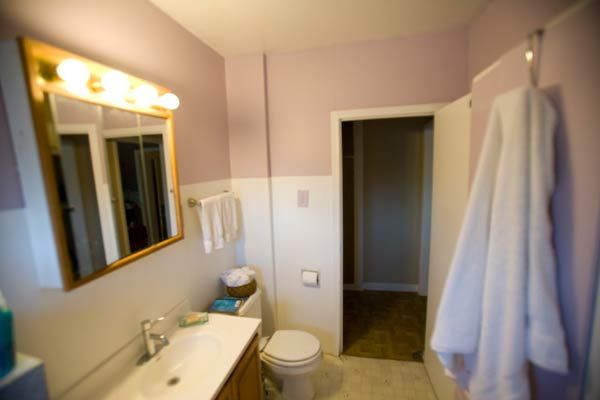
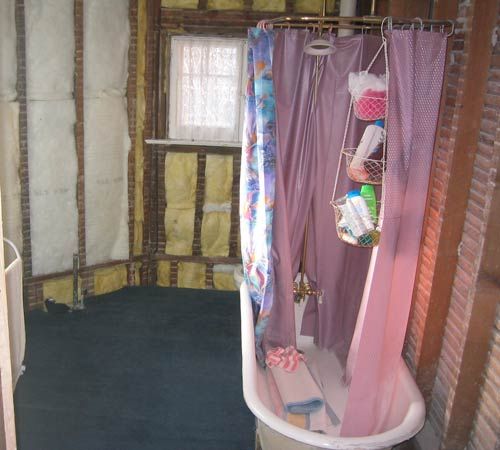
Modern Convenience and Period Character: Before
Who: Bonnye G.
Where: Seymour, IN
The former bathroom was only the size of what is now the shower and once held only a toilet and a sink. We had to gut the room, removed the fake blue-painted tile panels and poured concrete over the dirt floor. David actually dug out a huge hole of mud, added plumbing for the new shower, and then moved the plumbing for the toilet.
Modern Convenience and Period Character: After
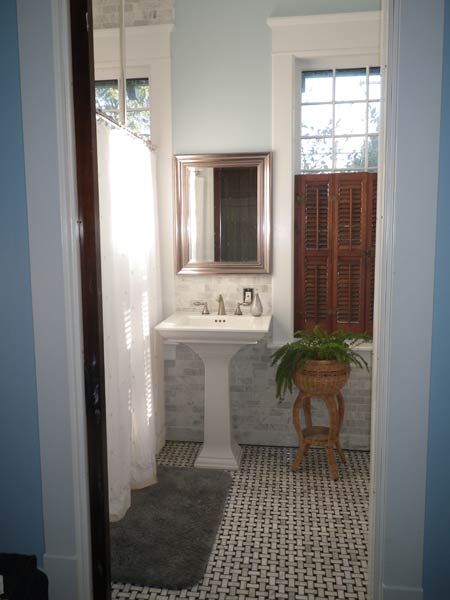
Who: Bonnye G.
Where: Seymour, IN
The transformation from a cramped, dark bathroom into a light-filled larger one with a shower still makes us happy! We love that the Carrara marble wall and marble basketweave floor feel like they fit in our 1911 Craftsman-style house.
Who did the work: We did most of the work ourselves.
Cost: $5,000-$10,000
See all the images from this entry.
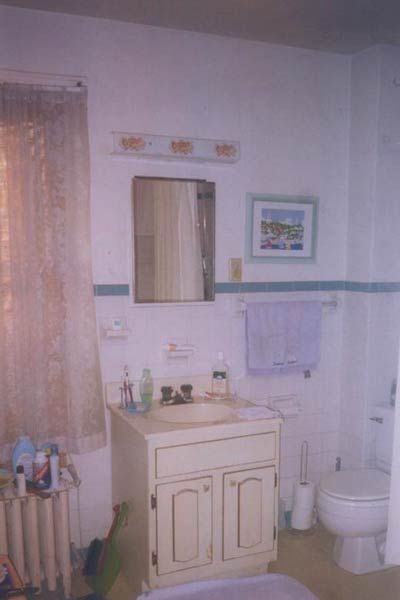
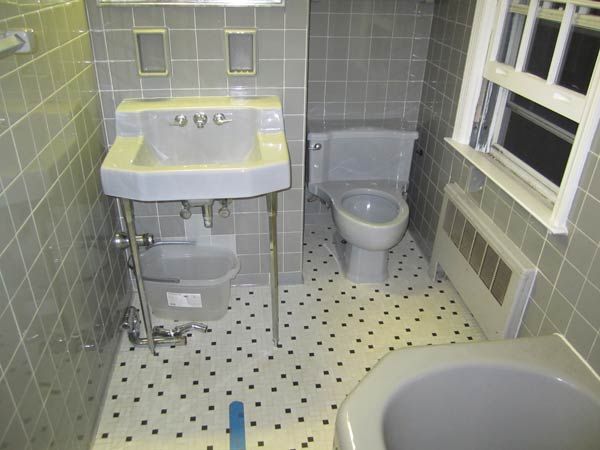
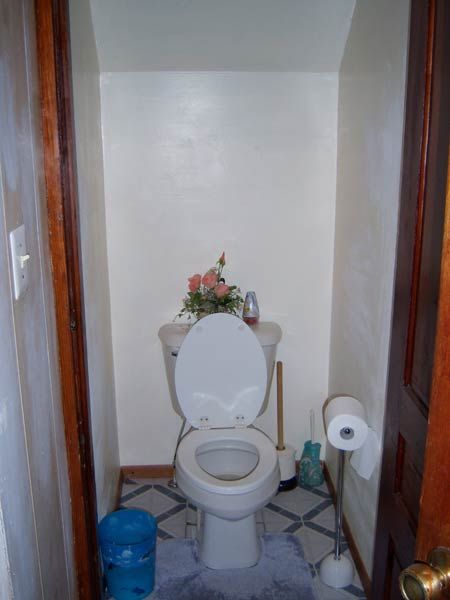
Over Budget but Exceeds Expectations: Before
Who: Beverly G.
Where: Riverside, CA
I bought the 1926 Spanish Mediterranean knowing the 5½-by-8-foot bathroom would have to be remodeled. Someone had apparently made changes to it in the 1950s, but the shower tile was cracking, the window rotting, the plumbing plugging up, and I sat on the edge of the door every time I sat on the toilet!
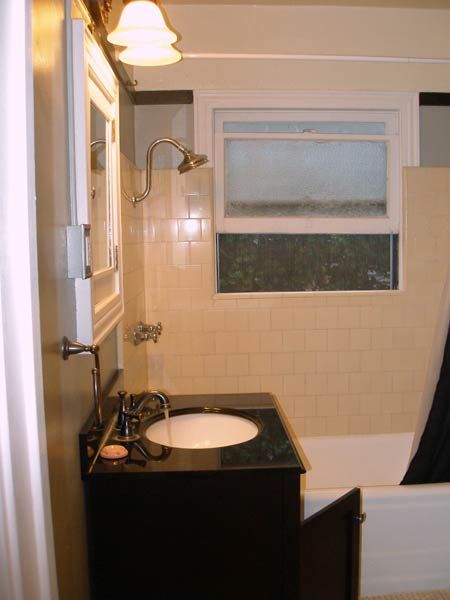
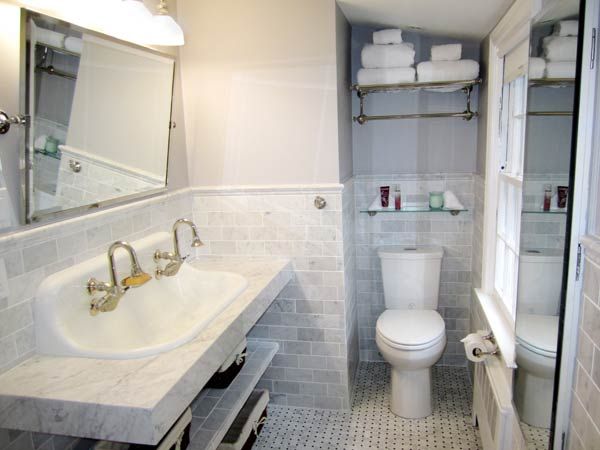
Over Budget but Exceeds Expectations: After
Who: Beverly G.
Where: Riverside, CA
The layout is so much better than it had been. With the door originally opening into the center of the bathroom and the vanity straight ahead, I ended up with two small open areas. Now that I’ve turned the door to open to the wall and placed the vanity and the toilet on same side, it looks twice as big.
Who did the work: I did some of the work myself but a contractor did most of it.
Cost: $10,000-$25,000
See all the images from this entry.
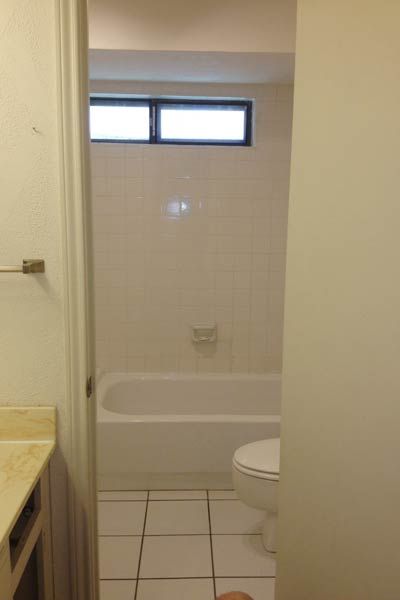
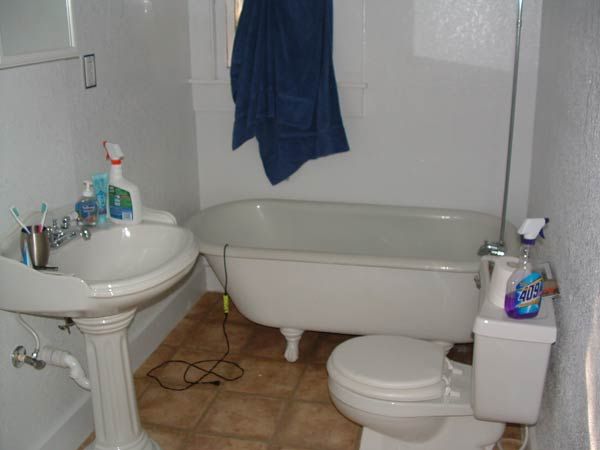
Form and Function for a Great Space: Before
Who: Scott H.
Where: Anoka, MN
We gutted the upstairs of our 1892 home so we could upgrade the electrical, insulate, and reconfigure some of the rooms. In the process, we combined the master bedroom with a small bedroom to create a master suite with walk-in closet and separate bath.
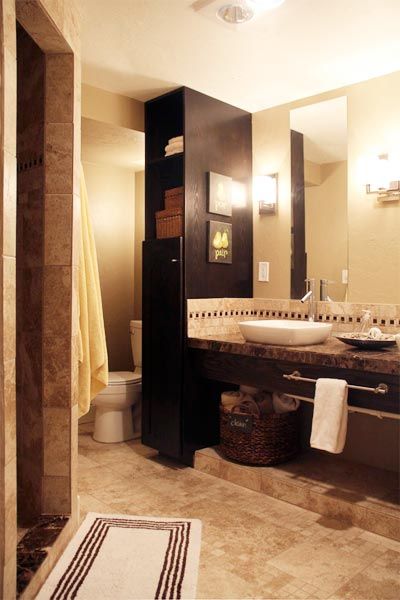
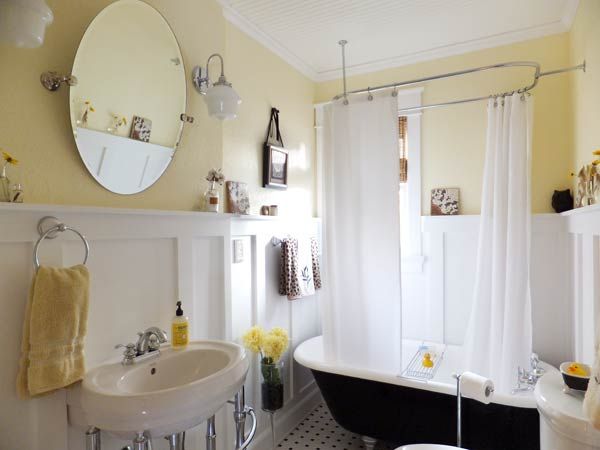
Form and Function for a Great Space: After
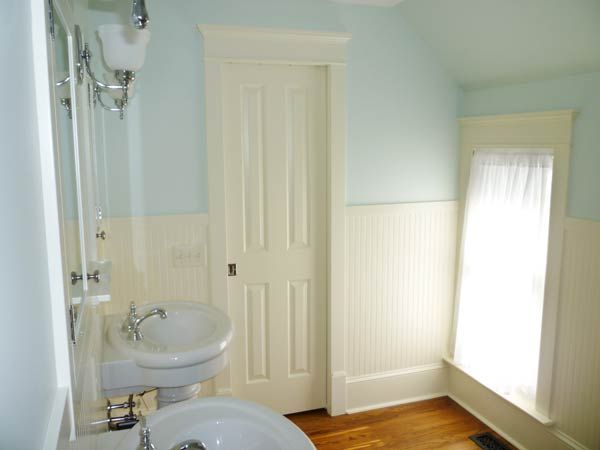
Who: Scott H.
Where: Anoka, MN
We love the look of the entire bathroom. It definitely has a vintage feel and some might think it is original to the house. My favorite component of the master bath is the 32-by-36-inch alcove for the toilet. The alcove consists of a wall separating the toilet from the pedestal-sink area and includes a southern-exposure window that overlooks the backyard, which provides a more spacious feeling.
Who did the work: We did most of the work ourselves.
Cost: $5,000-$10,000
See all the images from this entry.
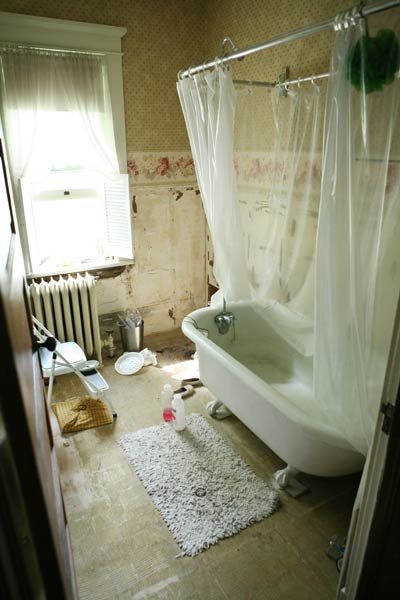
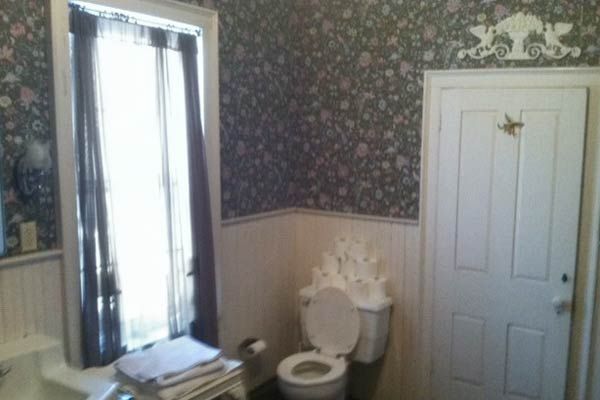
Vintage Charm Restored: Before
Who: Ryan H.
Where: Tampa, FL
This room was a total renovation, including extensive demolition, drywall repair, custom wood wainscoting, wood beadboard ceiling, refinishing a cast-iron claw-foot tub, all new plumbing fixtures, lighting, paint, basketweave tile flooring, and a built-in linen closet/medicine cabinet.
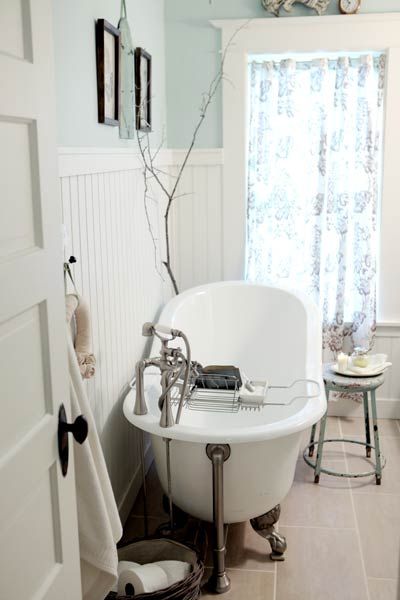
Vintage Charm Restored: After
Who: Ryan H.
Where: Tampa, FL
We love all of the custom woodwork, including the wainscoting and the linen closet. The woodwork sets the room apart from others and adds texture that gives the room added character and depth.
Who did the work: We did all the work ourselves.
Cost: $1,000-$5,000
See all the images from this entry.
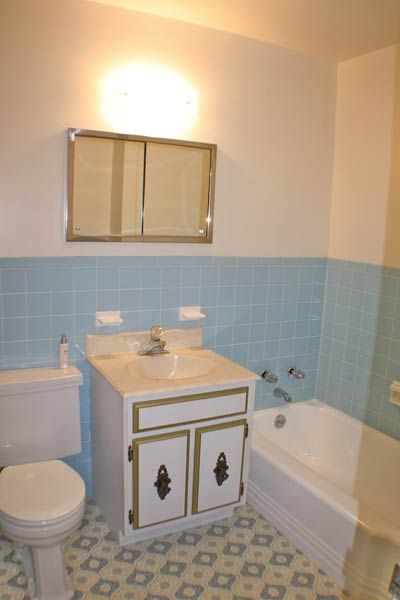
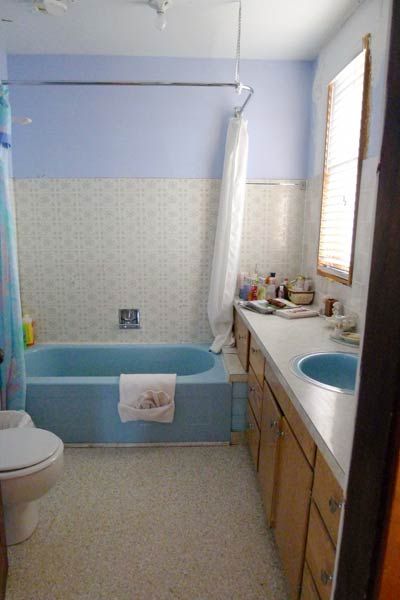
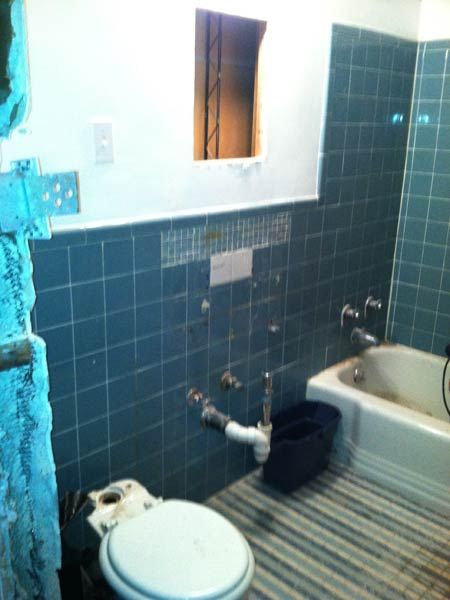
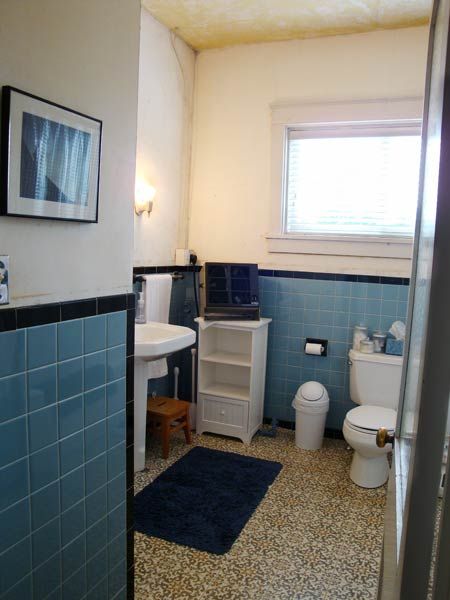
Blue Bayou ‘Before’ Now a Stunning Bathroom ‘After’: Before
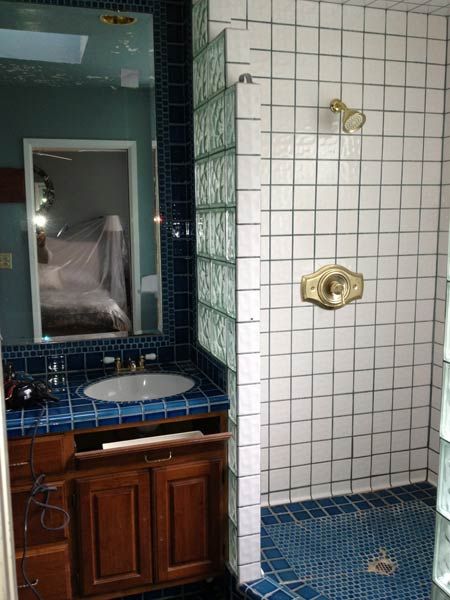
Who: Tami J.
Where: Cardiff-by-the-Sea, CA
The master-bath remodel of our 1959 ranch house was a total gut, including the removal of an exterior glass-block window. The “Blue Bayou,” as our contractor dubbed it, was a mess: one sink was broken and had morphed into a magazine holder, and there was mold in the shower that no amount of cleanser could eradicate.
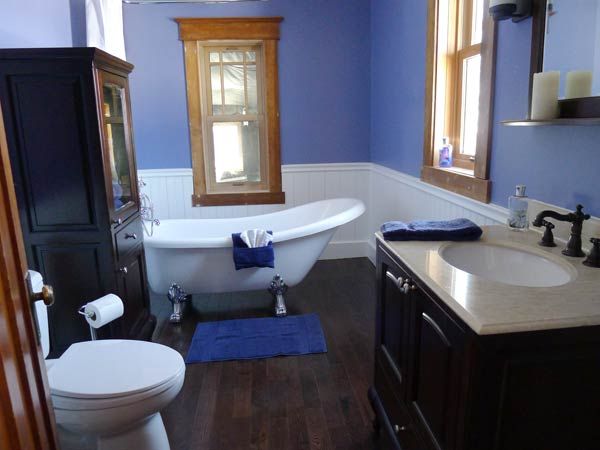
Blue Bayou ‘Before’ Now a Stunning Bathroom ‘After’: After
Who: Tami J.
Where: Cardiff-by-the-Sea, CA
My husband appreciates the master bathroom’s improved functionality, while I love the beautiful combination of materials: the shiny granite, dark matte floor tile, colorful limestone shower flooring, glossy subway tile, satiny salvaged wood, and sparkly glass block (a nod to our house’s era).
Who did the work: We did some of the work ourselves but a contractor did most of it.
Cost: $10,000-$25,000
See all the images from this entry.
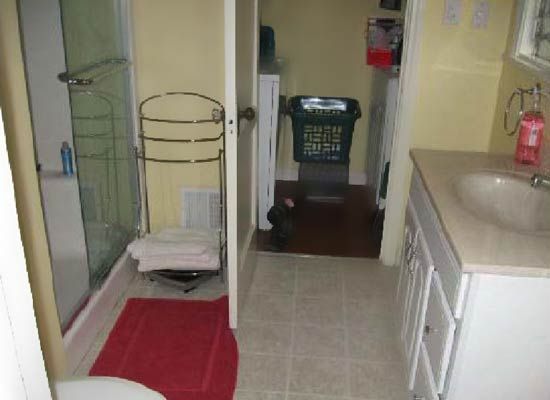
House by the Beach Gets a Cottage-Style Makeover: Before
Who: Martin L.
Where: Virginia Beach, VA
Because a water leak from the bathroom’s rotten wood flooring had made its way through a pendant light in the kitchen ceiling, it was time to finally remodel the bathroom. I completely gutted the floor, walls, and ceiling to prepare for beadboard wainscoting, a new window, heated tile floor, all new fixtures, and a custom vanity.
House by the Beach Gets a Cottage-Style Makeover: After
Who: Martin L.
Where: Virginia Beach, VA
The overall cottage theme really goes with our house, which was built in 1931 and is near the beach.
Who did the work: We did most of the work ourselves.
Cost: $1,000-$5,000
See all the images from this entry.
Bathroom Update Concludes Whole-House Reno: Before
Who: Sarah L.
Where: Portland, ME
When we moved into our 1940s Cape we loved the layout, but every room needed to be gutted. The bathroom (the only full bath in the house) was the last room we tackled. Like every other project we completed, there were many surprises along the way—from the 5 layers of flooring that I was determined to remove with brute force to the window that had been leaking water down through the studs.
Bathroom Update Concludes Whole-House Reno: After
Who: Sarah L.
Where: Portland, ME
It’s certainly nice to have it fresh and clean and reflect our style. The fixtures we chose are what we love most, though. We updated a short vanity to a much taller one that doesn’t have us hunched over to brush our teeth.
Who did the work: We did most of the work ourselves.
Cost: $10,000-$25,000
See all the images from this entry.
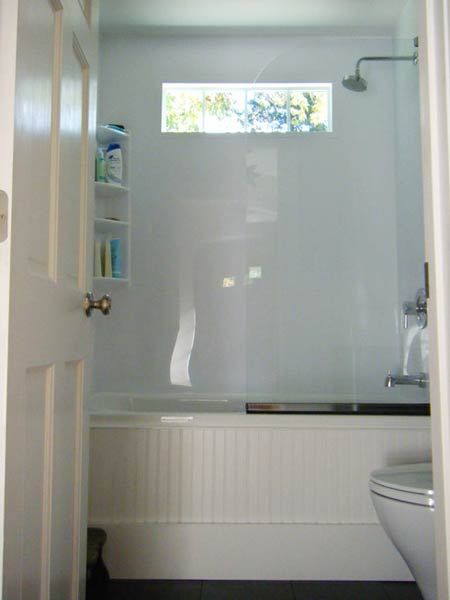
Luxurious Bathroom Remodel: Before

Who: Bridget L.
Where: St. Joseph, MI
The shower was built from scratch, including the drain tray, wall tiles, bench, and glass doors. We salvaged the medicine cabinet from the other bathroom to make a matching pair, replaced light fixtures, and painted.
Luxurious Bathroom Remodel: After
Who: Bridget L.
Where: St. Joseph, MI
We love the tile design and the marble trim. The shower is simple but feels so luxurious. The natural light from the window and the open floor design of the whole bathroom make it feel so spacious and inviting.
Who did the work: We did all the work ourselves.
Cost: $1,000-$5,000
See all the images from this entry.
Victorian Farmhouse: Before
Who: Amy M.
Where: Rocky Point, NC
We gutted the bathroom, replaced the floor and ceiling, installed a claw-foot tub, pedestal sink, new hot water heater, new toilet, and new light fixture. We were so pleased to find the original beadboard hiding behind the drywall.
Victorian Farmhouse: After
Who: Amy M.
Where: Rocky Point, NC
We love that the space is quirky but respectful of the original structure. The angel was from a New Orleans hotel—she adds a joyful vibe!
Who did the work: We did most of the work ourselves.
Cost: $1,000-$5,000
See all the images from this entry.
Master Bath Expanded and Updated: Before
Who: Maegan M.
Where: Chappaqua, NY
This master-bath remodel was a total gut job. The entire original bathroom was demolished to the studs. The bathroom was extended into the master bedroom by 4 feet in order to build a custom walk-in shower, which replaced the standard tub/shower combination. The original door into the bathroom was moved into the upstairs hallway in order to facilitate the new shower.
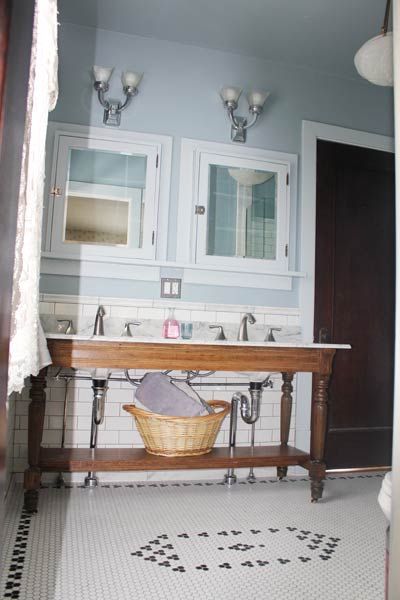
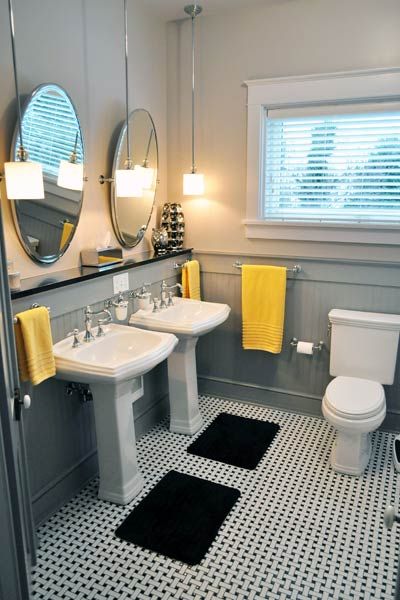
Master Bath Expanded and Updated: After
Who: Maegan M.
Where: Chappaqua, NY
The double-faucet sink is the best feature of the bathroom. As mentioned aboved, the limited space in the bathroom created difficulties when trying to find a double vanity without having to get one custom made. Instead, the double-faucet laundry sink not only looks beautiful but also has the same functionality as a standard double vanity. The custom countertop finished the classic look.
Who did the work: I did some of the work myself but a contractor did most of it.
Cost: $10,000-$25,000
See all the images from this entry.
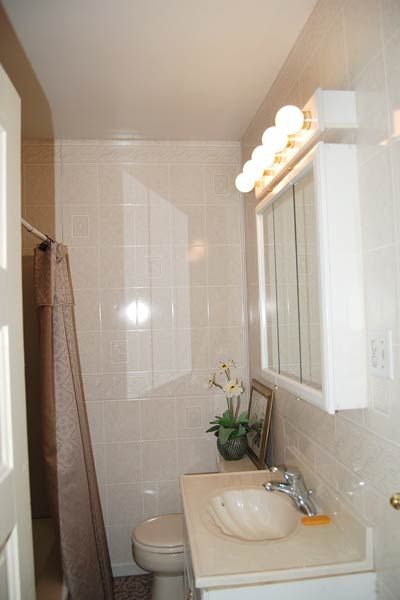
Elegant Master Bathroom Update: Before
Who: Terry M.
Where: Quincy, IL
This master bathroom consists of two rooms. One room has the tub and sinks, and the other has the toilet and shower. The contractor and I gutted the tub and sink room. We added a pocket door into the toilet room, added beadboard to the walls, and tiled the floor. We had the electrical and plumbing updated and installed all new tub, sinks, faucets, mirrors, lighting, cabinetry, and toilet. I painted and decorated.
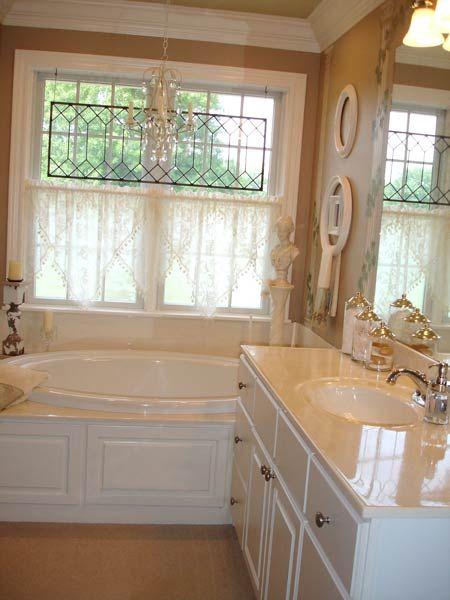
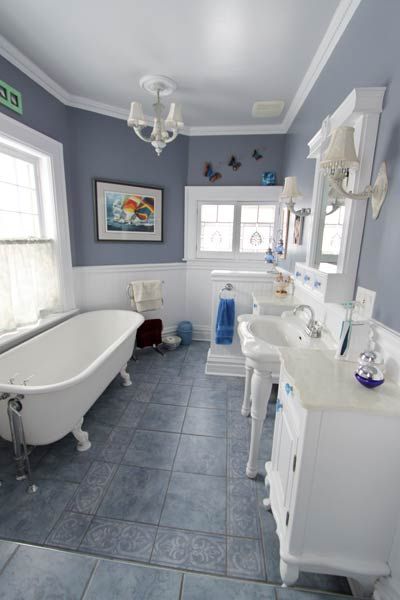
Elegant Master Bathroom Update: After
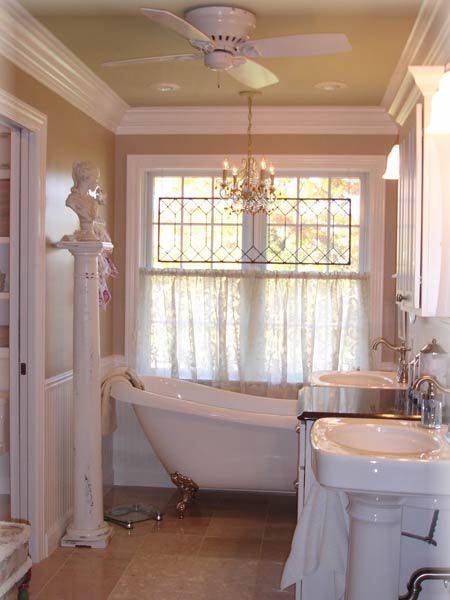
Who: Terry M.
Where: Quincy, IL
I love my master bath now. I think it’s so useful because the cabinetry between the sinks allows for storage and surface space where pedestal sinks normally don’t allow. I put in a ceiling fan for my hubby since he is always warm, and I hung a chandelier above the claw-foot tub that is on a dimmer for charm.
Who did the work: I did the work as a team with the contractor.
Cost: $5,000-$10,000
See all the images from this entry.
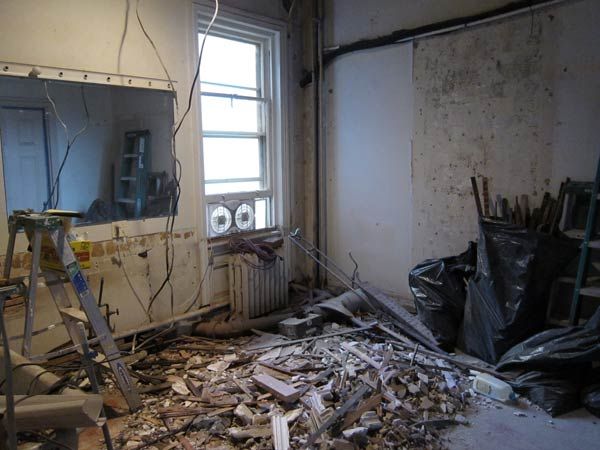
Clementine: The Cast-Iron Claw-Foot Tub: Before
Who: Tabatha M.
Where: Dayton, OH
Our tub, Clementine, didn’t have anything but a hole for the drain, so aside from refinishing her ourselves, we had to find freestanding supply lines and create (in cahoots with our plumber) a secret standing waste to accommodate the lack of an overflow valve. We also drove from Dayton, Ohio, to Pittsburgh to get the tub and bring her back.
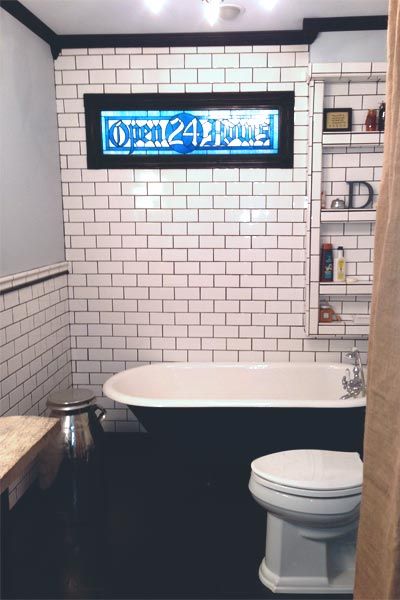
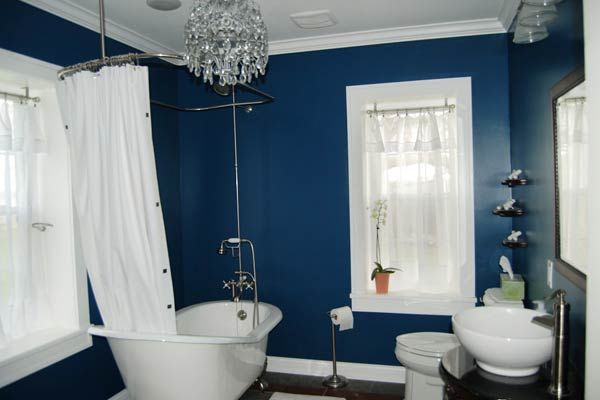
Clementine: The Cast-Iron Claw-Foot Tub: After
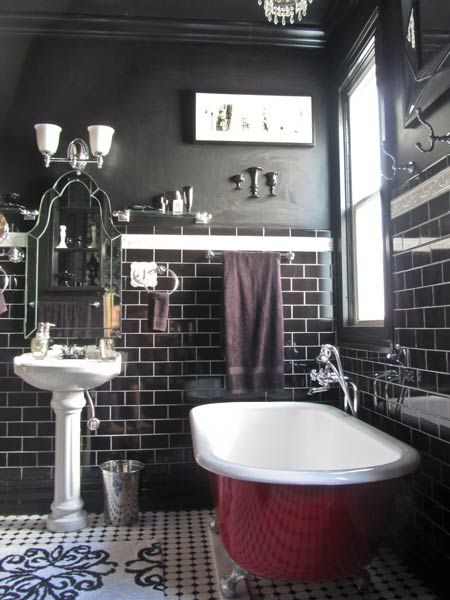
Who: Tabatha M.
Where: Dayton, OH
We really love it all. Our home is only 1,250 square feet, so this is a little corner of heaven for us to retreat to, like walking into a fantasy every single time. We went for gusto with the all-black scheme, and it truly lends a level of romance and decadence to the whole space. But nothing beats taking a hot bath in the tub we worked so hard to save and use.
Who did the work: We did most of the work ourselves.
Cost: $1,000-$5,000
See all the images from this entry.
ADA-Approved Bathroom Reno: Before
Who: Ina N.
Where: Falls Church City, VA
This remodel involved gutting the bathroom down to the studs—except for the old tile floor. (New tile was laid on top of the old.) Otherwise, all old fixtures were torn out, including drywall, and the bathroom was built up again. New tile, new sink, new toilet, new medicine cabinets (two), all new fixtures, chosen because they 1) were ADA approved; 2) fit the overall design of the bathroom, the square/rectangular shape taken from the basketweave pattern of the tile; and 3) are beautiful.
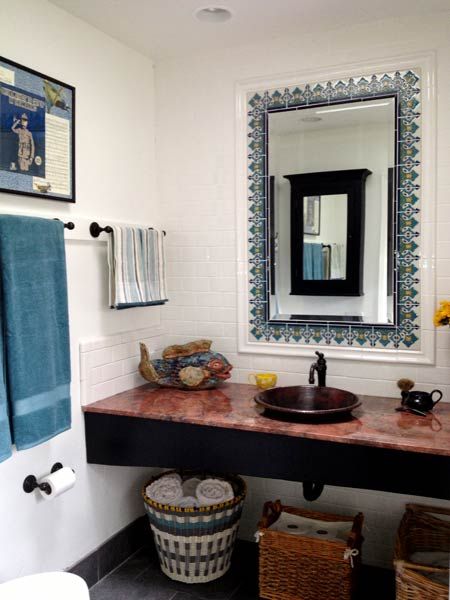
ADA-Approved Bathroom Reno: After
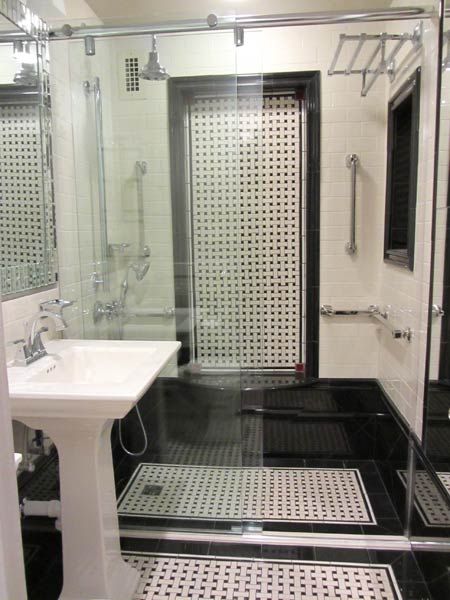
Who: Ina N.
Where: Falls Church City, VA
I love so many things about this bathroom! It is absolutely stunning while at the same time completely functional for those of limited mobility. It shows what can be done within the confines of a standard small 5-by-8-foot bathroom, the sort of limited space that is so typical for so many dwellings.
Who did the work: I did some of the work myself but a contractor did most of it.
Cost: $10,000-$25,000
See all the images from this entry.
Luxurious European Master Bath: Before
Who: Trina N.
Where: Sierra Madre, CA
We completely gutted the existing bathroom, added additional square footage from the adjacent master bedroom, and redesigned the entire space ourselves. We installed custom tile with medallions, laid heated floors, created a custom vanity from an antique European buffet, and commissioned faux finishing on walls, ceiling, and doors.
Luxurious European Master Bath: After

Who: Trina N.
Where: Sierra Madre, CA
The thing that we like best is our custom vanity that was converted from an antique European buffet. It is unique and adds so much character to the space. It is a complete showstopper!
Who did the work: I did some of the work myself but a contractor did most of it.
Cost: $25,000-$50,000
See all the images from this entry.
Bathroom Update in 1913 Farmhouse: Before
Who: Natalie R.
Where: Stillwater, MN
We gutted the bathroom, added a new subfloor, replaced the tub, added ceramic tile, replaced the beadboard, used an old farm table for a vanity, built a concrete top for the vanity, and painted.
Bathroom Update in 1913 Farmhouse: After
Who: Natalie R.
Where: Stillwater, MN
I love the tub! I also love my sink vanity. The table was from an old shop and had been used to take engines apart on. Now it’s in a beautiful feminine bathroom, which I think is so fun. I also love the concrete top. My dad is a cement mason, so I guess I have a soft spot for concrete!
Who did the work: We did most of the work ourselves.
Cost: $1,000-$5,000
See all the images from this entry.
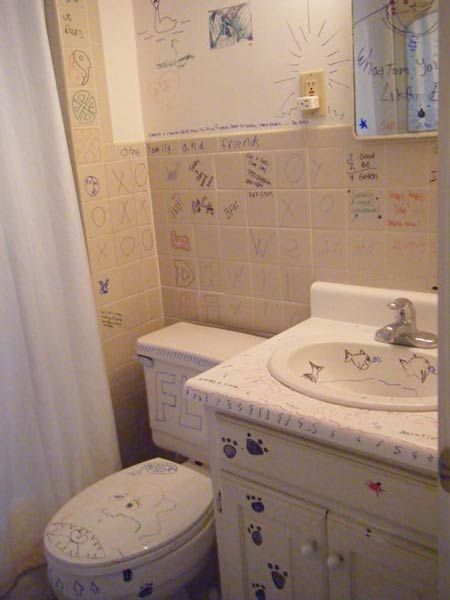
Salvaging Pieces for Antique Look: Before
Who: Sherry S.
Where: Hinckley, NY
The crooked walls, floors, doors, and windows made the installation of large molding a challenge. In order to mitigate this problem we used multiple pieces of molding and wide strips of paint to create the illusion of a single piece of large molding.
Salvaging Pieces for Antique Look: After
Who: Sherry S.
Where: Hinckley, NY
The children wanted a more modern bathroom, and we compromised by using salvaged pieces to merge old and new with functionality. This new remodel gives me the opportunity to take long, restful baths.
Who did the work: A contractor did all the work.
Cost: $1,000-$5,000
See all the images from this entry.
Built-in Details: Before
Who: Ariane S.
Where: Spokane, WA
We gutted the room (had to leave the bathtub) with all new drywall and cement board and subfloor. We replaced the toilet with a dual-flush model, the sink and vanity with a wall-hung sink, the mirror with a recessed medicine cabinet, and the hollow-core door with a solid poplar one. Plus we installed new lighting, wiring, and plumbing.
Built-in Details: After
Who: Ariane S.
Where: Spokane, WA
We could not be happier with how it turned out. Our house was built in 1909, but the bathroom seemed to have last been decorated in 1985. The vinyl floor was peeling up from water damage, and the powder-blue faux-marble paneling in the shower plus lavender walls was not the best choice. The fact that it looks so much better is immensely pleasing!
Who did the work: We did most of the work ourselves.
Cost: $1,000-$5,000
See all the images from this entry.
Old and New Come Together Seamlessly: Before
Who: Joe T.
Where: Mechanicsburg, PA
The hardest part was deciding on the design. My wife wanted dual sinks, countertop space, and storage space, and thus desired a conventional double vanity (requiring closet removal). I wanted a single pedestal (no change). Not being able to arrive at a mutually agreeable design solution kept us from pursuing the project for years.
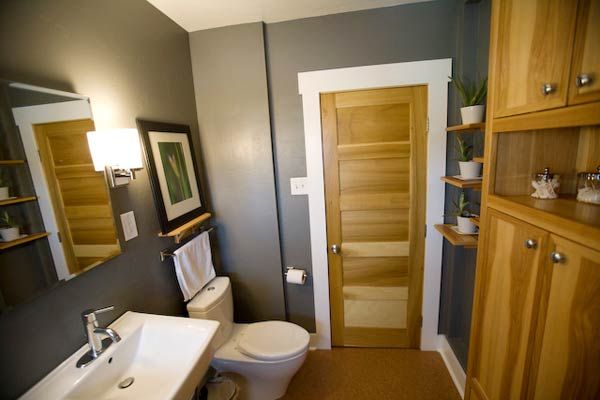
Old and New Come Together Seamlessly: After
Who: Joe T.
Where: Mechanicsburg, PA
The soft gray on the walls and the darker gray on the wainscoting allow the towels and accessories to provide pops of color. When you change the towels, you change the feel of the room. Had the room been painted in a bold color, this opportunity to routinely make the room resonate anew again by such a simple means would not have been possible.
Who did the work: We did most of the work ourselves.
Cost: $5,000-$10,000
See all the images from this entry.
Heated Towel Rack and Floors Warm Up a Space: Before

Who: Alex T. and Renee E.
Where: Portland, OR
First we stripped beadboard and lath and plaster from walls. Next, vinyl tiles were stripped from the floor. The walls of a closet from an adjoining bedroom were removed to open up 9 square feet of floor and make a second entrance to the bedroom to create the option of a master bed/bath.
Heated Towel Rack and Floors Warm Up a Space: After

Who: Alex T. and Renee E.
Where: Portland, OR
We love everything, from the ease of cleaning tile to simply standing on the heated floor. One thing that did surprise us is how much of a difference the addition of 9 square feet made when we demolished the closet; it allows for a person to really move around the bathroom without feeling restricted. We also added a second towel rack in this space.
Who did the work: We did all the work ourselves.
Cost: $1,000-$5,000
See all the images from this entry.
It’s All in the Details: Before
Who: Garth W.
Where: Lindsay, ON
This project was a massive undertaking, as the room had to be gutted completely and we ran plumbing and heating services to the attic while we were at it. The original claw-foot tub was stripped, repainted, and installed in a place of prominence beneath the main window.
It’s All in the Details: After
Who: Garth W.
Where: Lindsay, ON
We installed heat cables under the tiles, steps included, which is heaven in the dead of winter. We love the layout of the bathroom with the split-level design almost giving the illusion of a more expansive room.
Who did the work: We did most of the work ourselves.
Cost: $1,000-$5,000
See all the images from this entry.
Charming Bath For A 120-Year-Old House: Before
Who: Sydney W.
Where: New Haven, IN
The original downstairs bathroom was tiny, so we moved the master bedroom upstairs and remodeled the original master downstairs into a bathroom. The two interior walls were removed and the entire four walls were reframed.
Charming Bath For A 120-Year-Old House: After
Who: Sydney W.
Where: New Haven, IN
We love that everything is brand-new, clean, and beautiful, yet maintains the style and character of a 120-year-old house. The new doors look exactly like the old ones, except they actually close, open, and lock. The details, like the new door hardware (which was way too expensive), really add that little something extra, versus the same old hardware everyone gets at the store.
Who did the work: We did most of the work ourselves.
Cost: $5,000-$10,000
See all the images from this entry.
A New Bath in Our 1850s Row House: Before
Who: Catherine P. & Peter L.
Where: Philadelphia, PA
We wanted to give our master bathroom a look befitting our house’s era, instead of keeping this horrendous 1970s-era “style.” Plus, the two bathrooms on the second floor needed major repairs, including some butchered floor joists, so it made sense to update the master bath at the same time.